

Crawlspace Insulation in Royal Oak: Stop Drafts & Save Money
Cold floors? High energy bills? Learn how crawlspace insulation stops drafts, saves money, and protects Royal Oak homes from Michigan winters. Expert advice from NEXT Exteriors.

Walk barefoot across your living room floor in January. If it feels like you're stepping on ice, your crawlspace is the problem. Cold floors, high heating bills, frozen pipes — these aren't just annoyances. They're symptoms of an uninsulated or poorly insulated crawlspace bleeding heat and money straight into the frozen Michigan ground.
We've insulated hundreds of crawlspaces across Southeast Michigan over the past 35 years, and Royal Oak homes — particularly those built between the 1950s and 1970s — share a common issue: minimal or non-existent crawlspace insulation. The good news? Fixing it delivers immediate comfort and measurable energy savings. The U.S. Department of Energy estimates proper crawlspace insulation can reduce heating costs by 15-20%.
This isn't a sales pitch. It's what we've learned from crawling through hundreds of tight, cold spaces across Oakland County. Here's what actually works, what doesn't, and what it costs in Royal Oak.
Why Royal Oak Crawlspaces Lose So Much Heat
Royal Oak's housing stock tells a story. Many homes were built during the post-war boom when energy was cheap and building codes were minimal. Crawlspaces were vented to prevent moisture buildup — a strategy that made sense before we understood building science. But vented crawlspaces in Michigan create a thermal disaster.
Here's what happens: Cold winter air flows through foundation vents, directly under your floors. That cold air steals heat from the floor joists, subfloor, and everything above. Your furnace runs constantly trying to compensate. Meanwhile, the stack effect — the natural upward movement of warm air in a house — pulls cold air from the crawlspace up through gaps in your flooring, electrical penetrations, and plumbing holes.

Michigan's freeze-thaw cycles make this worse. When temperatures swing from 10°F to 35°F and back — sometimes in the same week — foundation walls expand and contract, opening gaps and cracks. Water infiltration becomes a problem. Fiberglass batts (the pink stuff stapled between floor joists in many older homes) absorb moisture, compress, and lose their insulating value. We've pulled out batts that weighed three times their original weight, soaked with condensation and mold.
The Stack Effect Problem: Studies from ASHRAE (American Society of Heating, Refrigerating and Air-Conditioning Engineers) show that stack effect drives approximately 40% of air leakage in homes. An uninsulated crawlspace acts as a direct highway for cold air infiltration, making your heating system work overtime.
The other issue? Royal Oak's older brick Colonial and ranch-style homes often have rim joists — the perimeter framing where floor joists meet the foundation — that were never sealed. These gaps allow outside air to pour directly into the crawlspace and up into wall cavities. It's like leaving a window cracked open all winter.
Signs Your Crawlspace Needs Insulation
You don't need to crawl under your house to know there's a problem. Here's what homeowners in Royal Oak, Birmingham, and Troy tell us when they call:
- Cold floors: First-floor rooms feel cold even when the thermostat reads 70°F. You wear slippers indoors all winter.
- High heating bills: Your gas bill spikes every winter, and your furnace runs constantly on cold days.
- Frozen pipes: Plumbing in the crawlspace freezes during cold snaps, or you've had pipes burst in the past.
- Musty odors: A damp, earthy smell rises through floor registers or in rooms above the crawlspace.
- Ice dams: Heat escaping through your floors warms the attic, melting snow on the roof and creating ice dams at the eaves.
- Drafts near baseboards: You feel cold air coming from electrical outlets or gaps along the floor.
- Condensation on windows: Excess humidity from an improperly sealed crawlspace causes condensation on interior windows.
If you're nodding along to two or more of these, your crawlspace is costing you money every month. The longer you wait, the more you pay — both in energy bills and potential water damage to floor joists and subflooring.
Crawlspace Insulation Options: What Actually Works in Michigan
Not all insulation is created equal, especially in Michigan crawlspaces. Here's what we install, what we avoid, and why.
Closed-Cell Spray Foam (Our Top Recommendation)
Closed-cell spray foam is the gold standard for Michigan crawlspaces. It delivers R-6 to R-7 per inch, creates an air barrier, and resists moisture. We spray it directly on foundation walls from the sill plate down to the crawlspace floor, creating a continuous thermal envelope.
Why it works: Spray foam seals rim joists, blocks air infiltration, and doesn't lose R-value when it gets damp. It also adds structural rigidity to foundation walls. In Royal Oak, where many homes sit on clay soil prone to shifting, that extra support matters.
The Michigan Residential Code requires a minimum R-15 for crawlspace walls in our climate zone. That's about 2.5 inches of closed-cell foam. We typically apply 3 inches to hit R-18 to R-21, giving homeowners extra performance and long-term durability.
Rigid Foam Board
Rigid foam board (extruded polystyrene or polyisocyanurate) is a solid second choice. We install 2-inch boards on foundation walls, sealing seams with spray foam or tape. It delivers R-10 per 2 inches and resists moisture well.
The downside? Installation takes longer, and it doesn't seal air leaks as effectively as spray foam. We still need to separately air-seal rim joists and penetrations with caulk or canned foam. But if budget is tight, rigid foam gets you 80% of the performance at 60% of the cost.
Fiberglass Batts (Why They Fail)
Fiberglass batts stapled between floor joists are common in older Royal Oak homes, and they're almost always a failure. Here's why:
- They don't stop air movement — cold air flows around and through them
- They absorb moisture from the crawlspace, compressing and losing R-value
- They sag over time, creating gaps and thermal bridges
- Rodents nest in them, creating holes and contamination
We remove old fiberglass batts on every crawlspace insulation job. They're almost always moldy, compressed, or falling down. If your home has them, assume they're not working.
Vapor Barriers and Encapsulation
Insulation alone isn't enough. Michigan crawlspaces need moisture control. We install a 6-mil polyethylene vapor barrier across the entire crawlspace floor, overlapping seams by 12 inches and sealing them with tape. The barrier extends up foundation walls and is sealed to the insulation.
Full encapsulation — where we seal vents, insulate walls, and condition the crawlspace as part of the home's envelope — is the best long-term solution. It eliminates moisture problems, improves indoor air quality, and maximizes energy savings. Our top-rated insulation contractor services in Detroit include complete crawlspace encapsulation designed for Michigan's climate.

The Right Way to Insulate a Crawlspace
Insulating a crawlspace isn't just about throwing foam at the walls. There's a sequence that matters. Skip a step, and you'll have problems — moisture buildup, mold, or insulation failure. Here's how we do it on every job:
Step 1: Air Seal First
Before any insulation goes in, we seal every penetration and gap where outside air enters the crawlspace. That means rim joists, plumbing penetrations, electrical conduit entries, and foundation cracks. We use spray foam for larger gaps and caulk for smaller ones. Air sealing is more important than insulation — if you don't stop air movement, R-value doesn't matter.
Step 2: Address Moisture and Drainage
We inspect for standing water, soil moisture, and drainage issues. If the crawlspace is wet, we fix the source first — grading around the foundation, installing or repairing gutters, adding a sump pump, or improving drainage. Insulating a wet crawlspace traps moisture and creates mold problems. Our seamless gutters in Detroit, MI are often part of the solution, directing water away from the foundation.
Step 3: Insulate Foundation Walls
We apply closed-cell spray foam or rigid foam board to the foundation walls, starting at the sill plate and extending down to the crawlspace floor. The goal is to create a continuous thermal barrier with no gaps or thermal bridges. We hit a minimum R-15 (Michigan code), but typically apply R-18 to R-21 for better performance.
We do NOT insulate between floor joists. Insulating the walls turns the crawlspace into conditioned space, which is far more effective and eliminates frozen pipe risk.
Step 4: Install Vapor Barrier
We lay 6-mil polyethylene vapor barrier across the entire crawlspace floor, overlapping seams by at least 12 inches and sealing them with contractor tape. The barrier extends up foundation walls and is sealed to the insulation with spray foam or tape. This stops ground moisture from evaporating into the crawlspace.
Step 5: Adjust Ventilation
If we're creating a conditioned (unvented) crawlspace — which we recommend for Michigan — we seal all foundation vents permanently. The crawlspace becomes part of the home's conditioned envelope, kept dry by the HVAC system or a dedicated dehumidifier.
If code or homeowner preference requires a vented crawlspace, we ensure proper cross-ventilation with 1 square foot of vent area per 150 square feet of crawlspace. But vented crawlspaces in Michigan are a compromise — they're less energy-efficient and more prone to moisture problems.
Building Code Note: Michigan allows unvented crawlspaces under the 2015 Michigan Residential Code (Section R408.3) if specific conditions are met: continuous insulation on walls, sealed vents, and conditioned air supply or mechanical ventilation. Always work with a licensed contractor who understands local code requirements.
Cost Reality: What Crawlspace Insulation Runs in Royal Oak
Let's talk numbers. Crawlspace insulation costs vary based on size, access, existing conditions, and insulation type. Here's what we see in Royal Oak and surrounding Oakland County communities:
Closed-Cell Spray Foam
$3.50 to $5.50 per square foot of wall area, including air sealing and vapor barrier installation. For a typical 1,200-square-foot ranch home with a 3-foot-tall crawlspace (300 linear feet of foundation wall × 3 feet = 900 square feet), expect $3,200 to $5,000.
Rigid Foam Board
$2.50 to $4.00 per square foot, including separate air sealing with canned foam. Same 900-square-foot example: $2,250 to $3,600.
Vapor Barrier Only
$1.50 to $2.50 per square foot of floor area. For a 1,200-square-foot crawlspace floor: $1,800 to $3,000. This is often paired with insulation for a complete encapsulation.
Full Encapsulation (Insulation + Vapor Barrier + Dehumidifier)
$5,000 to $10,000+ depending on size and complexity. This is the premium option — insulated walls, sealed vents, full vapor barrier, and climate control. It's also the most effective long-term solution for Michigan homes.
What affects cost? Access difficulty (small entry hatches or obstructions add labor time), existing moisture problems (requiring remediation first), and foundation condition (cracked or bowed walls need repair before insulation). Homes with plumbing, ductwork, or electrical work in the crawlspace take longer to insulate carefully.
Energy Savings and Payback
The Department of Energy estimates crawlspace insulation reduces heating costs by 15-20%. For a Royal Oak home with a $1,500 annual heating bill, that's $225 to $300 in annual savings. A $4,000 spray foam job pays for itself in 13 to 18 years through energy savings alone — and that doesn't account for improved comfort, eliminated frozen pipe risk, or higher resale value.
Many homeowners also qualify for utility rebates. DTE Energy offers rebates for insulation upgrades, and federal tax credits under the Inflation Reduction Act may apply for qualifying projects. Check current incentives before starting work.
Looking at other ways to improve your home's energy efficiency? Our Detroit window experts can help with energy-efficient window upgrades, and proper Detroit roofing services ensure your entire home envelope works together to stop energy loss.
When to Call a Professional vs. DIY
Can you insulate your own crawlspace? Technically, yes. Should you? That depends on your tolerance for tight spaces, moisture, mold, and potential code violations.
Why Crawlspace Work Is Harder Than It Looks
Crawlspaces are confined, dark, and often contaminated. We've found asbestos-wrapped pipes, mold colonies, rodent infestations, standing water, and structural damage in Royal Oak crawlspaces. Without proper protective equipment and training, you're risking your health.
Air sealing and insulation also require precision. Miss a gap in the rim joist, and cold air pours through. Install a vapor barrier incorrectly, and you trap moisture against wood framing, causing rot. Spray foam requires specialized equipment and training — DIY spray foam kits from big-box stores rarely deliver the coverage or R-value needed for Michigan winters.
Building Code and Permits
Most Michigan municipalities require permits for crawlspace insulation and encapsulation work, especially if you're sealing vents or altering ventilation. Code inspectors check for proper R-values, vapor barrier installation, and compliance with fire safety requirements (spray foam must be covered or rated for exposed application).
Hiring a licensed contractor ensures the work meets code and passes inspection. At NEXT Exteriors, we handle permits, inspections, and warranty on every crawlspace insulation project. We've been doing this since 1988 — we know what Royal Oak inspectors look for.
When DIY Makes Sense
If your crawlspace is dry, accessible (4+ feet of clearance), and you're only installing a vapor barrier over clean soil, DIY is feasible. Buy 6-mil polyethylene sheeting, overlap seams by 12 inches, and tape them with contractor tape. Extend the barrier up foundation walls and seal to the sill plate.
But if you're dealing with insulation, air sealing, moisture problems, or code compliance, call a professional. The cost difference between a DIY disaster and a professional job done right is massive — both in energy performance and potential structural damage.
Beyond insulation, NEXT Exteriors offers comprehensive exterior services in Detroit, including house siding in Detroit and Southeast Michigan painting professionals who use Sherwin-Williams products exclusively. We're the team that shows up on time, does the job right, and doesn't upsell you on things you don't need.

Ready to Get Started?
NEXT Exteriors has been protecting Michigan homes since 1988. Get a free, no-pressure estimate from a team that shows up on time and does the job right.
Get Your Free QuoteOr call us: (844) 770-6398
Frequently Asked Questions
Insulate the walls, not the floor joists. Insulating foundation walls turns the crawlspace into conditioned space, which is far more effective in Michigan. It eliminates frozen pipe risk, stops cold floors, and prevents moisture problems. Insulating between floor joists leaves the crawlspace exposed to outside temperatures and doesn't address air leakage.
If you're insulating the walls and creating a conditioned crawlspace, yes — seal the vents permanently. Conditioned crawlspaces perform better in Michigan's climate, eliminating the freeze-thaw moisture cycle and improving energy efficiency. Michigan building code allows unvented crawlspaces if you meet specific requirements: insulated walls, sealed vents, and mechanical ventilation or conditioned air supply.
The U.S. Department of Energy estimates 15-20% savings on heating costs. For a Royal Oak home with a $1,500 annual heating bill, that's $225 to $300 per year. Actual savings depend on your home's size, existing insulation levels, and how well the crawlspace is sealed and insulated. Most homeowners also report noticeably warmer floors and improved comfort.
Michigan Residential Code requires minimum R-15 for crawlspace walls in our climate zone (Zone 5). We typically install R-18 to R-21 for better performance and long-term durability. That's about 3 inches of closed-cell spray foam or 3.5 to 4 inches of rigid foam board. Higher R-values deliver better energy savings and cold-weather performance.
It depends on the scope. Installing a vapor barrier over clean, dry soil is a reasonable DIY project. But spray foam insulation, air sealing rim joists, and full encapsulation require specialized equipment, training, and code knowledge. Michigan crawlspaces often have moisture, mold, asbestos, or structural issues that need professional assessment. Most municipalities require permits and inspections for crawlspace insulation work.
Yes, if done correctly. Insulating foundation walls and sealing vents turns the crawlspace into conditioned space, keeping temperatures above freezing even during Michigan's coldest snaps. We've eliminated frozen pipe problems in hundreds of Royal Oak homes this way. Just insulating between floor joists won't protect pipes — you need to insulate the walls and control the crawlspace environment.
Most crawlspace insulation projects take 1 to 3 days depending on size, access, and scope. A straightforward spray foam job on a 1,200-square-foot home might take one full day. Full encapsulation with moisture remediation, vapor barrier, and dehumidifier installation can take 2 to 3 days. We'll give you an accurate timeline during the estimate based on your specific crawlspace conditions.
The Best Gutter Guards for Michigan's Leaves & Pine Needles
Michigan contractor reveals which gutter guards actually work against oak leaves, pine needles, and ice. Real-world testing from 35+ years in Southeast Michigan.

I've been installing and servicing gutters in Southeast Michigan since 1988, and I can tell you this: most gutter guards sold around here don't work the way homeowners expect. Not because they're poorly made, but because Michigan throws conditions at them that marketing brochures don't mention.
We've got massive oak trees dropping leaves the size of dinner plates. Maples that shed helicopter seeds by the thousands. Pine trees that drop needles year-round. And then there's the ice — 40+ freeze-thaw cycles every winter that turn any small design flaw into a catastrophic failure point.
The question isn't "Do gutter guards work?" It's "Which gutter guards work in Michigan, and under what conditions?" After installing, removing, and repairing every type of guard system on the market, I'm going to walk you through what actually performs in our climate — and what's a waste of money.
Why Michigan Is Brutal on Gutter Guards
Southeast Michigan is uniquely challenging for gutter protection systems. Here's why:
Freeze-thaw cycles destroy weak designs. The National Weather Service data for Detroit shows we average 40-50 freeze-thaw cycles between November and March. Water gets into any gap or seam in a gutter guard, freezes, expands, and pries the system apart. I've seen $3,000 gutter guard installations completely fail after one winter because the installer didn't account for this.
When we work on Detroit roofing services projects, we always inspect the gutter system at the same time. A roof is only as good as the drainage system below it, and gutter guards that create ice dams negate all the money you spent on proper attic ventilation and insulation.
Our trees drop everything. In Rochester Hills and Bloomfield Hills, where mature oak and maple canopies dominate, gutters can collect 6-8 inches of compacted leaves in a single autumn weekend. Pine trees in Lake Orion and Chesterfield drop needles constantly — not just in fall, but year-round. And those helicopter seeds from maples? They're small enough to slip through most screen-style guards and germinate inside your gutters, creating a root mat that blocks water flow.
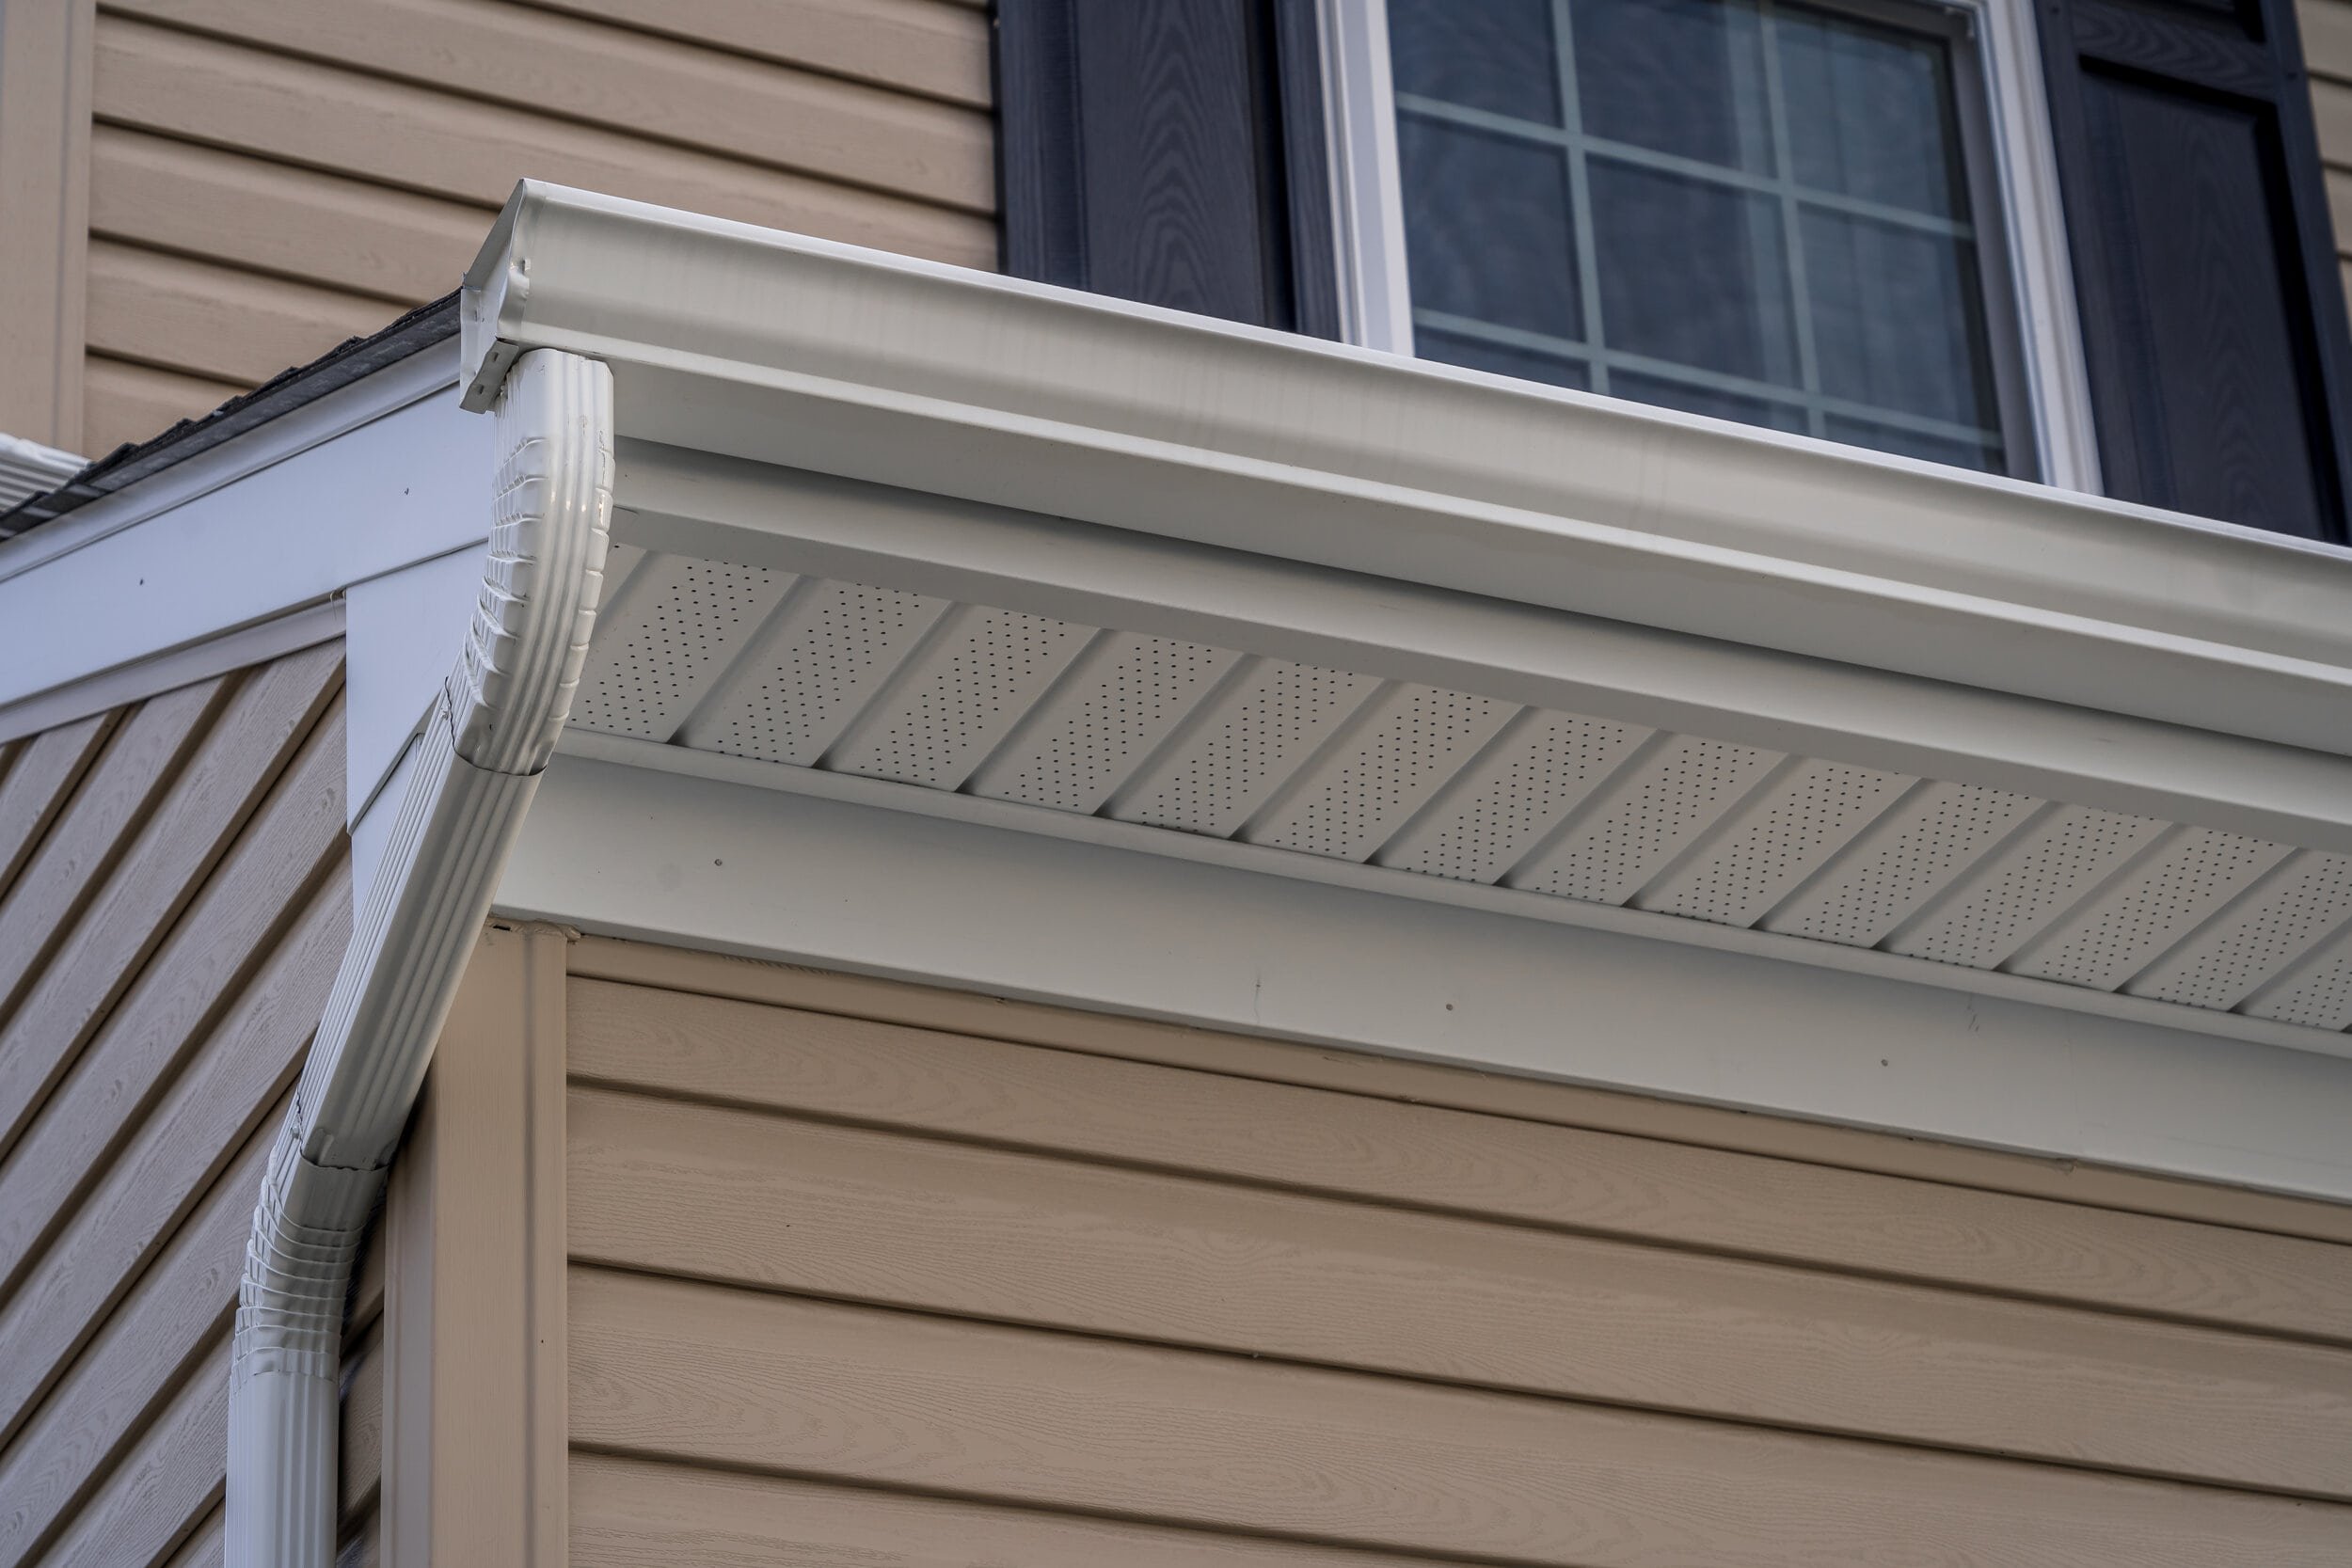
Ice dams are the silent killer. If you have ice dam problems and install the wrong type of gutter guard, you've just made the situation worse. Guards that create a solid surface over the gutter can trap heat rising from the house, accelerating snow melt on the lower roof and feeding the ice dam cycle. This is especially common on homes built in the 1960s and 1970s in Sterling Heights and Warren, where attic insulation was minimal by modern standards.
Real talk: If you have ice dams, gutter guards won't fix the problem. You need to address attic insulation and ventilation first. We've seen too many homeowners spend thousands on guards only to watch ice still destroy their fascia boards every February.
Wind-driven rain is underestimated. Michigan summer storms come with horizontal rain. If a gutter guard relies on surface tension to direct water into the gutter (reverse-curve designs), heavy wind can blow water right over the edge. I've stood on ladders during service calls in Troy and Shelby Township, watching $4,000 gutter guard systems completely fail during a thunderstorm.
Types of Gutter Guards (What Actually Works Here)
Let's break down the major categories and how they perform in real Michigan conditions. This isn't theory — this is based on thousands of installations and service calls across Macomb, Oakland, and St. Clair counties.
Micro-Mesh Guards (Best Overall for Michigan)
Micro-mesh guards use surgical-grade stainless steel mesh with holes smaller than a grain of sand. Water passes through via surface tension, while debris sits on top and blows off or washes away.
Performance in Michigan: This is the only system I've seen consistently handle pine needles, maple seeds, and oak leaves without clogging. The mesh is fine enough (around 50 microns) that even shingle grit — which destroys most other guards — can't penetrate.
Ice performance: Excellent, if installed correctly. The mesh doesn't create a solid ice dam surface. Water can still pass through even when snow is sitting on top. But — and this is critical — the frame must be installed under the shingles, not screwed to the fascia. Fascia-mounted micro-mesh will still ice up.
Cost: $15-25 per linear foot installed. For a typical 150-foot gutter system in Royal Oak or Grosse Pointe Farms, you're looking at $2,250-$3,750.
Brands we've had success with: LeafFilter, Raptor, and MasterShield all perform well when properly installed. The key is the installation method, not just the product.
Reverse-Curve (Surface Tension) Guards
These create a curved surface over the gutter. Water is supposed to follow the curve into the gutter while leaves blow off.
Performance in Michigan: Marginal. They work okay in light rain, but Michigan doesn't do light rain. During heavy downpours or wind-driven storms, water overshoots the gutter entirely. I've removed dozens of these systems from homes in Clinton Township and Mount Clemens after homeowners got tired of watching waterfalls pour off their roof edge.
Ice performance: Poor. The solid surface creates a perfect ice dam platform. Snow sits on the guard, melts from house heat, refreezes at the edge, and you've got a 6-inch ice ridge by January.
Cost: $10-18 per linear foot installed.
Verdict: Skip these in Michigan. They're designed for climates with gentler rain and no freeze-thaw cycles.
Foam Inserts
Triangular foam pieces that sit inside the gutter, allowing water to pass through while blocking debris.
Performance in Michigan: Terrible. Foam holds moisture, which means it freezes solid in winter. By spring, the foam is disintegrating, and you've got chunks of it washing down your downspouts. Plus, maple seeds and pine needles get embedded in the foam and sprout, creating a gutter garden.
Cost: $2-4 per linear foot (DIY installation).
Verdict: Don't waste your money. These are designed for warm, dry climates.
Screen Guards (Aluminum or Plastic)
Simple mesh screens that snap into the gutter or slide under the shingles.
Performance in Michigan: Depends entirely on mesh size. Coarse screens (1/4-inch holes) let everything through except large leaves. Fine screens (1/8-inch or smaller) work better but still struggle with pine needles and shingle grit.
Ice performance: Fair. They don't create solid ice surfaces, but ice can form between the screen and gutter, lifting the screen out of place. By spring, half the screens are hanging loose or missing.
Cost: $4-8 per linear foot installed.
Verdict: Budget option if you have minimal tree coverage and are willing to do annual maintenance. Not a long-term solution for heavily wooded properties.

The Pine Needle Problem
If you have pine trees, you know the struggle. Those needles are small, flexible, and designed by nature to slip through gaps. Here's what actually works:
Micro-mesh is the only reliable solution. The mesh needs to be fine enough (50 microns or less) that pine needles can't penetrate. They'll sit on top of the mesh and eventually blow off or wash away during rain. I've seen this work on properties in Chesterfield and St. Clair Shores with heavy pine coverage.
Standard mesh screens fail. Even 1/8-inch mesh is too coarse. Pine needles slip through, collect at the downspout outlet, and create a mat that blocks water flow. You end up with overflowing gutters anyway.
Reverse-curve guards are useless for pine needles. The needles are light enough that they don't blow off the curved surface. They accumulate, create a dam, and water backs up under your shingles. I've seen soffit rot on multiple homes in Lake Orion from this exact scenario.
Pro tip: If you have pine trees within 30 feet of your house, budget for micro-mesh guards or plan on cleaning your gutters 3-4 times per year. There's no middle ground that works long-term.
The relationship between clogged gutters and basement problems is real. Pine needle blockages cause water to overflow, saturate the soil around your foundation, and eventually find its way into your basement. It's a chain reaction that starts with a $50 gutter cleaning you skipped.
Ice, Snow, and Gutter Guards
This is where most gutter guard marketing falls apart. The photos show autumn leaves. The testimonials talk about "never cleaning gutters again." But nobody mentions what happens when 18 inches of snow sits on your roof for three months.
Ice formation is inevitable. Any gutter guard will accumulate some ice in Michigan winters. The question is whether the system still functions when that happens.
Micro-mesh handles ice best. Because water can still pass through the mesh even when snow is sitting on top, the system continues to drain. You'll get some icicle formation at the gutter edge, but it's minimal compared to other systems.
Solid-surface guards create ice dams. Reverse-curve and solid-top guards act like a shelf for snow and ice. Heat from the house melts the bottom layer, water runs to the gutter edge, and refreezes. By mid-winter, you've got a continuous ice ridge that can damage shingles, fascia, and even pull gutters off the house. We see this constantly on homes in Sterling Heights and Warren that have older attic insulation systems.
Installation method matters more than product type. If a micro-mesh guard is screwed to the fascia instead of slid under the shingles, it will still ice up. The guard needs to be positioned so the front edge is slightly lower than the back edge, allowing water to drain forward even when partially frozen.
When we're doing roof replacement projects in Metro Detroit, we always coordinate gutter guard installation with the roofing work. This ensures the guards are properly integrated under the shingles, which is critical for ice performance.
What About Heated Gutter Guards?
Some high-end systems include heating elements to prevent ice formation. Do they work? Yes. Are they worth it? Rarely.
Cost: $30-40 per linear foot installed, plus electrical work to power the heating elements. You're looking at $6,000-8,000 for a typical home.
Operating cost: Running the heating elements all winter adds $40-80 per month to your electric bill.
Verdict: Only makes sense if you have severe ice dam problems that can't be fixed with attic insulation and ventilation improvements. For most homeowners, that money is better spent on proper attic insulation and air sealing.
Cost Reality for Southeast Michigan Homes
Let's talk numbers. Gutter guard pricing varies wildly based on system type, installation complexity, and who's doing the work.
DIY vs. Professional Installation
DIY screen guards: $150-300 for materials to cover a typical 150-foot gutter system. Plan on 4-6 hours of ladder work. The challenge isn't the installation — it's getting them to stay in place during Michigan winters. Most DIY systems we see are half-destroyed by spring.
Professional micro-mesh installation: $2,250-$3,750 for the same 150-foot system. Includes proper integration under shingles, sealed end caps, and warranty. Installation takes 3-5 hours with a two-person crew.
Professional reverse-curve installation: $1,500-$2,700 for 150 feet. Cheaper than micro-mesh, but as I explained earlier, these don't perform well in Michigan conditions.
What Affects Price?
Roof pitch: Steeper roofs require more safety equipment and take longer to work on. Expect a 15-25% upcharge for pitches over 8/12.
Gutter condition: If your existing gutters are sagging, rusted, or improperly pitched, they need to be replaced or repaired before guards go on. We often find this on homes in Macomb and Clinton Township built in the 1970s-1980s. The original gutters are shot, and installing guards on them is throwing good money after bad.
Tree coverage: Heavily wooded properties require more frequent maintenance even with guards. Some companies charge a premium for properties with significant tree coverage because they know they'll be back for service calls.
Gutter size: 6-inch gutters cost more to protect than 5-inch gutters. The guards are larger, and there's more surface area to cover.
Real numbers from a recent project: Two-story Colonial in Rochester Hills, 180 linear feet of 6-inch gutters, 9/12 roof pitch, heavy oak coverage. Micro-mesh guard installation: $4,320. The homeowner had been spending $400-500 per year on professional gutter cleaning (3-4 cleanings annually). System will pay for itself in 8-9 years, and the gutters now drain properly year-round.
ROI and Maintenance Savings
Professional gutter cleaning in Southeast Michigan runs $150-250 per visit for a typical home. If you have heavy tree coverage, you need 3-4 cleanings per year. That's $450-1,000 annually.
A quality micro-mesh system costs $2,500-4,000 installed and should last 20+ years with minimal maintenance. Even accounting for occasional cleaning (yes, you'll still need to clean them every few years), the ROI is solid.
But here's the real value: preventing damage. Clogged gutters cause water to overflow, saturating fascia boards and soffit. We've replaced entire fascia systems on homes in Troy and Bloomfield Hills where gutters overflowed for years, causing $8,000-12,000 in rot damage. A $3,000 gutter guard investment would have prevented all of it.
Similarly, when we handle seamless gutter installations, we always discuss guard options with homeowners. The best time to add guards is during new gutter installation, when we can integrate them properly under the shingles without disturbing existing roofing.

When to Skip Gutter Guards (Honest Contractor Advice)
I install gutter guards for a living, but I'll tell you straight: they're not always the right solution. Here are situations where you should skip them or consider alternatives:
1. You Have Severe Ice Dam Problems
If ice dams are destroying your fascia and soffit every winter, gutter guards won't fix it. The problem is heat loss from your attic, not your gutters. Fix the insulation and ventilation first. We've done this work on dozens of homes in Sterling Heights and Warren, and the ice dam problems disappear once the attic is properly air-sealed and insulated.
Adding gutter guards before fixing the attic just gives you expensive guards with ice hanging off them.
2. Your Gutters Are Already Failing
If your gutters are sagging, pulling away from the fascia, or rusted through, don't put guards on them. Replace the gutters first with properly pitched seamless gutters in Detroit, MI, then add guards if needed.
I've seen too many homeowners spend $2,500 on guards for gutters that failed six months later. Now they're paying for new gutters and reinstallation of the guards.
3. You Have Minimal Tree Coverage
If you have one or two small trees and your gutters only need cleaning once a year, guards are overkill. Pay someone $150 to clean them annually and spend the $3,000 you would have spent on guards on something that delivers more value — like energy-efficient window replacement or new siding.
4. Your Roof Is Near End-of-Life
If your roof will need replacement in the next 3-5 years, wait on gutter guards. Quality guards should be installed under the shingles, which means they'll need to be removed and reinstalled during the roof replacement. That's an extra $500-800 in labor.
Better to replace the roof first, then add guards as part of the post-roofing cleanup and inspection process.
Alternative: Just Clean Your Gutters
Here's the reality: even with the best gutter guards, you'll need to clean them eventually. Micro-mesh guards accumulate shingle grit and fine debris over time. Every 3-5 years, you need to brush them off.
If you're physically able and comfortable on a ladder, cleaning gutters 2-3 times per year costs you nothing but time. If you're not comfortable with ladders or have a multi-story home, professional cleaning is still cheaper than guards for the first 5-7 years.
Guards make sense when:
- You have heavy tree coverage requiring 3+ cleanings per year
- You're physically unable to clean gutters yourself
- You have a multi-story home where professional cleaning is expensive and risky
- You've experienced fascia or soffit damage from overflowing gutters
What We Install (and Why)
At NEXT Exteriors, we install micro-mesh guards almost exclusively. After 35+ years in the Michigan exterior contracting business, we've tried everything, and micro-mesh is the only system that consistently performs in our climate.
Our installation process:
1. Gutter inspection and cleaning. We remove all existing debris and check gutter pitch, fascia condition, and downspout flow. If gutters are improperly pitched or damaged, we fix that first.
2. Shingle integration. We carefully lift the first course of shingles and slide the guard frame underneath. This creates a watertight seal and ensures water flows into the gutter rather than behind it. Guards screwed to the fascia will fail in Michigan winters — this is non-negotiable.
3. End caps and sealing. Every section gets sealed end caps to prevent debris from entering at the corners. We use a commercial-grade sealant that remains flexible in freeze-thaw cycles.
4. Downspout strainers. We install strainers at every downspout outlet to catch any debris that makes it past the guards. This prevents downspout clogs, which are the most common cause of overflow even with guards installed.
5. Flow testing. Before we leave, we run water through every section to verify proper flow and check for leaks.
Warranty: We offer a 20-year performance warranty on micro-mesh installations. If the guards clog or fail to perform as specified, we'll service or replace them at no charge. This warranty is only valid if we also install or service the gutters — we won't warranty guards installed on failing gutter systems.
Why we don't install reverse-curve or foam guards: Simple — they don't work in Michigan. I'm not going to sell you a system I know will fail in the first winter. Our reputation is built on doing the job right the first time, not maximizing profit on every sale.
We've built our reputation on comprehensive exterior services in Detroit and throughout Southeast Michigan. Whether it's roofing, gutters, siding, or exterior painting, we approach every project with the same philosophy: honest assessment, quality materials, and installation methods that account for Michigan's brutal climate.
Maintenance After Installation
Even the best gutter guards need occasional attention. Here's what we recommend:
Annual inspection: Once a year (usually spring), walk around your house and check for debris accumulation on top of the guards. In most cases, a leaf blower from the ground will clear everything off.
Every 3-5 years: Have the guards professionally cleaned. Shingle grit, fine dust, and pollen create a film on micro-mesh that reduces flow over time. We use a soft brush and low-pressure water to restore full flow capacity.
After major storms: Check for damage. High winds can lift guards if they weren't properly installed under the shingles. Hail can dent aluminum frames (though it won't affect performance).
This is significantly less maintenance than cleaning unprotected gutters 3-4 times per year, but it's not zero maintenance. Anyone who tells you otherwise is lying.
Ready to Get Started?
NEXT Exteriors has been protecting Michigan homes since 1988. Get a free, no-pressure estimate from a team that shows up on time and does the job right. We'll inspect your gutters, discuss your options honestly, and provide a detailed quote with no hidden fees.
Get Your Free QuoteOr call us: (844) 770-6398
Frequently Asked Questions
What's the True Cost to Paint a House in Macomb County?
Real exterior painting costs for Macomb County homes. From prep to finish, here's what 35+ years in Michigan taught us about pricing, quality, and what actually matters.
You're getting quotes for exterior painting, and the numbers are all over the map. One contractor quotes $4,500. Another says $9,000. A third comes in at $12,500 for what looks like the same job. So what's the real answer?
After 35+ years painting homes across Macomb County — from Clinton Township ranch homes to Sterling Heights Colonials — we've learned that "how much does it cost to paint a house" is the wrong question. The right question is: what are you actually getting for that price?
Because here's what most homeowners don't realize until it's too late: cheap paint jobs fail in Michigan weather. Every single time. The freeze-thaw cycles, the humidity swings, the UV exposure from summer sun — this climate eats bad prep work and budget paint for breakfast.
This guide breaks down real exterior painting costs for Macomb County homes, what drives those numbers, and why our Southeast Michigan painting professionals exclusively use Sherwin-Williams products for every project.
What Actually Drives Exterior Painting Costs in Macomb County
Painting estimates aren't pulled from thin air. Four factors determine what you'll pay, and understanding them helps you compare quotes accurately.
Square Footage and Surface Area
Most contractors calculate based on paintable square footage — not your home's floor plan square footage. A 2,000-square-foot ranch with minimal trim costs less than a 2,000-square-foot two-story with bay windows, decorative shutters, and complex rooflines.
We measure every exterior wall, soffit, fascia, trim board, and door. That's your actual painting surface. For most Macomb County homes:
- Small homes (1,000-1,500 sq ft): 1,200-1,800 paintable sq ft
- Medium homes (1,500-2,500 sq ft): 1,800-3,000 paintable sq ft
- Large homes (2,500+ sq ft): 3,000-4,500+ paintable sq ft
Material Quality: Why We Only Use Sherwin-Williams
Paint quality isn't subjective. It's chemistry. Premium exterior coatings from Sherwin-Williams contain higher concentrations of titanium dioxide (for opacity and UV resistance), better binders (for adhesion and flexibility), and mildewcides that actually work in Michigan's humid summers.
We spec Sherwin-Williams Duration, Emerald, or SuperPaint depending on substrate and exposure. These products cost 40-60% more per gallon than big-box paint, but they deliver 10-15 year performance in Southeast Michigan weather instead of 3-5 years.
The math is simple: spending $800 more on premium paint saves you $8,000+ on repainting five years sooner.
Prep Work Requirements
This is where costs separate honest contractors from corner-cutters. Michigan weather damages exterior surfaces in specific ways: wood trim deteriorates from freeze-thaw cycles, old paint chalks and peels, caulk fails around windows and doors.
Professional prep includes:
- Power washing to remove dirt, mildew, and loose paint
- Scraping and sanding all failing surfaces
- Wood repair or replacement where rot exists
- Priming bare wood and problem areas
- Caulking every joint, seam, and penetration
Prep typically accounts for 50-60% of labor hours on a paint job. It's also the most commonly skipped step by low-bid contractors.
Labor and Crew Size
A two-person crew painting your home over 7-10 days costs more than a four-person crew rushing through in 3 days. But rushed work shows: drips, thin coverage, missed spots, sloppy cut lines.
We staff projects based on complexity, not speed. Most medium-sized homes in Macomb County take our crews 5-7 days, weather permitting. That includes proper dry time between coats — something you can't shortcut without compromising the finish.
Real Numbers: What Macomb County Homeowners Pay
Here's what professional exterior painting actually costs in Macomb County in 2026. These numbers reflect complete jobs — proper prep, premium Sherwin-Williams paint, two coats on walls, three coats on trim, and a crew that shows up on time.
| Home Size | Paintable Sq Ft | Typical Cost Range | Cost Per Sq Ft |
|---|---|---|---|
| Small (1,000-1,500 sq ft) | 1,200-1,800 | $4,500-$7,000 | $3.75-$3.90 |
| Medium (1,500-2,500 sq ft) | 1,800-3,000 | $7,000-$11,500 | $3.85-$3.85 |
| Large (2,500+ sq ft) | 3,000-4,500+ | $11,500-$18,000+ | $3.85-$4.00 |
These ranges assume typical wood trim, standard siding or masonry, and moderate prep requirements. Costs increase for:
- Extensive wood rot or trim replacement: Add $1,500-$4,000
- Lead paint abatement (homes built before 1978): Add $800-$2,500
- Three-story homes or difficult access: Add 15-25% for staging and safety equipment
- Detailed Victorian or historic homes: Add 20-30% for intricate trim work
Macomb County Reality Check: If you're getting quotes under $3.00 per square foot, the contractor is either cutting corners on prep, using inferior paint, or underinsuring their crew. All three scenarios cost you more in the long run.
Why Prep Work Costs More in Michigan (And Why It Matters)
Michigan's climate is uniquely destructive to exterior paint. We cycle through freeze-thaw events 40-60 times each winter. Summer humidity averages 70-80%. UV exposure in July and August degrades cheap paint in months, not years.
This creates specific failure patterns we see on nearly every repainting project in Macomb County:
Freeze-Thaw Damage to Wood Trim
Water infiltrates wood grain, freezes, expands, and cracks the substrate. By spring, you've got split fascia boards, rotted window sills, and deteriorated corner trim. Paint can't hide structural damage — it just fails faster over compromised wood.
We replace damaged sections before painting. It costs more upfront, but it's the only way to get a finish that lasts. Our exterior services in Detroit and surrounding areas always include a thorough wood inspection before we quote any paint job.
Moisture Intrusion and Rot
Failed caulk around windows, doors, and trim joints lets water behind the paint film. Once moisture gets in, it can't get out — especially under latex paint applied over old oil-based coatings. The result: blistering, peeling, and rot.
Professional prep means removing all old caulk, letting joints dry completely, and re-caulking with premium elastomeric sealant. This step alone adds 8-12 hours of labor on a typical project. It's also non-negotiable for long-term performance.
Lead Paint Considerations
Most homes in Clinton Township, Warren, and Sterling Heights built before 1978 contain lead paint. Federal law requires EPA-certified lead-safe practices for any renovation that disturbs painted surfaces.
This means containment, HEPA vacuums, protective equipment, and proper disposal. It adds cost, but it's legally required and protects your family. Any contractor who dismisses lead paint concerns is cutting corners you can't afford.
Sherwin-Williams vs. Budget Paint: The 10-Year Cost Reality
Walk into any big-box store and you'll find exterior paint for $25-$35 per gallon. Sherwin-Williams Duration costs $65-$75 per gallon. That's a $1,200-$1,600 difference in materials for a typical 2,000-square-foot home.
So why do we exclusively use premium products? Because the total cost calculation looks completely different over 10 years.
Durability in Michigan Weather
Budget paint uses lower-quality resins and fillers. It goes on fine, but it doesn't flex with temperature swings or resist UV degradation. In Michigan's climate, you're looking at visible fading by year three and peeling by year five.
Sherwin-Williams Duration uses advanced acrylic polymers that remain flexible from -20°F to 110°F. The coating expands and contracts with your siding without cracking. It resists mildew growth in humid summers. And the color stays true for 10-15 years, not 3-5.
Fade Resistance and Color Retention
Cheap paint fades because it contains less titanium dioxide and inferior pigments. Dark colors fade to chalky pastels. Reds turn pink. Blues go gray.
Premium Sherwin-Williams products use colorfast pigments and higher TiO2 concentrations. Your home looks freshly painted a decade later, not three years later. That matters if you're planning to sell — curb appeal directly impacts sale price in Metro Detroit's competitive market.
The 10-Year Math
Let's compare real costs for a 2,000-square-foot home in Macomb County:
Budget Paint Scenario:
- Initial cost: $6,500 (lower-grade paint, minimal prep)
- Repaint needed at year 5: $7,200 (inflation-adjusted)
- Total 10-year cost: $13,700
Sherwin-Williams Premium Scenario:
- Initial cost: $9,200 (Duration paint, thorough prep)
- Repaint needed at year 12-15: $0 in first decade
- Total 10-year cost: $9,200
You save $4,500 over 10 years by doing it right the first time. Plus you avoid the hassle of another full paint project, the disruption to your landscaping, and the stress of finding a contractor all over again.
Signs Your Macomb County Home Needs Repainting
Most homeowners wait too long to repaint. By the time peeling is obvious, moisture has already damaged the substrate. Here's when to schedule a professional evaluation:
Peeling, Cracking, or Bubbling Paint
This is substrate failure, not just cosmetic wear. Paint peels because moisture got behind it, adhesion failed, or the surface wasn't properly prepped. Catching it early means less wood repair and lower total cost.
Fading and Chalking
Run your hand across your siding. If it comes away with a powdery residue, the paint is chalking — the binder has broken down and pigment is exposed. This means the coating is no longer protecting your home from moisture and UV.
Exposed Wood or Primer
Any bare wood or visible primer is an emergency. Unprotected wood absorbs moisture, swells, rots, and attracts insects. A small patch of exposed wood can turn into a $2,000 trim replacement if you wait another year.
Mold or Mildew Growth
Black or green staining on north-facing walls or shaded areas indicates mildew growth. Budget paint lacks effective mildewcides, so this is common on homes painted with cheap products. It's not just ugly — it's actively degrading your paint film.
Pro Tip: If your home was last painted 7-10 years ago and you're seeing any of these signs, schedule an estimate now. Waiting until spring means competing with everyone else for contractor availability. We book free quotes year-round and can often start projects faster in late fall or early spring.
What to Expect From a Professional Paint Job
You're investing $7,000-$15,000+ in your home's exterior. Here's what professional execution looks like from start to finish.
Timeline for Typical Projects
Most medium-sized homes in Macomb County take 5-7 working days to complete. That breaks down as:
- Day 1: Surface prep — power washing, scraping, sanding
- Day 2: Wood repair, priming, caulking
- Days 3-4: First coat on siding and trim
- Days 5-6: Second coat on siding, third coat on trim
- Day 7: Touch-ups, final inspection, cleanup
Weather impacts this schedule. We don't paint in rain, when temperatures drop below 50°F, or when humidity exceeds 85%. Rushing a paint job in marginal conditions ruins the finish.
Crew Size and Process
We typically staff projects with 2-4 crew members depending on home size and complexity. Smaller crews mean better quality control and less disruption to your daily routine.
Our teams arrive between 8:00-8:30 AM and work until 4:30-5:00 PM. We protect your landscaping with drop cloths, move outdoor furniture away from walls, and clean up thoroughly at the end of each day.
You'll have the same crew from start to finish — not a rotating cast of subcontractors. That consistency shows in the final result.
Weather Contingencies
Michigan weather is unpredictable. If rain or cold temperatures interrupt your project, we pause work until conditions improve. We never compromise quality to hit an arbitrary deadline.
Most projects experience 1-2 weather delays over a typical week. We communicate proactively — if we're not showing up because of weather, you'll know the night before, not when you're waiting in your driveway at 8 AM.

Final Walkthrough and Warranty
Before we call a project complete, we walk the entire exterior with you. We're looking for missed spots, drips, uneven coverage, or any detail that doesn't meet our standards.
If you spot something, we fix it. No arguments, no excuses.
Every paint job comes with a written warranty covering materials and workmanship. Sherwin-Williams backs their products with a lifetime limited warranty. We back our labor for 3-5 years depending on the product used.
That's the difference between a contractor who's still around in five years and one who disappears after cashing your check.
Ready to Get Started?
NEXT Exteriors has been protecting Michigan homes since 1988. Get a free, no-pressure estimate from a team that shows up on time and does the job right.
Get Your Free QuoteOr call us: (844) 770-6398
Other Services From NEXT Exteriors
While painting is our focus here, we're a full-service exterior contractor. If your home needs more than just a fresh coat of paint, we handle everything from the roof down.
Our Detroit roofing services include complete tear-offs and replacements using CertainTeed, GAF, and Owens Corning products. If your roof inspection reveals issues, we can coordinate painting and roofing work to minimize disruption.
We're also the area's leading house siding company in Detroit, specializing in James Hardie fiber cement and LP SmartSide engineered wood. If your siding is failing, choosing the right siding matters as much as choosing the right paint.
Window replacement is another common pairing with exterior painting. Our Detroit window experts install energy-efficient replacements that reduce drafts and lower heating costs — a smart investment before you paint.
Don't overlook insulation, either. If your home is under-insulated, you're wasting money on heating and cooling. We install spray foam, blown-in, and batt insulation to bring your home up to current energy codes.
Finally, our seamless gutters in Detroit, MI protect your foundation and prevent water damage. If you're repainting, it's the perfect time to address gutter issues before they cause bigger problems.
Frequently Asked Questions
For a typical 2,000-square-foot home in Macomb County, expect to pay $7,000-$11,500 for professional exterior painting with premium Sherwin-Williams products. This includes thorough surface prep, two coats on siding, three coats on trim, and proper caulking. Homes with extensive wood rot, lead paint, or complex architectural details will cost more.
Absolutely. Premium Sherwin-Williams exterior coatings last 10-15 years in Michigan weather versus 3-5 years for budget paint. The upfront cost difference is $1,200-$1,600, but you save $4,000-$6,000 by not repainting twice in a decade. Better durability, fade resistance, and mildew protection make it the only choice for long-term value.
Most medium-sized homes take 5-7 working days to complete, weather permitting. This includes surface prep, priming, two coats on siding, and three coats on trim. Michigan weather can add 1-2 delay days — we don't paint in rain, below 50°F, or in high humidity. Rushing the job compromises quality, so proper scheduling matters more than speed.
Professional prep includes power washing to remove dirt and loose paint, scraping and sanding all failing surfaces, wood repair or replacement where rot exists, priming bare wood and problem areas, and caulking every joint and seam. This accounts for 50-60% of labor hours and is the most commonly skipped step by low-bid contractors. Without proper prep, even premium paint fails early.
Yes, if your home was built before 1978. Federal law requires EPA-certified lead-safe practices for any renovation disturbing painted surfaces. This includes containment, HEPA vacuums, protective equipment, and proper disposal. It adds $800-$2,500 to project cost but is legally required and protects your family from lead exposure. Any contractor who dismisses this is breaking federal law.
Late spring through early fall (May-October) offers the most consistent weather for exterior painting. Temperatures need to stay above 50°F, and humidity below 85% for proper curing. We can work in early spring and late fall if conditions cooperate, but winter painting isn't possible in Michigan. Book early — contractors fill their schedules by April for prime summer months.
Look for peeling, cracking, or bubbling paint — these indicate substrate failure requiring repainting. Chalking (powdery residue when you touch the siding), fading colors, exposed wood or primer, and mold/mildew growth also mean it's time to repaint. If your home just looks dirty but the paint is intact, professional power washing may be enough. We offer free evaluations to help you decide.
Wood Rot on Trim & Fascia: Metro Detroit Repair Guide
Michigan contractor explains how to spot, repair, and prevent wood rot on trim and fascia. Real costs, material options, and when to replace vs. repair in Southeast Michigan.

I was on a ladder in Sterling Heights last spring, screwdriver in hand, when the homeowner asked me the question I hear at least once a week: "Can't we just patch this and paint over it?"
I pressed the screwdriver into what looked like solid fascia board. It sank in like I was pushing into wet cardboard. The rot had spread six feet in both directions from where the gutter had been overflowing all winter.
Wood rot on trim and fascia isn't just an aesthetic problem. It's structural. It spreads. And in Michigan's freeze-thaw climate, it accelerates faster than most homeowners realize. The moisture gets in through failed caulking or a backed-up gutter, freezes overnight, expands, thaws the next afternoon, and repeats. Each cycle breaks down more wood fiber. Within two seasons, what started as a small soft spot becomes a replacement project.
This guide walks through what we see on hundreds of Michigan homes every year — how wood rot starts, how to spot it before it spreads, when repair makes sense versus full replacement, and what materials actually hold up in Southeast Michigan weather. No sales pitch. Just the information you need to make the right call for your home.
What Causes Wood Rot on Trim and Fascia in Southeast Michigan
Wood rot happens when three conditions meet: moisture, oxygen, and temperatures above 40°F. Michigan provides all three in abundance. The specific fungus that causes rot — usually brown rot or white rot — breaks down the cellulose and lignin in wood, turning solid boards into spongy, crumbly material that loses all structural integrity.
Here's where the moisture comes from on most homes we inspect:
Failed Caulking and Paint
Caulk joints around trim and fascia don't last forever. Sherwin-Williams and other quality manufacturers rate exterior caulk for 10-15 years, but Michigan's temperature swings — from below zero in January to 90°F in July — stress those joints. When caulk cracks or pulls away, water seeps behind the trim. It can't dry out because the paint film traps it. The wood stays damp for weeks. That's when rot starts.
We see this most often at corner joints, where trim meets siding, and around window and door casings. The homeowner doesn't notice until paint starts peeling or the wood feels soft.
Ice Dams and Gutter Overflow
Ice dams are a Southeast Michigan tradition nobody wants. When heat escapes through an under-insulated attic, it melts snow on the roof. The water runs down to the cold eaves and refreezes. Ice builds up behind the gutters in Detroit, MI, forcing water under shingles and over the fascia. The fascia board stays soaked for days or weeks during repeated freeze-thaw cycles.
Clogged gutters cause similar problems. When gutters overflow, water runs down the fascia instead of through downspouts. We wrote about this chain reaction in our article on clogged gutters and basement problems — the damage starts at the roofline and works its way down.
Poor Ventilation and Condensation
Attic ventilation problems don't just cause ice dams. They create condensation that drips onto fascia boards from the inside. When warm, humid air from your living space rises into a cold attic, moisture condenses on the underside of the roof deck and on the fascia. Over time, this internal moisture rots the wood just as effectively as external water.
This is especially common on 1960s and 1970s ranch homes in Macomb and Oakland counties, where original soffit vents were undersized or blocked during insulation upgrades. Our top-rated insulation contractor in Detroit team sees this regularly during attic assessments.
Material Quality and Installation Errors
Not all wood is created equal. Pine trim installed without proper priming and back-priming absorbs moisture like a sponge. We've replaced fascia boards that were installed with the bark side facing out — a rookie mistake that traps water in the wood grain.
Proper installation includes:
- Priming all six sides of trim boards before installation
- Using stainless steel or hot-dipped galvanized fasteners (regular nails rust and create water entry points)
- Maintaining proper drip edge flashing behind fascia
- Caulking joints immediately after installation, before moisture can enter
- Sloping horizontal trim to shed water rather than trap it
When we handle Detroit roofing services, we always inspect fascia condition before starting. A new roof on rotted fascia is a waste of money — the fascia needs to be addressed first.
How to Spot Wood Rot Before It Spreads
Early detection saves thousands of dollars. Wood rot spreads along the grain and through joints. What starts as a six-inch section of soft fascia can become a 20-foot replacement project in one Michigan winter if you don't catch it.
Here's how to inspect your trim and fascia:
Visual Inspection from Ground Level
Walk around your house twice a year — once in spring after snowmelt, once in fall before winter. Look for:
- Discoloration: Dark streaks, gray patches, or greenish staining indicate moisture and possible fungal growth
- Peeling or bubbling paint: Paint fails when moisture pushes it away from the wood surface
- Warped or sagging boards: Rotted wood loses structural strength and bends under its own weight
- Gaps or separation: Joints that used to be tight now show daylight because the wood has shrunk as it deteriorates
- Missing chunks: Advanced rot causes wood to crumble away, especially at corners and joints
Use binoculars to inspect high fascia and second-story trim. You don't need to climb a ladder for the initial assessment.
The Screwdriver Test
This is the definitive field test contractors use. Take a flathead screwdriver or awl and gently press it into suspect areas at a 45-degree angle. Healthy wood resists. You'll feel solid resistance and the screwdriver won't penetrate more than a fraction of an inch.
Rotted wood feels soft. The screwdriver sinks in easily, sometimes half an inch or more. The wood may crumble around the entry point. If you can push the screwdriver in easily, that section needs replacement.
Test these high-risk areas first:
- Corners where two trim boards meet
- Joints between fascia sections
- Areas directly below gutter seams or downspouts
- Horizontal trim pieces that can trap water (window sills, door headers)
- Any area with visible paint failure or discoloration
Safety note: Only test areas you can safely reach from the ground or a stable step ladder. Never overreach or work from an unstable position. High fascia and second-story trim should be tested by a professional with proper equipment.
Seasonal Timing for Inspections
Spring is the best time to catch rot damage. After Michigan's freeze-thaw cycles and snowmelt, any moisture problems show up clearly. Wood that stayed wet all winter will be soft, discolored, and possibly already crumbling.
Fall inspections help you identify problems before winter makes them worse. If you find soft spots in October, you can plan replacement before snow and ice accelerate the damage.
We recommend documenting what you find with photos. If you're not ready to replace immediately, photos let you track whether the damage is spreading. Take close-ups of suspect areas from multiple angles, including wide shots that show the location on the house.
Repair vs. Replace: Making the Right Call
Homeowners in Royal Oak and Grosse Pointe Farms ask us this question constantly: "Can we just fix the bad section, or does the whole thing need to go?"
The honest answer depends on three factors: extent of damage, accessibility, and long-term value.
When Spot Repairs Work
Spot repairs make sense when:
- Damage is isolated: One small section (under 2 feet) is soft, and surrounding areas test solid
- The cause is fixed: You've already repaired the gutter, fixed the ice dam problem, or addressed whatever caused the moisture intrusion
- Matching material is available: You can find trim or fascia that matches the existing profile and can blend the repair
- Budget is extremely tight: A $300 repair buys you time to save for a full replacement
The reality: spot repairs on trim and fascia rarely last more than 3-5 years. The wood around the repair continues aging. The new piece expands and contracts at a different rate than the old wood. Joints open up. Moisture gets in again.
We do spot repairs when homeowners ask for them, but we're upfront about the limitations. It's a temporary fix, not a permanent solution.
When Full Replacement Is the Right Move
Replace the full run of trim or fascia when:
- Multiple sections are damaged: If rot shows up in three or more spots along one side of the house, the entire run is compromised
- Damage extends into joints: Once rot reaches the joints, it spreads through the entire connected system
- The wood is old and brittle: Even the "good" sections may be dried out and ready to fail
- You're doing other exterior work: If you're replacing the house siding in Detroit or getting a roof replacement, do the trim and fascia at the same time. You save on mobilization and scaffolding costs
- You want to upgrade materials: Switching from wood to PVC or fiber cement eliminates future rot problems
Cost Comparison: Repair vs. Replace
Here's what we typically see in Metro Detroit:
| Scope | Cost Range | Longevity |
|---|---|---|
| Spot repair (2-4 feet) | $250-$500 | 3-5 years |
| Single-side fascia replacement (wood) | $800-$1,500 | 15-20 years |
| Single-side fascia replacement (PVC) | $1,200-$2,200 | 30+ years |
| Full house trim replacement (wood) | $3,500-$7,000 | 15-20 years |
| Full house trim replacement (PVC) | $5,500-$10,000 | 30+ years |
The math: spending $500 on repairs every 4 years for 20 years costs $2,500 and leaves you with aging wood. Spending $2,000 once for PVC fascia solves the problem permanently. For homeowners planning to stay in their house, replacement wins.
Material Options for Trim and Fascia Replacement
Material choice determines how long your repair lasts and whether you'll be back on a ladder in five years. Each option has specific performance characteristics in Michigan's climate.
Wood (Cedar, Pine, Treated Lumber)
Cedar: Naturally rot-resistant due to oils in the heartwood. Holds paint well. Beautiful grain. Expensive — expect to pay 40-60% more than pine. Even cedar rots if water sits on it constantly, but it resists decay better than other woods.
Pine: Affordable and easy to work with. Must be primed on all sides before installation. Requires repainting every 5-7 years. Rots quickly if moisture gets behind the paint film. This is what's on most homes built before 2000.
Pressure-treated lumber: Used occasionally for fascia in high-moisture areas. The chemical treatment resists rot, but treated lumber is prone to warping and twisting as it dries. It's also difficult to paint — the treatment interferes with paint adhesion. We rarely recommend it for visible trim.
Best for: Historic homes where matching original materials matters, or budget-conscious homeowners willing to maintain painted wood every few years.
PVC and Cellular PVC
PVC trim (brands like Azek, KOMA, Versatex) is extruded plastic with a cellular structure that looks and cuts like wood. It's completely impervious to moisture. It will never rot, no matter how long it stays wet.
Performance in Michigan weather:
- Moisture resistance: Perfect. Water can't penetrate the material
- Freeze-thaw durability: Excellent. No moisture absorption means no expansion damage
- Thermal expansion: This is the challenge. PVC expands and contracts significantly with temperature changes. A 16-foot board can move up to 3/8" between winter and summer. Proper installation requires expansion gaps and specific fastening patterns
- Paint retention: Good if you use 100% acrylic paint in lighter colors. Dark colors absorb heat and can cause warping on south and west exposures
PVC costs more upfront but eliminates rot maintenance forever. We install it on homes where the homeowner never wants to deal with trim problems again.
Fiber Cement
James Hardie and other manufacturers make fiber cement trim that's dimensionally stable, rot-proof, and holds paint exceptionally well. It's a mix of cement, sand, and cellulose fibers, formed into boards that look like painted wood.
Advantages for Michigan homes:
- Zero rot risk: No organic material for fungus to feed on
- Minimal thermal movement: Expands and contracts much less than PVC
- Excellent paint adhesion: James Hardie's ColorPlus finish is factory-baked and warranted for 15 years
- Impact resistance: Won't dent from hail or ladder contact
Disadvantages:
- Weight: Heavier than wood or PVC, which affects installation labor
- Cutting produces silica dust: Requires proper safety equipment
- Cost: Typically 20-30% more than PVC, 50-70% more than pine
We use fiber cement trim when coordinating with James Hardie siding installations. The materials work together perfectly and create a cohesive, low-maintenance exterior.
Aluminum-Wrapped Options
Aluminum coil stock wrapped over wood fascia was popular in the 1980s and 1990s. The idea: protect the wood with a waterproof metal skin. The reality: if moisture gets behind the aluminum (and it always does eventually), the wood rots invisibly. You don't know there's a problem until the fascia sags or the aluminum pulls loose.
We don't recommend aluminum-wrapped fascia anymore. When we remove it during exterior services in Detroit projects, we typically find extensive hidden rot underneath.
What Trim and Fascia Replacement Actually Costs in Metro Detroit
Pricing depends on material choice, linear footage, accessibility, and whether you're replacing just fascia or including soffit, frieze boards, and other trim components.
Here's what we see across Southeast Michigan in 2026:
Material Costs (per linear foot, installed)
| Material | Cost per Linear Foot | Notes |
|---|---|---|
| Pine trim (primed and painted) | $8-$12 | Most affordable, requires maintenance |
| Cedar trim (primed and painted) | $12-$18 | Better rot resistance than pine |
| PVC trim (painted) | $14-$22 | Zero maintenance, best long-term value |
| Fiber cement trim (painted) | $16-$24 | Premium option, excellent durability |
| Pine fascia board (1x6 or 1x8) | $6-$10 | Includes priming and painting |
| PVC fascia board | $10-$16 | Includes painting in lighter colors |
Labor Factors and Complexity
Labor accounts for 60-70% of trim replacement costs. Factors that increase labor time and cost:
- Height: Second-story work requires scaffolding or lift equipment. Add 30-50% to base labor costs
- Architectural complexity: Homes with multiple gables, dormers, or decorative trim details take longer. A simple ranch costs less per foot than a Victorian with ornate corner boards
- Access: Tight side yards, landscaping obstacles, or decks that block access slow down the work
- Rot extent: If underlying framing is damaged, we need to repair or replace subfascia and rafter tails before installing new trim
- Coordination with other work: Replacing trim during a siding installation project is more efficient than scheduling it separately
Hidden Costs to Anticipate
Trim and fascia replacement often uncovers additional issues:
- Soffit replacement: If fascia is rotted, soffit panels are often damaged too. Add $4-$8 per linear foot for aluminum or vinyl soffit
- Gutter removal and reinstallation: Gutters must come down to access fascia. If your gutters are old or damaged, replacement makes sense. Budget $8-$12 per linear foot for new seamless aluminum gutters
- Roof edge repairs: Rotted fascia sometimes indicates problems with drip edge flashing or the first course of shingles. Minor roof repairs might be necessary
- Painting: If you're replacing only some trim, you'll need to paint the entire house to blend the new and old. Full exterior painting in Southeast Michigan runs $3,500-$8,000 depending on house size. Our Southeast Michigan painting professionals can provide detailed estimates

ROI and Home Value Impact
Trim and fascia replacement isn't a high-ROI project in terms of resale value — you won't get $1.50 back for every dollar spent. But it prevents larger problems (roof damage, siding failure, interior water intrusion) that cost significantly more to fix.
For homes being prepared for sale, fresh trim and fascia improve curb appeal and prevent inspection issues. Buyers notice peeling paint and soft wood. They'll either negotiate the price down or walk away. Addressing trim problems before listing eliminates that negotiating point.
When to Call a Contractor vs. DIY
Trim and fascia work looks straightforward until you're 20 feet up a ladder with a board that won't fit right and no way to safely hold it in place while you nail.
DIY Makes Sense When:
- You're replacing ground-level trim: Window casings, door trim, or decorative boards you can reach from a 6-foot ladder
- The section is short: Replacing one 8-foot board is manageable. Replacing 60 feet of fascia around the whole house is not
- You have carpentry experience: Cutting precise miters, understanding expansion gaps, and knowing proper fastening techniques are critical
- You have the right tools: Miter saw, pneumatic nailer, safety equipment, and stable ladder setup
Skills required for quality trim work:
- Accurate measuring and layout
- Cutting tight miters that won't open up as materials expand and contract
- Understanding how to flash and seal joints to prevent future water intrusion
- Proper priming and painting technique
- Safe ladder work and fall protection
Call a Contractor When:
- Work is above first-floor height: Second-story fascia and gable trim require scaffolding or lift equipment. Rental costs and safety risks make professional installation the smarter choice
- Rot has compromised structural components: If subfascia, rafter tails, or roof framing is damaged, repairs require building code knowledge and inspection
- You're coordinating with other exterior work: Trim replacement during a roof or siding project needs to be sequenced properly
- The project involves complex architectural details: Decorative brackets, crown molding, or custom profiles require specialized tools and experience
- You don't have time for a multi-weekend project: Professional crews complete most trim replacements in 1-3 days
Permit Requirements in Michigan
Most trim and fascia replacement projects don't require permits in Michigan municipalities. You're replacing like-for-like components without altering the structure. However, if the work involves:
- Structural repairs to rafter tails or roof framing
- Changes to roof edge configuration
- Work valued over a certain dollar threshold (varies by municipality)
...then permits may be required. Check with your local building department. In Mount Clemens, Sterling Heights, and most Macomb County communities, simple trim replacement is permit-exempt. Oakland County cities like Troy and Rochester Hills have similar policies, but it's worth confirming before starting work.
How NEXT Exteriors Approaches Trim and Fascia Projects
When we take on a trim or fascia replacement, here's our process:
1. Thorough inspection: We test all trim and fascia with a moisture meter and probe tool. We document exactly what's damaged and what's still sound. You get photos and a written assessment.
2. Honest scope discussion: If spot repairs will work, we tell you. If you need full replacement, we explain why. We don't upsell unnecessary work.
3. Material recommendations based on your situation: Budget-conscious and planning to move in 5 years? Pine might work. Staying long-term and tired of maintenance? PVC or fiber cement makes sense. We match materials to your goals.
4. Coordinated scheduling: If you're doing other exterior work — roofing, siding, gutters, painting — we sequence everything efficiently to minimize disruption and cost.
5. Clean, careful installation: Our crews protect landscaping, clean up daily, and treat your property with respect. We've been doing this since 1988, and our 5.0-star rating across 87+ reviews reflects that consistency.
We're a Michigan-licensed residential builder with 35+ years of experience in Southeast Michigan's climate. We know what works and what doesn't because we've seen it age through decades of freeze-thaw cycles.
Ready to Get Started?
NEXT Exteriors has been protecting Michigan homes since 1988. Get a free, no-pressure estimate from a team that shows up on time and does the job right.
Get Your Free QuoteOr call us: (844) 770-6398
Frequently Asked Questions
Properly installed and maintained pine trim lasts 15-20 years in Michigan. Cedar can go 20-25 years. PVC and fiber cement trim last 30+ years with minimal maintenance. The key factors are quality of initial installation (proper priming, flashing, and caulking) and ongoing maintenance (repainting every 5-7 years for wood). Trim exposed to constant moisture — near downspouts, under roof valleys, or in areas with poor drainage — fails faster regardless of material.
No. Painting over rotted wood doesn't stop the decay — it just hides it temporarily. The fungus causing the rot continues breaking down the wood fibers underneath the paint. Within months, the paint will fail again as the wood continues deteriorating. You need to remove all rotted material, treat the surrounding wood with a wood hardener or preservative if it's marginally soft, and then prime and paint. If the rot is extensive, replacement is the only reliable solution.
Fascia is the vertical board that runs along the roof edge, where gutters attach. Soffit is the horizontal panel underneath the eaves, between the fascia and the house wall. They work together as a system. If fascia is rotted, soffit is often damaged too because water that gets behind the fascia also soaks the soffit. However, you don't always need to replace both. If only the fascia is damaged and the soffit is solid aluminum or vinyl, you can replace just the fascia. Wood soffit usually needs replacement when fascia does.
For most homeowners planning to stay in their house more than 10 years, yes. PVC costs 40-60% more upfront than pine, but it eliminates rot risk permanently and requires no maintenance beyond occasional washing. Over 20 years, you'll spend more on wood trim repairs and repainting than the initial cost difference. PVC also holds up better to Michigan's freeze-thaw cycles because it doesn't absorb moisture. The main consideration is thermal expansion — PVC needs to be installed with proper expansion gaps, especially on long runs.
Prevention comes down to keeping water away from the wood. Clean your gutters twice a year so water doesn't overflow onto fascia. Inspect and re-caulk joints every 3-4 years before cracks open up. Repaint wood trim every 5-7 years to maintain the protective barrier. Make sure your attic is properly insulated and ventilated to prevent ice dams. Fix any roof leaks immediately. Trim landscaping so bushes and trees don't trap moisture against trim boards. If you're tired of maintenance, upgrade to PVC or fiber cement trim that won't rot no matter how much moisture hits it.
Trim and fascia should be replaced before or during siding installation, not after. New siding needs to butt against solid, straight trim boards. If your trim is rotted or warped, the siding won't fit properly and you'll have gaps that leak. Most professional contractors inspect trim condition during the siding estimate and recommend replacing damaged sections first. Coordinating both projects saves money because the crew is already mobilized with scaffolding and equipment. We handle this regularly on siding installation projects in Michigan — addressing trim issues before the new siding goes up.
Usually not. Most homeowners insurance policies exclude damage from long-term maintenance issues, including wood rot from normal wear and weathering. Insurance typically covers sudden, accidental damage — like a tree falling on your fascia or storm damage that causes immediate water intrusion. Gradual deterioration from age, poor maintenance, or moisture exposure is considered a homeowner responsibility. If ice dam damage causes sudden fascia failure during a specific storm event, you might have coverage, but you'll need to document the timeline. Check your policy and talk to your agent about specific scenarios.
Roof Ventilation Issues in Older Detroit Homes: Fixes
Attic moisture, ice dams, and shingle damage? Poor roof ventilation is destroying older Detroit homes. Learn how to diagnose and fix it from Michigan roofing experts.
If you own a home built before 1980 in Metro Detroit, there's a good chance your roof ventilation system is either inadequate or completely missing. We see it on nearly every older home we inspect in Royal Oak, Grosse Pointe Farms, and throughout Macomb County: ice dams in winter, sweltering attics in summer, and shingles that fail years before they should.
The problem isn't always obvious from the curb. But climb into the attic on a February morning, and you'll see frost coating the underside of the roof sheathing. Or check your cooling bills in July — if your AC is running constantly and the upstairs still feels like a sauna, poor roof ventilation is likely the culprit.
After 35 years of Detroit roofing services, we've diagnosed and fixed hundreds of ventilation problems in older homes. This isn't about selling you unnecessary upgrades. It's about explaining what's actually happening in your attic, why it matters, and what fixes work in Michigan's climate.
Why Older Detroit Homes Have Ventilation Problems
Homes built in the 1950s, 60s, and 70s across Southeast Michigan were constructed under building codes that either didn't require attic ventilation or set standards far below what we know works today. The typical brick Colonial or ranch-style home from that era might have a single gable vent on each end of the attic — and that's it.
The building science was different back then. Contractors weren't thinking about balanced airflow or the freeze-thaw cycles that define Michigan winters. Insulation levels were minimal (if present at all), so heat loss from the living space into the attic wasn't as pronounced. But as homeowners added insulation over the decades — often without upgrading ventilation — the attic became a moisture trap.
Here's what happens: Warm, humid air from your home rises into the attic. In winter, that moisture condenses on cold roof sheathing and rafters, leading to frost buildup, wood rot, and eventually mold. In summer, that same attic turns into an oven, radiating heat back down into your home and cooking your shingles from below.
Michigan-specific challenge: Our temperature swings are extreme. A January day might start at 15°F and climb to 35°F by afternoon. That freeze-thaw cycle accelerates ice dam formation and shingle deterioration when ventilation is inadequate. Lake-effect snow adds another layer of complexity — heavy snow loads on the roof create insulation that traps even more heat in poorly ventilated attics.
Common architectural styles in Detroit-area neighborhoods compound the problem. Many brick Colonials have shallow roof pitches and limited soffit overhang, making it difficult to retrofit intake vents. Ranch homes often have low-slope roofs with minimal attic space, where even small ventilation deficiencies create big problems.
The bottom line: If your home was built before modern building codes required balanced ventilation (typically the 1980s), you're probably dealing with a system that was never designed to handle Michigan's climate or today's insulation standards.
Signs Your Roof Ventilation Is Failing
Ventilation problems announce themselves in specific ways. Here's what to look for, broken down by season and location:
Winter Warning Signs
Ice dams: These ridges of ice form along the roof edge when heat escaping through an under-ventilated attic melts snow on the upper roof. The water runs down, refreezes at the cold eaves, and creates a dam that forces water under shingles. If you've had attic moisture and ventilation problems, ice dams are often the visible result.
Frost in the attic: On cold mornings, climb into your attic with a flashlight. Look at the underside of the roof sheathing and the tips of roofing nails poking through. If you see frost, you have a moisture problem caused by inadequate ventilation. This is especially common in Sterling Heights and Clinton Township homes built in the 1960s.
Icicles along the eaves: A few small icicles are normal. But if you have thick icicles hanging continuously along the roof edge, or if they're paired with ice buildup on the roof itself, your attic is too warm.
Summer Warning Signs
Excessive attic heat: Your attic should be hot in summer — that's normal. But if it's 150°F or hotter up there (measure with an infrared thermometer), you don't have enough exhaust ventilation to let that heat escape. That heat radiates down into your living space, making your AC work overtime.
High cooling bills: If your energy costs spike in summer despite a functioning AC system, your attic might be acting as a giant heat battery. Proper ventilation reduces attic temperatures by 20-30°F, which directly impacts cooling costs.
Premature shingle failure: Asphalt shingles are designed to withstand heat, but sustained attic temperatures above 140°F accelerate aging. If your shingles are curling, cracking, or losing granules well before their rated lifespan, poor ventilation is often the cause. We see this frequently on south- and west-facing roof planes in Shelby Township and Macomb.
Year-Round Red Flags
Mold or mildew in the attic: Dark stains on wood framing, a musty smell, or visible mold growth indicate chronic moisture problems. This is a health issue and a structural issue.
Peeling paint on soffits or eaves: Moisture escaping through inadequate ventilation can cause exterior paint to blister and peel, especially on the soffits and fascia.
Rusted or corroded attic fasteners: The nails and metal straps holding your roof together shouldn't rust. If they are, moisture is present — and it's not leaving.
If you're seeing any combination of these signs, it's time for a proper diagnosis. Ignoring ventilation problems doesn't just shorten your roof's lifespan — it can lead to structural damage that costs far more to fix than the ventilation system itself.
How We Diagnose Ventilation Issues
When a homeowner calls us about suspected ventilation problems, we don't just eyeball the roof from the driveway. A proper diagnosis requires getting into the attic and doing the math. Here's our process:
Step 1: Attic Inspection
We start by accessing the attic (if possible) and looking for the telltale signs mentioned above: frost, moisture stains, mold, condensation on rafters, and wet or compressed insulation. We check the condition of the roof sheathing and framing. We also look for insulation blocking airflow at the eaves — a common problem when insulation was added after the home was built.
We measure attic temperature (in summer) or look for temperature differentials (in winter) using infrared thermography. A well-ventilated attic should be close to outdoor temperature, not 30-40°F warmer.
Step 2: Exterior Inspection
From outside, we identify all existing ventilation components:
- Soffit vents: Are there perforated soffits or vent strips under the roof overhang? Many older homes have solid soffits with zero intake ventilation.
- Ridge vents: Is there a continuous vent running along the roof peak? Ridge vents are the gold standard for exhaust, but they weren't common until the 1990s.
- Box vents (static vents): These are the square metal caps you see on many roofs. We count them and note their size.
- Gable vents: Triangular or rectangular vents on the gable ends. These can help, but they're not a substitute for soffit and ridge ventilation.
- Turbine vents: The spinning metal vents. They work, but they're prone to failure and aren't as effective as ridge vents.
We also look for roof flashing failures and other issues that might be contributing to moisture intrusion.
Step 3: Calculate Required Ventilation
Building code (International Residential Code, Section R806) requires a minimum of 1 square foot of net free ventilation area for every 150 square feet of attic floor space. That's the 1:150 ratio. And it must be balanced: half of that ventilation should be intake (soffits), and half should be exhaust (ridge, box, or gable vents).
For example, if your attic floor is 1,500 square feet, you need at least 10 square feet of net free ventilation area — 5 square feet of intake and 5 square feet of exhaust.
We measure your attic, calculate the requirement, and then compare it to what's actually installed. In most older Detroit homes, we find one of two scenarios:
- No intake ventilation: Solid soffits, meaning zero fresh air entering the attic. Exhaust vents are present but can't function properly without intake.
- Insufficient exhaust: A few small box vents that provide maybe 2-3 square feet of ventilation when the home needs 8-10.
Step 4: Check for Airflow Obstructions
Even if vents are present, airflow can be blocked by insulation, debris, or improper installation. We look for:
- Insulation stuffed into the eaves, blocking soffit vents
- Missing or damaged baffles (the channels that keep insulation away from the roof deck)
- Painted-over or clogged soffit vents
- Attic fans or powered vents that disrupt natural airflow (these often do more harm than good)
Proper insulation services in Southeast Michigan always include ensuring ventilation isn't compromised.
What We Provide After the Inspection
You get a written report with photos, measurements, and specific recommendations. We'll tell you:
- How much ventilation you have vs. how much you need
- Whether the problem is intake, exhaust, or both
- What fixes are necessary and what's optional
- Estimated costs for each option
No sales pitch. Just the facts and the fixes that make sense for your home and budget.
Effective Fixes for Poor Roof Ventilation
Once we've identified the problem, the solution usually falls into one of a few categories. The right fix depends on your home's architecture, existing ventilation, and whether you're planning a roof replacement.
Adding Soffit Intake Vents
This is the most common missing piece in older Detroit homes. If you have solid soffits, we retrofit perforated soffit vents or continuous soffit vent strips. This involves cutting openings in the soffit material and installing vent panels that allow air to enter the attic at the eaves.
For homes with narrow or no soffit overhang (common on some brick Colonials), we sometimes install edge vents or over-fascia vents that sit at the roof edge and provide intake without requiring soffit modification.
Cost: Adding soffit vents typically runs $800-$1,500 for an average-sized home, depending on accessibility and the amount of soffit area.
Installing Ridge Vents
Ridge vents are the most effective exhaust solution for most homes. They run continuously along the roof peak, allowing hot air to escape naturally without the need for power or moving parts. When paired with adequate soffit intake, ridge vents create a balanced airflow system that works year-round.
We install ridge vents from manufacturers like CertainTeed, GAF, and Owens Corning as part of our roof replacement in Metro Detroit projects. If your roof is newer and in good condition, ridge vents can sometimes be added without a full replacement, though this is less common.
Cost: Ridge vent installation during a roof replacement adds $300-$600 to the project. Retrofitting ridge vents on an existing roof costs $1,200-$2,000.
Adding or Upgrading Box Vents
If a ridge vent isn't feasible (due to roof design or homeowner preference), we add box vents strategically placed on the upper half of the roof. Each box vent provides 50-60 square inches of net free area, so you'll need several to meet code requirements.
We space them evenly and install them high on the roof plane to maximize exhaust efficiency. Box vents work, but they're not as effective as ridge vents and require more penetrations through the roof.
Cost: $150-$250 per box vent installed, including flashing and sealing.
Installing Rafter Baffles
Baffles (also called rafter vents or vent chutes) are rigid foam or cardboard channels that fit between rafters at the eaves. They create a clear airway from the soffit vents to the attic space, preventing insulation from blocking airflow.
If your home has blown-in insulation or batt insulation that's been stuffed into the eaves, baffles are essential. Without them, adding soffit vents won't help — the air has nowhere to go.
Cost: Baffles cost $2-$4 each and are usually installed during insulation upgrades or roof replacements. Labor to install them in an existing attic runs $500-$1,000 depending on attic accessibility.
Removing or Deactivating Gable Vents (Sometimes)
This surprises people, but gable vents can actually interfere with a balanced soffit-to-ridge ventilation system. If you have both gable vents and ridge vents, the gable vents can short-circuit airflow, pulling air from the ridge vent instead of from the soffits.
In some cases, we recommend sealing or covering gable vents from the inside after installing ridge and soffit ventilation. This forces air to flow the way it should: in through the soffits, up along the underside of the roof deck, and out through the ridge.
Cost: Sealing gable vents from the inside is a minor task, usually $100-$200.
What about powered attic fans? We generally don't recommend them. They consume energy, require maintenance, and can create negative pressure that pulls conditioned air from your living space into the attic. A properly designed passive ventilation system (soffit + ridge) works better and costs nothing to operate.
Real-World Cost Example
A typical 1,500-square-foot ranch home in Warren with no soffit vents and inadequate exhaust might need:
- Soffit vent installation: $1,200
- Ridge vent installation (during roof replacement): $400
- Rafter baffles (if insulation is present): $600
Total ventilation upgrade: $2,200, often rolled into a roof replacement project.
For context, siding replacement costs in Michigan and roofing costs are often budgeted together when homeowners are planning major exterior work.
When Ventilation Fixes Should Happen During Roof Replacement
If you're planning a roof replacement in the next year or two, that's the ideal time to address ventilation. Here's why:
Access is already there: When we're tearing off old shingles, we can install ridge vents, add box vents, and inspect the roof deck for moisture damage — all without additional tear-out or labor costs.
It's part of a quality installation: A new roof without proper ventilation is a roof that won't last. Shingle manufacturers like CertainTeed and GAF require adequate ventilation to honor their warranties. If your attic doesn't meet the 1:150 ratio, your warranty could be void.
You're already spending the money: Roof replacement is a significant investment. Adding $1,500-$2,000 for proper ventilation ensures that investment lasts 25-30 years instead of 15.
When we do a roof replacement in Chesterfield Township or anywhere in Southeast Michigan, ventilation is part of the conversation from day one. We measure your attic, calculate requirements, and include the necessary vents in the proposal — no surprises, no upselling.
What Gets Included in a NEXT Exteriors Roof Replacement
When you hire us for a roof replacement, ventilation is baked into the process:
- Ridge vent installation: We install a continuous ridge vent along the entire peak using CertainTeed or GAF products that match your shingle system.
- Soffit vent assessment: We inspect your soffits and recommend intake vent installation if needed. This is quoted separately but coordinated with the roof work.
- Rafter baffles: If insulation is blocking airflow, we install baffles to maintain clear ventilation channels.
- Deck inspection: With the old shingles off, we inspect the roof sheathing for moisture damage, rot, or mold — all signs of past ventilation problems. Any damaged sheathing gets replaced before new shingles go on.
- Ice and water shield: We install ice and water shield along the eaves and valleys to protect against ice dams (which proper ventilation helps prevent).
This is standard practice for us. It's how roofing should be done in Michigan.
When to Address Ventilation Without a Full Roof Replacement
If your roof is relatively new (less than 10 years old) but you're experiencing ventilation problems, you don't necessarily need a full replacement. We can often add soffit vents, install baffles, and even retrofit ridge vents or box vents without tearing off the entire roof.
The decision depends on:
- The age and condition of your current roof
- The severity of the ventilation problem
- Whether moisture damage has already occurred
- Your budget and timeline
We'll walk you through the options and recommend the most cost-effective solution. Sometimes that's a targeted ventilation upgrade. Sometimes it's better to replace the roof and do it right.
Ready to Get Started?
NEXT Exteriors has been protecting Michigan homes since 1988. Get a free, no-pressure estimate from a team that shows up on time and does the job right.
Get Your Free QuoteOr call us: (844) 770-6398
Other Services from NEXT Exteriors
Beyond roofing and ventilation, we offer a full range of exterior services in Detroit and throughout Southeast Michigan. If you're planning exterior upgrades, consider coordinating multiple projects to save time and money:
Siding: Whether you're looking at vinyl, fiber cement, or engineered wood, our house siding services in Detroit include everything from material selection to installation. We're a CertainTeed 5-Star certified contractor, and we work with James Hardie and LP SmartSide as well.
Windows: Drafty windows waste energy year-round. Our Detroit window experts install energy-efficient double-hung, casement, and bay windows that stand up to Michigan weather. We often coordinate siding and window replacement together to streamline the project.
Gutters: Poor gutter performance contributes to ice dams and foundation problems. We install seamless gutters in Detroit, MI that are custom-fit to your home and designed to handle Michigan's heavy snow and rain.
Painting: As a Sherwin-Williams exclusive contractor, our Southeast Michigan painting professionals use premium products that hold up to freeze-thaw cycles and UV exposure. Exterior painting is often coordinated with siding or trim work for a complete refresh.
Frequently Asked Questions
Building code requires 1 square foot of net free ventilation area for every 150 square feet of attic floor space. So if your attic floor is 1,500 square feet, you need at least 10 square feet of ventilation total. Half of that (5 square feet) should be intake vents at the soffits, and half should be exhaust vents at or near the roof peak. This is the minimum — in Michigan's climate, more ventilation is often better, especially for homes with complex roof lines or heavy insulation.
Yes, in most cases. We can retrofit soffit vents by cutting openings in your existing soffits and installing vent panels. Box vents or even ridge vents can sometimes be added to an existing roof, though ridge vent installation is easier and more cost-effective during a roof replacement. The key is ensuring you don't create an imbalanced system — adding exhaust vents without adequate intake (or vice versa) won't solve the problem and can sometimes make it worse.
Proper ventilation is one of the three critical factors in preventing ice dams, along with adequate attic insulation and air sealing. Ventilation keeps your attic temperature close to the outdoor temperature, which prevents snow on the roof from melting unevenly. If your attic is 40°F when it's 20°F outside, heat is escaping and melting snow — that's when ice dams form. Balanced soffit-to-ridge ventilation, combined with proper insulation, dramatically reduces or eliminates ice dams in most cases. However, if your home has significant air leaks from the living space into the attic, those need to be sealed as well.
For a typical older home in Metro Detroit that needs soffit vents added and either a ridge vent or additional box vents installed, expect to spend $1,500-$3,000. If the work is done during a roof replacement, the cost is lower because we're already on the roof with materials and labor in place. Stand-alone ventilation upgrades cost more due to setup and the need to work around an existing roof. Homes with difficult attic access, complex roof lines, or structural issues (like damaged sheathing from past moisture problems) will be on the higher end of that range.
Not necessarily. If your roof is relatively new (less than 10-12 years old) and in good condition, we can often upgrade ventilation without replacing the shingles. However, if your roof is nearing the end of its lifespan or if poor ventilation has already caused shingle damage, moisture problems, or wood rot, a replacement makes more sense. We'll inspect your roof deck and shingles during the ventilation assessment and give you an honest recommendation. Sometimes the smartest move is to replace the roof and fix ventilation at the same time — you're getting maximum value for your investment.
Ridge vents run continuously along the peak of your roof and provide consistent exhaust ventilation across the entire roof plane. They're low-profile, require no moving parts, and work with natural convection — hot air rises and exits through the ridge. Box vents (also called static vents) are individual square or rectangular units installed on the roof surface. They work well but require multiple units to achieve the same ventilation as a ridge vent, and they create more roof penetrations. Ridge vents are generally the better choice for most homes, but box vents are sometimes necessary on hip roofs or roofs with limited ridge length.
Homes built before the 1980s were constructed under building codes that either didn't require attic ventilation or set much lower standards than we use today. Many older homes have solid soffits with no intake vents and only one or two gable vents for exhaust. The building science wasn't well understood back then, and Michigan's extreme climate — freeze-thaw cycles, heavy snow, high summer heat — wasn't fully accounted for. As homeowners added insulation over the years (a good thing for energy efficiency), it often blocked what little airflow existed, turning attics into moisture traps. The result: ice dams, mold, premature roof failure, and high energy bills.