

Lake Orion Hail Damage? Roof Repair & Insurance Guide
Lake Orion hail damage? Learn how to spot roof damage, file insurance claims, and work with contractors. Expert guidance from NEXT Exteriors' 35+ years in Michigan.

If you're reading this, chances are you just watched golf ball-sized hail pound your Lake Orion roof, or you're noticing suspicious damage after one of Oakland County's severe summer storms. Either way, you're probably wondering: Is this bad enough to file a claim? Will my insurance cover it? And how do I find a contractor who won't try to sell me a roof I don't need?
We've been handling storm damage restoration in Southeast Michigan since 1988, and we've walked hundreds of Lake Orion homeowners through this exact situation. Here's what you need to know about identifying hail damage, working with your insurance company, and getting your roof repaired the right way.
How to Spot Hail Damage on Your Lake Orion Roof
The first thing to understand: hail damage isn't always obvious from the ground. You might see dents in your gutters or siding, but the roof damage that matters most to your insurance company requires a closer look.
Here's what we look for during a post-storm inspection for our Detroit roofing services clients in Lake Orion:
Ground-Level Warning Signs
Check your gutters and downspouts first. If you see dents or dings on the metal, that's a strong indicator your roof took hits too. Hail doesn't discriminate—if it damaged horizontal surfaces like your AC condenser or patio furniture, it definitely hit your roof.
Look at your siding. Vinyl siding shows hail impact as cracks or punctures. Fiber cement or James Hardie siding might show chips or divots. If you're seeing damage to vertical surfaces, your roof—which takes the full force of falling hail—almost certainly has damage worth documenting.
Examine window screens and frames. Torn screens or dented aluminum frames are clear evidence of hail size and impact force. This documentation helps when you file your claim.

What Hail Damage Looks Like on Shingles
On the roof itself, hail damage appears differently depending on shingle age and quality. Here's what a licensed inspector looks for:
Granule loss. When hail strikes an asphalt shingle, it knocks off the protective ceramic granules on the surface. You'll see dark spots where the asphalt mat underneath is exposed. This is the most common form of hail damage and the easiest for insurance adjusters to document.
Bruising or soft spots. Press gently on a suspected impact area. If the shingle feels soft or spongy, the hail compressed the fiberglass mat underneath. This weakens the shingle's structural integrity even if you can't see obvious surface damage.
Cracking or fractures. Larger hail (1.5 inches or bigger) can crack shingles outright, especially on older roofs where the asphalt has become brittle from UV exposure. These cracks often don't appear until weeks after the storm as the shingle flexes with temperature changes.
Shiny spots or impact marks. Fresh hail damage often appears as shiny, dark circles where the impact compressed the granules into the asphalt. Over time, these spots weather and become harder to identify—which is why documenting damage quickly matters.
Don't climb on your roof yourself. After 35 years in this business, we've seen too many homeowners hurt themselves trying to inspect storm damage. A licensed contractor has the proper safety equipment, knows what to look for, and can document everything your insurance company needs. Call us at (844) 770-6398 for a free inspection.
What Hail Actually Does to Roofing Materials
Understanding the mechanics of hail damage helps you make informed decisions about repair versus replacement—and helps you push back if an insurance adjuster tries to minimize your claim.
The Physics of Impact
Hail falling from 10,000+ feet reaches terminal velocity around 50-70 mph for stones between 1-2 inches in diameter. When that ice ball hits your shingles, several things happen simultaneously:
The impact compresses the fiberglass mat that gives the shingle its tensile strength. Even if the surface looks okay, this compression creates weak points where tears and cracks will develop over time. The protective granule layer—designed to shield the asphalt from UV degradation—gets knocked loose. Without that protection, the asphalt binder breaks down exponentially faster under Michigan's intense summer sun.
The asphalt itself can fracture at the molecular level, creating microcracks invisible to the naked eye but devastating for long-term performance. These microcracks allow water penetration, leading to accelerated deterioration during our freeze-thaw cycles.
How Different Shingle Types Respond to Hail
Not all roofing materials handle hail the same way. Here's what we've observed across hundreds of storm damage inspections in Oakland County:
Standard 3-tab shingles are the most vulnerable. Their thinner profile and single-layer construction mean less impact resistance. A 1-inch hail stone can cause significant granule loss and bruising on a 3-tab roof, especially if the shingles are more than 10 years old.
Architectural (dimensional) shingles perform better due to their thicker, multi-layer construction. Brands like CertainTeed Landmark, GAF Timberline HDZ, and Owens Corning Duration have better impact resistance ratings. But they're not invincible—a severe storm with 2-inch hail will still cause damage requiring replacement.
Impact-resistant (Class 4) shingles are specifically engineered for hail-prone areas. Products like CertainTeed's StreakFighter IR or GAF's ArmorShield II use modified asphalt formulations and reinforced mats to withstand impacts up to 2 inches. Some insurance companies offer premium discounts for Class 4 shingles—worth asking about if you're replacing your roof after hail damage.
We install all three major brands through our exterior services in Detroit and across Southeast Michigan. As a CertainTeed Master Shingle Applicator—the highest credential in residential roofing—we can help you choose the right replacement material based on your budget and risk tolerance.

The Long-Term Consequences of Untreated Hail Damage
Here's what many homeowners don't realize: hail damage is progressive. What looks like minor cosmetic damage today becomes a major leak three years from now.
Once the granule layer is compromised, UV radiation breaks down the asphalt binder at an accelerated rate. In Michigan's climate—where we see temperature swings from -10°F in January to 95°F in July—this deterioration happens fast. The exposed asphalt becomes brittle and cracks. Those cracks allow water penetration. During winter, that water freezes and expands, making the cracks worse. By the time you notice a leak in your ceiling, you're often looking at damaged decking, wet insulation, and potential mold issues.
This is why insurance companies will cover hail damage claims—they know that ignoring the problem leads to much more expensive water damage claims down the road. But you typically have a limited window to file, usually one year from the storm date in Michigan. After that, the insurance company can argue that any roof problems are due to normal wear and tear rather than the storm event.
The Insurance Claim Process for Hail Damage in Michigan
Filing a hail damage claim can feel intimidating, but the process is straightforward if you know what to expect. We've helped Lake Orion homeowners navigate hundreds of these claims, and here's the reality: insurance companies are businesses. They'll pay legitimate claims, but they won't go out of their way to maximize your payout. That's why documentation and timing matter.
Step 1: Document the Storm and Initial Damage
Before you even call your insurance company, gather evidence:
- Note the exact date and time of the hail storm. Check local news reports or the National Weather Service for official records showing hail size and severity in Lake Orion.
- Take photos of any visible damage from ground level—dented gutters, damaged siding, broken window screens, dents on outdoor furniture or vehicles.
- Check your neighbors. If multiple homes on your street are filing claims, that strengthens your case that this was a significant storm event.
- Look for physical evidence of hail on your property—ice accumulation in downspouts, damaged plants or landscaping, divots in soft ground.
Step 2: Call Your Insurance Company
Most homeowner policies require you to report potential damage "promptly" after a storm. In practice, this means within a few weeks. When you call, you're not committing to a claim yet—you're simply reporting that you believe there may be damage worth investigating.
The insurance company will assign an adjuster and schedule an inspection, typically within 1-2 weeks. Before that inspection happens, you should have your own documentation ready.
Step 3: Get a Professional Inspection from a Licensed Contractor
This is the most important step, and it's where many homeowners make mistakes. You need a licensed Michigan roofing contractor to inspect your roof and document all damage before the insurance adjuster arrives.
Here's why: Insurance adjusters work for the insurance company, not for you. Their job is to assess damage accurately, but they're also incentivized to minimize claim payouts. A contractor's inspection report gives you leverage. If the adjuster's estimate doesn't match what your contractor found, you have documented evidence to challenge their assessment.
When we inspect a roof for hail damage, we provide:
- A detailed written report identifying every area of damage
- High-resolution photos showing granule loss, bruising, and impact marks
- Documentation of collateral damage (gutters, siding, flashing, vents)
- An estimate for repair or replacement based on current material and labor costs
We don't charge for storm damage inspections because we know that if you have legitimate damage, your insurance will cover the repairs—and if we do the work right, you'll recommend us to your neighbors. That's how we've built our reputation in Lake Orion and across Oakland County since 1988.
Step 4: Meet with the Insurance Adjuster
When the adjuster comes to inspect your roof, be present. Ideally, have your contractor there too. Walk the adjuster through the damage your contractor documented. Point out every area of concern.
Adjusters are trained to look for specific damage patterns. They'll check multiple areas of the roof—not just one or two shingles. Insurance companies typically require a certain density of hits per 100 square feet before they'll approve a full replacement. In Michigan, the threshold is usually 8-10 confirmed impact marks per test square (a 10x10 foot area).
If the adjuster finds sufficient damage, they'll approve either a repair or a full replacement. In most cases with significant hail damage, replacement is the only practical option—you can't patch a few shingles when the entire roof has been compromised.
Watch out for "matching" issues. If your roof has discontinued shingles, the insurance company may have to replace the entire roof even if only one slope shows obvious damage—because they can't match the color and style for a partial replacement. This is actually good for you, but adjusters don't always volunteer this information. Ask specifically about shingle availability and matching.
Step 5: Review the Adjuster's Estimate
The insurance company will send you a written estimate detailing what they'll cover. This estimate includes:
- The scope of work (repair vs. full replacement)
- Material specifications and quantities
- Labor costs
- Costs for related work (flashing, underlayment, ventilation, etc.)
- Your deductible amount
Compare this estimate line-by-line with your contractor's assessment. Common discrepancies we see:
- Missing items: Adjusters sometimes omit necessary components like ice and water shield, drip edge replacement, or proper ventilation upgrades required by current Michigan building code.
- Lowball labor rates: Insurance estimates often use outdated or regional-average labor rates that don't reflect actual contractor costs in Oakland County.
- Inadequate material allowances: The estimate might specify basic shingles when your existing roof has premium architectural shingles, or it might not account for the full cost of proper underlayment materials.
If the estimate is insufficient, your contractor can work with the insurance company to negotiate a supplement. This is standard practice. We handle supplement negotiations regularly, and insurance companies expect it. Don't accept an inadequate estimate just because it's what the adjuster initially wrote.
Step 6: Choose Your Contractor and Schedule the Work
Once the claim is approved and the scope is agreed upon, you'll receive an initial payment (usually the total estimate minus your deductible minus depreciation). The depreciation amount—called recoverable depreciation—gets paid after the work is completed and you submit final invoices.
Now you choose a contractor to do the work. This is where things can go sideways if you're not careful.
Choosing a Roofing Contractor After Hail Damage
After a major storm in Lake Orion, you'll see an influx of roofing contractors knocking on doors. Some are legitimate local companies ramping up their crews to handle increased demand. Others are "storm chasers"—out-of-state contractors who follow severe weather, do quick jobs, collect insurance checks, and disappear before warranty issues surface.
Here's how to tell the difference:
Red Flags: Storm Chasers and Scam Artists
They knock on your door unsolicited immediately after a storm. Legitimate contractors don't need to cold-call neighborhoods—our schedules fill up from referrals and existing customers. If someone shows up unannounced offering a "free roof inspection" and pressuring you to sign a contract on the spot, walk away.
They offer to "cover your deductible." This is insurance fraud. In Michigan, it's illegal for a contractor to waive or pay your deductible. If a contractor promises this, they're either inflating the claim (fraud) or planning to cut corners to make up the cost (shoddy work). Either way, you lose.
They have an out-of-state address or no permanent local office. Check their business license with Michigan LARA (Licensing and Regulatory Affairs). A legitimate residential builder in Michigan has a state license number you can verify online. If they can't provide that, don't hire them.
They push you to sign a contract before your insurance inspection. There's no reason to commit to a contractor before you know what your insurance will cover. A legitimate contractor will inspect your roof, help you document damage, and wait for your claim approval before asking for a contract signature.
Their estimate is significantly lower than others. If you get three estimates and one is 30% cheaper, that contractor is either planning to use inferior materials, skip necessary steps, or isn't including everything your insurance approved. The lowest bid is rarely the best value in roofing.
What to Look for in a Legitimate Contractor
Michigan residential builder's license. This is non-negotiable. Any contractor doing work over $600 in Michigan must be licensed. Verify the license at michigan.gov/lara.
Local presence and track record. How long have they been in business? Do they have a physical office you can visit? Can they provide references from recent projects in Lake Orion or nearby communities like Rochester Hills or Bloomfield Hills?
Manufacturer certifications. Certifications from CertainTeed, GAF, or Owens Corning indicate that the contractor has been trained in proper installation techniques and meets the manufacturer's quality standards. We're a CertainTeed Master Shingle Applicator—the highest level of certification available—which means we can offer extended warranties that basic contractors can't.
Insurance and bonding. Ask for proof of general liability insurance and workers' compensation coverage. If a crew member gets hurt on your property and the contractor doesn't have workers' comp, you could be liable.
Detailed written estimates. A professional estimate breaks down materials, labor, and scope of work line by line. It should specify shingle brand and model, underlayment type, ventilation components, and any additional work like soffit and fascia installation or gutter replacement.
Clear communication about the insurance process. A contractor experienced in insurance work should be able to explain how supplements work, what your responsibilities are, and what they'll handle on your behalf. We've worked with every major insurance carrier operating in Michigan—we know their processes and can navigate them efficiently.
Questions to Ask Before Signing a Contract
- "What's your Michigan builder's license number?" If they hesitate or can't provide it immediately, end the conversation.
- "How long have you been working in Lake Orion and Oakland County?" You want someone familiar with local building codes, permit requirements, and weather conditions.
- "Can you provide references from recent insurance jobs?" Talk to those homeowners. Ask if the contractor showed up on time, stayed on budget, and handled the insurance paperwork professionally.
- "What manufacturer warranties do your installations qualify for?" Standard shingle warranties are 25-50 years, but they only cover manufacturing defects. Installation warranties—which cover labor and workmanship—vary by contractor. We offer extended warranties through our CertainTeed Master Shingle Applicator certification.
- "How do you handle supplements and change orders?" If the insurance estimate doesn't cover everything needed, how does the contractor handle the additional cost? Will they negotiate with the insurance company, or will they expect you to pay out of pocket?
- "What's your typical timeline from contract signing to completion?" After a major storm, lead times can stretch to 6-8 weeks as contractors work through backlogs. A realistic timeline shows the contractor is busy (a good sign) but also organized enough to manage their schedule.
What Roof Repair or Replacement Costs in Lake Orion
Let's talk numbers. Most hail damage claims in Lake Orion result in full roof replacements rather than repairs—because once you have widespread granule loss across multiple slopes, patching a few shingles doesn't solve the underlying problem.
Typical Insurance Coverage
If your claim is approved, your insurance pays for:
- Complete tear-off and disposal of existing roofing materials
- New underlayment (typically synthetic underlayment or felt paper, plus ice and water shield in valleys and eaves)
- New shingles matching the quality and style of your existing roof (or better, if the original product is discontinued)
- Flashing replacement around chimneys, skylights, and roof penetrations
- Ridge vent and ventilation components if your existing system is damaged or inadequate
- Drip edge and starter shingles
- Labor for installation
What insurance typically doesn't cover without negotiation:
- Upgrades beyond your existing system—if you had standard architectural shingles and you want to upgrade to Class 4 impact-resistant shingles, you'll pay the difference
- Decking replacement unless the adjuster documents that the hail or subsequent water damage compromised the plywood or OSB sheathing
- Gutter replacement unless the gutters show documented hail damage (which they often do—those dents you see aren't just cosmetic)
- Code upgrades required by current Michigan building code but not present on your original roof—some policies include "code upgrade coverage," but many don't
Real Numbers for Lake Orion Roof Replacements
For a typical 2,000-square-foot Lake Orion home (about 22-25 squares of roofing), here's what a full replacement costs in 2026:
Standard architectural shingles (CertainTeed Landmark, GAF Timberline HDZ, or Owens Corning Duration): $8,500 - $12,000 installed, depending on roof complexity, pitch, and accessibility.
Premium architectural shingles (CertainTeed Northgate, GAF Timberline UHDZ): $10,000 - $14,500 installed.
Impact-resistant (Class 4) shingles: $11,000 - $15,500 installed. The upfront cost is higher, but you may qualify for insurance premium discounts that offset the difference over time.
These numbers include tear-off, disposal, underlayment, flashing, ventilation, and labor. They assume a moderately complex roof—two stories, a few valleys, standard chimney and plumbing vents. If your roof has multiple dormers, steep pitch (8:12 or higher), or requires special access equipment, expect costs on the higher end of these ranges.
Your Out-of-Pocket Cost
If your insurance approves a full replacement, your only out-of-pocket cost is your deductible. Standard homeowner policy deductibles in Michigan range from $500 to $2,500, with $1,000 being most common.
Here's how the payment works:
- Insurance sends you an initial check for the full claim amount minus your deductible and minus depreciation (usually 20-30% of the total).
- You pay the contractor from this initial payment, plus your deductible out of pocket.
- After the work is completed, you submit final invoices and photos to the insurance company.
- Insurance sends a second check for the recoverable depreciation amount.
If you're working with a reputable contractor, they'll work with you on payment timing. We typically don't require full payment until the job is complete and you're satisfied—though we do ask for the deductible amount upfront to cover materials ordering.
What if the insurance estimate doesn't cover actual costs? This happens sometimes, especially if the adjuster used outdated pricing or missed necessary components. Your contractor can file a supplement request with documentation showing why additional costs are justified. We handle this regularly—it's a normal part of the insurance claims process. Don't assume you have to pay the difference out of pocket without pushing back.
Additional Costs to Consider
While you're replacing your roof, consider addressing related issues that might not be covered by insurance but make sense to handle while crews are already on site:
Gutter replacement: If your gutters show hail damage, they should be covered. But if they're just old and you want to upgrade to heavier-gauge seamless gutters in Detroit, MI and surrounding areas, that's an out-of-pocket cost—typically $800-1,500 for a standard home.
Attic insulation upgrades: If the crew is already in your attic working on ventilation, it's an ideal time to assess your insulation. Michigan's current energy code requires R-49 in attics, but many older homes have R-19 or less. Adding insulation isn't covered by your roof claim, but it's a cost-effective upgrade. Our top-rated insulation contractor services can assess your current R-value and provide a quote.
Skylight replacement: If you have older skylights, consider replacing them during the roof job. Skylights are a common source of leaks, and addressing them while the roof is open saves money versus doing it later. We handle skylight installation and leak-proofing throughout Oakland County.
Why Lake Orion Gets Hit Hard by Hail Storms
If you've lived in Lake Orion for more than a few years, you know that severe weather is part of the deal. But why does Oakland County seem to get hammered by hail more than other parts of Southeast Michigan?
Geography and Weather Patterns
Lake Orion sits in northern Oakland County, where several meteorological factors converge to create ideal conditions for severe thunderstorms and hail:
Lake effect influence. While Lake Orion is inland from the Great Lakes, the atmospheric moisture from Lake Huron (about 40 miles east) and the more distant influence of Lake Michigan create instability in summer air masses. When warm, humid air from the south collides with cooler air over the lakes, you get the rapid updrafts necessary for hail formation.
Convective storm corridors. Southeast Michigan sits in a zone where warm fronts from the Gulf of Mexico frequently clash with cold Canadian air masses. These collisions create strong convective storms—the kind with towering cumulonimbus clouds that produce large hail. Lake Orion's location puts it directly in one of these common storm tracks.
Urban heat island effects. The Detroit metro area creates a heat island effect that can intensify storms as they approach from the west. Storms often strengthen as they move over the warmer urban areas, then unleash their energy as they reach the northern suburbs like Lake Orion, Rochester Hills, and Bloomfield Hills.
Historical Storm Data
National Weather Service records show that Oakland County experiences significant hail events (1 inch or larger) an average of 2-3 times per year. The most severe storms—with hail 2 inches or larger—occur roughly once every 3-5 years.
Recent severe hail events in Lake Orion and surrounding areas:
- July 2021: A severe thunderstorm produced golf ball-sized hail across northern Oakland County, causing widespread roof and vehicle damage from Lake Orion to Clarkston.
- August 2020: Multiple hail storms hit the area, with some reports of 2-inch hail in Lake Orion and Rochester Hills.
- June 2018: A particularly intense storm produced baseball-sized hail in parts of Oakland County, leading to thousands of insurance claims.
The pattern is clear: if you own a home in Lake Orion, you're going to deal with hail damage at some point. The question isn't if, but when—and whether you'll be prepared to handle the insurance claim and repairs efficiently.
What This Means for Lake Orion Homeowners
Given the frequency of severe weather in Oakland County, here are some practical considerations:
Consider impact-resistant shingles when replacing your roof. The upfront cost is higher, but Class 4 shingles significantly reduce the likelihood of damage in future storms. Some insurance companies offer 10-20% premium discounts for impact-resistant roofing, which can offset the cost difference over the life of the roof.
Document your roof's condition regularly. Take photos of your roof (or have a contractor do it) every few years. This documentation helps establish a baseline condition, which can be valuable if you need to prove that damage is storm-related rather than normal wear.
Know your insurance policy details. What's your deductible? Do you have replacement cost coverage or actual cash value coverage? (Replacement cost is better—it pays for a new roof regardless of your old roof's age. Actual cash value depreciates the payout based on your roof's age.) Does your policy include code upgrade coverage? Understanding these details before you need to file a claim saves stress later.
Have a contractor relationship established. Don't wait until after a storm to find a roofing contractor. If you know who you'll call when damage happens, you can move quickly to document everything and file your claim before the insurance company's backlog gets overwhelming.
Need a Hail Damage Inspection in Lake Orion?
NEXT Exteriors has been protecting Michigan homes since 1988. We're a CertainTeed Master Shingle Applicator with an A+ BBB rating and 5.0-star reviews across 87+ projects. We'll inspect your roof, document any damage, and help you navigate the insurance process—no charge for the inspection, no pressure to sign anything until you're ready.
Get Your Free InspectionOr call us directly: (844) 770-6398
Other Services from NEXT Exteriors
While we're known for our Detroit roofing services, we're a full-service exterior contractor serving Lake Orion and all of Southeast Michigan. If your home took hail damage to the roof, chances are your siding, windows, or gutters were affected too.
Our house siding company in Detroit handles everything from vinyl to James Hardie fiber cement. We've written extensively about the best siding for Michigan freeze-thaw cycles and vinyl vs. fiber cement siding if you're considering an upgrade.
If your windows took a beating, our Detroit window experts can assess whether you need repairs or full replacements. We also handle exterior painting in Southeast Michigan using Sherwin-Williams products exclusively.
And if you're dealing with the aftermath of storm damage, don't overlook the importance of proper attic ventilation and insulation. Poor ventilation contributes to ice dam formation in winter—which can compound existing hail damage. Our insulation services include attic assessments and upgrades to current Michigan energy code standards.
Frequently Asked Questions About Lake Orion Hail Damage
File as soon as you've confirmed damage, ideally within 2-4 weeks of the storm. Most Michigan homeowner policies require "prompt" notification, and while there's no specific deadline, waiting too long can complicate your claim. Insurance companies may argue that damage discovered months later is due to normal wear rather than the storm. That said, you typically have up to one year from the storm date to file in Michigan—but the sooner you act, the easier the process.
Generally no. Hail damage is considered a "no-fault" claim in Michigan—it's an act of nature, not something you caused through negligence. Most insurance companies won't raise your rates for a single weather-related claim. However, if you file multiple claims within a few years, or if your entire neighborhood files claims from the same storm (indicating a high-risk area), you might see rate adjustments at renewal. This is more about actuarial risk assessment than penalizing you for filing a legitimate claim.
You absolutely choose your own contractor. Some insurance companies have "preferred contractor" networks and may suggest specific companies, but you are not required to use them. In fact, we generally recommend getting at least two estimates from licensed contractors you research independently. The insurance company pays for the work based on their approved estimate, but you decide who does the actual installation. Choose based on reputation, licensing, and quality—not just because an insurance company recommended them.
It depends on your policy type. If you have "replacement cost" coverage, the insurance company pays to replace your roof with new materials regardless of age, minus your deductible. If you have "actual cash value" coverage, they depreciate the payout based on your roof's age—so a 15-year-old roof might only get 50% of replacement cost. Check your policy declarations page to see which type you have. Most homeowners in Lake Orion have replacement cost coverage, which is why it's worth filing a claim even if your roof is older—the insurance company still pays for a new roof.
The actual installation takes 1-3 days for most Lake Orion homes, depending on size and complexity. However, the timeline from claim filing to completion is longer—typically 4-8 weeks. This includes time for the insurance adjuster's inspection (1-2 weeks), claim processing (1-2 weeks), contractor scheduling (1-3 weeks depending on season and backlog), and the actual work (1-3 days). After major storms, these timelines can extend as contractors and adjusters work through high claim volumes. The key is getting the process started quickly so you're in the queue.
If you have active leaks causing interior damage, yes—make temporary repairs to prevent further damage. Most policies require you to mitigate additional damage, and emergency repairs are typically covered. Take photos before and after any temporary work, and save all receipts. However, don't do permanent repairs before the adjuster inspects—you need them to see the full extent of storm damage. If you're not sure whether you have leaks, have a contractor do a quick inspection to assess urgency. We offer emergency tarp services for Lake Orion homeowners when needed.
You have options. First, provide additional documentation—photos, contractor reports, or a second opinion from another licensed inspector. Request that the adjuster re-inspect with your contractor present to walk through disputed areas. If that doesn't resolve it, you can request a supervisory review within the insurance company. As a last resort, you can hire a public adjuster (who works for you, not the insurance company) or invoke your policy's appraisal clause, which brings in a neutral third-party appraiser. Most disputes get resolved at the documentation or re-inspection stage—insurance companies will adjust their estimates when presented with clear evidence.
Egress Window Installation in Macomb Township: Code & Cost
Michigan contractor explains egress window code requirements, installation costs, and basement safety rules for Macomb Township homeowners. Real pricing included.

We've been cutting foundation walls and installing egress windows in Macomb County basements since 1988, and the question we hear most often is simple: "Do I really need one?" If you're finishing a basement bedroom, preparing to sell, or just trying to make your home safer, the answer is almost always yes. Michigan's building code is clear, and Macomb Township enforces it.
Here's what you need to know about egress window installation in Macomb Township — the code requirements, what it actually costs, and how the process works when you're dealing with Michigan's clay soil and freeze-thaw cycles. No fluff. Just what we've learned installing hundreds of these windows across Southeast Michigan.
What Is an Egress Window and Why Michigan Code Requires It
An egress window is a code-required opening large enough for a person to escape through in an emergency — and for firefighters to enter. The International Residential Code (IRC) defines the minimum size, and Michigan adopted those standards into state law. Macomb Township follows the Michigan Residential Code, which means if you're finishing a basement bedroom or adding living space below grade, you need an egress window.
The rule exists for one reason: safety. In a fire, basements fill with smoke fast. A standard casement window or hopper window won't cut it — the opening has to be big enough for an adult to get through quickly, even in the dark. That's why the code specifies minimum dimensions, and why inspectors measure carefully.
If you're considering Detroit window experts for your basement project, understanding egress requirements is the first step. This isn't about aesthetics or energy efficiency — it's about meeting code and keeping your family safe.
Michigan Code Fact: Any basement bedroom or habitable space below grade requires at least one egress window. Without it, the space cannot legally be called a bedroom, which affects your home's value and marketability.
Macomb Township Code Requirements for Egress Windows
Macomb Township building inspectors follow the Michigan Residential Code, which is based on the 2015 IRC. Here are the exact requirements we work to on every egress window installation:
Minimum Opening Size
The net clear opening must be at least 5.7 square feet. That's the actual open area when the window is fully open — not the rough opening or the glass size. Most homeowners underestimate this. A window that looks big enough often isn't once you subtract the frame and sash.
Minimum Height and Width
The opening must be at least 24 inches tall and 20 inches wide. These are minimums. In practice, we usually go bigger — a 32" x 48" window is common because it gives you more room and meets code with margin to spare.
Sill Height
The bottom of the opening (the sill) can't be more than 44 inches above the basement floor. This is critical. We've seen contractors install beautiful egress windows that fail inspection because the sill was 46 inches up. Measure twice, cut once.
Window Well Requirements
If the window opens below grade (which it almost always does in a basement), you need a window well. The well must be at least 9 square feet in area with a minimum width and length of 36 inches. If the well is deeper than 44 inches, it needs a permanent ladder or steps.
In Macomb Township, where we're dealing with heavy clay soil, the window well also needs proper drainage. Michigan's freeze-thaw cycles will destroy a poorly drained well in one winter. We always connect the well to the foundation drainage system and backfill with gravel.

These requirements aren't suggestions. Macomb Township requires a permit for egress window installation, and the building inspector will verify every dimension. If you're working with a contractor who says "we can skip the permit," walk away. When you sell your home, the buyer's inspector will find the unpermitted work, and you'll be paying to fix it — or losing the sale.
For homeowners also considering window replacement cost in Metro Detroit, egress windows are a different category. They're not just replacements — they're structural modifications that require engineering and code compliance.
Cost Breakdown: What Egress Window Installation Actually Costs
Let's talk real numbers. Egress window installation in Macomb Township typically runs $3,500 to $6,500 for a complete project. Here's how that breaks down:
Window Unit: $500 - $1,500
A code-compliant egress window — usually a casement or slider — costs $500 to $1,500 depending on size and quality. We typically install vinyl or fiberglass units from manufacturers like Andersen or Pella. These hold up well in Michigan weather and meet the opening requirements without needing a massive rough opening.
Window Well: $300 - $1,200
A galvanized steel window well costs $300 to $600. Composite or stone wells run $600 to $1,200. We recommend composite for Macomb Township homes because they don't rust and they handle freeze-thaw cycles better than steel. Add another $200 to $400 for a cover, which keeps debris out and prevents someone from falling in.
Labor and Installation: $2,000 - $4,000
This is where the real cost is. Cutting through a poured concrete or block foundation wall isn't a DIY project. It requires a concrete saw, dust control, structural support (usually a steel lintel), and someone who knows what they're doing. We charge $2,000 to $4,000 for labor, depending on wall thickness, access, and whether the basement is finished.
If you're cutting through brick on the exterior (common in older Macomb Township homes), add another $500 to $1,000 for brick removal and re-pointing.
Additional Costs
- Permit: $150 to $300 in Macomb Township
- Excavation: $300 to $800 if access is tight or you're digging through landscaping
- Interior finishing: $200 to $600 for drywall, trim, and paint if the basement is finished
- Drainage work: $300 to $800 if the foundation drain system needs upgrading
Cost Reality: The cheapest egress window installation we've done in Macomb Township was $3,200. The most expensive was $8,500 — a finished basement with a brick exterior, tight access, and clay soil that required extra excavation and drainage work. Most projects land around $4,500.
For context, if you're also budgeting for other exterior work, check out our breakdown of siding replacement cost in Michigan or what window replacement actually costs in Michigan to understand how these projects compare.
Step-by-Step: How We Install Egress Windows in Macomb County
Here's how we approach every egress window installation. The process takes 2 to 3 days for a typical project, longer if we're dealing with finished basements or complex drainage.
Step 1: Interior and Exterior Layout
We start inside the basement, marking the window location on the wall. We verify it meets code clearances (sill height, size, etc.) and doesn't conflict with utilities, floor joists, or HVAC runs. Then we transfer those marks to the exterior and mark the foundation wall. Accuracy here prevents expensive mistakes later.
Step 2: Foundation Cutting
Using a concrete saw, we cut through the foundation wall. Poured concrete is easier than block, but both require dust control and careful cutting. We install a steel lintel across the top of the opening to carry the load — this is non-negotiable. The foundation above the window needs support, especially in a two-story home.

Step 3: Window Well Installation and Drainage
We excavate the exterior area to accommodate the window well. In Macomb Township, that means digging through clay soil, which doesn't drain well. We install drainage tile that connects to the foundation drain system, then backfill with gravel. This prevents the well from filling with water during Michigan's spring thaws or heavy summer storms.
The window well gets anchored to the foundation with concrete screws or bolts. We make sure it's level and properly sealed where it meets the foundation to prevent water infiltration.
Step 4: Window Installation and Flashing
The window unit goes into the rough opening. We level it, shim it, and fasten it securely to the foundation. Flashing is critical — we use self-adhering membrane and metal flashing to prevent water from getting behind the window. In Michigan, if water can find a way in, it will.
Step 5: Interior Finishing and Trim
If the basement is finished, we insulate around the window frame (spray foam works well here), then install drywall returns and trim. We match the existing finishes so the window looks like it was always there.
Step 6: Final Inspection and Code Compliance
We schedule the final inspection with Macomb Township. The inspector verifies the opening size, sill height, window well dimensions, and drainage. Once it passes, you're done — and your basement bedroom is legal.
This process is similar to the careful planning required for other exterior projects. If you're also considering upgrades to your home's exterior, our exterior services in Detroit cover everything from roofing to siding to insulation.
Signs Your Macomb Township Home Needs an Egress Window
Not sure if you need an egress window? Here are the situations where it's required — or strongly recommended:
You're Finishing a Basement Bedroom
This is the most common reason. If you're converting basement space into a bedroom, Michigan code requires an egress window. No exceptions. That means if you're planning to list the space as a bedroom when you sell, you need egress now.
You're Selling a Home with a Basement Bedroom
Buyer's inspectors flag non-compliant basement bedrooms immediately. If your home was built before egress codes were enforced (or someone finished the basement without a permit), you'll need to add an egress window before closing — or drop the price to cover it.
You're Adding a Rental Unit or In-Law Suite
Any habitable space below grade needs egress. If you're creating a basement apartment or in-law suite, you'll need at least one egress window per sleeping area.
Your Insurance Requires It
Some insurers require egress windows for basement living spaces. If you're refinancing or switching policies, check your coverage requirements.
You Want to Increase Home Value
A finished basement with a legal bedroom adds square footage and value. Without egress, that space can't be counted as a bedroom, which limits your selling price.
Beyond egress windows, other exterior improvements can also boost your home's value. Our guide on how new siding increases your home value in Metro Detroit covers another high-return project worth considering.
Common Mistakes Homeowners Make (And How to Avoid Them)
We've fixed a lot of bad egress window installations over the years. Here are the mistakes we see most often:
Choosing an Undersized Window
Homeowners buy a window that looks big enough but doesn't meet the 5.7 square foot opening requirement. Measure the net clear opening, not the glass size. If you're not sure, go bigger.
Ignoring Drainage in Michigan Clay Soil
Southeast Michigan has heavy clay soil that doesn't drain. If you install a window well without proper drainage, it'll fill with water every spring. We've seen wells with 12 inches of standing water — useless in an emergency and a breeding ground for mosquitoes.
DIY Structural Cuts Without Permits
Cutting through a foundation wall is structural work. It requires a permit, engineering (in some cases), and inspection. We've seen homeowners try to DIY this and end up with cracked foundations, settling floors, and thousands of dollars in repair costs.
Skipping the Inspection
Even if you pull a permit, some contractors skip the final inspection. That's a problem when you sell. Unpermitted work shows up on title searches and buyer inspections, and it'll cost you at closing.
Contractor Truth: We've never seen a DIY egress window installation that passed inspection on the first try. This isn't a weekend project — it's structural work that requires experience, the right tools, and knowledge of Michigan building codes.
If you're tackling other exterior projects alongside egress windows, make sure you're working with a licensed contractor who understands Michigan codes. Whether it's Detroit roofing services, house siding in Detroit, or seamless gutters in Detroit, MI, the same principle applies: do it right the first time.
Ready to Get Started?
NEXT Exteriors has been protecting Michigan homes since 1988. Get a free, no-pressure estimate from a team that shows up on time and does the job right.
Get Your Free QuoteOr call us: (844) 770-6398
Frequently Asked Questions
Exterior Painting in Rochester, MI: 2026 Cost Guide
Real pricing for exterior painting in Rochester, MI. Learn what drives costs, how to prep correctly, and why Sherwin-Williams matters for Michigan homes.
You're walking around your Rochester home on a Saturday morning, coffee in hand, and you notice it: the paint on your trim is chalking off on your fingers. The north-facing siding looks faded. There's peeling around the garage door frame. You know it's time, but the question that stops most homeowners cold is simple: What's this actually going to cost?
We've been painting homes across Southeast Michigan since 1988, and we've learned that homeowners in Rochester, Troy, and Bloomfield Hills don't want sales pitches — they want real numbers, honest timelines, and contractors who show up when they say they will. This guide breaks down what exterior painting in Southeast Michigan actually costs in 2026, what drives those costs, and how to make sure you're getting work that lasts more than three summers.
What Exterior Painting Actually Costs in Rochester
Let's start with the number everyone wants: for a typical 2,000-square-foot two-story Colonial in Rochester — the kind with wood trim, vinyl or fiber cement siding, and a two-car garage — you're looking at $5,500 to $9,500 for a complete exterior paint job in 2026. That's not a bait-and-switch estimate. That's the real range, and here's what drives the spread:
| Cost Factor | Low End | High End |
|---|---|---|
| House size (sq ft painted surface) | 1,500 sq ft | 3,500+ sq ft |
| Number of stories | 1 story ranch | 2.5 story Colonial |
| Trim complexity | Minimal trim, simple lines | Extensive trim, shutters, columns |
| Surface condition | Good condition, minimal prep | Peeling paint, wood rot, extensive repairs |
| Paint quality | Standard exterior acrylic | Premium Sherwin-Williams Duration or Emerald |
| Color changes | Same color, one coat over solid base | Dark to light or multiple colors requiring extra coats |
Here's what you need to understand: surface prep accounts for 40-50% of the total cost on a quality paint job. A crew that shows up, sprays two coats, and leaves in three days? They're skipping the work that actually makes paint last. The contractors who power wash for 15 minutes, skip the scraping, and don't prime bare wood are the same ones whose work starts peeling by the second winter.
Rochester-Specific Pricing Note: Homes in the historic districts near downtown Rochester or along Tienken Road often have more intricate trim work, original wood siding, or architectural details that add 15-25% to prep time. A 1920s Craftsman with original lap siding and detailed eave brackets will cost more than a 1990s vinyl-sided Colonial — not because we're charging more per hour, but because the work simply takes longer to do right.
What's Included in a Professional Estimate
When you call NEXT Exteriors for a painting estimate, here's what we're actually pricing:
- Surface cleaning: Professional power washing to remove dirt, mildew, and chalking
- Scraping and sanding: Removal of all loose, peeling, or failing paint
- Wood repair: Replacement of rotted trim boards, fascia, or soffits
- Priming: Oil-based primer on bare wood, stain-blocking primer over knots and water stains
- Caulking: All trim joints, window perimeters, and siding seams
- Two finish coats: Premium exterior acrylic paint applied with proper dry time between coats
- Cleanup: Daily site cleanup and final walkthrough
We use Sherwin-Williams exclusively because after 35 years of painting Michigan homes, we've seen what holds up and what doesn't. More on that in a minute.
Why Paint Quality Matters in Michigan Weather
Michigan weather is brutal on exterior paint. We get freeze-thaw cycles from November through March that expand and contract every surface. We get summer humidity that sits at 70-80% for weeks. We get UV exposure that breaks down cheap paint in two seasons. And we get lake-effect moisture that creeps into every crack and seam.
Here's what happens when you use builder-grade paint from the big-box store:
- Year 1-2: Looks fine. You think you saved money.
- Year 3: Chalking starts. You wipe the siding and white powder comes off on your hand.
- Year 4: Fading becomes obvious, especially on south and west exposures.
- Year 5: Peeling begins around trim joints, window frames, and anywhere moisture can get behind the paint film.
- Year 6: You're repainting. The "cheap" option just cost you more.
Premium exterior paint — Sherwin-Williams Duration, Emerald, or Resilience — uses better resins, better pigments, and better additives. The difference isn't marketing. It's chemistry. These paints flex with temperature changes instead of cracking. They resist UV breakdown. They shed water instead of absorbing it. And they're formulated for the exact conditions we see in Southeast Michigan.
The Sherwin-Williams Difference: Duration Exterior has a 15-year warranty when applied correctly. That's not a pro-rated "we'll give you 20% off your next bucket" warranty — it's actual coverage. We've seen Duration hold up on north-facing trim for 12+ years in Rochester without significant fading or peeling. You can't say that about the $28/gallon stuff.
Surface Prep: The Step Most Contractors Skip
This is where most painting jobs fail, and it's the part homeowners can't see until it's too late. Paint is only as good as what's underneath it. If you're painting over dirt, chalking, or loose substrate, you're wasting money.
Here's what proper surface prep looks like on a Rochester exterior painting project:
Step 1: Power Washing
We're not talking about a garden hose with a spray nozzle. Professional power washing uses 2,500-3,000 PSI to remove:
- Dirt and grime buildup (especially on north exposures that never see direct sun)
- Mildew and algae (common on soffits and under eaves)
- Chalking from old paint oxidation
- Loose paint that's ready to fail
After power washing, the house needs to dry completely — 48 to 72 hours depending on humidity. Painting over damp siding is a guaranteed failure. We've seen contractors spray the house at 9 a.m. and start painting by noon. That's not how it works in Michigan.
Step 2: Scraping and Sanding
Every square inch of peeling, bubbling, or flaking paint gets scraped down to solid substrate. Then we feather-sand the edges so you don't see a visible line through the new paint. This is hand work. It's tedious. It takes time. And it's the difference between a paint job that lasts 10 years and one that starts peeling in 18 months.
On older homes in Rochester — especially the 1920s-1940s Colonials near downtown — we often find six or seven layers of old paint. Sometimes we're scraping down to bare wood. That's fine. That's what primer is for.
Step 3: Wood Repair
If there's rot, we replace it. Period. You can't paint over rotted wood and expect it to hold. Common trouble spots on Michigan homes:
- Bottom edges of garage door trim (splash-back from driveways)
- Window sills (especially on north and west exposures)
- Corner boards where gutter overflow has been running for years
- Fascia boards behind failed gutters
We cut out the damaged section, sister in new material, prime it with oil-based primer, and integrate it into the existing trim. When we're done, you can't tell where the repair was made.
Step 4: Priming
Every piece of bare wood gets primed. Every knot gets sealed with stain-blocking primer. Every water stain gets covered. Primer is the bond between the substrate and the finish coat. Skip it, and the finish coat will peel off in sheets.
We use oil-based primer on bare wood because it penetrates deeper and seals better than acrylic. Yes, it smells. Yes, it takes longer to dry. And yes, it's worth it.
Step 5: Caulking
Every joint, every seam, every gap gets caulked with paintable exterior-grade caulk. This isn't cosmetic — it's weatherproofing. Michigan freeze-thaw cycles will open up any gap you leave. Water gets in, freezes, expands, and pushes the paint off from behind. Proper caulking prevents that.
We caulk:
- All trim-to-siding joints
- Window and door perimeters
- Corner board seams
- Fascia-to-soffit transitions
- Any penetration (light fixtures, vents, hose bibs)
Step 6: Two Finish Coats
After all that prep, the actual painting is the easy part. First coat goes on, dries completely (24-48 hours depending on temperature and humidity), then second coat. The second coat isn't optional — it's what gives you even coverage, proper mil thickness, and long-term durability.
We don't paint in the rain. We don't paint when it's below 50°F. We don't paint when the forecast shows rain in the next 24 hours. Paint needs proper curing conditions, and Michigan weather doesn't always cooperate. That's fine. We'd rather wait two days than ruin a $7,000 paint job.
Sherwin-Williams vs. Big-Box Paint: Real Performance Differences
Homeowners ask us all the time: "Can I just buy the paint myself and save money?" Short answer: you can, but you shouldn't. Here's why.
Sherwin-Williams Duration Exterior costs about $65-75 per gallon. The "premium" exterior paint at the big-box store costs $35-45 per gallon. On a 2,000-square-foot house, you're looking at maybe $400-500 difference in material cost. That sounds like a lot until you realize:
- Coverage: Duration covers 350-400 sq ft per gallon. Big-box paint covers 250-300 sq ft per gallon. You need more of it.
- Hide: Duration has better hide (ability to cover the old color). You might get away with one coat on light-to-light color changes. Big-box paint almost always needs two coats, sometimes three on dark-to-light transitions.
- Durability: Duration lasts 12-15 years in Michigan. Big-box paint lasts 5-7 years. When you divide cost by years of service, Duration is cheaper.
Contractor-Grade vs. Retail: The Sherwin-Williams paint we buy isn't the same formulation you can buy at the store, even if it has the same name on the can. Contractor-grade Duration has higher solids content, better flow and leveling additives, and tighter quality control. It sprays better, brushes better, and cures harder. This isn't gatekeeping — it's just how the paint industry works.
We've been using Sherwin-Williams exclusively since 2005. Before that, we used whatever the customer wanted. We got tired of callbacks for peeling paint, fading, and premature failure. Since switching to Sherwin-Williams, our callback rate on exterior painting projects dropped by 80%. That's not an exaggeration — that's what our records show.
Signs Your Rochester Home Needs Exterior Painting
Most homeowners wait too long. They see the peeling start and think, "I'll get to it next year." By the time they call, there's water damage, rotted trim, and a much bigger bill. Here's when you should be thinking about repainting:
1. Chalking
Wipe your hand across the siding. If you get a powdery residue on your fingers, that's chalking — the paint is breaking down from UV exposure. It's not an emergency, but it means the paint is past its prime. You've got maybe 1-2 years before peeling starts.
2. Fading
Compare the color on a south-facing wall to a north-facing wall. If there's a noticeable difference, the paint's UV inhibitors are gone. Fading doesn't hurt anything structurally, but it's a sign that the paint film is degrading.
3. Peeling or Flaking
This is the red flag. Once paint starts peeling, water is getting behind it. That water will rot the wood underneath. Peeling around windows, doors, and trim joints is especially concerning — those are the spots where water intrusion causes the most damage.
4. Cracking or Alligatoring
If the paint surface looks like reptile skin — small cracks forming a pattern — that's alligatoring. It happens when paint gets too thick from multiple coats, or when a hard paint is applied over a softer one. Either way, it means the paint has lost its flexibility and is failing.
5. Mildew or Mold Growth
Black or green spots on siding, soffits, or trim aren't just cosmetic. Mildew grows on the sugars in degraded paint. If you've got mildew, the paint film is breaking down and providing food for biological growth. Power washing will clean it off, but it'll come back unless you repaint.
6. Caulk Failure
Check the caulk around windows, doors, and trim joints. If it's cracked, pulling away, or missing entirely, water is getting in. Failed caulk is one of the top three causes of premature paint failure in Michigan.
The 8-10 Year Rule: Even if your paint looks fine, most exterior paint jobs in Southeast Michigan should be refreshed every 8-10 years. That's not a sales tactic — it's building science. Paint protects the wood. Once the paint starts failing, the wood starts rotting. A $6,500 paint job now saves you a $15,000 siding replacement later.
How Long Does Exterior Paint Last in Southeast Michigan?
This is the question that determines whether you're making a smart investment or throwing money away. The honest answer: it depends. But here are the variables that matter:
Paint Quality
- Builder-grade acrylic: 4-6 years
- Mid-grade exterior paint: 6-8 years
- Premium paint (Sherwin-Williams Duration, Emerald, Resilience): 10-15 years
Surface Material
- Wood siding and trim: 7-10 years (premium paint, proper prep)
- Fiber cement siding: 12-15 years (holds paint better than wood)
- Vinyl siding: 8-10 years (if painted — most vinyl doesn't need paint)
- Aluminum siding: 10-12 years (smooth surface holds paint well)
Exposure
- South and west exposures: Take the most UV damage, fade faster
- North exposures: Stay wet longer, more prone to mildew
- Under eaves and overhangs: Protected from weather, last longer
- Full sun with no shade: Expect 20-30% shorter lifespan
Prep Quality
This is the big one. A premium paint job with poor prep will fail in 3-4 years. A mid-grade paint job with excellent prep will last 8-10 years. Prep quality matters more than paint quality — but you need both to get 12-15 years of service.
We've been tracking our paint jobs since 2005. Homes we painted in 2010 with Duration Exterior are still holding up today — 16 years later. The ones that failed early all had the same problem: the homeowner hired someone else to do "touch-up work" that introduced moisture or used incompatible paint. Left alone, properly applied premium paint lasts.
What to Expect During Your Painting Project
You've decided to move forward. You've signed the contract. Now what? Here's the realistic timeline for a typical Rochester exterior painting project:
Week 1: Scheduling and Prep
We'll schedule your project based on weather forecasts and crew availability. In Michigan, that means we're watching 10-day forecasts and looking for a window of dry, moderate weather. Ideal painting conditions are 55-85°F with low humidity and no rain for 48 hours after application.
Day 1-2: Power washing, scraping, and surface prep. This is the messy part. Expect noise, water runoff, and paint chips. We'll protect your landscaping and cover anything that shouldn't get wet.
Day 3-4: Wood repairs, priming, and caulking. This is detail work. It's quiet, but it takes time.
Week 2: Painting
Day 5-6: First coat of finish paint. Depending on house size, this might take 1-2 days.
Day 7: Dry time. We don't rush this. Paint needs to cure.
Day 8-9: Second coat of finish paint.
Day 10: Final walkthrough, touch-ups, and cleanup.
Weather Delays Are Normal: If it rains, we stop. If the temperature drops below 50°F, we stop. If humidity spikes above 85%, we stop. We'd rather take an extra week than compromise the job. Most painting projects in Michigan have at least one weather delay. Plan for it.
What You'll Notice
Our crews show up at 8 a.m. and work until 4-5 p.m. We clean up daily — no paint cans, drop cloths, or equipment left in your driveway overnight. We're respectful of your property, your neighbors, and your schedule.
You'll have access to your house the entire time. We work around you. If you need to leave for work, that's fine. If you're working from home, that's fine too. We'll coordinate access and make sure you're never locked out or inconvenienced.
When we're done, we do a final walkthrough with you. We'll point out what we did, show you the areas that needed extra attention, and make sure you're 100% satisfied before we pack up.
Related Services You Might Need
While we're painting your exterior, it's worth thinking about the other systems that protect your home. If your gutters are sagging or leaking, that water runoff will shorten your paint's lifespan. If your siding has damage or rot, painting over it just hides the problem. And if your windows are drafty or failing, you're losing energy and comfort.
NEXT Exteriors handles all of it — roofing, siding, windows, insulation, and gutters. We're a one-stop shop for exterior work, and we've been doing it in Southeast Michigan since 1988. When you work with us, you're working with a team that understands how Michigan weather affects every part of your home's exterior.
Ready to Get Started?
NEXT Exteriors has been protecting Michigan homes since 1988. Get a free, no-pressure estimate from a team that shows up on time and does the job right.
Get Your Free QuoteOr call us: (844) 770-6398
Frequently Asked Questions
Gutter Installation in Waterford Township: Cost & Materials
Real 2026 pricing for gutter installation in Waterford Township, MI. Material comparisons, cost breakdowns, and what Michigan homeowners actually pay.

If you're a homeowner in Waterford Township looking at sagging gutters or water pooling around your foundation, you're probably wondering what new gutters actually cost in 2026—and which materials hold up best against Michigan's freeze-thaw cycles and heavy spring rains.
We've been installing seamless gutters in Southeast Michigan since 1988, working on everything from the classic ranch homes around Elizabeth Lake to the newer builds near Hess-Hathaway Park. This guide breaks down real pricing, material options, and the factors that change your quote—no sales pitch, just what you need to know before you call a contractor.
What Gutter Installation Actually Costs in Waterford Township
Let's start with the number most homeowners want first: what you'll actually pay for gutter installation in Waterford Township in 2026.
For a typical single-story ranch home (about 150-180 linear feet of gutters), you're looking at $1,200 to $2,400 for aluminum seamless gutters installed. A two-story Colonial with more complex rooflines might run $2,500 to $4,500. These ranges include removal of your old gutters, new seamless aluminum installation, downspouts, and basic gutter guards if you want them.
Here's the per-linear-foot breakdown for the most common materials we install in Oakland County:
| Material | Cost Per Linear Foot (Installed) | Typical Lifespan |
|---|---|---|
| Aluminum Seamless (5-inch) | $8 - $12 | 20-30 years |
| Aluminum Seamless (6-inch) | $10 - $15 | 20-30 years |
| Vinyl Sectional | $4 - $7 | 10-15 years |
| Copper Seamless | $25 - $40 | 50+ years |
| Steel (Galvanized) | $9 - $14 | 15-25 years |
Those numbers include labor, materials, hangers, downspouts, and end caps. They don't include fascia board repair (common on older homes), gutter guards, or structural fixes if your roofline has issues.
Why the range? Home height, roofline complexity, fascia condition, and how many corners and downspouts you need all affect the final price. A simple ranch with straight runs costs less per foot than a Victorian with dormers and valleys.
Material Options: What Works Best in Michigan
Not all gutter materials perform the same in Michigan weather. Here's what we've learned installing gutters across Oakland County for three decades.
Aluminum Seamless Gutters (Most Popular)
Aluminum is the workhorse of gutter materials in Southeast Michigan, and for good reason. It doesn't rust, handles freeze-thaw cycles without cracking, and stays lightweight so it won't pull away from your fascia boards during heavy snow loads.
We custom-fabricate seamless aluminum gutters on-site using a mobile gutter machine, which means no seams along the length of each run—just at the corners. Fewer seams mean fewer potential leak points, which matters when you're dealing with ice dams in Michigan winters.
Aluminum comes in dozens of colors baked into the finish, so you can match your trim or siding color. The factory finish holds up better than paint and won't chip or peel the way old steel gutters did.

Vinyl Gutters (Budget Option)
Vinyl gutters are the cheapest upfront, but they don't last in Michigan. The freeze-thaw cycle makes vinyl brittle over time—we've seen them crack and split after just five or six winters. They also sag under snow and ice weight because they're not as rigid as metal.
If you're planning to sell in the next year or two and just need something functional for the inspection, vinyl might work. For a long-term solution, we don't recommend them.
Copper Gutters (Premium Choice)
Copper is the Cadillac of gutter materials. It'll outlast your roof, your siding, and probably your mortgage. Copper develops a natural patina over time—that green oxidation you see on historic buildings—which actually protects the metal underneath.
The cost is steep ($25-$40 per linear foot installed), so copper makes the most sense on high-end homes in areas like Bloomfield Hills or historic properties where aesthetics matter as much as function. We've installed copper gutters on homes built in the 1920s that still had their original copper downspouts—that's the kind of longevity you get.
Steel Gutters (Galvanized or Stainless)
Galvanized steel gutters are stronger than aluminum and cost slightly more. They handle heavy snow loads well and won't dent as easily if a ladder leans against them. The downside? They will rust eventually, especially at seams and where the galvanized coating gets scratched.
Stainless steel solves the rust problem but costs nearly as much as copper. We don't install much stainless in residential work—it's overkill for most homes.
How Gutter Size Affects Cost and Performance
Standard residential gutters come in two widths: 5-inch and 6-inch. Most homes in Waterford Township have 5-inch gutters, but there are situations where upsizing to 6-inch makes sense—and costs you a bit more.
5-inch gutters handle typical Michigan rainfall just fine for most single-family homes. They're the standard size, which keeps costs lower and gives you more color options.
6-inch gutters move about 50% more water than 5-inch gutters. We recommend them if:
- Your roof has a steep pitch that sends water down fast
- You have large roof sections draining into one gutter run
- You're in an area with mature trees that drop a lot of debris (bigger gutters clog less easily)
- You've had overflow problems with your current 5-inch gutters during heavy summer storms
The cost difference is usually $2-$3 more per linear foot for 6-inch gutters. On a typical home, that's an extra $300-$500 total. Worth it if you need the capacity, overkill if you don't.
Downspout sizing matters too. Standard downspouts are 2x3 inches, but 3x4-inch downspouts move significantly more water. If you're going with 6-inch gutters, use the larger downspouts—otherwise you're creating a bottleneck.
Installation Variables That Change Your Quote
Two identical ranch homes in Waterford Township can get different gutter quotes based on factors that aren't obvious from the curb. Here's what changes the price.
Home Height and Roofline Complexity
Single-story homes are straightforward—we set up ladders, work safely from the ground, and move quickly. Two-story homes require scaffolding or lift equipment for safety, which adds labor time and cost. Homes with steep roofs, dormers, or multiple gable ends take longer to measure, fabricate, and install.
A simple rectangular ranch might take a crew half a day. A two-story Colonial with bay windows and multiple roof valleys could take a full day or more.
Fascia Board Condition
Gutters attach to the fascia board—the vertical trim board that runs along your roofline. If that board is rotted, warped, or water-damaged, we can't securely mount new gutters to it. Fascia repair adds to the cost, but it's not optional.
We see this most often on homes where the old gutters were leaking or overflowing for years. The constant water exposure rots the wood behind them. On a typical home, fascia board replacement might add $500-$1,500 to your gutter project depending on how much needs replacing.

Gutter Guard Add-Ons
Gutter guards (or leaf guards) keep debris out so you don't have to clean your gutters twice a year. They're not necessary, but they're popular with homeowners who have a lot of trees or don't want to climb ladders.
Basic mesh gutter guards run about $2-$4 per linear foot installed. Higher-end systems like micro-mesh or reverse-curve guards can cost $7-$12 per foot. On a typical home, that's an extra $400-$2,000 depending on what you choose.
Gutter guards work, but they're not maintenance-free. You still need to check them annually and clear off any debris that piles up on top. They just reduce how often you're up on a ladder.
Removal and Disposal of Old Gutters
Most quotes include old gutter removal, but it's worth confirming. Taking down old gutters, unhooking downspouts, and hauling everything away adds an hour or two of labor. If your old gutters are steel or copper, we'll usually credit you for the scrap value—it's not much, but it offsets disposal costs.
Signs You Need New Gutters (Not Just Repairs)
Not every gutter problem requires a full replacement. Sometimes a repair or a section replacement is enough. Here's how to tell the difference.
Replace your gutters if you're seeing:
- Separation from the fascia board: If gutters are pulling away in multiple spots, the hangers are failing or the fascia is rotted. Rehanging them is a temporary fix—they'll pull away again.
- Rust holes or corrosion: Once steel or aluminum gutters start rusting through, the damage spreads. Patching one hole doesn't stop the next one from forming.
- Sagging sections: Gutters should slope slightly toward downspouts, but if you see visible sags or standing water, the structure is compromised. This usually means the hangers are spaced too far apart or the gutter itself is bent.
- Water damage on your fascia, soffit, or foundation: If you're seeing rot, staining, or basement water issues, your gutters aren't doing their job. That's often a sign they're beyond repair.
- Cracks or splits at seams: Sectional gutters leak at the seams over time. If you're caulking the same spots every year, it's time to replace them with seamless gutters.
Repair might work if:
- Only one or two sections are damaged (from a fallen branch, ladder impact, etc.)
- Hangers have pulled loose but the gutter itself is still solid
- A single downspout is clogged or disconnected
When we come out for an estimate, we'll tell you honestly whether a repair makes sense or if you're better off replacing. We've been doing this long enough to know when a patch job is just delaying the inevitable.
If you're also noticing roof leaks during winter storms, it's worth having us look at your entire roofing system while we're evaluating your gutters—sometimes water problems are multi-layered.
Why Seamless Gutters Cost More (And Why They're Worth It)
You'll see two types of gutters on homes: sectional (sold in 10-foot lengths at big-box stores) and seamless (custom-fabricated on-site). Seamless gutters cost more upfront, but here's why they're the standard for professional installations.
Leak Prevention
Sectional gutters have seams every 10 feet where sections connect. Those seams are sealed with caulk or gaskets, and they leak. Not immediately—but after a few freeze-thaw cycles, the caulk cracks and water seeps through. We've replaced hundreds of sectional gutter systems where the only real problem was leaking seams.
Seamless gutters have seams only at corners and downspout connections. On a typical ranch home, that might mean four seams total instead of twenty. Fewer seams = fewer leak points.
Custom Fabrication Process
We bring a portable gutter machine to your home and fabricate each gutter run to the exact length needed. No cutting, no joining sections, no gaps. The machine rolls flat aluminum coil stock into a finished gutter profile in one continuous piece.
This means we can run a 40-foot gutter along the back of your house without a single seam. Try doing that with sectional gutters—you can't.
Longevity in Freeze-Thaw Cycles
Michigan winters are hard on gutters. Water gets into seams, freezes, expands, and cracks the caulk. Then it thaws, seeps deeper, and freezes again. Over a few seasons, sectional gutters start to fail.
Seamless gutters eliminate most of that problem. The continuous aluminum doesn't have those weak points, so ice expansion doesn't create the same stress fractures. We've seen seamless aluminum gutters last 25-30 years in Michigan without major issues—sectional gutters rarely make it past 15.
If you're investing in new gutters for your Metro Detroit home, seamless is the way to go. The upfront cost difference is $2-$4 per linear foot, but you'll make that back in longevity and fewer repairs.
What about DIY gutter installation? Sectional gutters are sold as DIY products, and plenty of homeowners try to install them. We've fixed a lot of those jobs. The pitch has to be exact (1/4 inch drop per 10 feet), hangers need to be spaced correctly, and downspouts need to drain away from the foundation. Get any of that wrong and you're creating water problems instead of solving them. For most homeowners, professional installation is worth the cost.
Ready to Get Started?
NEXT Exteriors has been protecting Michigan homes since 1988. Get a free, no-pressure estimate from a team that shows up on time and does the job right.
Get Your Free QuoteOr call us: (844) 770-6398
Other Services from NEXT Exteriors
While we're known for our gutter installation work, we're a full-service exterior contractor. If you're planning other home improvements, we handle everything from window replacement to attic insulation upgrades. Our crews are trained on the latest building science for Michigan homes, and we use the same old-school approach to every project: show up on time, do the work right, and clean up when we're done.
We also offer exterior painting services using Sherwin-Williams products exclusively, so if your trim needs refreshing while we're installing new gutters, we can handle that too. Check out our full range of exterior services to see how we can help protect and improve your home.
Frequently Asked Questions
Most single-story homes take 4-6 hours for a complete gutter replacement. Two-story homes or homes with complex rooflines might take a full day. We'll give you a time estimate when we quote your project, and our crews show up when we say we will.
Gutter guards aren't required, but they reduce how often you need to clean your gutters—especially if you have oak, maple, or pine trees nearby. They won't eliminate maintenance entirely, but they cut it down significantly. We install several types depending on your budget and how much debris you typically get.
Most homeowners match their gutters to their trim color so they blend in. White, almond, and brown are the most common. If you want gutters to stand out as an accent, you can match them to your roof or siding, but that's less common. We'll bring color samples when we come out for your estimate.
Yes, we install gutters year-round as long as temperatures are above freezing and conditions are safe. The sealants and hangers we use need temps above 32°F to cure properly. Late fall and early spring are the busiest times for gutter work, so if you're planning a project, booking ahead helps.
Look for soft spots, discoloration, peeling paint, or visible rot along the board where your gutters attach. If you can press into the wood with your thumb and it feels spongy, that's rot. We check fascia condition during every gutter estimate and let you know if repairs are needed before we install new gutters.
Yes, we work with financing partners to offer payment plans for exterior projects. Ask us about options when you schedule your free estimate—we'll walk you through what's available based on your project size.
Our gutter installations come with a workmanship warranty covering installation defects. The gutter material itself is backed by the manufacturer—aluminum gutters typically carry a 20-year warranty against defects. We'll give you all warranty documentation when the job is complete.
Window & Siding Replacement for Older Homes in Leonard, MI
Upgrading windows and siding in Leonard's historic homes requires specific techniques. Learn what works in Michigan's climate from a contractor with 35+ years experience.
Leonard's tree-lined streets are full of character homes—Craftsman bungalows from the 1920s, ranch houses from the 1960s, and everything in between. These homes have stories, solid bones, and usually one thing in common: windows and siding that have been patched, painted, and pushed past their useful life.
We've been doing house siding in Detroit and the surrounding Oakland County communities since 1988, and Leonard projects have taught us something important: older homes don't play by new construction rules. The rough openings aren't standard. The framing has settled. The original builders used materials and methods that modern products weren't designed for.
If you try to treat a 1950s Leonard ranch like a 2020 subdivision build, you're going to have problems—air leaks, moisture intrusion, trim that doesn't fit, windows that bind. This guide walks through what actually works when you're upgrading Detroit window experts and siding on homes that have seen decades of Michigan weather.
What Makes Leonard's Older Homes Different
Leonard sits in northern Oakland County, and the housing stock reflects the area's agricultural roots and post-war expansion. You've got farmhouses that date back to the early 1900s, modest Capes and bungalows from the 1930s and 1940s, and a wave of ranch homes from the 1950s through the 1970s.
Here's what that means for exterior work:
Original construction used real wood. Not engineered wood—actual dimensional lumber for framing, solid wood siding, wood window frames. When that wood starts to rot (and after 70+ years in Michigan, it does), you're not just replacing a panel. You're often dealing with structural repairs to studs, headers, and sills.
Homes have settled. Foundations shift. Floors slope. What was once a square, level window opening might now be out of plumb by half an inch or more. Modern replacement windows are built to tight tolerances—they don't forgive that kind of movement.
Insulation is minimal or nonexistent. Many older Leonard homes were built with no wall insulation, no vapor barriers, and attic insulation that's settled to R-11 or less. When we pull off old siding, we're often looking at bare studs and sheathing. That's an opportunity, but it also means the project scope changes.
Architectural details matter. Leonard homeowners tend to care about curb appeal and historic character. Wide corner boards, decorative brackets, multi-pane windows—these aren't just cosmetic. They're part of what makes the house feel right in the neighborhood. Any exterior services in Detroit and surrounding areas need to respect that.
Window Replacement Challenges in Historic Leonard Homes
Let's start with windows, because they're often the first thing homeowners want to upgrade—and the first place contractors run into trouble.
Non-Standard Rough Openings
Modern replacement windows come in standard sizes: 36" x 48", 30" x 60", etc. Older homes? Not so much. We've measured windows in Leonard homes that are 37.5" wide, 52.25" tall, and slightly trapezoidal because the framing has shifted over time.
You have three options:
- Custom windows: Order units built to your exact measurements. More expensive, longer lead times, but they fit correctly and perform as designed.
- Retrofit/insert windows: Fit inside the existing frame. You lose some glass area, but installation is faster and less invasive. Works well if the original frames are still solid.
- Reframe the opening: Cut back to the studs and build a new rough opening to standard dimensions. Adds cost and requires siding/trim work, but gives you the most options for window selection.
We don't push one approach over another—it depends on the condition of the existing framing, your budget, and how much glass area you're willing to sacrifice. But we do measure twice (sometimes three times) and order based on what's actually there, not what the blueprints say should be there.
Brick Mold and Exterior Trim Complications
Older windows were typically installed with exterior brick mold (a flat trim piece that wraps the perimeter) and integrated into the siding. When you pull those windows, you're left with gaps, exposed sheathing, and trim profiles that don't match anything available today.
If you're also replacing siding, this is less of an issue—we can detail the new siding to meet the new window trim cleanly. But if you're only doing windows and leaving the siding, expect custom trim work. We've fabricated plenty of one-off pieces to match original profiles, and it's worth the effort to avoid the "obviously replaced" look.
Weight Pockets and Rope-and-Pulley Systems
Many pre-1960 double-hung windows used a counterweight system—cast iron weights hidden in pockets on either side of the window, connected to the sash with ropes or chains. These pockets are voids in the wall that leak air like crazy.
When we replace these windows, we fill the weight pockets with foam insulation. It's a small thing that makes a noticeable difference in comfort and energy bills. If your contractor doesn't mention this, ask about it. It's part of doing the job right, similar to how we approach insulation services in Southeast Michigan.
Modern Energy Efficiency vs. Historic Character
Here's the tension: energy-efficient windows (low-E glass, argon fills, vinyl frames) don't always look right in a 1920s Craftsman. Homeowners want lower heating bills, but they also don't want the house to look like it's been stripped of character.
A few solutions we've used:
- Simulated divided lites (SDL): Grids that look like individual panes but sit over a single insulated glass unit. You get the traditional look with modern performance.
- Wood-clad windows: Aluminum or vinyl exterior for low maintenance, wood interior for traditional appearance. Pricier, but they bridge the gap.
- Matching muntin profiles: If the original windows had thick, chunky grids, we specify SDL grids with similar dimensions. Details matter.
For more on how modern windows perform in Michigan's climate, see our piece on energy-efficient windows in Metro Detroit.
Siding Over (or Removing) Original Materials
Siding replacement on older Leonard homes is rarely straightforward. You're not just swapping one material for another—you're dealing with layers of history, and sometimes hazards.
Dealing with Original Wood Siding
If the house still has its original wood clapboards or shingles, the first question is: what's the condition? We've seen wood siding that's 80 years old and still solid (rare, but it happens) and wood siding from the 1990s that's rotted through (poor installation, no paint maintenance).
If the wood is sound, you can side over it. This adds some insulating value (the old siding acts as an extra layer) and saves on demolition and disposal costs. We typically add a layer of rigid foam insulation or fanfold over the old siding to create a flat, consistent nailing surface and boost the R-value.
If the wood is rotted, it has to come off. No exceptions. Siding over rot just hides the problem—moisture will continue to wick into the framing, and you'll end up with bigger structural issues down the road. We've seen too many homes where a previous contractor took shortcuts, and the homeowner paid for it twice.
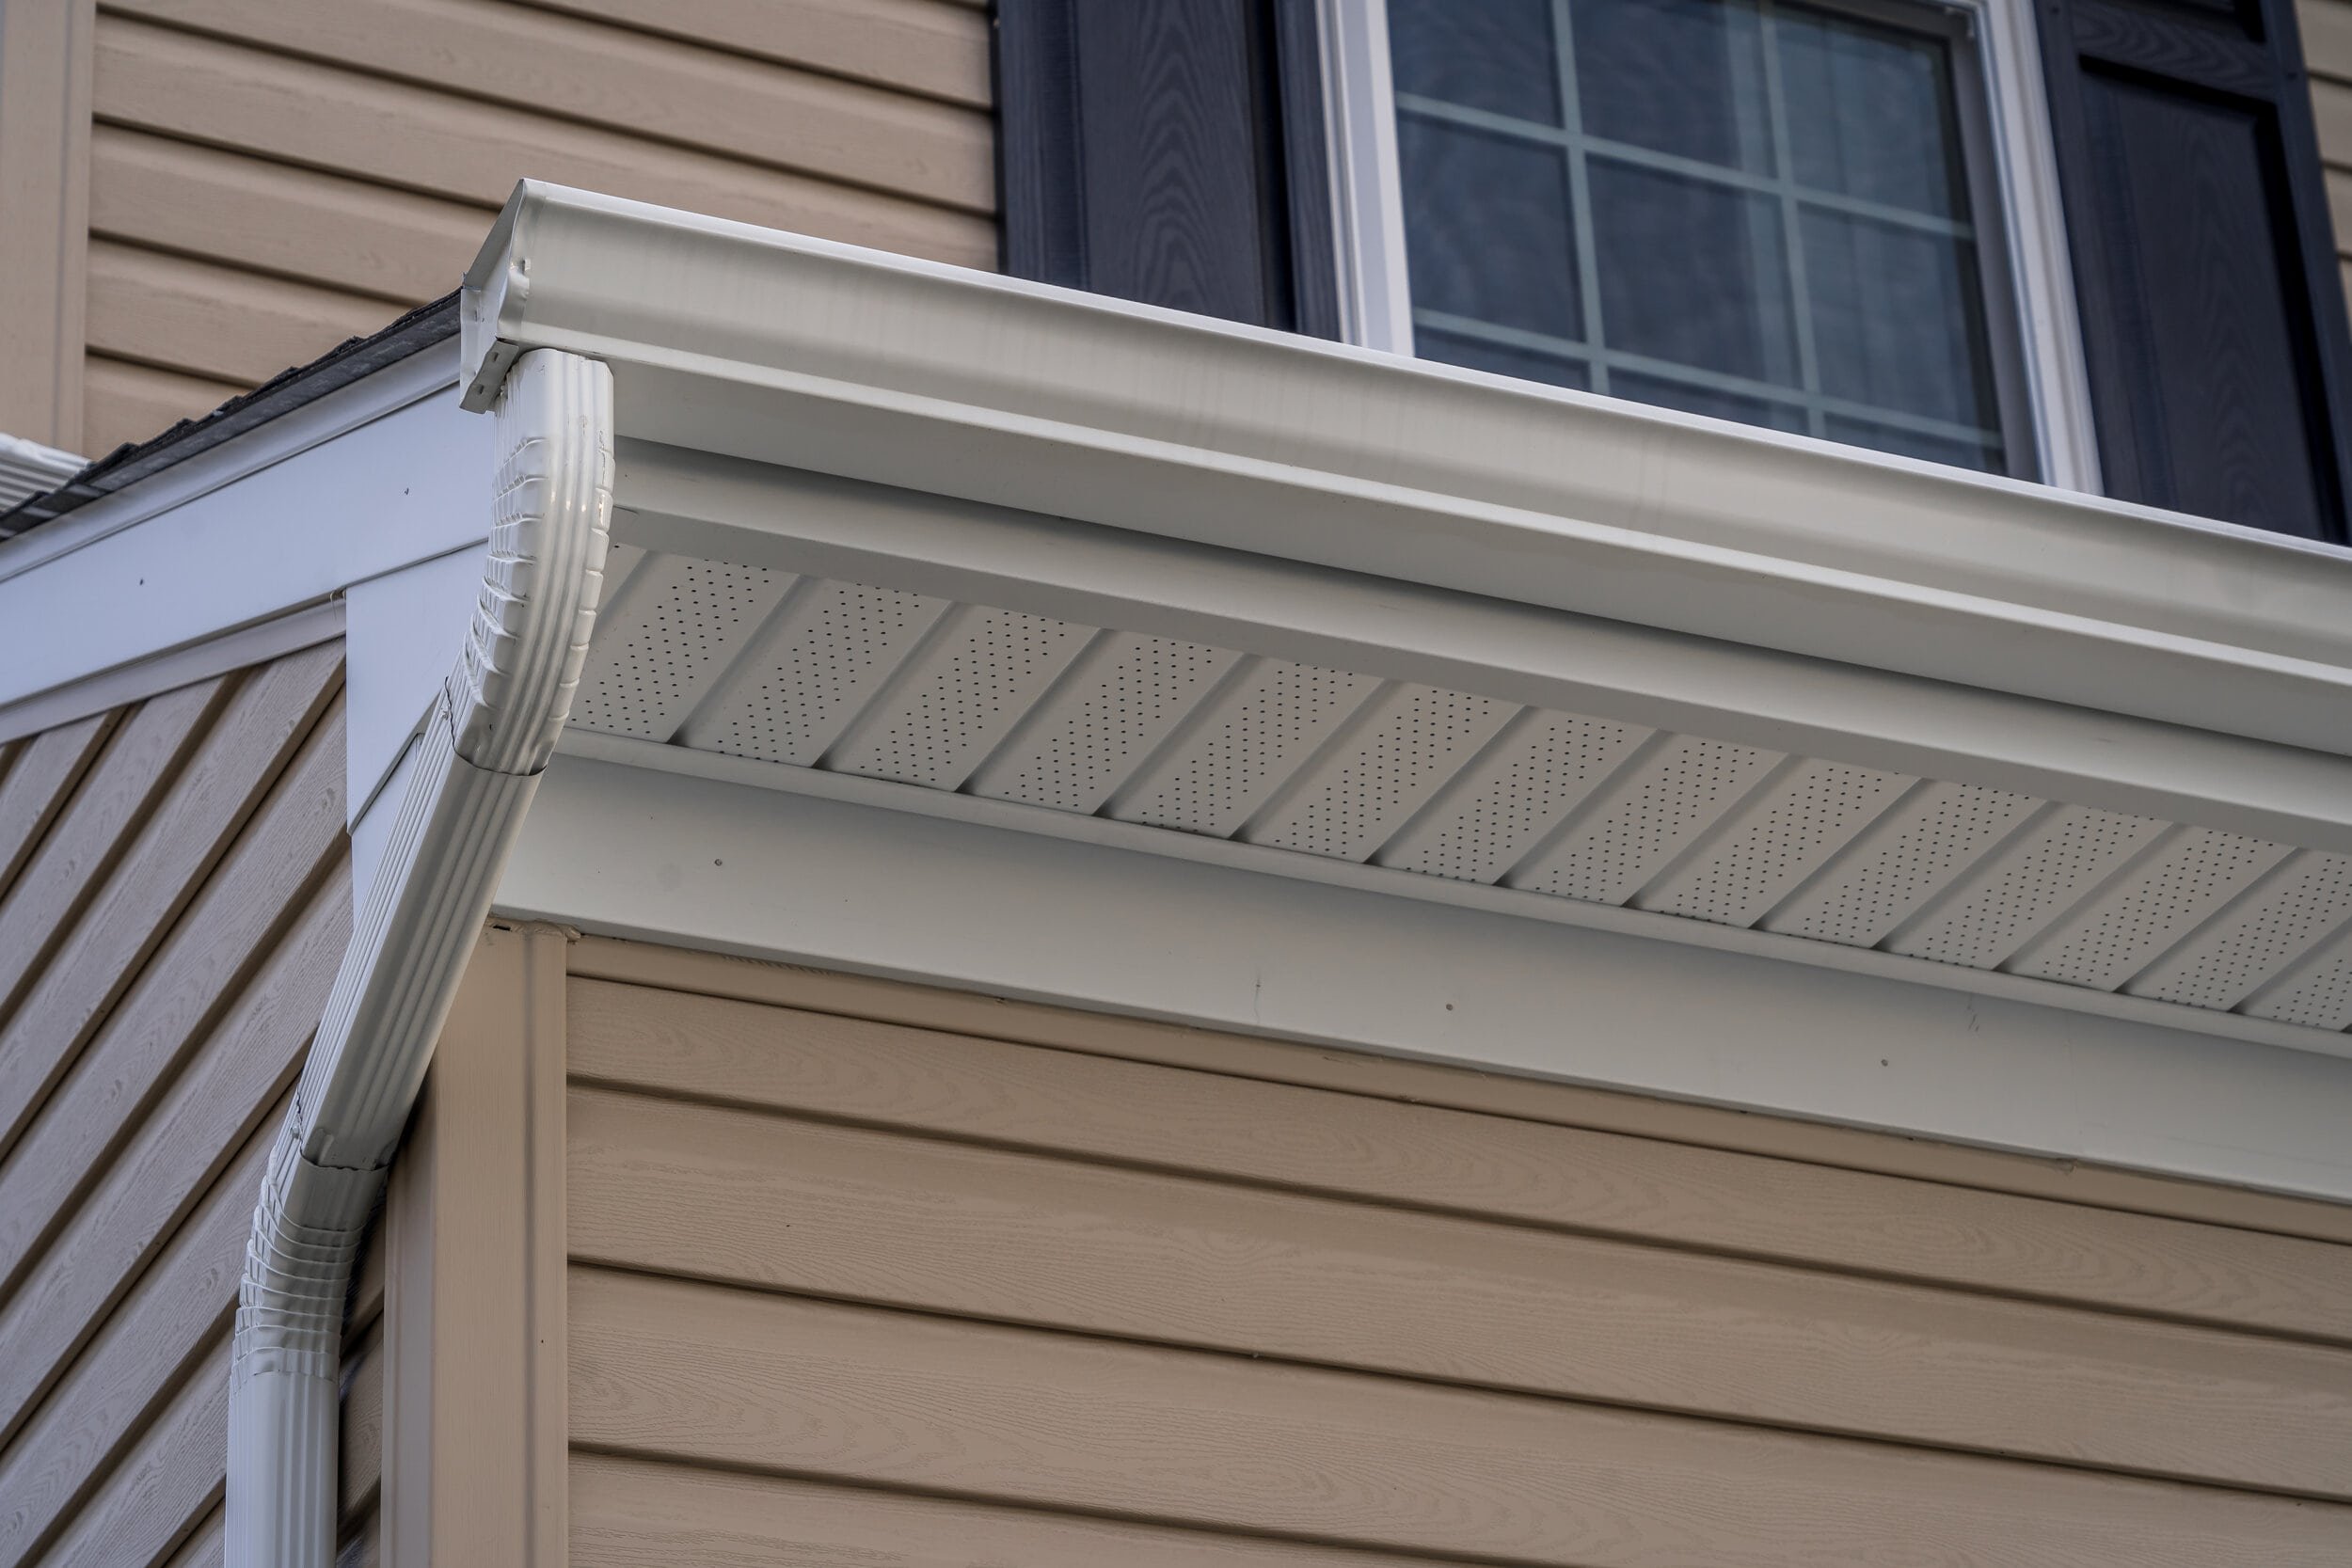
Asbestos Considerations in 1950s-1970s Homes
This is the big one. A lot of homes built between 1950 and 1980 have asbestos-cement siding. It was popular because it was durable, fireproof, and low-maintenance. It's also a regulated material.
Asbestos siding isn't dangerous if left undisturbed. But if you're removing it, Michigan law requires proper handling and disposal. That means:
- Testing to confirm the presence of asbestos (if there's any doubt)
- Hiring a licensed asbestos abatement contractor for removal
- Following EPA and MDHHS guidelines for containment and disposal
You can side over asbestos in many cases, which avoids the abatement cost. We've done this plenty of times—furring strips over the asbestos, then new siding on top. It's code-compliant, safe, and saves money. But if the asbestos siding is cracked, brittle, or in poor condition, removal is the better call.
We're not an abatement company, but we work with certified contractors regularly and can coordinate the process. It adds to the timeline and budget, but it's not optional. For more on dealing with deteriorated exterior materials, check out our guide on wood rot on trim and fascia in Metro Detroit.
Insulation Opportunities During Siding Replacement
Once the old siding is off, you're looking at the bones of the house. This is your chance to add insulation that wasn't there before—or upgrade what's there to modern standards.
Options include:
- Rigid foam board: 1" or 1.5" of foam adds R-5 to R-7.5, creates a thermal break, and provides a flat surface for siding installation. We use this on most jobs.
- Spray foam in wall cavities: If the sheathing is off or there are large gaps, we can spray foam into the stud bays. More expensive, but it air-seals and insulates in one step.
- Blown-in cellulose or fiberglass: Drilled through the sheathing into each stud bay. Less invasive than spray foam, still effective.
The right choice depends on the existing wall assembly and your budget. But ignoring insulation during a siding project is a missed opportunity—you're already paying for the labor to remove and replace the exterior. Adding insulation is a relatively small incremental cost with a big payoff in comfort and energy savings.
Vapor Barrier and Moisture Management
Older homes were built to breathe. No vapor barriers, no house wrap, just wood sheathing and siding. That worked okay when heating systems were less efficient and indoor humidity was lower. Modern homes are tighter, and we heat them more, which drives moisture into the wall cavities.
When we re-side an older home, we add a weather-resistant barrier (house wrap or similar product) over the sheathing. This stops wind-driven rain from getting into the wall while still allowing water vapor to escape. It's a balance—you want the wall to dry to the outside, but you don't want bulk water intrusion.
If we're adding foam insulation, we pay attention to where the dew point falls in the wall assembly. In Michigan's climate (cold winters, warm summers), you generally want the vapor barrier on the warm side (interior) and the foam on the exterior. Get this wrong, and you can trap moisture and cause rot. Get it right, and the wall assembly performs for decades.
Material Selection for Michigan's Climate
Not all siding and window products handle Michigan weather equally well. Leonard gets the full range: sub-zero cold snaps in January, 90-degree humidity in July, freeze-thaw cycles in spring, and the occasional severe thunderstorm with hail.
Vinyl vs. Fiber Cement for Freeze-Thaw Cycles
Vinyl siding expands and contracts with temperature. In Michigan, that's a lot of movement. Cheap vinyl gets brittle in the cold and can crack if you bump it with a snowblower. Quality vinyl (thicker gauge, impact-resistant formulations) holds up much better.
We install a lot of CertainTeed Monogram and Mastic vinyl. Both are engineered for northern climates, with higher impact resistance and fade warranties that actually mean something. The key is proper installation—leaving room for expansion at the ends, not over-driving nails, and using the right accessories (J-channel, corner posts) that move with the siding.
Fiber cement (James Hardie, LP SmartSide) doesn't expand and contract like vinyl. It's dimensionally stable, which is an advantage in a climate with big temperature swings. It's also more impact-resistant, won't melt if the grill gets too close, and can be painted any color.
The downsides: it's heavier (requires more labor and sometimes additional framing support), more expensive, and requires periodic repainting (every 10-15 years, depending on the finish). But for homeowners who want the look of wood without the maintenance, fiber cement is hard to beat. We're James Hardie siding installers in Metro Detroit and have installed thousands of squares over the years.
For more on how different siding materials hold up in Michigan, see our article on how long siding lasts in Michigan's climate.
Window Materials That Handle Temperature Swings
Windows face the same challenge: they need to perform in extreme cold and extreme heat, often within the same week in spring or fall.
Vinyl windows are the most common replacement option. They don't rot, don't need painting, and modern formulations handle temperature swings well. Look for welded corners (not screwed), multi-chamber frames for insulation, and quality hardware. We install a lot of Andersen, Pella, and Marvin vinyl windows—all are proven in Michigan conditions.
Fiberglass windows are even more stable. Fiberglass expands and contracts at nearly the same rate as glass, which reduces stress on the seals and extends the life of the insulated glass unit. They're more expensive than vinyl, but they last longer and can be painted if you want to change the color down the road.
Wood-clad windows (wood interior, aluminum or vinyl exterior) give you the traditional look inside with low-maintenance performance outside. They're a good fit for historic homes where appearance matters. The downside is cost—expect to pay 30-50% more than comparable vinyl windows.
Color Retention and UV Exposure
Michigan gets plenty of sun, especially in summer. Darker siding colors absorb more heat, which accelerates fading and can cause warping on south- and west-facing walls.
If you're set on a dark color (navy, charcoal, deep red), make sure the product is rated for it. Many vinyl manufacturers now offer "dark color" formulations with higher heat resistance and better UV inhibitors. Fiber cement handles dark colors better because it doesn't expand as much with heat.
We also talk to homeowners about color choices in the context of their neighborhood and home style. Leonard has a lot of traditional homes—Craftsmans, Colonials, Capes—and some colors just look more appropriate than others. For ideas, see our post on the best siding colors for Michigan homes in 2026.
Manufacturer Warranties in Older Home Applications
Here's something most contractors won't tell you: manufacturer warranties often have fine print that excludes certain applications. Installing siding over old wood? Might void the warranty. Installing windows in out-of-plumb openings? Same issue.
We read the warranty documents and install according to the manufacturer's specifications. That means if we're installing James Hardie over an existing substrate, we follow their guidelines for moisture barriers, fastening, and clearances. If we're installing CertainTeed siding, we use CertainTeed accessories and follow their installation manual.
Does it take more time? Sometimes. But it means the warranty is valid, and if there's ever a product defect, you're covered. We've been a CertainTeed certified 5-star contractor for years, which gives our customers access to extended warranties they wouldn't get otherwise.
Cost Reality for Leonard Homeowners
Let's talk money. Older homes cost more to upgrade than new construction. There's no way around it.
Why Older Homes Cost More to Upgrade
New construction is predictable. The framing is square, the openings are standard, the sheathing is flat. You can estimate materials and labor with confidence.
Older homes? Every one is different. We've started siding jobs where we found rotted band joists that needed replacing. We've started window jobs where the headers were undersized and sagging. We've found knob-and-tube wiring, abandoned chimneys, and wasp nests the size of basketballs.
None of that shows up in an initial estimate based on exterior measurements. It shows up when we start peeling back layers. And it has to be addressed—you can't side over a rotted rim joist and expect the siding to stay straight.
Good contractors build contingency into their estimates for older homes. We typically add 10-15% to the base cost to cover unknowns. If we don't need it, great—the project comes in under budget. If we do need it, we're not hitting you with surprise change orders.
Hidden Conditions and Contingency Budgets
Here are the most common hidden conditions we find on Leonard projects:
- Rotted framing: Sills, headers, studs, band joists. Water gets in, wood rots. Happens on every third or fourth older home we work on.
- Insufficient flashing: Older homes often have no flashing around windows and doors, or flashing that's rusted through. We add it as part of the job.
- Outdated electrical: Sometimes old siding jobs covered exterior outlets or light fixtures that aren't up to code. We coordinate with electricians to bring things current.
- Critter damage: Squirrels, raccoons, and bats love old soffits and fascia. If we find damage, we repair it and seal entry points. Related to our exterior trim repair guide for Metro Detroit.
If your contractor gives you a rock-bottom estimate with no mention of contingencies, be cautious. Either they're inexperienced with older homes, or they're planning to hit you with change orders once the job starts.
ROI Considerations for Historic Properties
New windows and siding won't necessarily increase your home's value dollar-for-dollar. Real estate appraisers look at comparable sales, and if the comps have old windows and siding, yours won't appraise higher just because it's been upgraded.
But here's what new exteriors do give you:
- Lower energy bills: Better insulation and air sealing can cut heating costs by 20-30% in older homes. That's real money every winter.
- Easier sales process: Homes with new exteriors sell faster and with fewer inspection issues. Buyers don't want to inherit deferred maintenance.
- Improved comfort: Less drafts, more consistent temperatures, quieter interiors. Hard to quantify, but it matters.
- Avoided emergency repairs: Replacing siding before it fails is cheaper than replacing siding and fixing water damage after it fails.
If you're planning to stay in the house for 5+ years, the investment usually makes sense. If you're selling next year, you might be better off with a fresh coat of paint and some targeted repairs.
Financing and Planning Timeline
A full window and siding replacement on a 1,500-square-foot Leonard home typically runs $20,000-$40,000, depending on materials and the extent of repairs needed. That's not pocket change for most homeowners.
Financing options include:
- Home equity loans or HELOCs: Usually the lowest interest rates if you have equity in the home.
- Manufacturer financing: Some manufacturers (James Hardie, for example) offer promotional financing through approved contractors.
- Personal loans: Faster approval, but higher interest rates.
- Contractor payment plans: We offer flexible payment schedules—deposit at contract signing, progress payments during the job, final payment at completion.
As for timeline, plan on 4-8 weeks from contract signing to project completion for a typical job. That includes ordering materials (custom windows can take 6-8 weeks), scheduling the crew, and doing the work. We don't rush—older homes require careful attention, and we'd rather take an extra week to do it right than cut corners to hit a deadline.
When to Call a Contractor Who Knows Older Homes
Not every contractor is equipped to handle older home projects. You need someone who's seen it before, knows how to adapt, and isn't going to panic when they find something unexpected.
Red Flags That Indicate Urgent Need
Here's when window and siding replacement moves from "nice to have" to "get this done now":
- Visible rot: Soft wood around windows, doors, or corners. If you can push a screwdriver into the trim, it's time.
- Water stains on interior walls: Especially around windows or near the roofline. Water is getting in somewhere, and it's doing damage.
- Drafts you can feel: Hold your hand near a window on a windy day. If you feel air moving, the seals are shot.
- Peeling paint in sheets: On wood siding, this often means moisture is trapped behind the paint. The siding is failing.
- Condensation between window panes: Means the seal has failed and the insulating gas has leaked out. The window is no longer energy-efficient.
If you're seeing any of these, don't wait. The longer you wait, the more expensive the repairs get. We've seen situations where a $15,000 siding job turned into a $30,000 job because the homeowner waited two more years and let the rot spread into the framing.
Seasonal Timing for Leonard Projects
We work year-round, but some seasons are better than others for exterior projects.
Spring (April-May): Popular time, so schedules fill up fast. Weather can be unpredictable—rain delays are common. But it's a good time to get projects done before summer.
Summer (June-August): Best weather, longest days, most predictable schedules. Also the busiest season, so book early. Heat can be a factor for crews, but it doesn't affect the work quality.
Fall (September-October): Another popular window. Cooler temperatures are easier on the crew, and homeowners want to button up before winter. Schedules are usually full by mid-August.
Winter (November-March): We do winter work, but it's more challenging. Siding can be installed in cold weather (with some material limitations), but window installation in sub-freezing temps is tough on the crew and the homeowner (open windows = heat loss). If you need emergency repairs, we'll get it done. If it can wait until spring, we'll tell you that too.
For related seasonal considerations, check out our guide on exterior house painting in Mount Clemens for spring 2026.
What to Ask Contractors During Estimates
When you're getting estimates for window and siding work on an older Leonard home, here are the questions that separate experienced contractors from the ones who are going to cause you headaches:
- "Have you worked on homes from this era before?" You want someone who's seen the construction methods and materials common to your home's age.
- "What do you do if you find rot or structural issues?" The answer should include a process for documenting, estimating the repair, and getting your approval before proceeding.
- "How do you handle non-standard window openings?" If they say "we'll make it work," that's not an answer. You want specifics about custom sizing, reframing, or retrofit options.
- "What kind of warranty do you offer on labor?" Material warranties are one thing. Labor warranties (what happens if the installation fails) are another. We offer a 5-year labor warranty on all installations.
- "Can you provide references from similar projects?" Ideally in Leonard or nearby communities, on homes of similar age and style.
Also ask to see their contractor's license (required in Michigan for any project over $600) and proof of liability insurance. If they hesitate or make excuses, walk away.
Ready to Get Started?
NEXT Exteriors has been protecting Michigan homes since 1988. We've worked on hundreds of older homes in Leonard, Lake Orion, Rochester Hills, and throughout Oakland County. We know what to expect, how to handle surprises, and how to do the job right the first time. Get a free, no-pressure estimate from a team that shows up on time and does the job right.
Get Your Free QuoteOr call us: (844) 770-6398
Other Services from NEXT Exteriors
Beyond window and siding replacement, we offer a full range of exterior services in Detroit and Southeast Michigan. That includes Detroit roofing services for homes that need new shingles or repairs, seamless gutters in Detroit, MI to manage water runoff, and Southeast Michigan painting professionals for exterior painting projects using Sherwin-Williams products exclusively. We're also Detroit's top-rated insulation contractor, offering attic, wall, and spray foam insulation to improve energy efficiency in older homes.
Frequently Asked Questions
Yes, but only if the old wood siding is in solid condition—no rot, no major warping, and firmly attached to the framing. We typically add a layer of rigid foam insulation over the old siding to create a flat surface and improve energy efficiency. If the wood is rotted or damaged, it must be removed before new siding goes on. Siding over rot just hides the problem and leads to bigger structural issues down the road.
Asbestos-cement siding was common from the 1950s through the early 1980s. It's usually recognizable by its rigid, brittle texture and the fact that it often looks like shingles or clapboards but doesn't flex like wood or vinyl. The only way to know for sure is to have a sample tested by a certified lab. If you're planning to remove siding from a home built during that era, testing is a smart first step. If asbestos is present, you'll need a licensed abatement contractor to handle removal, or you can side over it (which is often the more cost-effective option).
It depends on your budget, the home's architectural style, and your maintenance preferences. Vinyl siding is the most affordable and low-maintenance option—quality brands like CertainTeed and Mastic hold up well in Michigan's freeze-thaw cycles. Fiber cement (James Hardie, LP SmartSide) is more expensive but offers better impact resistance, dimensional stability, and a more authentic wood-like appearance. For historic homes where appearance matters, fiber cement is often the better choice. For ranch homes and more utilitarian styles, high-quality vinyl performs well and saves money.
For a typical 1,500-square-foot home, expect 4-8 weeks from contract signing to project completion. That includes ordering materials (custom windows can take 6-8 weeks), scheduling the crew, and completing the installation. The actual on-site work usually takes 5-10 days for siding and 1-2 days for windows, depending on the number of openings and the complexity of the job. Older homes often take longer because of repairs and custom fitting. We don't rush—quality work takes time, and we'd rather do it right than fast.
Yes, especially in older homes that have minimal insulation and drafty original windows. New energy-efficient windows with low-E glass and proper installation can reduce heat loss by 25-30% compared to old single-pane or failed double-pane units. New siding, especially when combined with added insulation (rigid foam or spray foam), creates a better thermal envelope and reduces air infiltration. Most homeowners see a noticeable drop in heating costs the first winter after the project. The exact savings depend on your home's size, insulation levels, and heating system, but 20-30% reductions are common.
Not necessarily, but there are advantages to doing both together. When we replace siding, we can properly flash and seal the new windows into the wall assembly, which improves water resistance and energy performance. It also saves on labor—the crew is already on-site, scaffolding is up, and we can coordinate the trim and finish details so everything looks cohesive. That said, if your budget only allows for one or the other, prioritize based on condition. If the siding is failing and causing water intrusion, do that first. If the windows are drafty and rotting but the siding is solid, start with windows. We can help you assess which is more urgent.
Fiber cement typically costs 30-50% more than quality vinyl siding for materials and installation. For a 1,500-square-foot home, vinyl siding might run $8,000-$12,000, while fiber cement would be $12,000-$18,000, depending on the product line and extent of trim work. Fiber cement is heavier, requires more labor to install, and often involves more complex trim details. But it's also more durable, more impact-resistant, and holds paint longer. If you're planning to stay in the home long-term and want the look of wood without the maintenance, fiber cement is worth the investment. For more on fiber cement costs, see our guide on James Hardie siding cost in Bloomfield Hills.