

Contractors Siding Installation Michigan: What to Expect
Learn what professional siding installation looks like in Michigan. From prep work to cleanup, here's what homeowners should expect from contractors in Southeast Michigan.

You've picked your siding. You've signed the contract. Now what?
If you're a homeowner in Southeast Michigan getting ready for a siding replacement, you probably have questions about what actually happens when the crew shows up. How long will it take? How messy will it be? What should you do to prepare? And most importantly—how do you know if the work is being done right?
After 35 years installing siding across Macomb, Oakland, and St. Clair counties, we've learned that the best projects start with clear expectations. When homeowners know what's coming, there are fewer surprises, less stress, and better results. That's what this guide is for.
Here's what professional siding installation in Southeast Michigan actually looks like—from the day before the crew arrives to the final cleanup—and what separates a rushed job from one that'll protect your home for decades.
Before the Crew Arrives: What Should Happen First
A good siding contractor doesn't just show up and start ripping off your old siding. There's prep work—and most of it should happen before anyone touches your house.
Pre-Installation Communication
You should get a call or email a few days before the start date confirming the schedule. The project manager should walk you through:
- Start date and estimated timeline (weather permitting—this is Michigan)
- Crew arrival time (usually between 7:30 and 8:30 a.m.)
- Where materials will be staged (driveway, side yard, etc.)
- Dumpster placement (if one's needed for tear-off)
- What you need to do (move outdoor furniture, clear landscaping near the house, relocate grills or planters)
At NEXT Exteriors, we also ask homeowners to clear a path around the entire perimeter of the house. Crews need access to every wall, and tripping hazards slow things down.
Permits and Inspections
In most Michigan municipalities, siding replacement requires a building permit. Your contractor should handle this—not you. If they're asking you to pull the permit yourself, that's a red flag.
The permit ensures the work meets local building codes and allows for inspections (usually after tear-off and again after installation). This protects you. Don't skip it.
Material Delivery
Siding materials are typically delivered 1-3 days before the job starts. Expect pallets of siding panels, boxes of trim, bundles of house wrap, and fasteners. If you're getting fiber cement like James Hardie or engineered wood like LP SmartSide, those materials are heavy—delivery trucks need clear access to your driveway.
Materials should be covered and protected from moisture. Even vinyl siding can warp if it sits in direct sun for days before installation.
Michigan Weather Note: If rain or snow is in the forecast, good contractors will delay the start date rather than risk exposing your home's sheathing to moisture during tear-off. A day or two of delay is better than water damage behind your new siding.
Day One: Site Setup and Tear-Off
The first day is the loudest and messiest. This is when the old siding comes off.
Site Protection
Before any siding gets removed, the crew should protect your property:
- Tarps or plywood over landscaping near the house
- Window protection (plastic sheeting or boards if needed)
- Dumpster or debris containment set up
- Staging area for tools and materials
If you've got flower beds, shrubs, or AC units right against the house, speak up. Good contractors will work around them, but they need to know what matters to you.

Removing the Old Siding
Tear-off is straightforward but labor-intensive. Crews use pry bars, hammers, and sometimes power tools to strip the old siding off the house. Vinyl comes off in big sections. Aluminum gets cut and peeled. Wood siding—especially old cedar or hardboard—can be brittle and comes off in pieces.
What happens next is critical: sheathing inspection.
Once the old siding is off, the crew should walk the entire house looking for:
- Rot or water damage in the sheathing (especially around windows, doors, and corners)
- Missing or damaged house wrap
- Structural issues (sagging walls, loose studs, etc.)
- Insect damage (carpenter ants, termites—more common than you'd think in older Michigan homes)
If they find problems, they should stop and show you. This is when change orders happen—and they're legitimate. You can't install new siding over rotten sheathing. It's not about upselling; it's about doing the job right.
At NEXT Exteriors, we take photos of any damage we find and walk homeowners through the repair plan before we move forward. No surprises.
End-of-Day Cleanup
By the end of day one, the old siding should be in the dumpster, the sheathing should be inspected (and repaired if needed), and the house should be weather-tight. If the forecast looks clear, some contractors will leave the house open overnight. If rain's coming, they'll tarp the walls or install temporary weather protection.
Your yard should be clear of debris. Nails, metal scraps, and siding chunks shouldn't be left lying around—especially if you have kids or pets.
The Installation Process: Step by Step
Once the old siding is off and any repairs are done, the real work begins. Here's how professional contractors handle siding installation in Michigan.
Step 1: Install House Wrap or Weather Barrier
Before a single piece of siding goes up, the house gets wrapped. This is your home's first line of defense against moisture.
House wrap (like Tyvek or Typar) is a breathable membrane that blocks water from the outside but allows moisture vapor to escape from the inside. It's critical in Michigan, where freeze-thaw cycles can drive water into wall cavities.
The crew should:
- Start at the bottom and work up, overlapping seams by at least 6 inches
- Tape all seams with compatible tape (not just any tape—it has to bond to the house wrap material)
- Flash all penetrations (windows, doors, vents, light fixtures) with peel-and-stick flashing or integrated flashing tape
- Ensure the wrap is tight and wrinkle-free (wrinkles can trap water)
If you see loose, flapping house wrap or gaps around windows, speak up. This is where water intrusion starts.
Step 2: Install Starter Strips and Corner Posts
Siding doesn't just slap onto the wall. It needs a foundation.
The crew installs a starter strip at the bottom of each wall. This is a horizontal piece that the first row of siding locks into. It has to be level—if the starter strip is crooked, every row above it will be crooked too.
Corner posts go up next (for vinyl and some fiber cement systems). These are the vertical trim pieces at outside and inside corners. They're installed plumb (perfectly vertical) and fastened to allow for expansion and contraction—critical in Michigan's temperature swings.
Step 3: Install Siding Panels
Now the siding goes up, row by row, starting from the bottom.
Here's what should happen:
- Each panel locks into the one below it (for vinyl and engineered wood systems)
- Fasteners are placed in the center of the nail slots, not at the ends—this allows the siding to expand and contract without buckling
- Nails or screws are driven straight, not overdriven—the siding should be able to move slightly side-to-side
- Panels are overlapped at seams according to manufacturer specs (usually 1-1.5 inches)
- Expansion gaps are left at corners and trim (1/4 inch for vinyl, less for fiber cement)
For fiber cement siding like James Hardie, the process is different. Panels are face-nailed (nails go through the face of the board, not hidden), and each nail is caulked. Joints are caulked and painted. It's slower, but the result is a tighter, more weather-resistant wall.

Step 4: Trim and Detail Work
Siding installation isn't just about the panels. The details matter:
- Window and door trim (J-channel or picture-frame trim) seals the edges around openings
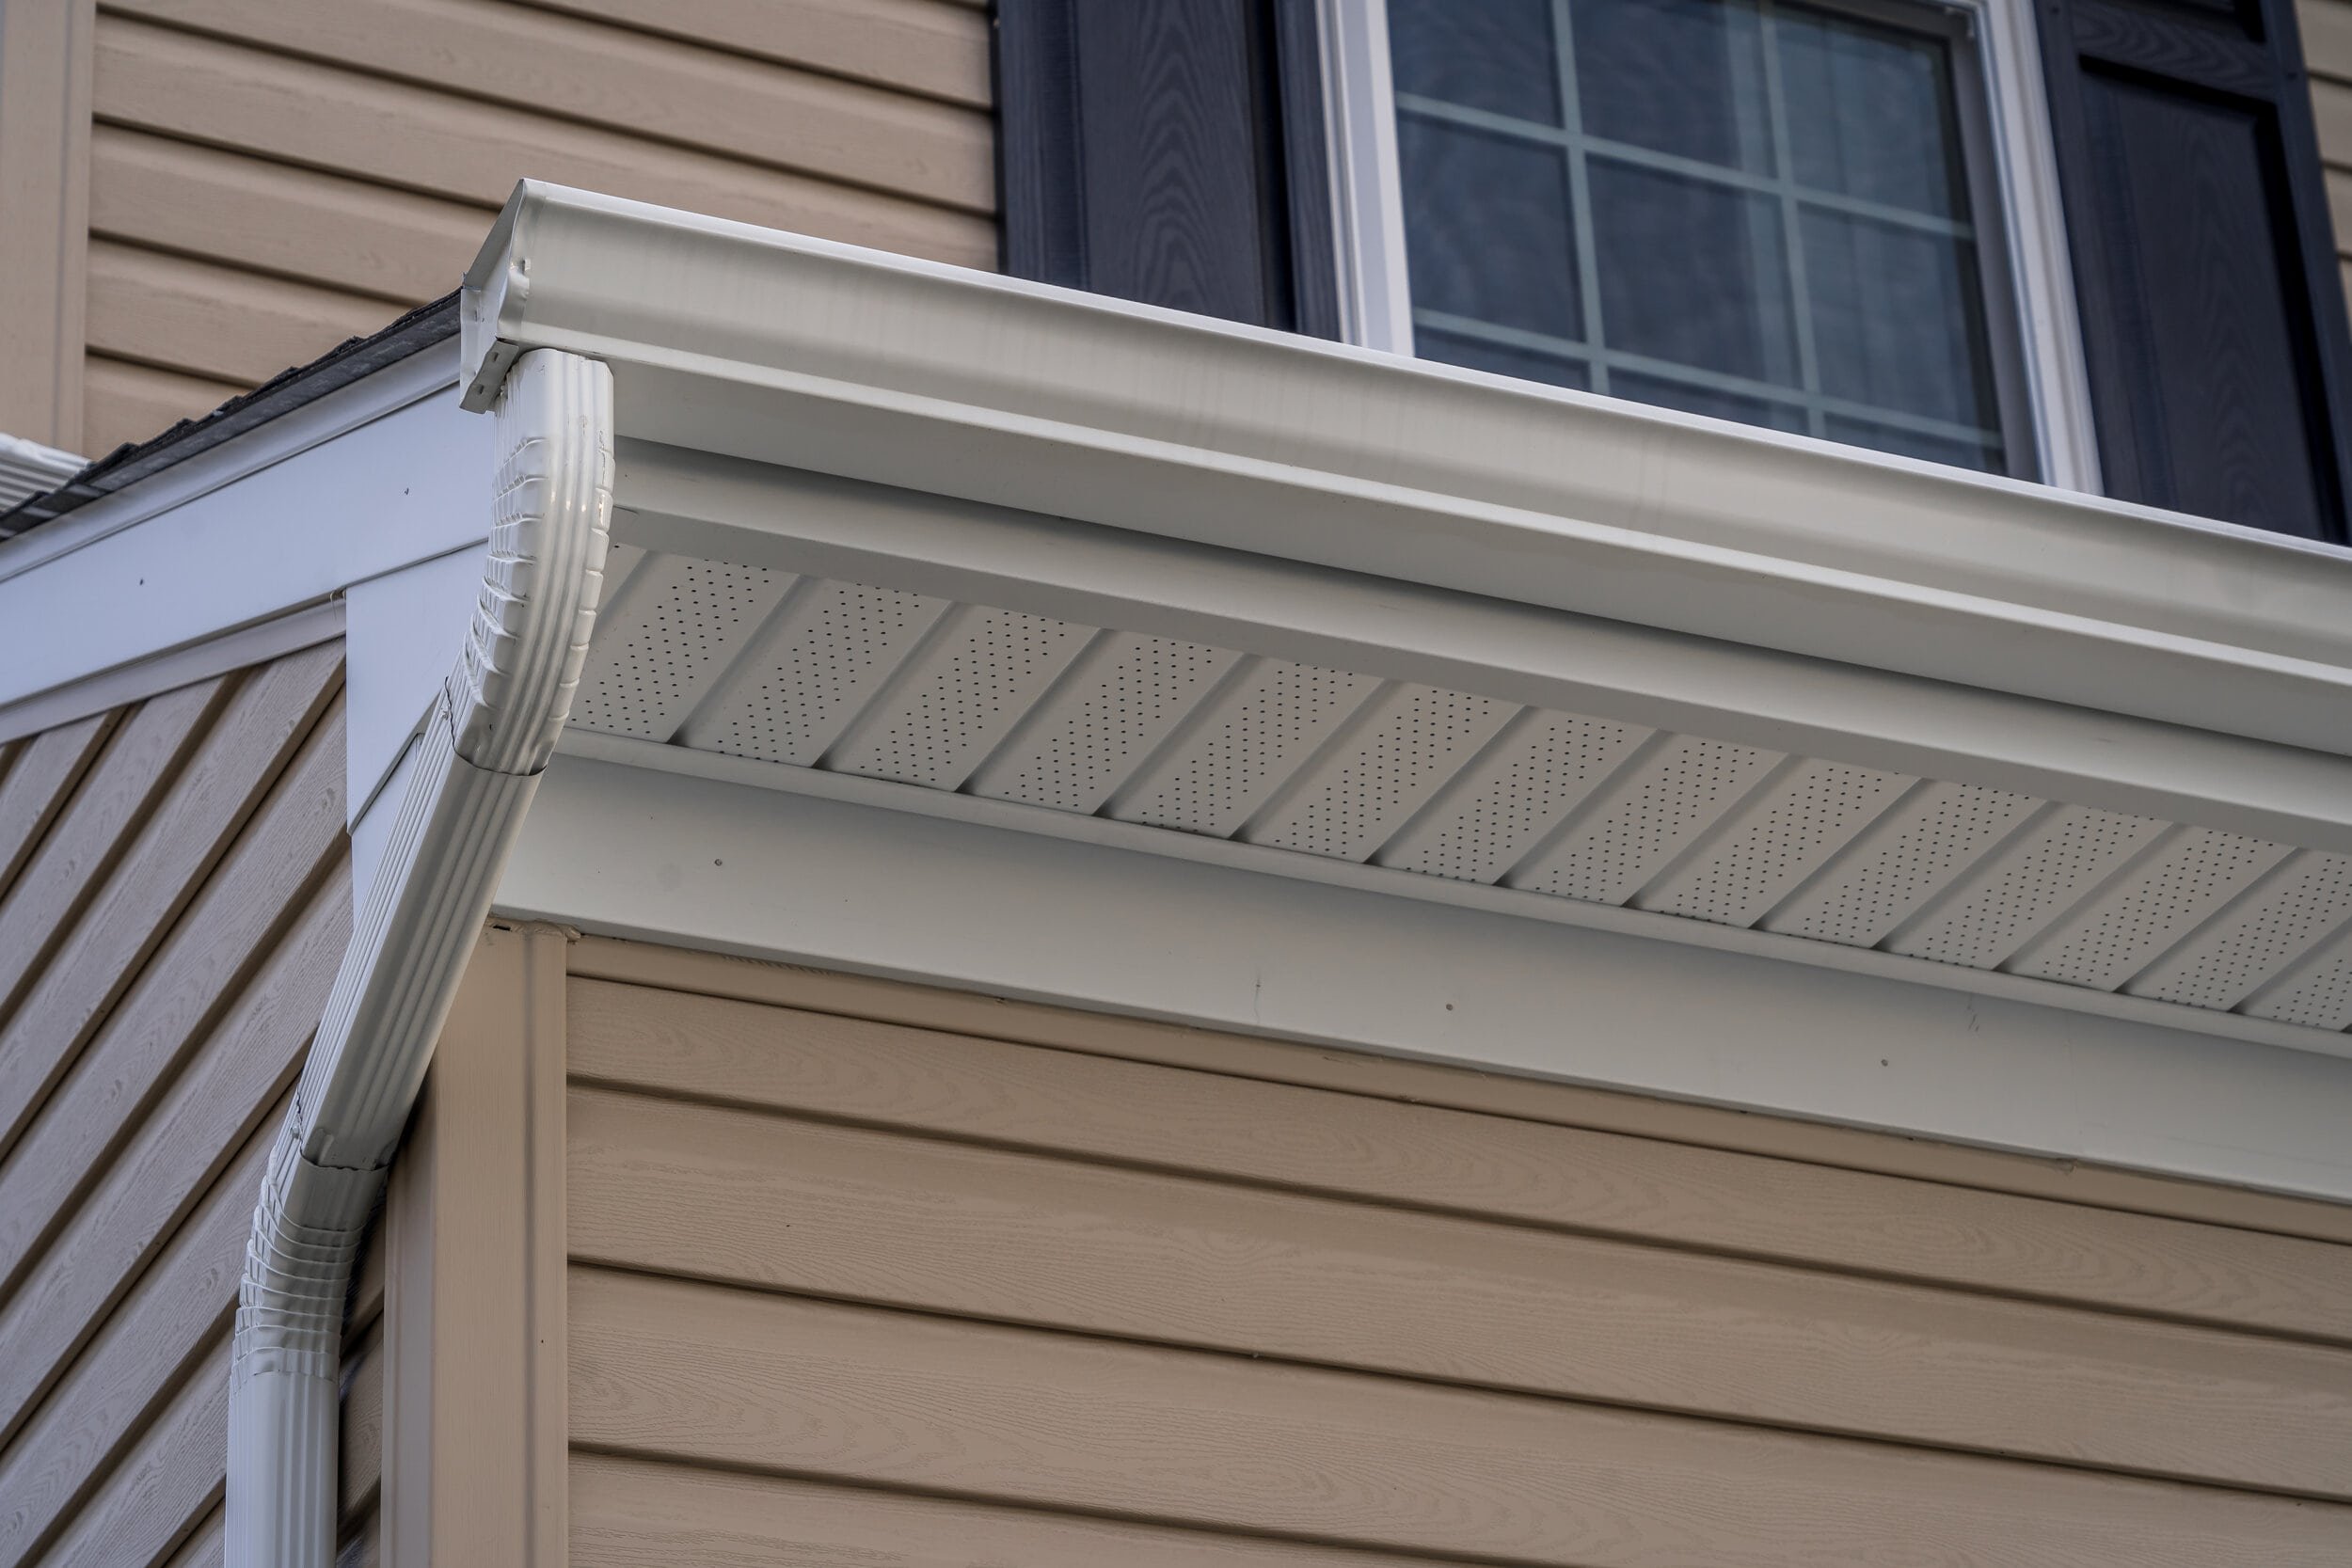
- Soffit and fascia connections need to be clean and sealed
- Vents and fixtures are cut in and flashed properly
- Gable ends are trimmed and sealed at the roofline
This is where craftsmanship shows. Sloppy trim work looks bad and leaks. If you're getting fiber cement, the trim is usually painted on-site after installation. For vinyl, trim pieces snap into place.
If you're also upgrading your gutters in Southeast Michigan, now's the time to coordinate that work. New siding and new gutters should integrate cleanly—no gaps, no water running behind the fascia.
Step 5: Final Inspection and Caulking
Once all the siding is up, the crew does a final walk-through:
- Check all fasteners (nothing loose or overdriven)
- Caulk seams and joints where needed (manufacturer-specific—some systems require it, some don't)
- Install any final trim pieces or accessories
- Clean up debris and do a magnet sweep for nails
You should be invited to do a walkthrough with the project manager. This is your chance to ask questions, point out anything that looks off, and get explanations for how things were done.
What Good Contractors Do Differently
Not all siding jobs are created equal. Here's what separates professional exterior contractors in Detroit from the guys who rush through and move on.
They Follow Manufacturer Installation Specs
Every siding product has an installation manual. James Hardie has one. LP SmartSide has one. CertainTeed has one. These manuals specify fastener types, fastener spacing, flashing requirements, and clearances.
Good contractors follow these specs. Not because they're rule-followers, but because your warranty depends on it. If the siding fails and the manufacturer inspects the job, they'll void the warranty if the installation didn't meet their standards.
Ask your contractor: "Are you following [manufacturer name] installation guidelines?" If they hesitate or say "we do it our way," walk away.
They Respect Michigan's Climate
Michigan isn't North Carolina. We get lake-effect snow in Macomb County. We get freeze-thaw cycles that split poorly installed siding. We get summer storms that test every seam and flashing detail.
Good contractors know this. They:
- Use wider expansion gaps for vinyl siding (Michigan's temperature swings are extreme)
- Flash every penetration like it's going to see a blizzard—because it will
- Don't install siding in freezing temperatures (vinyl gets brittle below 40°F; fiber cement shouldn't be installed if there's frost on the sheathing)
- Pay extra attention to north-facing walls, which stay wet longer and are more prone to mold and algae
If your contractor is pushing to install in January because "we need to keep the crew busy," find someone else. Siding installed in bad conditions fails early.
They Communicate Throughout the Job
You shouldn't have to hunt down your contractor to find out what's happening. Good crews:
- Show up when they say they will
- Let you know if there are delays (weather, material shortages, unexpected repairs)
- Explain any changes or issues as they come up
- Answer your questions without making you feel like you're bothering them
At NEXT Exteriors, we've been doing this since 1988. We know homeowners have lives—jobs, kids, routines. We work around you, not the other way around.
They Clean Up Every Day
Siding jobs are messy. There's debris, there are scraps, there are nails. But your yard shouldn't look like a construction zone when the crew leaves for the day.
Good contractors:
- Sweep or rake the work area daily
- Run a magnetic roller to pick up nails and metal scraps
- Keep materials organized and out of the way
- Haul away trash regularly (not just at the end of the job)
If you're finding nails in your driveway a week after the job is done, the crew didn't finish the job properly.
Timeline and Weather Considerations in Michigan
How long does siding installation take? It depends on the size of your house, the type of siding, and Michigan's weather.
Typical Timeline
For an average single-family home (1,500-2,500 sq ft) in Southeast Michigan:
- Vinyl siding: 3-5 days
- Fiber cement (James Hardie): 5-7 days
- Engineered wood (LP SmartSide): 4-6 days
Larger homes, complex architecture (lots of corners, gables, or trim details), or homes that need significant sheathing repair will take longer.
Weather Delays Are Normal
Michigan weather is unpredictable. Spring and fall are ideal for siding installation—temps are moderate, and rain is manageable. Summer works too, though extreme heat can make vinyl siding harder to handle (it expands in the sun).
Winter installations are possible but tricky. Vinyl becomes brittle below 40°F. Fiber cement can be installed in cold weather, but caulk and paint don't cure properly in freezing temps.
If it rains mid-job, good contractors will tarp the house and wait. If it's a light drizzle, they might keep working (house wrap protects the sheathing). If it's a downpour, they stop. Pushing through bad weather to "stay on schedule" leads to mistakes.
At NEXT Exteriors, we'd rather delay a day than compromise the quality of the installation. We've seen what happens when contractors rush through rain or cold—callbacks, warranty claims, and unhappy homeowners.

Cost Breakdown: What You're Actually Paying For
Siding installation isn't cheap. If you're getting quotes in Southeast Michigan, you're probably seeing numbers between $8,000 and $25,000+ depending on the size of your home and the material you choose.
Here's what you're paying for:
Materials (40-50% of the Total Cost)
- Siding panels: Vinyl is the most affordable ($3-7 per sq ft installed). Fiber cement like James Hardie runs $8-12 per sq ft. Engineered wood like LP SmartSide is in the middle at $6-10 per sq ft.
- Trim and accessories: Corner posts, J-channel, soffit, fascia, window trim—these add up quickly.
- House wrap and flashing: Quality weather barriers aren't cheap, but they're essential.
- Fasteners and caulk: Small costs, but necessary.
Labor (40-50% of the Total Cost)
Good siding crews aren't cheap—and they shouldn't be. You're paying for:
- Skilled installers who know how to flash, seal, and fasten siding correctly
- Experience working with Michigan's climate and building codes
- Efficiency (a good crew works fast but doesn't cut corners)
- Insurance and licensing (legitimate contractors carry liability insurance and workers' comp—that's built into the price)
Overhead and Warranty (10-20% of the Total Cost)
- Permits and inspections: Required by most Michigan municipalities.
- Dumpster rental: Tear-off creates a lot of waste.
- Project management: Someone has to coordinate the crew, order materials, and handle logistics.
- Warranty and follow-up: Good contractors stand behind their work. If something goes wrong in year two, they come back and fix it. That peace of mind is part of what you're paying for.
If you're comparing quotes and one is significantly lower than the others, ask why. It's usually because they're cutting corners—skipping house wrap, using cheaper fasteners, or hiring inexperienced crews.
For more details on what siding projects cost in Michigan, check out our guide on siding services in Metro Detroit.
Other Services That Often Pair with Siding
Many homeowners tackle multiple exterior projects at once. If you're already getting siding, it's often a good time to upgrade:
- Windows in Detroit: New siding exposes window trim and flashing. If your windows are old, replacing them now makes sense.
- Insulation in Detroit: Once the siding is off, you can add or upgrade wall insulation. This is your chance to improve energy efficiency.
- Roofing services in Detroit: If your roof is nearing the end of its life, doing both projects together saves on staging and labor costs.
- Exterior painting in Southeast Michigan: If you're keeping your existing siding but it needs a refresh, professional painting with Sherwin-Williams products can extend its life by years.
Ready to Get Started?
NEXT Exteriors has been protecting Michigan homes since 1988. Get a free, no-pressure estimate from a team that shows up on time and does the job right.
Get Your Free QuoteOr call us: (844) 770-6398
Frequently Asked Questions About Siding Installation in Michigan
For a standard 1,500-2,500 sq ft home in Southeast Michigan, vinyl siding takes 3-5 days, fiber cement (James Hardie) takes 5-7 days, and engineered wood (LP SmartSide) takes 4-6 days. Larger homes, complex architecture, or homes needing sheathing repairs will take longer. Weather delays are common in Michigan—expect an extra day or two if rain or extreme temperatures interrupt the schedule.
No, you don't need to be home every day, but it's helpful to be available for the initial walkthrough and the final inspection. Most of the work happens outside, so crews don't need access to your home's interior. If you have pets, you'll want to keep them inside or away from the work area—siding installation is loud and involves a lot of movement around the house.
If the crew finds rotten sheathing, water damage, or structural issues during tear-off, they should stop and show you the problem. This usually results in a change order to repair the damage before installing new siding. It's not a scam—you can't install siding over compromised sheathing. Good contractors will document the damage with photos and explain the repair process and cost before moving forward.
It depends on the material and the temperature. Vinyl siding becomes brittle below 40°F and can crack during installation. Fiber cement can be installed in colder weather, but caulk and paint don't cure properly in freezing temps. Most contractors in Michigan avoid siding installations from December through February unless there's a long stretch of mild weather. Spring and fall are the ideal seasons for siding work in Southeast Michigan.
For a typical home in Macomb, Oakland, or St. Clair County, expect to pay $8,000-$15,000 for vinyl siding, $12,000-$25,000+ for fiber cement (James Hardie), and $10,000-$20,000 for engineered wood (LP SmartSide). Costs vary based on home size, siding material, trim complexity, and whether sheathing repairs are needed. Always get at least three quotes from licensed Michigan contractors and compare what's included—not just the bottom-line price.
Yes, most municipalities in Southeast Michigan require a building permit for siding replacement. Your contractor should handle the permit application—not you. The permit ensures the work meets local building codes and allows for inspections. If a contractor tells you "we don't need a permit" or asks you to pull it yourself, that's a red flag. Legitimate contractors pull permits as part of the job.
Look for these signs of quality installation: panels are level and evenly spaced, fasteners are centered in nail slots (not overdriven), corner posts and trim are plumb and sealed, expansion gaps are consistent (about 1/4 inch for vinyl), and all seams and penetrations are properly flashed. Ask your contractor to walk you through the installation process and show you how they followed manufacturer specs. Good contractors are happy to explain their work.
Contractors Siding Installation Michigan: What to Expect
Learn what professional siding installation looks like in Michigan. From prep work to final inspection, here's what separates quality contractors from rushed jobs.
You've picked your siding material. You've gotten quotes. Now you're wondering what actually happens when the crew shows up. If you're hiring contractors for siding installation in Michigan, you deserve to know what professional work looks like — not just the finished product, but the process that gets you there.
After 35 years installing siding across Southeast Michigan, we've learned that homeowners who understand the process are happier with the outcome. They know what to expect. They recognize quality work when they see it. And they can spot shortcuts before they become problems.
This isn't about making you an expert. It's about showing you what separates a crew that's been doing this since 1988 from one that's rushing through jobs to hit a quota. Let's walk through a professional siding installation from the moment the truck pulls up to the final walkthrough.
Before the First Nail: Site Preparation That Matters
The first hour of a siding job tells you everything you need to know about the crew. Professional contractors don't just show up and start tearing off siding. They protect your property first.
Here's what should happen before any demolition work begins:
Landscaping Protection: Tarps go down around the foundation. Shrubs near the house get covered or temporarily tied back. Flower beds get plywood sheets laid over them to distribute foot traffic. We've seen too many jobs where crews trampled hostas and crushed perennials because they didn't take ten minutes to lay down protection.
Debris Containment: A dumpster or dump trailer gets positioned close to the work area. Tarps get spread beneath the work zone to catch falling debris. On windy Michigan days, this matters — old siding pieces can travel surprisingly far across a yard.
Access Planning: The crew walks the entire house perimeter, noting obstacles. AC units, propane tanks, deck railings, downspouts — anything that might interfere with ladder placement or material staging gets identified and worked around.
Michigan-Specific Consideration: If your home has brick on the first floor and siding on the second (common in 1960s Colonials across Macomb County), the crew needs to plan ladder placement carefully. Brick doesn't forgive careless ladder placement the way vinyl siding does.
Material delivery should happen either the day before or early morning of day one. Siding panels, trim pieces, house wrap, fasteners — everything gets staged in a location that's accessible but out of the way. Quality exterior services in Detroit and surrounding areas include organized staging as part of the process, not an afterthought.

Removing Old Siding Without Damaging Your Home
Siding removal is where you learn whether your contractor understands the difference between "fast" and "careful." Both matter, but careful comes first.
The Removal Process: Old siding comes off in sections, working from top to bottom. Vinyl siding unzips from the pieces below it — there's a technique to releasing the interlock without bending or cracking adjacent pieces. Aluminum siding gets pried off carefully to avoid denting the sheathing underneath. Wood siding requires the most care because it's often nailed directly into studs, and aggressive removal can pull chunks of sheathing with it.
As each section comes off, the crew should be inspecting what's underneath. This is when you discover problems:
- Rot around windows or doors — common where flashing was never installed or failed years ago
- Water damage on north-facing walls — Michigan's freeze-thaw cycles are hardest on walls that never get direct sun
- Insect damage — carpenter ants love the gap between old siding and sheathing
- Missing or damaged sheathing — sometimes the only thing holding up old siding is habit
A professional crew documents these issues with photos and discusses them with you before proceeding. You shouldn't discover structural repairs buried in a final invoice. If sheathing needs replacement or wall studs need sistering, that conversation happens now, not after the new siding is half-installed.
What We've Learned: On homes built before 1980 in Sterling Heights and Warren, we find sheathing issues about 40% of the time. It's not always catastrophic — sometimes it's just a few sheets near a bathroom vent that's been leaking for years. But addressing it during the siding replacement is ten times easier than coming back to it later.
Old siding, nails, and trim pieces should be going into the dumpster throughout the day, not piling up around your foundation. End of each day, the site should be clean enough that you're not worried about stepping on a nail when you let the dog out.
The Weather Barrier: Michigan's First Line of Defense
Once old siding is off and any sheathing repairs are complete, the house wrap goes on. This is the most important part of the job that nobody sees once it's finished.
House wrap (Tyvek, Typar, or similar) creates a continuous weather barrier. It sheds water that gets behind the siding while allowing water vapor from inside the house to escape. In Michigan, where we get driving rain in October and freeze-thaw cycles all winter, this layer is what keeps your wall cavities dry.
Proper Installation Matters:
- Overlap: Horizontal seams overlap like roof shingles — upper sheet over lower sheet, minimum 6 inches. Vertical seams overlap minimum 6 inches and get taped.
- Tape: All seams get taped with manufacturer-approved tape, not duct tape or painter's tape. Corners get taped. Tears get patched and taped.
- Window and Door Integration: House wrap gets cut and folded into window and door openings, then taped or integrated with flashing tape to create a continuous barrier. This is where most water intrusion happens if the work is rushed.
- Penetrations: Every electrical box, dryer vent, outdoor faucet, and light fixture gets sealed where it penetrates the wrap.
If your contractor is skipping house wrap entirely ("the old siding didn't have it, you don't need it"), find a different contractor. Modern building science is clear: the weather barrier is non-negotiable. We include it in every house siding installation in Detroit and throughout Southeast Michigan, regardless of what was there before.
The Installation Process: What Quality Looks Like
With the weather barrier in place, the actual siding installation begins. This is where technique, experience, and attention to detail separate professional siding contractors in Southeast Michigan from crews that are just trying to finish fast.
Step 1: Starter Strips and Trim
Installation starts at the bottom. A level starter strip gets fastened along the foundation line — this is what the first row of siding locks into. If the starter strip isn't level, every row above it will be off. Professional crews check level every few feet and shim as needed to compensate for foundation irregularities.
J-channel goes in around windows and doors. Corner posts get installed. These trim pieces create the framework that the siding panels slide into. Corners need to be plumb (perfectly vertical), and J-channel needs to be positioned to allow for siding expansion and contraction.
Step 2: Hanging the Siding
Siding goes on from bottom to top, one row at a time. Each panel locks into the panel below it and gets fastened through the nail hem at the top. Here's what quality installation looks like:
Nail Placement: Nails go in the center of the nail slots, not at the ends. This allows the siding to expand and contract with temperature changes. In Michigan, vinyl siding can expand up to half an inch over a 12-foot panel on a hot summer day. If it's nailed tight at the ends, it buckles. If it's nailed in the center with proper clearance, it moves freely.
Nail Depth: Nails get driven until the head touches the siding, then backed off about 1/32 inch. You should be able to slide the siding panel side-to-side slightly. Over-driven nails create dimples and restrict movement. Under-driven nails let panels rattle in the wind.
Spacing: Nails are spaced every 16 inches on center along the nail hem. Closer spacing doesn't make it stronger — it just restricts movement and increases buckling risk.
Panel Overlap: Where panels meet end-to-end, they overlap about an inch. This overlap faces away from the main viewing angle and gets staggered from row to row so you don't see a vertical seam running up the wall.
Cutting: Panels get cut to fit around windows, doors, outlets, and fixtures. Quality contractors use a fine-tooth blade or snips, not a circular saw with a standard blade (which melts the cut edge and looks terrible). Every cut edge that shows gets tucked into J-channel or trim.
Step 3: Level Checks and Adjustments
Every few rows, the crew should be checking level. Siding that's off by an eighth inch at row three will be off by an inch at row twenty. Small adjustments happen constantly — a shim behind a panel here, a slight adjustment to the next panel there. This is the difference between siding that looks professionally installed and siding that looks "off" even though you can't quite explain why.
Real Talk: We've been called to fix installations where the siding was three inches out of level by the time it reached the soffit. The original contractor just kept going, figuring the homeowner wouldn't notice. They noticed. Fixing it meant removing and reinstalling the top third of the house. Don't hire the cheapest contractor.
Material-Specific Installation: Vinyl, Fiber Cement, and Engineered Wood
The general process is similar across materials, but each type of siding has specific installation requirements that matter in Michigan's climate.
Vinyl Siding Installation
Vinyl is the most forgiving material for thermal expansion. Panels interlock and hang from nails, allowing free movement. The critical factors are proper nail placement (center of slots, not over-driven) and adequate expansion gaps at trim and corners. In Michigan's temperature swings — from below zero in January to 90 degrees in July — vinyl needs room to move.
Color matters for expansion. Darker colors absorb more heat and expand more. A dark brown or navy panel needs wider expansion gaps than a light gray or cream panel. Experienced contractors know this and adjust accordingly.
Fiber Cement Siding Installation
James Hardie and other fiber cement products are rigid and heavy. They don't expand and contract like vinyl, but they're brittle and can crack if installed improperly. Key differences:
- Cutting: Fiber cement requires a specialized blade or shears. Cutting it with a standard circular saw creates silica dust (a respiratory hazard) and rough edges. Professional crews use dust-collection systems or wet-cutting methods.
- Fastening: Nails must be driven flush, not over-driven. Over-driving can crack the face of the panel. Fiber cement gets face-nailed in specific locations per manufacturer specs, not through a nail hem like vinyl.
- Caulking and Painting: All cut edges get primed and painted. Joints between panels get caulked with paintable caulk. This isn't optional — exposed fiber cement edges absorb moisture and deteriorate.
- Weight: Fiber cement is significantly heavier than vinyl. It requires solid nailing into studs or proper sheathing attachment. You can't just nail it to old board sheathing and hope for the best.
Fiber cement installation takes longer and costs more than vinyl, but it's the most durable option for Michigan homes. If you're considering fiber cement siding in Metro Detroit, make sure your contractor is certified by the manufacturer and has experience with the product.
Engineered Wood Siding Installation
LP SmartSide and similar products combine wood aesthetics with engineered durability. Installation is similar to fiber cement in that it requires face-nailing and proper edge treatment, but it's lighter and easier to cut. The critical factor is moisture management — all cut edges get sealed with manufacturer-approved primer, and joints get caulked. Michigan's humidity and freeze-thaw cycles will find any unsealed edge and start the deterioration process.
Engineered wood expands and contracts less than solid wood but more than fiber cement. Fastener placement follows manufacturer specs, typically 16 inches on center into studs, with nails placed a specific distance from edges to prevent splitting.
Timeline and Cost Reality for Michigan Homeowners
Let's talk numbers and schedules, because this is where expectations often don't match reality.
How Long Does Siding Installation Take?
For a typical 2,000-square-foot two-story home in Rochester Hills or Troy:
- Vinyl siding: 3-5 days for removal, prep, and installation
- Fiber cement: 5-7 days (more cutting, more precision, more caulking and painting)
- Engineered wood: 4-6 days (falls between vinyl and fiber cement in complexity)
These timelines assume decent weather. Michigan's unpredictable spring and fall weather can add delays. We don't install siding in rain or when temperatures are below 40 degrees (vinyl becomes brittle and cracks; caulk and paint don't cure properly).
Larger homes, complex architecture (lots of gables, dormers, bay windows), or significant sheathing repairs add time. A 3,500-square-foot Colonial with brick on the first floor and siding on the second might take 7-10 days even for vinyl.
What Does Professional Siding Installation Cost?
In Southeast Michigan, as of 2026, here's what you should budget:
- Vinyl siding: $8,000-$15,000 for a typical home, depending on quality level and trim complexity
- Fiber cement: $18,000-$30,000 for the same home (material costs more, installation takes longer)
- Engineered wood: $12,000-$22,000 (between vinyl and fiber cement in cost)
These ranges include removal of old siding, house wrap installation, trim, and soffit/fascia work if needed. They don't include major structural repairs, window replacements, or insulation upgrades — those get quoted separately if discovered during removal.
If a quote comes in significantly below these ranges, ask questions. Corners are being cut somewhere — either in material quality, installation technique, or labor experience. We've been in business since 1988 and maintain an A+ BBB rating because we don't chase the bottom of the market. Quality work costs what it costs.
Cost Factors in Michigan: Homes in historic districts (parts of Grosse Pointe Farms, downtown Royal Oak) may have additional requirements that increase costs. Two-story homes cost more per square foot than ranches because of the ladder work and safety equipment required. Complex trim details add labor hours. These aren't upsells — they're realities of the work.
How to Recognize Quality Work While It's Happening
You don't need to hover over the crew, but you should know what to look for during the project. Here are the green flags and red flags:
Green Flags (Signs of Quality Contractors)
- The site is clean at the end of each day. Tools put away, debris in the dumpster, tarps folded or secured.
- The crew arrives when they say they will. Not necessarily at 7 AM sharp every day, but within the timeframe they committed to.
- They ask questions before making decisions. "Do you want the outdoor outlet moved up two inches so it's centered in the new siding?" "We found rot around this window — want to take a look before we repair it?"
- Nail patterns are consistent. Walk along the wall and look at the nail spacing — it should be regular, not random.
- Panels are level. Stand back and sight along the rows. They should be parallel to the ground and to each other.
- Trim is tight. J-channel around windows should be mitered at corners and fit snugly. Gaps and sloppy cuts are signs of rushed work.
- They protect your property. Ladders have standoffs to protect gutters and siding. Tarps stay in place. They're careful around landscaping.
Red Flags (Warning Signs)
- Over-driven nails. If you see dimples in the siding face or nails driven tight against the panel, that's wrong. It will cause buckling.
- Panels that won't slide. If you can't move a siding panel side-to-side slightly, it's nailed too tight.
- Visible seams that aren't staggered. Vertical seams should be staggered from row to row, not lined up.
- Cut edges that aren't tucked into trim. Every cut edge should disappear into J-channel or corner trim, not hang exposed.
- Sloppy caulking. Caulk should be smooth and consistent, not globbed on or smeared across the siding face.
- Missing or torn house wrap. If you see sheathing exposed or house wrap flapping in the breeze, that's a problem.
- The crew disappears for days. Professional contractors finish one job before starting another. If your crew vanishes mid-project to start someone else's job, that's a red flag about their business practices.
Trust your instincts. If something looks wrong, it probably is. Take photos and ask questions. A quality contractor will explain what they're doing and why. A contractor who gets defensive when you ask questions is not someone you want finishing your project.
The Final Walkthrough
Before the crew leaves for the last time, you should do a complete walkthrough together. This is when you:
- Check that all trim is secure and properly caulked
- Verify that outlets, lights, and vents are properly cut and sealed
- Confirm that gutters were reinstalled (if they were removed)
- Make sure the site is clean — no debris, no leftover materials
- Get warranty information in writing
- Receive care and maintenance instructions
Professional contractors want you to be happy with the work. We don't consider a job complete until you're satisfied. That's been our approach since 1988, and it's why we maintain a 5.0-star average rating across 87+ reviews.
Related Services: Siding replacement often reveals the need for other exterior work. If your gutters in Detroit are sagging or your windows are drafty, addressing everything at once saves time and money. We also frequently recommend insulation upgrades when walls are open — it's the most cost-effective time to improve your home's energy efficiency. And if your roof is nearing the end of its life, coordinating both projects prevents the need for future siding removal to access the roof edge. Our exterior painting services can also refresh trim and doors to complement your new siding.
Ready to Get Started?
NEXT Exteriors has been protecting Michigan homes since 1988. Get a free, no-pressure estimate from a team that shows up on time and does the job right. We're licensed, insured, and maintain an A+ BBB rating because we treat your home like our own.
Get Your Free QuoteOr call us: (844) 770-6398
Frequently Asked Questions About Siding Installation in Michigan
Contractors Siding Installation Michigan: What to Expect
What actually happens during a professional siding installation in Michigan? A licensed contractor breaks down the process, timeline, and what separates good work from bad.
You've picked out the color. You've signed the contract. The crew is scheduled to arrive next Tuesday. But what actually happens during a professional siding installation in Michigan?
Most homeowners see the finished product — clean lines, fresh color, tight seams. What they don't see is the ten-step process happening behind those panels, the flashing details that prevent ice dam leaks, or the expansion gaps that keep vinyl from buckling during a July heat wave in Sterling Heights.
After 35 years installing house siding in Detroit and across Southeast Michigan, we've learned that the difference between siding that lasts 30 years and siding that fails in five comes down to installation details most homeowners never notice — until something goes wrong.
Here's what actually happens when professional contractors handle a siding installation in Michigan, what separates good work from shortcuts, and what you should be watching for when the crew shows up at your house.
The Pre-Installation Process
Before a single panel goes up, there's work happening that most homeowners never see.
Initial Assessment and Measurements
A proper siding estimate starts with accurate measurements. We're not just measuring wall area — we're accounting for waste factor (typically 10-15% depending on the home's complexity), noting every window, door, soffit, and corner that requires trim.
During this phase, we're also looking at your home's current condition. Is the sheathing solid? Are there signs of water damage around windows? Is the house wrap intact, or are we looking at a full tear-off and re-wrap? These answers determine whether you're getting a straightforward siding replacement or a more involved project that addresses underlying issues.
Material Selection
Michigan homeowners typically choose between three siding materials, each with different installation requirements:
Vinyl siding is the most common choice in Southeast Michigan. It's affordable, low-maintenance, and when installed correctly with proper expansion gaps, it handles our freeze-thaw cycles well. We work with CertainTeed and GAF vinyl products that carry wind ratings appropriate for Michigan weather — typically 110-130 mph.
Fiber cement siding (James Hardie is the industry standard) requires different installation techniques. It's heavier, doesn't expand and contract like vinyl, and needs to be painted or comes pre-finished. The installation is more labor-intensive, which is why fiber cement siding in Metro Detroit costs more upfront — but it also outlasts vinyl in harsh conditions.
Engineered wood siding like LP SmartSide offers the look of real wood with better moisture resistance. It requires careful flashing and proper clearance from grade (at least 6 inches) to prevent moisture wicking.
Each material has manufacturer-specific installation requirements. Cutting corners on these specs voids warranties and leads to premature failure.
Permit Requirements
In most Michigan municipalities, siding replacement requires a building permit. This isn't bureaucratic red tape — it's quality control. The permit process ensures the work meets Michigan building codes and gets inspected.
Professional contractors pull permits as part of the job. If someone tells you "we can skip the permit and save you money," that's a red flag. When we handle exterior services in Detroit, permits are standard practice, not an optional extra.

Preparation and Tear-Off
Installation day starts with protection. Before any old siding comes off, we're laying ground protection, covering landscaping, and setting up debris chutes if needed.
Removing Old Siding
Tear-off is more than just ripping off old panels. We're working carefully around windows and doors to avoid damage. We're watching for hazards — old siding on 1960s Michigan ranch homes sometimes contains asbestos, which requires special handling.
As the old siding comes off, we're inspecting what's underneath. This is when hidden problems reveal themselves: rotted sheathing around a bathroom window that's been leaking for years, missing house wrap, improperly flashed penetrations.
Sheathing Inspection and Repair
Once the old siding is off, we can see the bones of your house. OSB or plywood sheathing should be solid, dry, and structurally sound. Any soft spots, water staining, or rot gets cut out and replaced before we proceed.
This is also when we address any insulation services in Southeast Michigan that make sense — adding rigid foam insulation over sheathing before the house wrap goes on can significantly improve your home's thermal performance.
Weather Barrier Installation
House wrap (or a similar weather-resistant barrier) is your home's primary defense against wind-driven rain and moisture infiltration. Proper installation means:
- Starting at the bottom and working up, overlapping each course by at least 6 inches
- Taping all seams with manufacturer-approved tape (not just any tape)
- Integrating with window and door flashing
- Ensuring the wrap is tight but not stretched
This layer is critical in Michigan, where wind-driven rain during storms can find its way behind siding. We've seen too many siding failures that had nothing to do with the siding itself — the house wrap was installed poorly or skipped entirely.
The Installation Process Step-by-Step
Now we get to the actual siding installation. Here's what happens, in order:
Step 1: Flashing Installation
Before any siding goes up, we flash every opening. Windows and doors get drip edge flashing at the top, sill flashing at the bottom, and proper integration with the house wrap. This creates a drainage plane — water that gets behind the siding has a path to get back out.
Penetrations for vents, exterior lights, and seamless gutters in Detroit, MI all get flashed before siding covers them.
Step 2: Starter Strips and J-Channels
The starter strip at the bottom of the wall provides a locking point for the first row of siding. It needs to be level — if it's not, every row above it will be off.
J-channels go around windows, doors, and at inside corners. These channels create a finished edge and allow for proper drainage. Cutting corners here (literally) leads to water infiltration and aesthetic problems.
Step 3: Corner Posts
Outside corners get corner posts installed first. These need to be plumb and properly fastened. Inside corners get either corner posts or J-channel, depending on the product and aesthetic preference.
Step 4: Panel Installation
This is where most of the visible work happens. Each siding panel locks into the one below it and gets nailed through the nailing hem. Here's where installation technique matters:
Nailing technique: Nails go in the center of the nailing slot, not at the ends. They're driven flush but not tight — the panel needs to be able to move. Overdriven nails (a common shortcut) prevent thermal expansion and lead to buckling.
Expansion gaps: Vinyl siding expands and contracts significantly with temperature changes. In Michigan, where we see 100°F+ temperature swings between summer and winter, this matters. Panels need 1/4-inch gaps at trim and J-channels to allow for movement. Install vinyl tight in July, and it'll buckle. Install it too loose in January, and you'll have gaps in summer.
Overlap: Each panel overlaps the one next to it by about an inch. These overlaps should face away from high-traffic areas and prevailing winds to minimize visibility and water infiltration.
Step 5: Trim and Finishing
Once all panels are up, trim work happens. This includes fascia, soffit, corner trim, and any decorative elements. Proper trim installation requires the same attention to expansion gaps and flashing.
If you're also addressing exterior trim replacement in Metro Detroit, this is when that work integrates with your new siding.
Michigan-Specific Installation Considerations
Installing siding in Michigan isn't the same as installing it in North Carolina or Arizona. Our climate demands specific techniques.
Freeze-Thaw Cycle Preparation
Michigan's freeze-thaw cycles are brutal on exterior materials. Water gets into small gaps, freezes, expands, and widens those gaps. The next thaw brings more water, and the cycle repeats.
Proper siding installation prevents this by ensuring water can't get trapped behind the siding. That means proper flashing, weep holes where needed, and ensuring the drainage plane works as designed.
Ice Dam Prevention
Where your siding meets your roofline matters in Michigan. Ice dams form when heat escaping through your roof melts snow, which then refreezes at the eaves. This can drive water up under siding at the roofline.
Professional installation includes proper flashing at this junction and ensures ice dams in Michigan won't compromise your siding. Often, this means coordinating siding work with Detroit roofing services to address both systems together.
Wind Rating Requirements
Michigan building codes require siding to withstand specific wind loads. In most of Southeast Michigan, that means products rated for 110 mph winds minimum. Storm-prone areas near the lakes may require higher ratings.
This isn't just about the product — it's about installation. Proper nailing patterns and fastener spacing are part of meeting wind load requirements. Cutting corners on fasteners to save time means your siding might not survive the next severe thunderstorm.
Moisture Management in Humid Summers
Michigan summers are humid. That moisture needs somewhere to go. Proper siding installation includes ventilation — soffit vents, ridge vents, and ensuring the wall cavity can breathe.
This is especially important if you're adding top-rated insulation contractor in Detroit services as part of your project. Adding insulation without addressing ventilation can trap moisture and lead to mold and rot.
What Separates Professional Installation from Poor Work
You can't always tell good siding installation from bad by looking at it from the street. The problems show up later — in three years when panels are buckling, in five years when you're seeing water damage inside walls, in ten years when you're replacing siding that should have lasted 30.
Here's what separates professional work from shortcuts:
Common Shortcuts Contractors Take
Skipping the house wrap: "The old siding is the house wrap" is something we've heard from homeowners whose previous contractor cut corners. House wrap is not optional.
Improper nailing: Nailing too tight, nailing at the ends of slots, using too few fasteners, or using the wrong fasteners entirely. All of these save time. All of them cause problems.
Ignoring expansion gaps: Butting panels tight against trim looks cleaner initially but leads to buckling when temperatures rise.
Poor flashing: Skipping flashing or using improper materials around windows and doors. This is the number one cause of water infiltration behind siding.
Not addressing underlying damage: Installing new siding over rotted sheathing or failing to fix moisture problems. The new siding looks great for a year, then the problems start showing.
Red Flags During Installation
If you see any of these while your siding is being installed, stop work and ask questions:
- Crew members driving nails with hammers instead of using a nail gun set to proper depth
- Panels being forced into place or trimmed excessively to fit
- No visible flashing being installed around windows and doors
- Siding being installed in freezing temperatures (most vinyl can't be properly installed below 40°F)
- Crew working in heavy rain (moisture gets trapped behind siding)
- No building permit posted
Quality Checkpoints
Professional installations include quality checks at each phase:
- Sheathing inspection and repair before house wrap goes on
- House wrap inspection for proper overlap and taping
- Flashing inspection before siding covers it
- Level check on starter strips and first row
- Random checks of nailing depth and expansion gaps during installation
- Final walk-through with the homeowner
When you're researching siding contractors near me in Southeast Michigan, ask about these quality control steps. Contractors who have a system for quality checks are contractors who stand behind their work.
Timeline and What to Expect
How long does a siding installation take in Michigan? The honest answer: it depends.
Typical Project Duration
For an average 1,500-2,000 square foot home in Rochester Hills or Troy, a complete siding replacement typically takes 5-7 working days with a crew of 3-4 people. That breaks down roughly as:
- Day 1: Setup, protection, tear-off of old siding
- Day 2: Sheathing inspection and repair, house wrap installation
- Day 3-4: Flashing, trim installation, start panel installation
- Day 5-6: Complete panel installation
- Day 7: Trim work, cleanup, final inspection
Larger homes, complex architectural details, or extensive sheathing repair can extend this timeline. A 3,000 square foot Colonial in Bloomfield Hills with multiple gables and detailed trim work might take 10-12 days.
Weather Delays and Seasonal Considerations
This is Michigan. Weather happens. Rain delays are common, especially in spring and fall. We don't install siding in heavy rain — moisture gets trapped behind the house wrap and siding.
Temperature also matters. Vinyl siding shouldn't be installed when temperatures are below 40°F. The material is too brittle and can crack during cutting and installation. Fiber cement has more temperature flexibility but still has limits.
The best time for siding installation in Southeast Michigan is late spring through early fall — May through October. We work year-round when weather permits, but winter installations require careful temperature monitoring and sometimes take longer due to shorter daylight hours and weather delays.
What Happens at Your House Daily
Here's what you can expect during installation:
Arrival time: Crews typically arrive between 7:30-8:30 AM. We'll let you know the day before when to expect us.
Noise: Siding installation is loud. Nail guns, saws, and general construction noise happen from arrival until 4:30-5:00 PM most days. If you work from home, plan accordingly.
Access: Crews need access to all exterior walls. That means moving patio furniture, grills, and anything else within a few feet of the house. We'll walk through this before starting.
Debris: We contain debris in a dumpster or trailer, but there will be construction activity around your house. We do a thorough cleanup at the end of each day and a final cleanup when the project is complete.
Security: Your home will be weather-tight every night. We don't leave open walls exposed overnight.
Cost Reality: What You're Actually Paying For
Siding installation costs vary widely in Southeast Michigan, and understanding what you're paying for helps explain why.
Labor vs. Materials Breakdown
For a typical vinyl siding project, the cost breakdown is roughly:
- 40-50% labor and installation
- 30-40% materials (siding, trim, fasteners, house wrap, flashing)
- 10-15% overhead and project management
- 5-10% profit margin
Labor is the biggest cost because proper installation is labor-intensive. Flashing every window correctly takes time. Installing house wrap with proper overlap and taping takes time. Setting up and breaking down scaffolding safely takes time.
When you see quotes that are significantly lower than others, the savings are usually coming from labor — which means shortcuts in installation quality. For detailed pricing information, see our guide on siding cost in Metro Detroit.
Why the Cheapest Bid Usually Costs More
We've replaced a lot of siding that was installed poorly by the low bidder. Here's what happens:
The low-bid contractor cuts corners on installation. The siding looks fine for a year or two. Then problems start: panels buckling, water damage appearing inside walls, trim pulling away from the house.
Now you're paying twice — once for the cheap installation, and again to fix it properly. Often, that means complete tear-off and reinstallation because the underlying damage is too extensive to patch.
Professional installation costs more upfront because it includes:
- Proper surface preparation and repair
- Quality materials from manufacturers like CertainTeed, James Hardie, and LP SmartSide
- Experienced crews who know Michigan-specific installation requirements
- Proper flashing and moisture management
- Building permits and inspections
- Warranty coverage that actually means something
- Insurance and worker's compensation coverage
A well-installed siding job lasts 30-40 years with minimal maintenance. A cheap job might last 5-10 years before major problems appear. The math favors doing it right the first time.
Related Services That Make Sense
When you're already removing siding, several related projects become more cost-effective:
Window replacement: If your windows are 15+ years old, replacing them during siding installation makes sense. The new siding can be properly flashed to the new windows, and you're not paying twice for setup and cleanup. Our Detroit window experts can coordinate this work seamlessly.
Insulation upgrades: With the siding off, adding rigid foam insulation or upgrading wall cavity insulation is straightforward. This is your chance to significantly improve your home's energy efficiency.
Exterior painting: If you have trim, shutters, or other exterior elements that need painting, coordinating this with siding installation makes sense. We're already set up with scaffolding and protection. Our Southeast Michigan painting professionals use Sherwin-Williams products exclusively for long-lasting results.
Ready to Get Started?
NEXT Exteriors has been protecting Michigan homes since 1988. Get a free, no-pressure estimate from a team that shows up on time and does the job right.
Get Your Free QuoteOr call us: (844) 770-6398
Frequently Asked Questions About Siding Installation in Michigan
Properly installed vinyl siding lasts 25-30 years in Michigan. Fiber cement siding like James Hardie can last 40-50 years. Engineered wood typically lasts 25-35 years. The key word is "properly installed" — poor installation can cut these timespans in half. Michigan's freeze-thaw cycles, humidity, and temperature extremes are hard on siding, which is why installation quality matters more here than in milder climates.
Vinyl siding should not be installed when temperatures are below 40°F because the material becomes brittle and can crack. Fiber cement and engineered wood have more temperature flexibility but still have manufacturer limits. We can install siding during Michigan winters on days when temperatures are suitable, but projects often take longer due to weather delays and shorter daylight hours. Late spring through early fall (May-October) is the ideal window for siding installation in Southeast Michigan.
You don't need to be home during installation, but you should be available for the initial walkthrough and the final inspection. We'll need access to exterior electrical outlets and need to discuss where to place dumpsters and equipment. Most homeowners choose to be home the first day and the last day, but it's not required. We'll keep you updated on progress and let you know if any unexpected issues come up that need your input.
Light rain doesn't usually stop work, but we don't install siding during heavy rain because moisture can get trapped behind the house wrap. Your home will be weather-tight every night — we don't leave exposed walls overnight. If rain delays the project, we'll communicate the revised timeline. Spring and fall in Michigan often include rain delays, which is why we build buffer time into project schedules.
Look for these signs of proper installation: house wrap being installed with proper overlap and sealed seams, flashing around every window and door before siding covers it, nails being driven flush but not tight (panels should move slightly), expansion gaps at trim and J-channels, and a building permit posted. Red flags include nails being overdriven, panels forced into place, no visible flashing, or work continuing in freezing temperatures or heavy rain. A professional contractor will welcome your questions and explain what they're doing.
If your windows are 15+ years old or showing signs of failure (drafts, condensation between panes, difficulty opening), replacing them during siding installation makes financial sense. The setup costs are already covered, and the new siding can be properly flashed to new windows for better long-term performance. However, if your windows are newer and performing well, there's no need to replace them just because you're doing siding. A good contractor will give you an honest assessment of your windows' condition and let you decide.
The difference is usually in installation quality and what's included. The lower quote might be skipping house wrap, using minimum-quality materials, not including proper flashing, or planning to work without permits. The higher quote likely includes complete tear-off, sheathing inspection and repair, proper house wrap and flashing, quality materials from manufacturers like CertainTeed or James Hardie, experienced crews, permits and inspections, and comprehensive warranty coverage. In Michigan's climate, proper installation isn't optional — it's the difference between siding that lasts 30 years and siding that fails in 5.
Exterior Siding Repair Metro Detroit | NEXT Exteriors
Expert exterior siding repair in Metro Detroit. NEXT Exteriors fixes cracked, warped, and damaged siding across Southeast Michigan. Licensed, A+ rated, 35+ years experience.

You walk around your house in Sterling Heights on a cold March morning and notice a crack running down a siding panel near the garage. Or maybe you're in Rochester Hills and spot a warped section above the kitchen window that wasn't there last fall. It's easy to ignore — just one panel, right? — but in Southeast Michigan, small siding problems don't stay small.
We've been doing house siding in Detroit and the surrounding counties since 1988, and here's what we know: the homeowners who call us early spend less than the ones who wait. A cracked vinyl panel in November becomes water intrusion by February. A loose section of fiber cement becomes rot behind the sheathing by spring.
This isn't a sales pitch. It's building science. Michigan's freeze-thaw cycles, ice buildup, wind-driven rain, and summer humidity create conditions that punish even well-installed siding. When damage starts, it accelerates. The question isn't whether to fix it — it's whether you catch it early enough to repair instead of replace.
Why Michigan Weather Makes Siding Repair Critical
Southeast Michigan sits in a climate zone that's uniquely hard on exterior materials. We get freeze-thaw cycles that crack vinyl, ice dams that force water behind panels, summer storms with 60+ mph winds, and enough humidity to support mold growth when moisture gets trapped behind siding.
Here's what happens when siding gets damaged and you don't address it:
Winter freeze-thaw cycles expand the damage. Water gets into a crack or gap, freezes, expands, and makes the crack bigger. By spring, what started as a hairline fracture is now a split panel that's letting water reach the housewrap or sheathing. We see this every year in Macomb County — small cracks in November that become full panel failures by March.
Ice dams push water where it shouldn't go. When gutters back up or ice builds along the roofline, water gets forced up under siding at the eaves. If there's already a gap or loose panel, that water finds its way into the wall cavity. Once it's in there, you're dealing with potential rot, mold, and insulation damage — not just a siding problem anymore.
Wind-driven rain finds every weakness. Michigan spring storms don't just drop rain straight down. Wind pushes it sideways, and any loose panel, cracked corner, or failed caulk joint becomes an entry point. The siding might look fine from the curb, but behind it, moisture is accumulating.
This is why Detroit roofing services and siding work often go hand-in-hand — the same weather that damages your roof is testing your siding every day. When you're protecting the building envelope, you can't ignore either component.

Common Siding Problems We Fix in Metro Detroit
After 35+ years working across Oakland County, St. Clair County, and Macomb County, we've seen the same siding failures repeat. Here are the most common issues homeowners call us about — and what causes them.
Cracked or Split Panels
Vinyl siding cracks when it's installed too tight (no room for thermal expansion) or when it gets brittle from UV exposure and age. A baseball, falling branch, or even a hard freeze can crack an already-stressed panel. Fiber cement can crack from impact or improper fastening. Engineered wood splits when moisture gets into the edges and the material swells.
The fix depends on the material and the extent of the damage. Single vinyl panels can often be replaced without touching adjacent sections. Fiber cement usually requires cutting out the damaged piece and fitting a new one. LP SmartSide or other engineered wood may need caulking and paint if the crack is minor, or full panel replacement if the damage is structural.
Warped or Buckled Siding
This almost always comes down to installation. Vinyl siding needs to "float" — it expands and contracts with temperature changes. If it's nailed too tight or the nails are driven through the panel instead of the nailing slot, the siding can't move. When summer heat hits, it buckles. When winter cold contracts it, it pulls and warps.
We also see buckling when there's moisture trapped behind the siding. If the housewrap failed or wasn't installed correctly, water gets into the wall cavity, the sheathing swells, and the siding gets pushed out. That's not a siding repair — that's a wall system failure that needs to be addressed from the inside out.
Loose or Blown-Off Panels
High winds are common in Southeast Michigan, especially during spring and fall storms. If siding wasn't properly fastened — nails missed the studs, panels weren't locked together correctly, or the starter strip is failing — wind can get under the panels and peel them off.
This is more common on older homes where the original installation didn't follow manufacturer specs. We also see it on DIY jobs where the homeowner or a handyman didn't understand how the locking mechanism works. Proper Detroit siding company work includes fastening to code and ensuring every panel is fully engaged.
Moisture Intrusion and Rot
When siding fails, water gets in. If it stays in, rot starts. We see this most often around windows, doors, and corners — anywhere there's a transition or penetration. Caulk fails, flashing wasn't installed, or the J-channel wasn't sealed properly. Water runs down the wall and soaks into the sheathing or framing.
By the time you see staining or soft spots on the interior wall, the damage behind the siding is usually significant. This is why early repair matters. A $300 panel replacement in year one prevents a $3,000 sheathing and framing repair in year three.
Fading, Chalking, and UV Damage
Vinyl siding fades over time — that's just physics. UV breaks down the pigments and the surface starts to chalk. South- and west-facing walls get the worst of it. Darker colors fade faster. Cheap vinyl fades faster than quality products like CertainTeed or James Hardie ColorPlus.
Fading isn't a structural problem, but it affects curb appeal and resale value. Some homeowners choose to replace faded sections, others repaint (if the material allows it), and some opt for a full siding upgrade. There's no wrong answer — it depends on your budget and how long you plan to stay in the house.
Related Issue: If you're noticing water stains or ice buildup near your roofline, you may also have gutter problems contributing to siding damage. Our seamless gutters in Detroit, MI work often goes hand-in-hand with siding repair — fixing both systems together prevents recurring issues.
Vinyl vs. Fiber Cement vs. Engineered Wood: Repair Realities
Not all siding repairs are the same. The material on your house determines what can be fixed, how it's fixed, and what it costs. Here's what we see in the field.
Vinyl Siding Repairs
Vinyl is the most common siding in Southeast Michigan, and it's generally the easiest to repair. Individual panels can be removed and replaced without disturbing the rest of the wall. We carry common profiles and colors in our trucks, so minor repairs can often be done same-day.
The challenge is color matching. If your siding is more than 10 years old and has faded, a new panel will look noticeably different. We can sometimes find close matches or source older stock, but perfect matches aren't always possible. Some homeowners choose to replace an entire wall section to keep the color consistent.
Vinyl is also the most vulnerable to impact damage and thermal stress. A well-done vinyl repair addresses the damage and checks the installation — are the panels nailed correctly? Is there room for expansion? Is the starter strip secure? If those fundamentals are off, you'll have more problems down the line.
Fiber Cement Repairs (James Hardie, CertainTeed)
Fiber cement is more durable than vinyl, but repairs are more involved. You can't just pop a panel out. Damaged sections need to be cut out, new pieces fitted, caulked, and painted. If the siding was factory-finished (like James Hardie ColorPlus), you'll need touch-up paint to match.
The good news: fiber cement holds up better to Michigan weather. It doesn't warp from heat, doesn't crack from cold, and resists moisture intrusion better than vinyl or wood. When we do fiber cement repairs, it's usually from impact damage (a ladder, a lawnmower, a falling branch) rather than material failure.
Proper fiber cement repair requires the right tools — carbide blades, dust control, and an understanding of how the material fastens and overlaps. This isn't a DIY job. A bad fiber cement repair creates gaps that let water in, and once water gets behind fiber cement, it can sit against the sheathing for months before you notice.
Engineered Wood Repairs (LP SmartSide, Others)
LP SmartSide and similar engineered wood products are popular in Southeast Michigan for their appearance and performance. They're more dimensionally stable than solid wood, but they're not indestructible. Edge swelling, splits, and moisture damage are the most common problems.
Engineered wood repairs often involve sealing, caulking, and repainting. If the damage is extensive, panel replacement is the better option. The key is keeping water out of the edges — once moisture gets into the core, the material can delaminate or rot.
We also see issues with older engineered wood products that didn't have the same moisture resistance as modern LP SmartSide. If your home was sided in the 1990s or early 2000s with an older product, you may be dealing with systemic failures rather than isolated damage. In those cases, full replacement is usually more cost-effective than ongoing repairs.
When to Repair vs. When to Replace Your Siding
This is the question we get asked most: "Should I fix this, or just replace the whole thing?" The answer depends on the extent of the damage, the age of the siding, and what you're planning to do with the house.
Repair Makes Sense When:
- The damage is localized. One or two cracked panels, a small section blown off in a storm, or isolated impact damage can be repaired without touching the rest of the siding.
- The siding is less than 15 years old. Modern vinyl, fiber cement, and engineered wood products hold up well. If your siding is relatively new and the damage is from a specific event (storm, accident, etc.), repair is usually the right call.
- You can get a good color match. If the repair will blend in and you're not planning to sell soon, fixing the damaged section preserves the rest of your investment.
- The underlying structure is sound. If the sheathing, housewrap, and framing are in good shape, there's no reason to tear off functional siding just because one section failed.
Replacement Makes Sense When:
- You're seeing damage in multiple areas. If you've got cracks, warping, and moisture issues on multiple walls, the siding is reaching the end of its service life. Patching it now just delays the inevitable.
- The siding is 20+ years old. Vinyl and engineered wood products from the 1990s and early 2000s don't perform like modern materials. If your siding is old and showing its age, replacement gives you better energy efficiency, curb appeal, and peace of mind.
- You're planning to sell. New siding is one of the highest-ROI exterior upgrades. If you're prepping the house for market, full replacement makes more sense than patchwork repairs.
- There's hidden damage behind the siding. If we pull off a damaged panel and find wet sheathing, failed housewrap, or rot, that's a sign the wall system needs attention. At that point, you're better off replacing the siding and addressing the underlying issues at the same time.
We're not here to upsell you. If a repair solves the problem, we'll tell you. If replacement is the smarter long-term move, we'll explain why. After 35+ years in business, our reputation depends on giving homeowners honest advice — not pushing the biggest invoice.
For homeowners dealing with broader exterior issues, our exterior services in Detroit cover everything from siding to roofing to insulation, so we can assess the whole building envelope and recommend the right approach.
What Professional Siding Repair Actually Costs in Southeast Michigan
Homeowners want straight answers about cost, so here's what we see in the Metro Detroit market. These are real numbers from actual jobs — not national averages pulled from a database.
Minor Vinyl Siding Repairs: $200–$600
Replacing 1–3 damaged panels, fixing a loose section, or reattaching blown-off siding. This assumes we can match the color and profile, the underlying structure is sound, and the job takes a few hours. If we're already on-site for another project, the cost is usually on the lower end. If it's a standalone service call, expect to pay a trip charge.
Moderate Repairs (Multiple Panels, Corner Posts, Trim): $600–$1,500
Replacing a larger section of siding, fixing damage around windows or doors, or addressing issues that require removing and reinstalling trim. This range also covers jobs where we need to order specific materials or deal with older siding profiles that aren't readily available.
Fiber Cement or Engineered Wood Repairs: $800–$2,000+
Fiber cement and engineered wood repairs take more time and skill. Cutting, fitting, caulking, and painting add labor. If the repair involves multiple pieces or hard-to-reach areas (second story, dormers, gables), the cost goes up. High-quality fiber cement work isn't cheap, but it lasts.
Extensive Repairs or Partial Replacement: $2,000–$5,000+
If you're replacing an entire wall, fixing storm damage across multiple elevations, or addressing rot and sheathing issues along with siding, you're in this range. At this point, you're approaching the cost of partial or full siding replacement, so it's worth getting a comparison estimate.
What Drives the Price Up:
- Hard-to-match materials. Discontinued colors, older profiles, or custom siding add cost and lead time.
- Height and access. Second-story repairs, steep roofs, or areas that require scaffolding increase labor costs.
- Hidden damage. If we pull off siding and find wet sheathing or rot, that needs to be fixed before new siding goes on.
- Permits and inspections. Most siding repairs don't require permits, but if the job involves structural work or exceeds a certain square footage, local building departments may require one.
We give free estimates. We'll come out, assess the damage, explain what needs to be done, and give you a written quote. No pressure, no gimmicks — just honest pricing based on the actual scope of work.
Budget Tip: If you're also dealing with drafty windows or high energy bills, consider addressing insulation and window upgrades at the same time. Our top-rated insulation contractor in Detroit services and Detroit window experts can help you tackle multiple issues in one project, often saving on labor and scaffolding costs.
Signs You Need Siding Repair Now (Before It Gets Worse)
Most siding damage doesn't announce itself. You won't wake up to a wall falling off. Instead, you'll notice small things — and if you ignore them, they become big things. Here's what to watch for.
Visible Cracks, Holes, or Splits
This is the obvious one. If you can see a crack, water can get in. Even small cracks let moisture behind the siding, where it can sit against the sheathing and cause rot. Don't wait for the crack to get bigger — fix it now.
Warped, Buckled, or Loose Panels
If siding panels are pulling away from the wall, buckling, or visibly warped, something's wrong. It could be a fastening issue, thermal expansion, or moisture damage behind the siding. Either way, it needs attention before the next storm pulls the whole section off.
Peeling Paint or Bubbling on Painted Siding
If you have painted siding (wood, fiber cement, or older aluminum), peeling or bubbling paint is a sign that moisture is getting in. Paint fails when water gets under it. That means the siding isn't doing its job anymore.
Water Stains or Mold on Interior Walls
If you're seeing water stains, mold, or damp spots on interior walls — especially near windows, corners, or the roofline — water is getting past the siding. This is a serious problem. The longer you wait, the more expensive the fix becomes.
Increased Heating or Cooling Bills
Damaged siding creates air leaks. If your energy bills are climbing and you can't figure out why, failing siding could be the culprit. Cold air gets in during winter, hot air gets in during summer, and your HVAC system works overtime to compensate.
Fading, Chalking, or Discoloration
This isn't a structural issue, but it's a sign the siding is aging. Severe fading and chalking mean the UV protection is breaking down. The material becomes more brittle and more vulnerable to cracking and impact damage.
Pest Intrusion or Nesting
If you're seeing insects, rodents, or birds getting into the walls, there's a gap somewhere. Damaged siding creates entry points. Fixing the siding keeps pests out and prevents further damage to insulation and wiring.
We recommend walking around your house twice a year — once in early spring after the snow melts, and once in late fall before winter hits. Look for these warning signs. Catch problems early, and repairs are simple. Wait too long, and you're looking at replacements.
For homes that also struggle with ice dams or gutter overflow, addressing the full water management system is critical. Check out our guide on ice dams and gutter problems to understand how these systems interact.

Why NEXT Exteriors for Your Siding Repair in Metro Detroit
We've been doing this since 1988. We're licensed, BBB A+ accredited, and we've completed over 500 projects across Macomb, Oakland, and St. Clair counties. We're not the biggest contractor in Michigan, and we're not trying to be. We're the contractor who shows up on time, does the work right, and doesn't push unnecessary upgrades.
When you call us for a siding repair, here's what happens:
- We assess the damage honestly. If a repair solves the problem, we'll tell you. If replacement makes more sense, we'll explain why. No sales pressure, no gimmicks.
- We give you a written estimate. Clear scope of work, itemized pricing, no surprises.
- We show up when we say we will. Our crews are professional, experienced, and respectful of your property.
- We fix it right the first time. Proper fastening, proper flashing, proper sealing. We follow manufacturer specs and Michigan building codes.
- We stand behind our work. If there's a problem, we come back and make it right.
We're also equipped to handle related exterior work — roofing, gutters, windows, insulation, and painting. If your siding repair uncovers other issues, we can address them all in one project. Our Southeast Michigan painting professionals can refinish fiber cement or wood siding to match perfectly, and our insulation and window teams can improve energy efficiency while we're on-site.
Changing contractor culture means doing what we say we'll do, charging fair prices, and treating your home like it's ours. That's been our approach for 35+ years, and it's why we have a 5.0-star rating across 87+ reviews.
Ready to Get Started?
NEXT Exteriors has been protecting Michigan homes since 1988. Get a free, no-pressure estimate from a team that shows up on time and does the job right.
Get Your Free QuoteOr call us: (844) 770-6398
Frequently Asked Questions About Exterior Siding Repair in Metro Detroit
In most cases, you can repair just the damaged section. Vinyl siding is designed to allow individual panel replacement. Fiber cement and engineered wood can also be repaired in sections, though the process is more involved. The key factors are whether we can match the color and profile, and whether the surrounding siding is in good condition. If the damage is isolated and the rest of the siding is sound, a targeted repair is usually the most cost-effective option.
Minor repairs — replacing a few vinyl panels or fixing a small section — can often be done in a few hours. More extensive repairs involving fiber cement, multiple walls, or addressing underlying moisture damage can take 1–3 days. Weather plays a role, too. We can't install siding in heavy rain or extreme cold, so Michigan winters sometimes require scheduling flexibility. We'll give you a realistic timeline when we assess the job.
It depends on your policy and the cause of the damage. Most homeowners insurance policies cover storm damage (wind, hail, falling trees) but not damage from lack of maintenance or normal wear and tear. If a storm blew off siding panels or a tree branch punched a hole, you'll likely have coverage. If the siding is cracked from age and UV exposure, probably not. We can work with your insurance adjuster, provide documentation and estimates, and help you navigate the claims process.
There's no single "best" material — it depends on your budget, aesthetic preferences, and maintenance tolerance. Vinyl is affordable, low-maintenance, and performs well if installed correctly. Fiber cement (James Hardie, CertainTeed) is more durable, resists moisture better, and holds paint longer, but costs more upfront. Engineered wood (LP SmartSide) offers a wood-grain look with better stability than solid wood. All three work in Michigan if they're installed to manufacturer specs and properly maintained. We can walk you through the pros and cons based on your specific situation.
You usually can't tell from the outside. Cosmetic damage (fading, minor cracks, surface wear) doesn't affect the wall structure. Structural damage (rot, wet sheathing, mold) happens behind the siding and requires removing panels to inspect. Warning signs include water stains on interior walls, soft spots when you press on the siding, visible mold or mildew, and a musty smell near exterior walls. If you're seeing any of those, call a professional. We'll inspect the wall cavity, assess the damage, and tell you exactly what needs to be fixed.
We do our best, but perfect matches aren't always possible. If your siding is less than 10 years old and still in production, we can usually get an exact match. If it's older or discontinued, we'll try to source close matches from suppliers or manufacturer archives. In some cases, homeowners choose to replace an entire wall section to keep the color consistent, or they use the repair as an opportunity to upgrade to a newer, more fade-resistant product. We'll show you samples and help you decide what looks best.
Most minor siding repairs don't require a permit. If you're replacing a few panels or fixing storm damage, you're usually fine. However, if the repair involves structural work (replacing sheathing, framing repairs) or exceeds a certain square footage, local building departments may require a permit. Requirements vary by city — Troy, Sterling Heights, and Rochester Hills all have slightly different rules. We know the local codes and will handle permit applications if needed. It's part of doing the job right.
Exterior Siding Repair Metro Detroit: What Actually Works
Expert guide to exterior siding repair in Metro Detroit. Learn what repairs hold up in Michigan weather, when to repair vs. replace, and how to avoid common mistakes.
We've been doing house siding in Detroit and across Southeast Michigan since 1988, and here's something we tell homeowners every week: not all siding damage needs a full replacement. But the repair has to be done right, or you're just postponing a bigger problem.
Michigan's climate is brutal on exterior siding. The freeze-thaw cycles we get in Macomb County, Oakland County, and St. Clair County aren't just hard on roads — they're murder on siding that's installed poorly or damaged. Water gets behind a cracked panel in November, freezes in December, expands, and by March you've got rot in your sheathing.
This guide covers what actually works for exterior siding repair in Metro Detroit. We'll walk through the types of damage we see most, when repair makes sense versus replacement, what a proper repair involves, and what it costs. No fluff — just what we've learned from 35+ Michigan winters.
Why Metro Detroit Siding Fails (And When Repair Makes Sense)
Siding damage in Southeast Michigan falls into three categories: climate damage, installation errors, and impact damage. Understanding which one you're dealing with determines whether repair is viable.
Freeze-Thaw Cycle Damage
This is the big one. Water infiltrates through a small crack, gap in caulking, or failed flashing. When temperatures drop below freezing — which happens 60+ times per winter in Metro Detroit — that water expands by about 9%. The expansion forces cracks wider, pushes panels apart, and can buckle entire sections.
Vinyl siding becomes brittle below 40°F. If it's installed too tight (no expansion gaps), winter contraction can cause it to warp or pull away from the house. If it's nailed too tight, the panels can't move naturally and they crack at the nail holes.
Fiber cement handles freeze-thaw better than vinyl, but only if it's sealed properly. Unsealed cut edges absorb moisture, and in Michigan's wet spring conditions, that moisture can cause swelling and delamination.
Wood siding — whether cedar or engineered wood like LP SmartSide — needs consistent paint or stain protection. Once the finish fails and moisture gets in, freeze-thaw cycles accelerate rot. We see this constantly on 1960s ranch homes in Sterling Heights and Warren where the original cedar was never properly maintained.
Michigan Reality Check: If the damage is isolated to one or two panels and there's no moisture intrusion behind the siding, repair usually makes sense. If you're seeing damage across multiple walls or water stains on interior walls, you likely have a systemic problem that repair won't solve.
Installation Errors
Bad installation causes more siding problems than homeowners realize. Common mistakes we fix:
- Nails driven through the siding face instead of the nailing hem — creates holes that leak and prevents proper panel movement
- No house wrap or damaged house wrap — siding is the first line of defense, but house wrap is the critical moisture barrier
- Missing or improper flashing — around windows, doors, and where siding meets the roof or deck
- Panels installed too tight — no room for expansion and contraction with Michigan's 100°F temperature swings
- Wrong fasteners — using staples instead of nails, or nails that are too short to properly secure the siding
Installation errors often show up 3-5 years after the job, once the siding has been through a few Michigan winters. If your siding is relatively new but showing problems, get a professional inspection before you spend money on repairs — you might have warranty coverage if the installation was defective.
Impact Damage
Hail, wind-blown debris, ladders, lawn equipment — impact damage is straightforward. A few cracked or dented panels, no underlying moisture issues. This is the easiest repair scenario and almost always worth fixing rather than replacing entire walls.
The challenge with impact damage in Metro Detroit is matching the color. Vinyl siding fades over time from UV exposure, and even if you have the manufacturer and color name, a new panel will look noticeably different next to 10-year-old siding. Fiber cement can be repainted to match. Wood can be stained or painted. Vinyl? You're stuck with the mismatch unless you replace the entire visible wall section.
The 4 Types of Siding Repairs We Do Most in Southeast Michigan

1. Crack Repairs and Panel Replacement
Single or multiple cracked panels from impact or stress. This is the most common repair we do for Detroit siding company clients.
The Process: Remove the damaged panel by unlocking it from the panel below (vinyl and some engineered wood products interlock). Inspect the house wrap and sheathing behind it for moisture damage. If the substrate is sound, install a new panel with proper nailing technique — nails centered in the slots, driven flush but not tight, spaced 16" apart. If it's vinyl, leave 1/4" gap at J-channels and trim for expansion.
What Makes It Last: The repair is only as good as what's behind it. If water has been getting past the damaged panel, you need to address sheathing rot and house wrap damage before installing new siding. Skip that step and you're just covering up a problem that will get worse.
2. Moisture Damage and Rot Repair
This is where repair gets complicated. You've got damaged siding, but the real issue is rotted sheathing, water-damaged framing, or failed house wrap underneath.
The Process: Remove enough siding to access all damaged substrate material. Cut out rotted sheathing back to solid wood. Replace with new OSB or plywood sheathing. Install new house wrap with proper overlap and tape all seams. If framing is damaged, that needs sister studs or full replacement. Then reinstall siding.
Cost Reality: This type of repair can cost more than replacing the siding on that wall, because you're essentially doing a partial wall rebuild. But if the damage is localized — say, around a window where flashing failed — repair makes sense. If you're seeing moisture damage across multiple walls, you likely need to look at your seamless gutters in Detroit, MI or Detroit roofing services for the source of water intrusion.
3. Trim, Corner, and Flashing Repairs
Siding panels might be fine, but trim boards, corner posts, J-channels, or flashing are failing. This is common on homes where the siding itself is holding up but the accessories weren't installed properly or have reached end of life.
The Process: Remove and replace the damaged trim components. On vinyl siding, this often means removing several courses of siding to access J-channel or corner posts. On fiber cement or wood, trim is typically face-nailed and easier to replace without disturbing the field siding.
Michigan-Specific Issue: Aluminum trim (common on older homes) corrodes in Michigan's road salt environment. If your trim is pitted and corroding, especially near the ground or driveway, replacement with vinyl or fiber cement trim solves the problem permanently.
4. Reattachment and Securing Loose Siding
Panels are coming loose, buckling, or pulling away from the house. Often caused by wind damage, improper nailing, or missing fasteners.
The Process: Remove the affected panels, inspect for underlying damage, and reinstall with proper fastening. For vinyl, this means new nails in the nailing hem — never face-nail vinyl siding. For fiber cement or wood, you can face-nail but you need to caulk the nail heads and touch up paint.
When This Happens: If multiple panels are coming loose across different walls, you likely have a wind rating problem or installation defect. Properly installed siding should handle Michigan's typical 40-50 mph wind gusts without issue. If yours doesn't, you might need a full reinstallation with proper fastening.
Vinyl vs. Fiber Cement vs. Wood: What Repairs Look Like
Repair approaches vary significantly by material. Here's what we've learned from thousands of repair jobs across Metro Detroit.
Vinyl Siding Repairs
Advantages: Individual panels are easy to remove and replace. No painting required. Relatively inexpensive. Most homes in Macomb County and Oakland County have vinyl, so we stock common profiles and colors.
Challenges: Color matching is difficult after 5+ years due to UV fading. Vinyl becomes brittle in cold weather — we don't do vinyl repairs below 40°F because the material cracks too easily during removal. Some older profiles are discontinued, making exact replacement impossible.
Best Repair Scenarios: Impact damage, isolated cracks, loose panels. If the house wrap and sheathing are sound, vinyl panel replacement is straightforward.
When to Replace Instead: If more than 30% of the siding shows damage, or if the color mismatch will bother you, consider replacing the entire visible wall section. Vinyl is affordable enough that this often makes more sense than patching.
Fiber Cement Repairs (James Hardie, CertainTeed, Allura)
Advantages: Can be painted to match existing siding perfectly. More durable than vinyl — handles impacts and freeze-thaw better. Holds fasteners securely, making reattachment repairs reliable.
Challenges: Heavier and harder to work with than vinyl. Requires specialized cutting tools (fiber cement creates silica dust — proper equipment is mandatory). More expensive material and labor. Cut edges must be sealed before installation to prevent moisture absorption.
Best Repair Scenarios: Cracked or damaged planks, trim replacement, areas where you need perfect color matching. We do a lot of James Hardie repairs in Grosse Pointe and Bloomfield Hills where the homes have higher-end fiber cement siding.
When to Replace Instead: If the existing fiber cement is original to a 20+ year old home and was never properly maintained (painted every 10-15 years), you might have delamination or moisture damage across multiple planks. At that point, full replacement makes more sense.
Wood and Engineered Wood Repairs
Advantages: Can be painted or stained to match. Real wood (cedar, redwood) has natural rot resistance when properly maintained. Engineered wood (LP SmartSide, Boral TruExterior) combines wood aesthetics with better moisture resistance.
Challenges: Requires ongoing maintenance — paint or stain every 5-7 years in Michigan's climate. Rot spreads quickly once it starts. Older engineered wood products (pre-2000s hardboard siding) are notorious for moisture problems and often need full replacement.
Best Repair Scenarios: Isolated rot on otherwise sound siding, impact damage, trim board replacement. If you're maintaining the finish properly, wood siding can last 40+ years with periodic repairs.
When to Replace Instead: If you're seeing widespread rot, or if the siding is old hardboard (Masonite), replacement is usually the right call. Modern LP SmartSide or fiber cement will perform better and require less maintenance.
Contractor Truth: We see a lot of homeowners try to DIY vinyl siding repairs and end up cracking adjacent panels or damaging the house wrap. Vinyl looks simple, but there's a technique to unlocking and removing panels without breaking them — especially in cold weather. If you're not confident, hire it out. A $300 repair is cheaper than a $3,000 wall replacement after a DIY job goes wrong.
When Repair Isn't Worth It (The Honest Answer)
We turn down repair jobs regularly because it's not the right solution for the homeowner. Here's when replacement makes more sense than repair.
Age and Condition Thresholds
Vinyl siding over 25 years old: It's near the end of its service life anyway. If you're seeing damage in multiple areas, invest in replacement. Modern vinyl has better UV inhibitors and impact resistance than 1990s material.
Fiber cement over 30 years old: If it hasn't been painted in 10+ years and shows widespread weathering, repair isn't cost-effective. The old material is saturated with moisture and likely delaminating.
Wood siding with active rot in multiple locations: Rot spreads. If you're patching rot spots every few years, you're fighting a losing battle. Replace with fiber cement or engineered wood and be done with it.
Extent of Damage
Our rule of thumb: if more than 30% of a wall section needs repair, or if you're seeing damage on three or more walls, replacement is probably the better value.
Here's the math: a typical vinyl siding repair runs $300-800 depending on complexity. If you need repairs on four walls, that's $1,200-3,200. For that price range, you could replace the siding on one or two walls completely, get new house wrap and flashing, and have a warranty on the work.
Hidden Structural Issues
If the siding damage is a symptom of a bigger problem — failed insulation services in Southeast Michigan, ice dam damage from inadequate attic insulation, water intrusion from roof problems, or foundation settling — repair is just a band-aid.
We see this often with ice dam damage. Homeowner calls about damaged siding on the second story. We get up there and find the real issue is heat loss through the attic melting snow on the roof, water backing up under shingles, and running down behind the siding. Repairing the siding without fixing the top-rated insulation contractor in Detroit problem means it'll happen again next winter.
Aesthetic Concerns
This is subjective, but it matters. If you're repairing vinyl siding and the color mismatch will bother you every time you look at your house, replacement might be worth it for peace of mind.
We had a client in Rochester Hills with a 12-year-old tan vinyl siding. Storm damage required replacing 6 panels on the front of the house. The new panels were noticeably lighter than the faded originals. Technically the repair was sound, but she hated the look. We ended up replacing the entire front wall so it matched.
Fiber cement and wood don't have this problem — you can paint to match perfectly. But with vinyl, set your expectations appropriately.
What a Proper Siding Repair Actually Involves
Here's what happens when NEXT Exteriors does a siding repair job in Southeast Michigan. This is the process that ensures the repair lasts as long as the rest of your siding.
Step 1: Inspection and Diagnosis
We don't just look at the damaged siding — we check what's behind it. That means removing at least one damaged panel to inspect house wrap, sheathing, and framing. We're looking for:
- Moisture stains or rot on sheathing
- Tears or gaps in house wrap
- Proper flashing around windows, doors, and other penetrations
- Evidence of insect damage or animal intrusion
- Condition of existing fasteners and whether they're installed correctly
If we find issues beyond the visible siding damage, we'll give you options: repair just the siding (knowing the underlying issue might cause problems later), or address the substrate damage as part of the repair.
Step 2: Material Sourcing and Matching
For vinyl, we identify the profile and color. If it's a common product (CertainTeed, Alside, Norandex), we can usually source matching material. If it's discontinued, we'll find the closest match and show you samples so you know what to expect.
For fiber cement and wood, we measure the exposure (visible width of each plank), thickness, and texture. Then we order material and prepare for painting or staining to match.
Step 3: Removal of Damaged Material
This is where technique matters. Vinyl panels interlock — you need to unlock them from below without cracking the adjacent panels. Fiber cement is face-nailed or blind-nailed, and you need to remove fasteners without damaging surrounding planks.
We remove enough siding to access all damaged substrate material and to ensure we have solid nailing surfaces for the replacement panels.
Step 4: Substrate Repair
If sheathing is damaged, we cut it back to solid material and install new OSB or plywood. If house wrap is torn, we install new sections with proper overlap (upper layer over lower layer to shed water) and tape all seams with Tyvek tape or equivalent.
If flashing is missing or inadequate, we install new flashing. This is critical around windows and doors — most siding moisture problems start with failed flashing at these penetrations.
Step 5: Installation of Replacement Siding
For vinyl: Panels get nailed through the nailing hem, centered in the slots, driven flush but not tight. We leave 1/4" gap at J-channels and trim pieces for expansion. Each panel locks into the one below it with a firm snap.
For fiber cement: Planks are face-nailed or blind-nailed depending on the profile. All cut edges get sealed with paint or caulk before installation. Nails are placed per manufacturer specs (typically 3/4" from edges, 12-16" apart). After installation, we caulk nail heads and touch up paint.
For wood: Similar to fiber cement, but we're more careful about moisture barriers behind the siding. Wood needs to breathe, so we ensure proper ventilation gaps. All cut ends get sealed with primer or end-cut sealer before installation.
Step 6: Sealing and Finishing
All seams, joints, and transitions get appropriate caulking. For vinyl, we use clear or color-matched siliconized acrylic caulk. For fiber cement and wood, we use paintable acrylic latex caulk.
We check that water will drain properly — no spots where water can pool or get trapped behind the siding.
For painted siding, we prime and paint to match. For stained wood, we stain and seal to match.
Step 7: Final Inspection and Cleanup
We verify that all panels are secure, properly aligned, and will shed water correctly. We clean up all debris and old materials. We walk the homeowner through what we did and what to watch for.
Why This Matters: The difference between a repair that lasts 20 years and one that fails in 3 years is almost always what happens behind the siding. If you're getting quotes and one contractor is significantly cheaper than the others, ask what they're doing about the house wrap, sheathing, and flashing. If the answer is "nothing," you're getting a patch job, not a repair.
Cost Reality: Siding Repair Pricing in Metro Detroit
Here's what siding repairs actually cost in Southeast Michigan in 2026. These are real numbers from jobs we've done in Macomb County, Oakland County, and St. Clair County.
Simple Panel Replacement (No Substrate Damage)
Vinyl: $300-600 for 1-5 panels, depending on accessibility and color matching difficulty. If we need to order special-order material or match a discontinued color, add $100-200.
Fiber Cement: $500-900 for 1-5 planks, including paint matching. Fiber cement labor costs more because it's heavier and requires more careful handling.
Wood: $400-800 for 1-5 boards, including stain or paint matching. Real cedar costs more than pine or engineered wood.
Panel Replacement with Substrate Repair
When you need to replace sheathing, house wrap, or address rot, costs increase significantly.
Minor substrate repair: Add $400-800 to the panel replacement cost. This covers replacing a 4x8 section of sheathing, new house wrap, and flashing repair.
Extensive substrate repair: $1,200-2,500 depending on the extent of rot and whether framing is damaged. If we're rebuilding part of a wall, you're paying for carpentry work in addition to siding.
Trim and Flashing Repairs
Corner post or J-channel replacement: $200-400 depending on how much siding needs to be removed to access it.
Window or door flashing repair: $300-600 per opening, including removing and reinstalling siding around the opening.
Fascia or soffit repair: $400-1,000 depending on extent. Often connects to gutter installation in Southeast Michigan work if the fascia damage is from failed gutters.
What Affects Price
- Height and accessibility: Second story or higher adds 20-30% for staging and safety equipment
- Material availability: Discontinued or special-order materials cost more and take longer
- Extent of hidden damage: We can't give a final price until we see what's behind the siding
- Time of year: We're busiest spring and fall. Winter repairs (when possible) sometimes get a discount because it's slower season
- Related work: If you're doing exterior painting in Detroit or window replacement in Detroit at the same time, we can often bundle services for better overall value
When Does Repair Cost More Than Replacement?
If you're looking at $2,000+ in repairs for one wall, compare that to replacement costs. A typical single-story wall (30' long x 10' high = 300 sq ft) costs $2,500-4,500 to replace completely with new vinyl siding, including house wrap and trim. For fiber cement, $4,500-7,500.
At that point, you're getting brand new siding with a warranty, fresh house wrap, new flashing, and the peace of mind that you won't have more repairs next year.
Signs You Need Professional Siding Repair
Most homeowners wait too long to address siding problems. By the time they call, what could have been a $400 repair has become a $2,000 substrate rebuild. Here's what to watch for.
Visible Damage
- Cracks or holes in siding panels — even small ones let water in
- Warped, buckled, or loose panels — sign of improper installation or water damage
- Fading or discoloration in spots — can indicate moisture behind the siding
- Rot, soft spots, or crumbling material — especially on wood siding
- Missing or damaged trim pieces — corner posts, J-channels, fascia boards
Water Intrusion Signs
- Interior water stains — especially near windows or on exterior walls
- Peeling paint inside the house — on exterior walls, sign of moisture coming through
- Mold or mildew smell — particularly in rooms against exterior walls
- Higher than normal energy bills — damaged siding allows air infiltration
Structural Concerns
- Siding pulling away from the house — fastener failure or rot
- Gaps between siding and trim — sign of movement or settling
- Sagging or uneven siding lines — substrate damage or failed framing
After Michigan Weather Events
Always inspect your siding after:
- Hailstorms — even if you don't see obvious damage, check for dents and cracks
- High winds — 50+ mph gusts can lift panels or drive debris into siding
- Ice dams — water backing up under shingles often runs down behind siding
- Heavy snow load — can stress siding where it meets the roof or foundation
If you're in Clinton Township, Sterling Heights, Troy, or anywhere in Metro Detroit and you notice any of these signs, get a professional inspection. NEXT Exteriors offers free estimates — we'll tell you honestly whether you need repair, replacement, or if it's something you can monitor for now.
Related Services: Siding problems often connect to other exterior issues. If you're dealing with water intrusion, check your professional roofing in Southeast Michigan for leaks. If you're seeing drafts or energy loss, your energy-efficient windows in Southeast Michigan might need attention. And if ice dams are causing siding damage, your attic insulation in Metro Detroit probably needs upgrading. We look at your home as a system — fixing one component without addressing related issues rarely solves the problem long-term.
Ready to Get Started?
NEXT Exteriors has been protecting Michigan homes since 1988. We'll give you an honest assessment of your siding damage and tell you whether repair or replacement makes more sense for your situation. No pressure, no gimmicks — just straight answers from people who've been doing this work through 35+ Michigan winters.
Get Your Free QuoteOr call us: (844) 770-6398
Frequently Asked Questions About Exterior Siding Repair in Metro Detroit
You can do simple vinyl panel replacement if you're comfortable on a ladder and have the right tools (a zip tool to unlock panels). But most DIY repairs fail because homeowners don't check what's behind the siding. If there's moisture damage to the sheathing or house wrap, or if the damage is on the second story, hire a professional. A $300-500 professional repair is cheaper than fixing a botched DIY job that causes $2,000 in additional damage.
A properly done repair should last as long as the rest of your siding — 20-30 years for vinyl, 30-50 years for fiber cement, 30-40 years for wood with proper maintenance. The key is addressing any moisture or substrate damage, not just replacing the visible panels. If the repair fails within a few years, it means the underlying issue wasn't fixed.
Fiber cement and wood can be painted or stained to match perfectly. Vinyl is trickier — it fades over time from UV exposure, so new vinyl will be noticeably brighter than 10+ year old siding. If the color mismatch bothers you, consider replacing the entire visible wall section so it all matches. We always show homeowners sample pieces before starting the repair so they know what to expect.
Repair means replacing damaged sections while keeping the rest of your existing siding. Replacement means removing all siding on one or more walls and installing new material. Repair makes sense when damage is localized and the rest of your siding is in good shape. Replacement makes sense when you have widespread damage, your siding is near end of life (20+ years for vinyl, 30+ for fiber cement), or when repairs would cost more than 50% of replacement cost.
It depends on the cause of damage. Storm damage (hail, wind, falling trees) is usually covered, minus your deductible. Gradual deterioration, rot from poor maintenance, or damage from insects isn't covered. If you think you have storm damage, document it with photos and call your insurance company before starting repairs. We work with insurance adjusters regularly and can provide detailed estimates for claims.
As soon as possible, especially in Michigan. Any crack or hole in your siding lets moisture in. Once water gets behind the siding, freeze-thaw cycles accelerate damage to the sheathing and framing. What starts as a $400 panel replacement can become a $2,000 wall rebuild if you wait. If you can't get it fixed immediately, at least tape over cracks with waterproof tape as a temporary measure until a contractor can do the proper repair.
Verify they're licensed (Michigan Residential Builder's License), insured, and have experience with your specific siding material. Ask if they'll inspect behind the damaged siding for moisture issues — if they say they'll just replace the visible panels without checking the substrate, find someone else. Get a written estimate that specifies what's included. And check reviews — a contractor with consistent 5-star ratings over several years (like NEXT Exteriors' 87+ reviews) is a safer bet than someone with a handful of recent reviews.