

Window Replacement Cost Metro Detroit: Real 2026 Pricing
What window replacement actually costs in Metro Detroit. Licensed contractor breaks down real pricing, material options, and what drives costs up or down in Southeast Michigan.

If you're researching window replacement cost in Metro Detroit, you've probably noticed the numbers are all over the map. One contractor quotes $400 per window. Another says $1,200. A third won't give you a number until they've measured your house, inspected your trim, and asked about your basement.
Here's the straight answer: In Southeast Michigan, quality window replacement typically runs $450 to $750 per window installed for standard vinyl double-hungs, $650 to $1,100 for fiberglass, and $900 to $1,500+ for wood-clad units. A whole-house project for a typical Michigan ranch or Colonial—12 to 18 windows—usually lands between $8,000 and $18,000, depending on material choice, glass packages, and installation complexity.
Those ranges aren't arbitrary. After 35 years installing Detroit window experts in homes across Macomb, Oakland, and St. Clair counties, we've learned that window costs in Michigan are driven by factors most online calculators ignore: freeze-thaw cycles that punish cheap frames, brick openings that require careful flashing, and energy efficiency standards that actually matter when it's 5°F outside in January.
This post breaks down what window replacement actually costs in Metro Detroit—and what you're paying for when you hire a contractor who knows how to install them correctly in Michigan weather.
What Window Replacement Actually Costs in Metro Detroit
Let's start with real numbers from actual projects in Southeast Michigan. These are installed costs—material, labor, disposal of old windows, cleanup, and warranty. They reflect what homeowners in Sterling Heights, Rochester Hills, Grosse Pointe Farms, and Troy are paying in 2026.
Vinyl Windows
$450–$750 per window installed
Vinyl is the most common choice in Metro Detroit, and for good reason. Quality vinyl windows handle Michigan's freeze-thaw cycles well, require minimal maintenance, and deliver solid energy performance. The range depends on glass package (double-pane vs. triple-pane, Low-E coatings), frame thickness, and brand. A basic builder-grade vinyl double-hung runs closer to $450. A premium vinyl window with triple-pane glass, argon fill, and reinforced frames pushes toward $750.
Fiberglass Windows
$650–$1,100 per window installed
Fiberglass costs more upfront but offers superior durability and thermal performance. The material expands and contracts at nearly the same rate as glass, which means fewer seal failures over time—critical in Michigan, where temperature swings from -10°F to 90°F aren't unusual. Fiberglass also holds up better in direct sun without warping or fading. If you're planning to stay in your home long-term, fiberglass is worth considering.
Wood-Clad Windows
$900–$1,500+ per window installed
Wood-clad windows—typically aluminum or vinyl exterior with a wood interior—deliver the aesthetics many homeowners want, especially in historic districts or upscale neighborhoods. The wood interior can be stained or painted to match trim. The protected exterior requires less maintenance than bare wood but still demands attention. These are premium units, and the cost reflects that. Expect to pay more for custom sizes, specialty shapes, or high-end brands.

Whole-House Projects: What to Expect
Most Michigan homes have 12 to 20 windows. A typical whole-house replacement breaks down like this:
- Small ranch (10–12 windows): $6,000–$12,000
- Medium Colonial (14–18 windows): $10,000–$18,000
- Large two-story (20+ windows): $15,000–$30,000+
These ranges assume standard double-hung or casement windows in reasonably accessible locations. Add bay windows, second-story installations, or structural repairs, and costs climb. Subtract a few windows by keeping newer units in good shape, and you'll save accordingly.
Michigan-Specific Cost Factor: Brick openings are common in Metro Detroit—especially in older Colonials and ranch homes. Removing old windows from brick, repairing mortar, and properly flashing new units adds time and cost compared to vinyl-sided homes. Expect to pay 10–20% more per window when working with brick.
Five Factors That Drive Window Costs Up or Down
Window replacement cost in Metro Detroit isn't just about the window itself. Here's what actually moves the needle on your final invoice.
1. Window Material and Construction Quality
Not all vinyl windows are created equal. A basic vinyl window might have thin walls, minimal reinforcement, and mediocre weatherstripping. A premium vinyl window uses thicker extrusions, steel or aluminum reinforcement in the sash and frame, multi-chamber construction for better insulation, and high-quality seals that don't fail after five winters. The difference in material cost is $100 to $300 per window—but the performance gap is significant in Michigan weather.
Fiberglass and wood-clad windows start at a higher baseline because the materials themselves cost more to manufacture. You're paying for dimensional stability, longevity, and thermal performance that vinyl can't quite match.
2. Glass Packages: More Than Just "Double-Pane"
The glass is where energy efficiency lives—or dies. Here's what different glass packages cost and deliver:
- Standard double-pane, air-filled: Baseline. Adequate for Michigan, but you'll feel the difference on cold nights.
- Double-pane with Low-E coating and argon fill: Adds $50–$100 per window. Blocks UV, reduces heat transfer, and cuts energy bills. This is the minimum we recommend for Southeast Michigan.
- Triple-pane with Low-E and argon: Adds $150–$250 per window. Significantly better insulation, less condensation, quieter operation. Worth it if you're in an exposed location or prioritize comfort and efficiency.
Low-E coatings are thin metallic layers that reflect infrared heat while allowing visible light through. In winter, they keep heat inside. In summer, they block solar heat gain. Argon is a dense, inert gas that insulates better than air. These aren't gimmicks—they're building science that works.
3. Window Style and Operability
Different window styles have different price points:
- Double-hung windows: Most common, most affordable. Two operable sashes, tilt-in for cleaning.
- Casement windows: Hinged on the side, crank open. Better air seal than double-hungs, slightly higher cost. Excellent for ventilation.
- Sliding windows: Similar cost to double-hungs. Work well in tight spaces or above counters.
- Bay and bow windows: Significantly more expensive—$2,500 to $5,000+ installed. These are structural assemblies that project from the wall and often require framing modifications.
- Picture windows: Fixed glass, no moving parts. Less expensive than operable windows of the same size.
At NEXT Exteriors, we help homeowners choose window styles based on function, not just aesthetics. A casement window in a kitchen provides better ventilation than a double-hung. A picture window in a living room maximizes light and views without the cost of unnecessary operability.
4. Installation Complexity
This is where contractor experience matters—and where costs vary widely. Installing a window in a wood-sided ranch is straightforward. Installing a window in a 1960s brick Colonial with rotted framing, out-of-square openings, and no existing flashing is a different job entirely.
Factors that increase installation cost:
- Brick or stone exterior: Requires careful removal, mortar repair, and proper flashing integration.
- Structural repairs: Rotted sills, headers, or framing need to be replaced before the new window goes in.
- Second-story or difficult access: Scaffolding, lifts, or extra labor time.
- Custom or oversized units: Anything outside standard dimensions costs more and takes longer to install.
- Interior trim work: If you want new interior trim, extension jambs, or drywall repair, that's additional labor.
A good contractor will identify these issues during the estimate. A bad contractor will lowball the price, then hit you with change orders once the old windows are out.
5. Project Size and Timing
Replacing all your windows at once is more cost-effective per window than doing them one at a time. Contractors can order materials in bulk, schedule crews efficiently, and minimize mobilization costs. You'll typically save 10–15% on a whole-house project compared to piecemeal replacements.
Timing matters too. Spring and fall are peak seasons for window replacement in Michigan. If you're flexible and can schedule work in late winter or early summer, some contractors offer off-season discounts. At NEXT Exteriors, we work year-round—Michigan winters don't stop us—but demand does fluctuate.

Window Materials That Work in Michigan Weather
Michigan weather is hard on windows. Freeze-thaw cycles stress frames and seals. Summer humidity tests weatherstripping. Ice dams and wind-driven rain find every weak point. Not every window material handles these conditions equally.
Vinyl: The Practical Choice
Vinyl windows dominate the Michigan market for good reason. Quality vinyl—thick-walled, multi-chamber construction with proper reinforcement—handles freeze-thaw cycles without cracking or warping. It doesn't rot, doesn't need painting, and delivers solid thermal performance at a reasonable price.
The key word is quality. Cheap vinyl windows with thin walls and minimal reinforcement sag over time, especially in larger sizes. The frames flex, seals fail, and you're back to drafts and condensation. We install vinyl windows from manufacturers who engineer for Michigan conditions—brands that use thicker extrusions, steel or aluminum reinforcement, and fusion-welded corners that don't separate.
Best for: Homeowners who want low-maintenance, energy-efficient windows at a reasonable cost.
Fiberglass: Built for the Long Haul
Fiberglass is the most dimensionally stable window material available. It expands and contracts at nearly the same rate as glass, which means fewer seal failures and longer-lasting performance. In Michigan, where a window might see a 100°F temperature swing from winter to summer, that stability matters.
Fiberglass is also stronger than vinyl, so frames can be thinner, which means more glass area and better views. The material doesn't degrade in UV exposure, doesn't warp, and can be painted if you want to change the color down the road.
The downside? Cost. Fiberglass windows run 30–50% more than comparable vinyl units. But if you're planning to stay in your home for 20+ years, the durability and performance often justify the investment.
Best for: Homeowners prioritizing long-term durability, thermal performance, and minimal maintenance.
Wood-Clad: Aesthetics with Protection
Wood-clad windows give you the warmth and beauty of wood on the interior with a weather-resistant exterior cladding—typically aluminum or vinyl. The wood can be stained or painted to match your trim. The cladding protects the exterior from Michigan weather.
Wood-clad windows are premium products. They cost more, and they require more maintenance than vinyl or fiberglass—though far less than bare wood. The interior wood needs occasional refinishing, and the exterior cladding can dent or scratch. But for homeowners who want the look of traditional wood windows without the full maintenance burden, wood-clad is a solid middle ground.
Best for: Historic homes, upscale properties, or homeowners who prioritize aesthetics and are willing to invest in maintenance.
What We Install at NEXT Exteriors
We work with vinyl and fiberglass windows from manufacturers who engineer for Michigan conditions and back their products with real warranties. We don't push the most expensive option—we recommend what makes sense for your home, your budget, and how long you plan to live there. Our window replacement in Detroit projects reflect that philosophy: honest recommendations, quality materials, and installation that lasts.
Signs It's Time to Replace Your Windows
Not every drafty window needs immediate replacement. Sometimes weatherstripping, caulk, or a tune-up is enough. But if you're seeing these signs, replacement is the right call:
Condensation Between the Panes
If you see fog, moisture, or condensation between the glass layers, the seal has failed. That means the insulating gas (argon or krypton) has leaked out, and the window's thermal performance is shot. You can't fix a failed seal—the insulated glass unit needs to be replaced. In many cases, especially with older windows, replacing the entire window makes more sense than trying to source and install new glass.
Drafts You Can Feel
Stand next to your windows on a cold day. If you feel air movement, the window isn't sealing properly. Weatherstripping degrades over time, frames warp, and sashes settle. Some of this can be addressed with maintenance, but if the window is more than 15–20 years old and you're feeling significant drafts, replacement is usually the better investment.
Difficulty Opening, Closing, or Locking
Windows that stick, bind, or won't lock properly are more than an annoyance—they're a security and safety issue. In Michigan, this often happens because vinyl frames have warped, wood components have swollen or rotted, or the window was improperly installed to begin with. If multiple windows in your home are difficult to operate, it's time to consider replacement.
Visible Rot, Decay, or Damage
Check your window sills, jambs, and exterior trim. If you see soft wood, peeling paint that exposes bare wood, or visible rot, water is getting in. This isn't just a window problem—it's a structural problem. Water infiltration leads to mold, insulation damage, and framing rot. Replacing the windows and properly flashing them stops the problem before it gets worse.
Rising Energy Bills
Old, inefficient windows are a major source of heat loss in winter and heat gain in summer. If your energy bills have climbed and your HVAC system is running constantly, your windows are likely part of the problem. Modern windows with Low-E glass, argon fill, and quality frames can cut heat loss by 30–50% compared to old single-pane or early double-pane units.
Ice Buildup on Interior Frames
If you're seeing ice or heavy condensation on the interior side of your windows during Michigan winters, the window isn't insulating properly. This is common with old aluminum-frame windows or single-pane glass. The cold exterior surface is cooling the interior frame below the dew point, causing condensation that freezes. This isn't just uncomfortable—it damages paint, trim, and drywall. New windows with better thermal breaks and insulated glass solve this.
If you're experiencing any of these issues in your Sterling Heights, Shelby Township, or Clinton Township home, it's worth getting an assessment. At NEXT Exteriors, we'll tell you honestly whether your windows need replacement or if a repair will buy you a few more years.
What You're Actually Paying For
When you hire a contractor for window replacement, you're not just buying windows. You're paying for expertise, proper installation, and long-term performance. Here's what separates a quality window job from a cheap one.
Proper Flashing and Weatherproofing
The window itself is only half the job. How it's integrated into the wall assembly determines whether it leaks or lasts. In Michigan, where we get wind-driven rain, ice dams, and freeze-thaw cycles, flashing is critical.
Proper flashing means:
- A continuous water-resistive barrier (housewrap or building paper) behind the siding
- Sill pan flashing at the bottom of the opening to direct water out, not into the wall
- Head flashing above the window to shed water away from the opening
- Jamb flashing on the sides, integrated with the water-resistive barrier
- Proper caulking and sealant at all joints
This takes time. It requires knowledge of building science and attention to detail. A contractor who skips flashing or uses improper materials is setting you up for water damage down the road. We've repaired plenty of window installations where the previous contractor didn't flash correctly—and the homeowner paid twice.
Structural Repairs Done Right
When we remove old windows, we often find rotted sills, damaged headers, or compromised framing. Quality contractors fix these issues before installing the new window. They sister in new framing, replace rotted wood, and ensure the opening is square and structurally sound.
Bad contractors ignore the rot, shim around it, and hope the homeowner doesn't notice. The new window goes in crooked, doesn't operate smoothly, and fails prematurely because it's not properly supported.
Insulation and Air Sealing
The gap between the window frame and the rough opening needs to be insulated and air-sealed. We use low-expansion spray foam to fill the gap without bowing the frame, then back it up with backer rod and sealant on the interior. This prevents drafts, improves energy efficiency, and stops moisture infiltration.
Some contractors skip this step or use the wrong type of foam (high-expansion foam that bows the frame and causes the window to bind). The result is a window that looks fine but performs poorly.
Quality Materials and Manufacturer Warranties
We install windows from manufacturers who stand behind their products—brands with real warranties, local support, and a track record in Michigan. When a window fails, we can get parts or replacements without a fight. Cheap windows from unknown brands might save you $100 per unit upfront, but when the seal fails in year three and the manufacturer is out of business, you're stuck.
Cleanup and Respect for Your Home
Window replacement is messy. Old windows get cut out, insulation gets disturbed, and debris piles up. Quality contractors protect your floors, contain the mess, and haul everything away when the job is done. We treat your home like it's ours—because reputation matters more than saving 20 minutes on cleanup.
This is part of what you're paying for when you hire exterior services in Detroit from a licensed, insured contractor with 35 years in business. It costs more than the guy who shows up in an unmarked van with no insurance. It's also why our customers don't call us back to fix problems.

How to Get Accurate Pricing for Your Home
Online cost calculators are useful for ballpark estimates, but they can't account for the specifics of your home. Here's how to get accurate pricing for window replacement in Metro Detroit.
Why Online Calculators Fall Short
Most online calculators ask for the number of windows, your zip code, and maybe the window style. They spit out a range—often a wide one—based on national averages. What they don't account for:
- Your home's construction type (brick, vinyl siding, wood siding)
- The condition of existing framing and trim
- Window sizes and custom dimensions
- Access challenges (second story, landscaping, tight spaces)
- Local labor rates and material costs
- The specific glass packages and features you want
A calculator might tell you $7,000 to $15,000 for 12 windows. That's a $8,000 spread—not particularly helpful when you're trying to budget.
What to Expect During an Estimate
A quality contractor will visit your home, measure every window, assess the condition of the openings, and ask about your goals. Here's what that process looks like with NEXT Exteriors:
- Measurement and inspection: We measure each window opening, check for square and level, and inspect the surrounding framing, siding, and trim. We note any structural issues, rot, or water damage.
- Material discussion: We explain the differences between vinyl, fiberglass, and wood-clad windows, and recommend options based on your home, budget, and priorities.
- Glass package options: We discuss double-pane vs. triple-pane, Low-E coatings, and argon fill. We explain what each option costs and what it delivers in terms of energy efficiency and comfort.
- Detailed quote: We provide a written estimate that breaks down material costs, labor, any necessary repairs, and timeline. No surprises, no hidden fees.
This process takes 60–90 minutes for a typical home. It's the only way to provide accurate pricing.
Questions to Ask Contractors
When you're getting estimates, ask these questions to separate quality contractors from the rest:
- "Are you licensed and insured in Michigan?" This should be a yes with proof. A Michigan Residential Builder's License is required for window replacement.
- "How do you handle flashing and weatherproofing?" A good contractor will explain their process in detail. A bad one will give you a vague answer or say "we seal it up real good."
- "What brands do you install, and why?" Quality contractors work with reputable manufacturers and can explain why they choose those brands.
- "What's included in your warranty?" Ask about both the manufacturer's warranty on the windows and the contractor's warranty on installation. Get it in writing.
- "What happens if you find structural damage during installation?" A good contractor will explain how they handle repairs and provide pricing upfront or as a change order with your approval.
- "Can you provide references from recent projects in my area?" Any contractor worth hiring will have a list of satisfied customers in Southeast Michigan.
Red Flags in Window Quotes
Watch out for these warning signs:
- Pressure tactics: "This price is only good today" or "We can start tomorrow if you sign now." Quality contractors don't need to pressure you.
- Quotes without a site visit: No one can give you accurate pricing over the phone or based on square footage alone.
- Vague line items: "Windows and installation: $12,000." What windows? What glass? What's included? A detailed quote protects both parties.
- No license or insurance: This is illegal in Michigan and leaves you with zero recourse if something goes wrong.
- Payment upfront: Never pay the full amount before work starts. A reasonable deposit (typically 25–50%) is standard, with the balance due upon completion.
At NEXT Exteriors, we provide detailed, written estimates with no pressure. We're happy to answer questions, explain our process, and give you time to think it over. Our free quote page is where most homeowners start—we'll schedule a visit, assess your home, and provide accurate pricing based on what you actually need.
Related Services: Window replacement often pairs well with other exterior upgrades. If your siding is aging or your insulation services in Southeast Michigan need attention, tackling multiple projects at once can save time and money. We also handle roof replacement in Metro Detroit, gutter installation in Southeast Michigan, and exterior painting in Detroit. Coordinating these projects improves efficiency and ensures consistent quality across your home's exterior.
Ready to Get Started?
NEXT Exteriors has been protecting Michigan homes since 1988. Get a free, no-pressure estimate from a team that shows up on time and does the job right. We'll assess your windows, explain your options, and provide accurate pricing—no gimmicks, no surprises.
Get Your Free QuoteOr call us: (844) 770-6398
Frequently Asked Questions
Most window replacement projects in Metro Detroit take 1–3 days, depending on the number of windows and any structural repairs needed. A typical whole-house job (12–18 windows) is usually completed in 2 days. We work efficiently but never rush the critical steps—flashing, insulation, and air sealing take time to do correctly. We'll give you a specific timeline during your estimate.
Yes. We install windows year-round in Southeast Michigan. The process is the same—we remove the old window, prep the opening, and install the new unit as quickly as possible to minimize heat loss. Most windows are replaced in under an hour each. We use tarps and temporary coverings to protect your home during the swap. Cold weather doesn't affect the quality of the installation, though some materials (like caulk and spray foam) require specific cold-weather formulations.
No, but there are advantages to doing them all at once. You'll save 10–15% per window on a whole-house project compared to replacing them individually. You'll also get consistent performance, aesthetics, and warranty coverage. That said, if budget is a concern, prioritize the windows that are in the worst shape—typically north-facing windows, windows with visible damage, or windows in high-traffic areas like living rooms and bedrooms. We can help you phase the project if needed.
Energy savings alone typically don't justify window replacement—the payback period is often 15–25 years. But that's not the full picture. New windows improve comfort (less drafts, more consistent temperatures), reduce noise, enhance curb appeal, and eliminate maintenance headaches like painting or repairing rotted frames. If your windows are failing—condensation between panes, drafts, difficulty operating—replacement isn't about payback, it's about fixing a problem before it gets worse. For more on real ROI, check our post on replacement windows in Michigan: real ROI and energy savings.
If the issue is minor—worn weatherstripping, a broken lock, or a cracked pane of glass—repair is often the right call. If you're dealing with failed seals (condensation between panes), rotted frames, warped sashes, or windows that are 20+ years old and inefficient, replacement makes more sense. We'll assess your windows honestly and tell you which route is best. Sometimes a repair buys you a few more years. Sometimes it's throwing good money after bad.
Yes. We work with financing partners to offer flexible payment options for homeowners in Southeast Michigan. Whether you want to pay over time or take advantage of promotional rates, we can help you find a plan that fits your budget. Ask about financing options when you schedule your free estimate.
NEXT Exteriors provides a workmanship warranty on all installations, and the windows themselves come with manufacturer warranties that typically cover the frame, glass, and hardware for 10–20 years or more, depending on the brand and model. We'll explain both warranties in detail during your estimate and provide everything in writing. If there's ever an issue, we handle it—no runaround, no finger-pointing between us and the manufacturer.
Attic Insulation Levels: What's "Enough" in Metro Detroit?
Michigan winters demand specific R-values. Learn what attic insulation levels actually work in Metro Detroit's climate—from a contractor who's been doing this since 1988.
Here's a question we hear constantly from homeowners in Sterling Heights, Troy, and across Southeast Michigan: "How much attic insulation do I actually need?"
The internet will tell you R-38. Your neighbor's contractor might say R-49. The guy who came out for a quote last week probably threw out R-60. And if you're sitting there wondering what any of that means—or why the numbers keep changing—you're not alone.
After 35 years installing attic insulation in Metro Detroit, we've learned this: Michigan winters don't care about generic national recommendations. They care about whether your attic can handle 15°F nights in January, lake-effect snow in February, and 90°F attic temperatures in July—sometimes all in the same week.
This isn't about hitting some arbitrary number. It's about understanding what actually works in our climate, what you're paying for, and what "enough" looks like when you're trying to keep ice dams off your roof and your heating bill under control.
Let's break it down.
What R-Value Actually Means (And Why It Matters in Michigan)
R-value measures thermal resistance—how well a material resists heat flow. The higher the number, the better it insulates. Simple enough.
But here's what most contractors won't tell you: R-value assumes perfect conditions. It doesn't account for air leaks, moisture intrusion, compression over time, or the way Michigan's freeze-thaw cycles stress building materials.
When you read "R-38 recommended," that's based on Department of Energy climate zones. Metro Detroit sits in Zone 5, which covers most of the northern United States. The DOE's baseline recommendation for Zone 5 is R-38 to R-60 for attics.
That's a 22-point spread. Why? Because "recommended" depends on your home's age, construction type, existing insulation, air sealing quality, and whether you're dealing with a vented or unvented attic.
Michigan Reality Check: A 1960s ranch in Warren with original insulation probably has R-11 to R-19—less than half of what it should be. A newer home in Rochester Hills built to 2015 code might have R-38 but still underperform if the attic isn't properly air-sealed.
The Michigan Residential Code requires a minimum of R-49 for attic insulation in new construction. That's not a suggestion—it's code. But thousands of homes across Macomb and Oakland counties were built before that standard existed, and insulation degrades over time.
Fiberglass batts settle. Cellulose compacts. Rodents nest in it. Roof leaks soak it. After 20 to 30 years, what started as R-30 might be performing closer to R-20.

The Michigan Standard: R-49 to R-60
If you're upgrading attic insulation in Metro Detroit, here's the target range we recommend: R-49 to R-60.
Not R-38. Not "whatever the last guy said." R-49 minimum, R-60 if you want to future-proof your home and maximize energy savings.
Why this range?
- R-49 meets Michigan code and provides solid thermal performance for most homes in Macomb, Oakland, and St. Clair counties.
- R-60 is the Energy Star recommendation for Zone 5 and delivers measurably better performance during extreme cold snaps and summer heat.
- Anything below R-38 leaves you vulnerable to ice dams, high heating costs, and HVAC strain during Michigan winters.
What R-49 to R-60 Looks Like in Different Insulation Types
| Insulation Type | R-Value per Inch | Depth for R-49 | Depth for R-60 |
|---|---|---|---|
| Blown-in Fiberglass | R-2.5 | 19.6 inches | 24 inches |
| Blown-in Cellulose | R-3.5 | 14 inches | 17 inches |
| Open-Cell Spray Foam | R-3.5 | 14 inches | 17 inches |
| Closed-Cell Spray Foam | R-6.5 | 7.5 inches | 9.2 inches |
Most homes in Southeast Michigan use blown-in fiberglass or cellulose because it's cost-effective and performs well when properly installed. Spray foam is more expensive but makes sense in specific situations—cathedral ceilings, unvented attics, or homes with significant air leakage issues.
The key isn't just hitting a number. It's ensuring the insulation is evenly distributed, properly air-sealed at penetrations (recessed lights, plumbing stacks, attic hatches), and not compressed or damaged.
What "Not Enough" Looks Like in Real Life
You don't need a thermal camera to know your attic insulation is inadequate. Michigan winters make it obvious.
Ice Dams and Icicle Formation
This is the big one. If you're getting ice dams along your roof edges or giant icicles hanging from your gutters, your attic is too warm. Heat from your living space is escaping through the ceiling, warming the roof deck, melting snow, and refreezing at the eaves.
Ice dams aren't just cosmetic. They force water under shingles, rot fascia boards, damage gutters, and cause interior water damage. We've seen ice dams rip entire gutter systems off homes in Shelby Township during particularly brutal winters.
Proper attic insulation—combined with adequate ventilation—keeps your roof deck cold and prevents this cycle. If you're dealing with recurring ice dams, your attic insulation is almost certainly below R-38.
Uneven Heating and Cold Spots
Rooms directly below the attic that feel noticeably colder in winter? That's heat escaping through inadequate insulation. You'll notice it most in second-story bedrooms, bonus rooms, or any space with a vaulted ceiling.
Your furnace runs constantly trying to compensate, but the heat just keeps bleeding into the attic and out through the roof.
High Energy Bills
We've worked with homeowners in Clinton Township whose heating bills dropped 25% to 35% after upgrading from R-19 to R-60. That's not a sales pitch—it's building science.
If your natural gas or electric bills spike every winter and you can't figure out why, check your attic. Chances are good you're heating the neighborhood instead of your house.
HVAC System Strain
Furnaces and air conditioners aren't designed to run 24/7. When your attic insulation is inadequate, your HVAC system works overtime trying to maintain temperature. That means more wear, more breakdowns, and a shorter lifespan for expensive equipment.
We've seen furnaces in 15-year-old homes fail prematurely because they were compensating for R-19 attic insulation in a house that should have had R-49.

Insulation Types and How to Hit Target R-Values
Not all insulation is created equal, and what works best depends on your home's construction, budget, and specific needs. Here's what we install most often in Southeast Michigan—and why.
Blown-In Fiberglass
This is the workhorse. Blown-in fiberglass (made by manufacturers like Owens Corning and CertainTeed) is cost-effective, non-combustible, and performs well in Michigan's climate.
At roughly R-2.5 per inch, you need about 20 inches to hit R-49 and 24 inches for R-60. It's installed with a blowing machine that distributes the material evenly across the attic floor, filling gaps and covering joists.
Pros: Affordable, fire-resistant, doesn't settle as much as cellulose, and widely available.
Cons: Lower R-value per inch than cellulose or spray foam, so you need more depth. Can be itchy to work around (but that's why you hire professionals).
Blown-In Cellulose
Cellulose is made from recycled paper treated with fire retardants. At R-3.5 per inch, it's denser than fiberglass and requires less depth to achieve the same R-value—about 14 inches for R-49.
Pros: Higher R-value per inch, better air-sealing properties, eco-friendly (recycled content), and slightly better soundproofing.
Cons: Settles more over time (loses about 20% of its initial R-value), can absorb moisture if your roof leaks, and is heavier than fiberglass.
We use cellulose often in older homes where we're topping off existing insulation or filling wall cavities as part of a broader exterior services project.
Spray Foam Insulation
Spray foam comes in two types: open-cell (R-3.5 per inch) and closed-cell (R-6.5 per inch). Both expand on contact, filling gaps and creating an air seal in addition to insulating.
Open-cell spray foam is softer and less expensive. It's good for sound dampening and works well in vented attics where you want insulation at the attic floor.
Closed-cell spray foam is rigid, moisture-resistant, and adds structural strength. It's ideal for unvented attics, cathedral ceilings, or situations where you're insulating the roof deck instead of the attic floor.
Pros: Superior air sealing, high R-value per inch (especially closed-cell), and excellent for problem areas like rim joists or around recessed lights.
Cons: Expensive—often 3x to 5x the cost of blown-in insulation. Not DIY-friendly. Requires professional installation and proper ventilation during application.
Spray foam makes sense for specific applications, but for most attics in Metro Detroit, blown-in fiberglass or cellulose delivers better value.
Hybrid Approaches
Sometimes the best solution is a combination. We'll often use spray foam to air-seal problem areas (attic hatches, recessed lights, plumbing penetrations) and then top with blown-in insulation to hit R-49 or R-60.
This gives you the air-sealing benefits of spray foam without the cost of foaming the entire attic.
Cost Reality: What to Budget for Attic Insulation in Southeast Michigan
Let's talk numbers. Attic insulation costs vary based on square footage, insulation type, existing conditions, and how much prep work is required.
Here's what we typically see for a 1,500-square-foot attic in Metro Detroit:
| Insulation Type | Target R-Value | Cost Range |
|---|---|---|
| Blown-in Fiberglass | R-49 | $1,800 - $2,800 |
| Blown-in Fiberglass | R-60 | $2,200 - $3,400 |
| Blown-in Cellulose | R-49 | $2,000 - $3,200 |
| Blown-in Cellulose | R-60 | $2,400 - $3,800 |
| Spray Foam (Open-Cell) | R-49 | $4,500 - $7,000 |
| Spray Foam (Closed-Cell) | R-49 | $7,000 - $11,000 |
These are ballpark figures. Your actual cost depends on accessibility, whether we need to remove old insulation, air sealing requirements, and any structural repairs (like replacing damaged decking or fixing roof leaks before we insulate).
ROI and Energy Savings
Upgrading from R-19 to R-49 typically pays for itself in 5 to 8 years through lower heating and cooling costs. In Michigan, where we run furnaces from October through April, the savings add up fast.
Homeowners in Sterling Heights and Troy regularly report 20% to 30% reductions in winter energy bills after upgrading attic insulation. Over a 15-year period, that's thousands of dollars in savings—plus increased home comfort and resale value.
Utility Rebates and Tax Credits
Check with your utility provider. DTE Energy and Consumers Energy both offer rebates for insulation upgrades that meet Energy Star standards. The federal Energy Efficient Home Improvement Credit also covers insulation—up to 30% of the cost, capped at $1,200 annually.
These incentives change, so ask us during your estimate. We'll help you navigate available rebates and maximize your savings.

When to Call a Professional (And What to Look For)
You can measure your existing insulation yourself—grab a tape measure, head into the attic, and check the depth. But knowing whether you need more insulation is only part of the equation.
Here's when you should call a professional:
Signs Your Attic Needs Attention
- Ice dams or icicles forming along roof edges every winter
- High heating bills that don't match your thermostat settings
- Uneven temperatures between rooms, especially second-story spaces
- Visible insulation damage—water stains, compression, rodent nests, or mold
- Your home was built before 2000 and you've never upgraded insulation
- You're planning other exterior work—roof replacement, siding upgrades, or window installation—and want to tackle insulation at the same time
What a Proper Insulation Assessment Includes
A legitimate contractor won't give you a quote over the phone. They'll come to your house, get in the attic, and assess:
- Current insulation type and depth
- Existing R-value and whether it's performing as designed
- Air leaks around penetrations, hatches, and recessed lights
- Ventilation—soffit vents, ridge vents, gable vents, and whether they're functioning properly
- Moisture issues—roof leaks, condensation, mold, or water stains
- Structural concerns—damaged rafters, sagging decking, or inadequate support
If a contractor skips any of these steps, they're guessing. And guessing leads to problems down the road.
Red Flags When Hiring a Contractor
Not all insulation contractors are created equal. Here's what to watch out for:
- No license or insurance. Michigan requires a Residential Builder's License for insulation work. If they can't show proof, walk away.
- Pressure tactics. "This price is only good today" is a sales gimmick, not a legitimate business practice.
- Vague estimates. A proper quote specifies insulation type, target R-value, square footage, and exactly what's included.
- No air sealing. If they're not addressing air leaks before blowing in insulation, they're doing it wrong.
- Skipping ventilation. Insulation without proper attic ventilation creates moisture problems and reduces insulation effectiveness.
At NEXT Exteriors, we've been doing this since 1988. We're a CertainTeed Master Shingle Applicator, BBB A+ Accredited, and licensed in Michigan. We don't do high-pressure sales, and we don't cut corners. We show up on time, do the work right, and clean up when we're done.
If you're also considering other improvements—like upgrading your home's curb appeal with exterior painting—we can coordinate everything as part of a comprehensive approach to protecting your home.
Ready to Upgrade Your Attic Insulation?
NEXT Exteriors has been protecting Michigan homes since 1988. Get a free, no-pressure estimate from a team that shows up on time and does the job right.
Get Your Free QuoteOr call us: (844) 770-6398
Frequently Asked Questions About Attic Insulation in Metro Detroit
Michigan building code requires R-49 minimum for attic insulation in new construction. For optimal energy efficiency and comfort in Metro Detroit's climate, we recommend R-49 to R-60. Homes built before 2000 often have R-19 or less and should be upgraded. The exact amount depends on your home's age, existing insulation, and whether you're experiencing ice dams or high energy bills.
R-49 meets Michigan code and provides solid thermal performance for most homes. R-60 is the Energy Star recommendation for our climate zone and delivers measurably better performance during extreme cold and heat. The difference is about 4-5 inches of additional insulation depth (depending on material type) and typically costs $400-$600 more for an average attic. R-60 pays off faster in homes with high heating costs or recurring ice dam problems.
Yes, in most cases. If your existing insulation is dry, undamaged, and not compressed, we can blow new insulation on top to reach R-49 or R-60. However, if the old insulation is wet, moldy, infested with rodents, or heavily compressed, it should be removed first. We always inspect existing insulation during the estimate to determine the best approach. Mixing insulation types (like adding fiberglass over old cellulose) is fine as long as the existing material is in good condition.
Blown-in fiberglass and cellulose typically last 20-30 years before settling and losing effectiveness. Spray foam can last 80+ years if properly installed. However, insulation performance degrades faster if your attic has moisture issues, roof leaks, or pest problems. Regular attic inspections—especially after severe storms or roof work—help catch problems early. If your home is 25+ years old and you've never upgraded insulation, it's likely time for an assessment.
Proper attic insulation is critical for preventing ice dams, but it's not the only factor. Ice dams form when heat escapes through your ceiling, warms the roof deck, melts snow, and refreezes at the eaves. To stop them, you need three things: adequate insulation (R-49 minimum), proper air sealing (to prevent warm air from reaching the roof deck), and adequate ventilation (to keep the roof deck cold). We address all three during installation. If you're getting ice dams every winter, your attic insulation is almost certainly inadequate.
Spray foam has advantages—higher R-value per inch, superior air sealing, and moisture resistance—but it costs 3x to 5x more than blown-in insulation. For most attics in Metro Detroit, blown-in fiberglass or cellulose delivers excellent performance at a fraction of the cost. Spray foam makes sense for specific applications: unvented attics, cathedral ceilings, rim joists, or homes with severe air leakage. We'll recommend the most cost-effective solution based on your home's needs, not what makes us the most money.
For a typical 1,500-square-foot attic, blown-in fiberglass to R-49 costs $1,800-$2,800. Upgrading to R-60 adds $400-$600. Cellulose runs slightly higher. Spray foam costs $4,500-$11,000 depending on type and coverage. Prices vary based on accessibility, prep work, and whether we need to remove old insulation. Most homeowners see 20-30% reductions in heating costs, with the upgrade paying for itself in 5-8 years. Utility rebates and federal tax credits can offset 20-30% of the cost.
Exterior Paint Prep: The Step Homeowners Underestimate
Michigan contractors reveal why proper exterior paint prep determines your paint job's lifespan. What to expect, what to demand, and what most painters skip.

Here's what most homeowners in Sterling Heights, Royal Oak, and across Southeast Michigan don't realize about exterior painting: the paint you choose matters far less than the prep work that happens before the first brush stroke.
I've been doing this work since 1988, and I can tell you with absolute certainty — a $30-per-gallon paint applied over properly prepped surfaces will outlast a $70-per-gallon premium paint slapped onto dirty, poorly prepared siding. Every single time.
The problem? Prep work is invisible once it's done. You can't see the hours of scraping, sanding, caulking, and priming under that beautiful finished coat. So when you're comparing bids from three different painting contractors, the lowest number looks tempting. But that low bid almost always means one thing: they're cutting corners on prep.
And in Michigan, where we deal with brutal freeze-thaw cycles, summer humidity, and UV exposure that would make a Phoenix contractor wince, cutting corners on prep isn't just wasteful — it's setting you up for paint failure within three to five years instead of the ten to fifteen you should expect.
What Proper Exterior Paint Prep Actually Involves
Let's walk through what actually needs to happen before paint touches your home's exterior. This isn't theory — this is what our crews do on every Southeast Michigan painting project, and what any reputable contractor should be doing.
Surface Cleaning and Power Washing
Every exterior surface accumulates dirt, mildew, pollen, and environmental contaminants. Paint doesn't stick to dirt — it sticks to clean substrate. We power wash every surface at the right pressure (too much pressure damages wood siding, too little leaves contaminants behind). Then we let everything dry completely, usually 48 to 72 hours depending on weather conditions.
Mildew is particularly problematic in Michigan's humid summers. If you paint over mildew, it continues growing under the paint film, causing premature failure. We treat affected areas with appropriate cleaners before washing.
Scraping and Sanding
This is where the real labor happens. Every square inch of loose, peeling, or bubbling paint gets scraped off. Not just the obvious stuff — we're looking for paint that's lost adhesion even if it looks okay from ten feet away.
After scraping, we sand the edges where old paint meets bare wood. This creates a smooth transition so you don't see ridges through the finished coat. On older homes in Grosse Pointe Farms or Bloomfield Hills with multiple layers of paint, this process can take days.
Caulking and Sealing
Michigan's freeze-thaw cycles open gaps in every joint, seam, and corner. Water gets in, freezes, expands, and makes the gap worse. The cycle repeats until you've got rot.
We caulk every joint between trim and siding, around windows and doors, at corner boards — anywhere water could infiltrate. We use paintable, flexible caulk that moves with the wood as it expands and contracts with temperature and moisture changes.
This step alone can prevent thousands of dollars in future siding repair costs. Water infiltration is the number one cause of premature paint failure and wood rot.
Priming Bare Wood and Problem Areas
Any bare wood gets primed. Period. Primer seals the wood, prevents tannin bleed-through, and provides a proper base for topcoat adhesion. Skipping primer on bare wood is painting malpractice.
We also spot-prime problem areas: knots that might bleed sap, areas where old paint was scraped to bare wood, and any repairs we've made. Different substrates require different primers — what works on cedar doesn't necessarily work on pine or fiber cement.
Our partnership with Sherwin-Williams means we're using primers specifically engineered for Michigan's climate and the substrates we're working with. This isn't generic big-box store primer — it's commercial-grade product matched to the specific conditions and materials.
Why Michigan Weather Makes Prep Even More Critical
If you lived in Southern California where it's 72 degrees and sunny 300 days a year, you could probably get away with mediocre prep work. In Michigan? Not a chance.
Freeze-Thaw Cycle Damage
Southeast Michigan typically sees 80 to 100 freeze-thaw cycles per winter. Water infiltrates any crack or gap, freezes overnight when temperatures drop, expands (water expands about 9% when it freezes), then thaws during the day. This cycle literally tears paint and wood apart from the inside.
Proper prep — thorough caulking, complete coverage with no thin spots, good adhesion to clean substrate — is your only defense against this relentless mechanical stress. Bad prep means water gets in, and once water gets in during a Michigan winter, the countdown to failure begins.
Moisture Infiltration and Wood Movement
Michigan's humidity swings are extreme. Summer humidity regularly hits 70-80%. Winter indoor heating drops indoor humidity to 20-30%, creating massive moisture gradients between inside and outside.
Wood responds to these moisture changes by expanding and contracting. Paint needs to move with the wood. But it can only do that if it's properly adhered to a clean, well-prepared surface. Paint applied over dirt, loose paint, or improperly sealed wood will crack and peel as the substrate moves beneath it.
Michigan Reality Check: That beautiful paint job you see in July might look completely different by March. Temperature swings from -5°F to 85°F put enormous stress on exterior finishes. Proper prep isn't optional — it's the foundation that allows paint to survive these conditions.
UV Exposure and Paint Degradation
Michigan's summer sun is more intense than most homeowners realize. UV radiation breaks down paint binders and causes chalking, fading, and loss of gloss. South and west-facing walls take the worst beating.
High-quality paint helps, but even the best paint fails prematurely if applied over poor prep. UV damage accelerates wherever adhesion is compromised — at edges where old paint wasn't properly feathered, over dirty surfaces, anywhere moisture has gotten under the film.
The Prep Steps Most Painters Skip (And Why That's a Problem)
After 35+ years in this business, I can spot a rushed prep job from across the street. Here's what corners get cut when a painting contractor is trying to maximize profit or move on to the next job.
Inadequate Surface Cleaning
The shortcut: A quick spray with a garden hose or a half-hearted power wash that doesn't actually remove mildew and contaminants.
Why it matters: Paint needs to bond to the substrate, not to a layer of dirt and mildew. Poor cleaning means poor adhesion, which means premature peeling. You might get two or three years before problems show up, but they will show up.
Skipping Primer on Bare Wood
The shortcut: Slapping topcoat directly on bare wood or scraped areas, claiming "modern paints don't need primer" or "this is paint-and-primer-in-one."
Why it matters: Bare wood is porous and absorbs paint unevenly, leading to thin spots and poor coverage. Without primer, tannins can bleed through (especially on cedar and redwood), causing brown stains. And most importantly, topcoat adhesion to bare wood is significantly worse than adhesion to properly primed wood.
"Paint-and-primer-in-one" is marketing language. These products work fine over previously painted surfaces in good condition. They're not a substitute for actual primer on bare wood.

Poor or Incomplete Caulking
The shortcut: Minimal caulking, using cheap non-paintable caulk, or skipping caulking entirely on areas that "don't look that bad."
Why it matters: Every unsealed gap is a water entry point. In Michigan's freeze-thaw cycles, these gaps widen every winter. Water infiltration leads to paint failure, wood rot, and eventually structural damage. The $200 saved by skipping proper caulking can easily turn into $5,000+ in siding replacement costs within five years.
Rushing the Drying Process
The shortcut: Painting too soon after power washing, applying topcoat before primer has fully cured, or painting in marginal weather conditions (too cold, too humid, rain in the forecast).
Why it matters: Paint chemistry requires proper conditions to cure correctly. Moisture trapped under paint leads to blistering and peeling. Primer needs adequate cure time before topcoat application. Rushing these steps compromises the entire system.
Sherwin-Williams technical specs are clear: substrate moisture content needs to be below 15% before painting, primer needs appropriate cure time (varies by product and conditions), and application should only happen within specified temperature and humidity ranges. These aren't suggestions — they're requirements for warranty coverage and long-term performance.
What a Professional Prep Process Looks Like
When you hire NEXT Exteriors for exterior painting in Southeast Michigan, here's what actually happens before we open the first paint can.
Initial Assessment and Planning
We inspect every surface that's getting painted. We're looking for underlying problems: wood rot that needs repair, failed caulking, areas where previous paint is failing and why. We check substrate moisture content with a moisture meter — if readings are above 15%, we need to identify and fix the moisture source before painting.
We also assess the existing paint: how many coats are on there, what type of paint was used, whether there's lead paint (common on homes built before 1978), and the overall condition. This assessment determines our prep strategy and timeline.
The Prep Timeline
On a typical 2,000-square-foot home in Rochester Hills or Troy, proper prep takes three to five days before we start painting. That breaks down roughly like this:
- Day 1: Power washing and cleaning. Then we wait for everything to dry completely.
- Day 2-3: Scraping, sanding, making minor repairs. This is the most labor-intensive part.
- Day 4: Caulking all joints and seams. Spot-priming bare wood and problem areas.
- Day 5: Final inspection, touch-up any missed spots, verify everything is ready for topcoat.
Only then do we start applying finish coats. Weather can extend this timeline — we're not painting if rain is forecast within 24 hours or if temperatures are going to drop below 50°F before the paint has adequate cure time.
Quality Materials Make a Difference
Our exclusive partnership with Sherwin-Williams isn't just marketing. Their Duration, Emerald, and SuperPaint lines are engineered for extreme weather performance. But more importantly, we have access to their technical support team when we encounter unusual situations.
We use Sherwin-Williams Loxon Concrete & Masonry Primer on foundation areas, their PrepRite ProBlock Interior/Exterior Primer on bare wood, and their Extreme Climate Wood Stain for deck and fence projects. Different substrates and conditions require different products — one-size-fits-all doesn't work in Michigan's climate.
The caulk matters too. We use Sherwin-Williams Krack Kote or similar high-quality, paintable, flexible sealants. Cheap caulk from the big-box store dries hard, cracks within a year, and doesn't adhere properly to paint. Professional-grade sealants cost more but remain flexible and maintain their seal through Michigan's temperature extremes.
Signs Your Painter Is Cutting Corners on Prep
You've got three bids on your kitchen table. Two are similar, one is 30% lower. Before you sign with the low bid, watch for these warning signs.
Red Flags in the Estimate
- Vague language about prep work: If the bid just says "prep as needed" or "standard prep," that's not specific enough. You want to see line items for power washing, scraping/sanding, caulking, priming.
- Unrealistic timeline: If they're promising to prep and paint your whole house in three days, they're either bringing a massive crew (expensive) or cutting corners (likely).
- No mention of primer: If primer isn't listed as a separate line item with its own material cost, they're probably skipping it or using "paint-and-primer-in-one" as a substitute.
- No weather contingency: Professional painters know Michigan weather is unpredictable. If there's no language about weather delays or rescheduling, they're planning to paint regardless of conditions.
Red Flags During the Job
- Painting too soon after power washing: Surfaces need 48-72 hours to dry. If they're washing Monday morning and painting Monday afternoon, moisture is trapped under that paint.
- Minimal scraping: If you're not seeing piles of scraped paint debris, they're not doing enough scraping.
- No caulking or minimal caulking: Walk around the house. You should see fresh caulk at every joint, seam, and gap. If you don't, they're skipping this critical step.
- Painting in bad weather: If they're painting in temperatures below 50°F, above 90°F, in high humidity, or when rain is forecast, they're compromising the paint's ability to cure properly.
Questions to Ask Before Hiring: "How many days do you allocate for prep work?" "What specific primer will you use and where?" "How do you handle weather delays?" "Can I see your process for caulking and sealing?" A good contractor will have detailed answers. A bad one will give you vague reassurances.
Contract Language to Insist On
Make sure your contract specifies:
- Power washing with appropriate equipment and cleaning solutions
- Scraping and sanding of all loose or failing paint
- Caulking of all joints, seams, and gaps with paintable, flexible sealant
- Primer application on all bare wood and problem areas (specify the primer brand/type)
- Number of topcoats (two coats minimum for most applications)
- Paint brand and product line (not just "exterior paint")
- Weather contingencies and rescheduling policy
If a contractor resists putting these details in writing, that tells you everything you need to know about how seriously they take prep work.
The Real Cost of Skipping Proper Prep
Let's talk numbers, because this is where the low-bid trap becomes obvious.
A proper exterior paint job on a typical 2,000-square-foot home in Macomb County or Oakland County runs $6,000 to $10,000 depending on condition, number of stories, and complexity. Roughly 40-50% of that cost is labor, and most of the labor is prep work.
A low-bid painter might come in at $4,000. They're saving money by cutting prep time from 40 hours to 15 hours. That's $1,000-$1,500 in labor savings, which lets them undercut everyone else.

What Happens When Prep Gets Skipped
Year 1-2: Paint looks fine. You think you got a great deal.
Year 3-4: You start noticing peeling at corners, around windows, on south-facing walls. The paint is failing where prep was inadequate.
Year 5: Significant peeling and paint failure. Water has been infiltrating through the failed areas, and now you've got wood rot starting. You need to repaint, but first you need to repair rotted wood.
The repaint costs $7,000-$9,000 (prices have gone up). The wood rot repairs add another $2,000-$4,000. Total: $9,000-$13,000.
If you'd paid $7,500 for proper prep and quality paint five years ago, you'd still have a paint job that looks good and protects your home. Instead, you paid $4,000 five years ago and now you're paying $11,000 to fix it. You're out $15,000 total versus $7,500 — you literally doubled your cost by going with the cheap option.
The Hidden Costs of Paint Failure
Beyond the repaint cost, consider:
- Energy costs: Failed paint and caulking means air infiltration. Your heating and cooling costs go up.
- Structural damage: Water infiltration through failed paint leads to wood rot, which can compromise structural integrity. I've seen situations where failed paint led to $20,000+ in structural repairs.
- Reduced home value: Peeling paint is one of the first things potential buyers notice. It signals deferred maintenance and raises questions about what else has been neglected.
- Stress and disruption: Dealing with contractors, living through another paint job, the hassle of getting it right the second time — these aren't costs you can put on a spreadsheet, but they're real.
What Proper Prep Gets You
A properly prepped and painted exterior should last 10-15 years in Michigan's climate before needing a full repaint. You might need minor touch-ups at 7-8 years, but the paint should still be protecting your home and looking decent.
That $7,500 investment spread over 12 years is $625 per year. The cheap paint job that fails in five years costs $800 per year ($4,000 ÷ 5 years), and that's before you factor in the repair costs.
Proper prep isn't an expense — it's an investment in long-term protection and value.
Beyond Painting: Protecting Your Home's Exterior
While we're talking about exterior protection, it's worth noting that paint is just one component of your home's weather defense system. At NEXT Exteriors, our comprehensive exterior services in Detroit and throughout Southeast Michigan include everything that protects your home from the elements.
Your roof is obviously the first line of defense against Michigan weather. We're CertainTeed Master Shingle Applicators — the highest credential in the roofing industry — and we work with premium manufacturers like GAF and Owens Corning to ensure your roof can handle everything from summer storms to winter ice dams.
Quality seamless gutters work hand-in-hand with proper paint to keep water away from your siding and foundation. And if your siding itself is failing, sometimes paint isn't the answer — you need new siding installation with options like James Hardie fiber cement or LP SmartSide engineered wood.
Energy-efficient windows reduce the moisture differential between inside and outside, which reduces stress on your paint. And proper attic insulation prevents ice dams that can damage both your roof and your siding, extending the life of your paint job.
The point is this: your home is a system. Every component affects every other component. That's why we take a comprehensive approach to exterior work, and why we're honest when paint isn't the right solution — sometimes you need to address underlying issues first.
Ready to Get Started?
NEXT Exteriors has been protecting Michigan homes since 1988. We don't cut corners on prep work, we don't rush the job, and we use Sherwin-Williams commercial-grade products engineered for Michigan's extreme weather. Get a free, detailed estimate that shows exactly what we'll do and why it matters.
Get Your Free QuoteOr call us: (844) 770-6398
Frequently Asked Questions About Exterior Paint Prep
For a typical 2,000-square-foot home in Southeast Michigan, proper prep takes 3-5 days before any paint goes on. This includes power washing (with 48-72 hours drying time), scraping and sanding all loose paint, caulking every joint and seam, and priming bare wood and problem areas. Larger homes, homes with multiple stories, or homes with significant paint failure will take longer. If a contractor promises to prep and paint your whole house in three days total, they're cutting corners somewhere.
Yes, if you have any bare wood. "Paint-and-primer-in-one" products work fine over previously painted surfaces in good condition, but they're not a substitute for actual primer on bare wood. Bare wood needs a dedicated primer to seal the surface, prevent tannin bleed-through, and provide proper adhesion for the topcoat. This is especially critical in Michigan's climate where moisture infiltration and freeze-thaw cycles will exploit any weakness in the paint system. Sherwin-Williams and other professional paint manufacturers are clear about this in their technical specifications.
Premature paint failure is almost always a prep issue, not a paint quality issue. The most common causes: painting over dirty or mildewed surfaces (poor adhesion), skipping primer on bare wood, inadequate caulking allowing water infiltration, painting over moisture (trapped water causes blistering and peeling), or painting in poor weather conditions. In Michigan, freeze-thaw cycles accelerate failure wherever prep was inadequate. If your paint is peeling after 3-5 years instead of lasting 10-15 years, the problem happened before the first coat of paint went on.
Professional-grade paintable caulk (like Sherwin-Williams Krack Kote) remains flexible through Michigan's temperature extremes, maintains its seal for 10+ years, adheres properly to both wood and paint, and doesn't shrink significantly as it cures. Cheap caulk from big-box stores often dries hard and brittle, cracks within 1-2 years, shrinks excessively leaving gaps, and doesn't adhere well to painted surfaces. The cost difference is maybe $3-$5 per tube, but the performance difference is enormous. In Michigan's freeze-thaw cycles, cheap caulk fails quickly, allowing water infiltration that leads to paint failure and wood rot.
Most exterior paints require temperatures above 50°F during application and for 24-48 hours afterward to cure properly. Some specialty cold-weather paints can be applied down to 35°F, but performance is still compromised. In Michigan, this means the exterior painting season typically runs from late April through October. Painting outside these windows risks improper curing, which leads to poor adhesion, slow drying, and premature failure. If a contractor is willing to paint your house in November or March when temperatures are marginal, that's a red flag — they're prioritizing their schedule over your paint job's long-term performance.
If the siding substrate is sound (no rot, no warping, no structural damage), repainting is usually the right choice. But if you're seeing wood rot, extensive cracking, warping, or if the siding is so deteriorated that proper prep would require replacing boards anyway, new siding makes more sense financially. We do both — painting and siding installation — so we don't have a bias toward one solution. During the estimate, we'll probe suspect areas with an awl to check for soft spots, assess the overall condition, and give you an honest recommendation. Sometimes a section needs replacement but the rest can be painted. Sometimes the whole thing needs to go. We'll show you exactly what we're seeing and why we're recommending what we recommend.
A detailed estimate should include specific line items for power washing, scraping/sanding labor hours, caulking (with the product specified), primer (brand and type), topcoat paint (brand, product line, number of coats), and any repairs needed. It should specify how surfaces will be prepared, what products will be used, and what weather conditions will trigger delays. Vague language like "prep as needed" or "standard prep" isn't acceptable. You want to see the specific Sherwin-Williams (or equivalent) products listed by name, not just "exterior paint." The estimate should also include timeline expectations, payment schedule, and warranty information. If you're comparing estimates and one is significantly lower, look at the prep specifications — that's almost always where the cost difference is.
Soffit and Fascia Installation Metro Detroit | NEXT Exteriors
Expert soffit and fascia installation in Metro Detroit. Learn why proper installation matters, what materials work in Michigan, and how to protect your home's roofline.
Most homeowners don't think about soffit and fascia until something goes wrong — a gutter pulling away, water stains on the eaves, or squirrels chewing their way into the attic. By then, what started as a small problem has usually turned into rotted wood, compromised ventilation, and a repair bill that could've been avoided.
Here's what 35 Michigan winters have taught us: soffit and fascia aren't just trim. They're the first line of defense against water infiltration, ice dams, and pest entry. When they're installed correctly with the right materials, they protect your roof deck, attic insulation, and the structural integrity of your home. When they're done wrong — or when they're left to rot — the damage spreads fast.
This guide covers what proper soffit and fascia installation in Metro Detroit looks like, why Michigan's freeze-thaw cycles destroy bad work, and how to know when it's time to replace what you have. If you're in Sterling Heights, Troy, or anywhere across Macomb and Oakland counties, this is what you need to know before you hire a contractor.
What Are Soffit and Fascia? (And Why They Matter)
Let's start with the basics, because most homeowners confuse the two or don't realize they serve completely different functions.
Fascia is the vertical board that runs along the edge of your roofline, right where the roof meets the outer walls of your house. It's what your gutters attach to. Fascia protects the ends of your roof rafters from weather exposure and provides a finished edge for your roofline. When fascia rots, your gutters sag or pull away, and water starts running behind your siding.
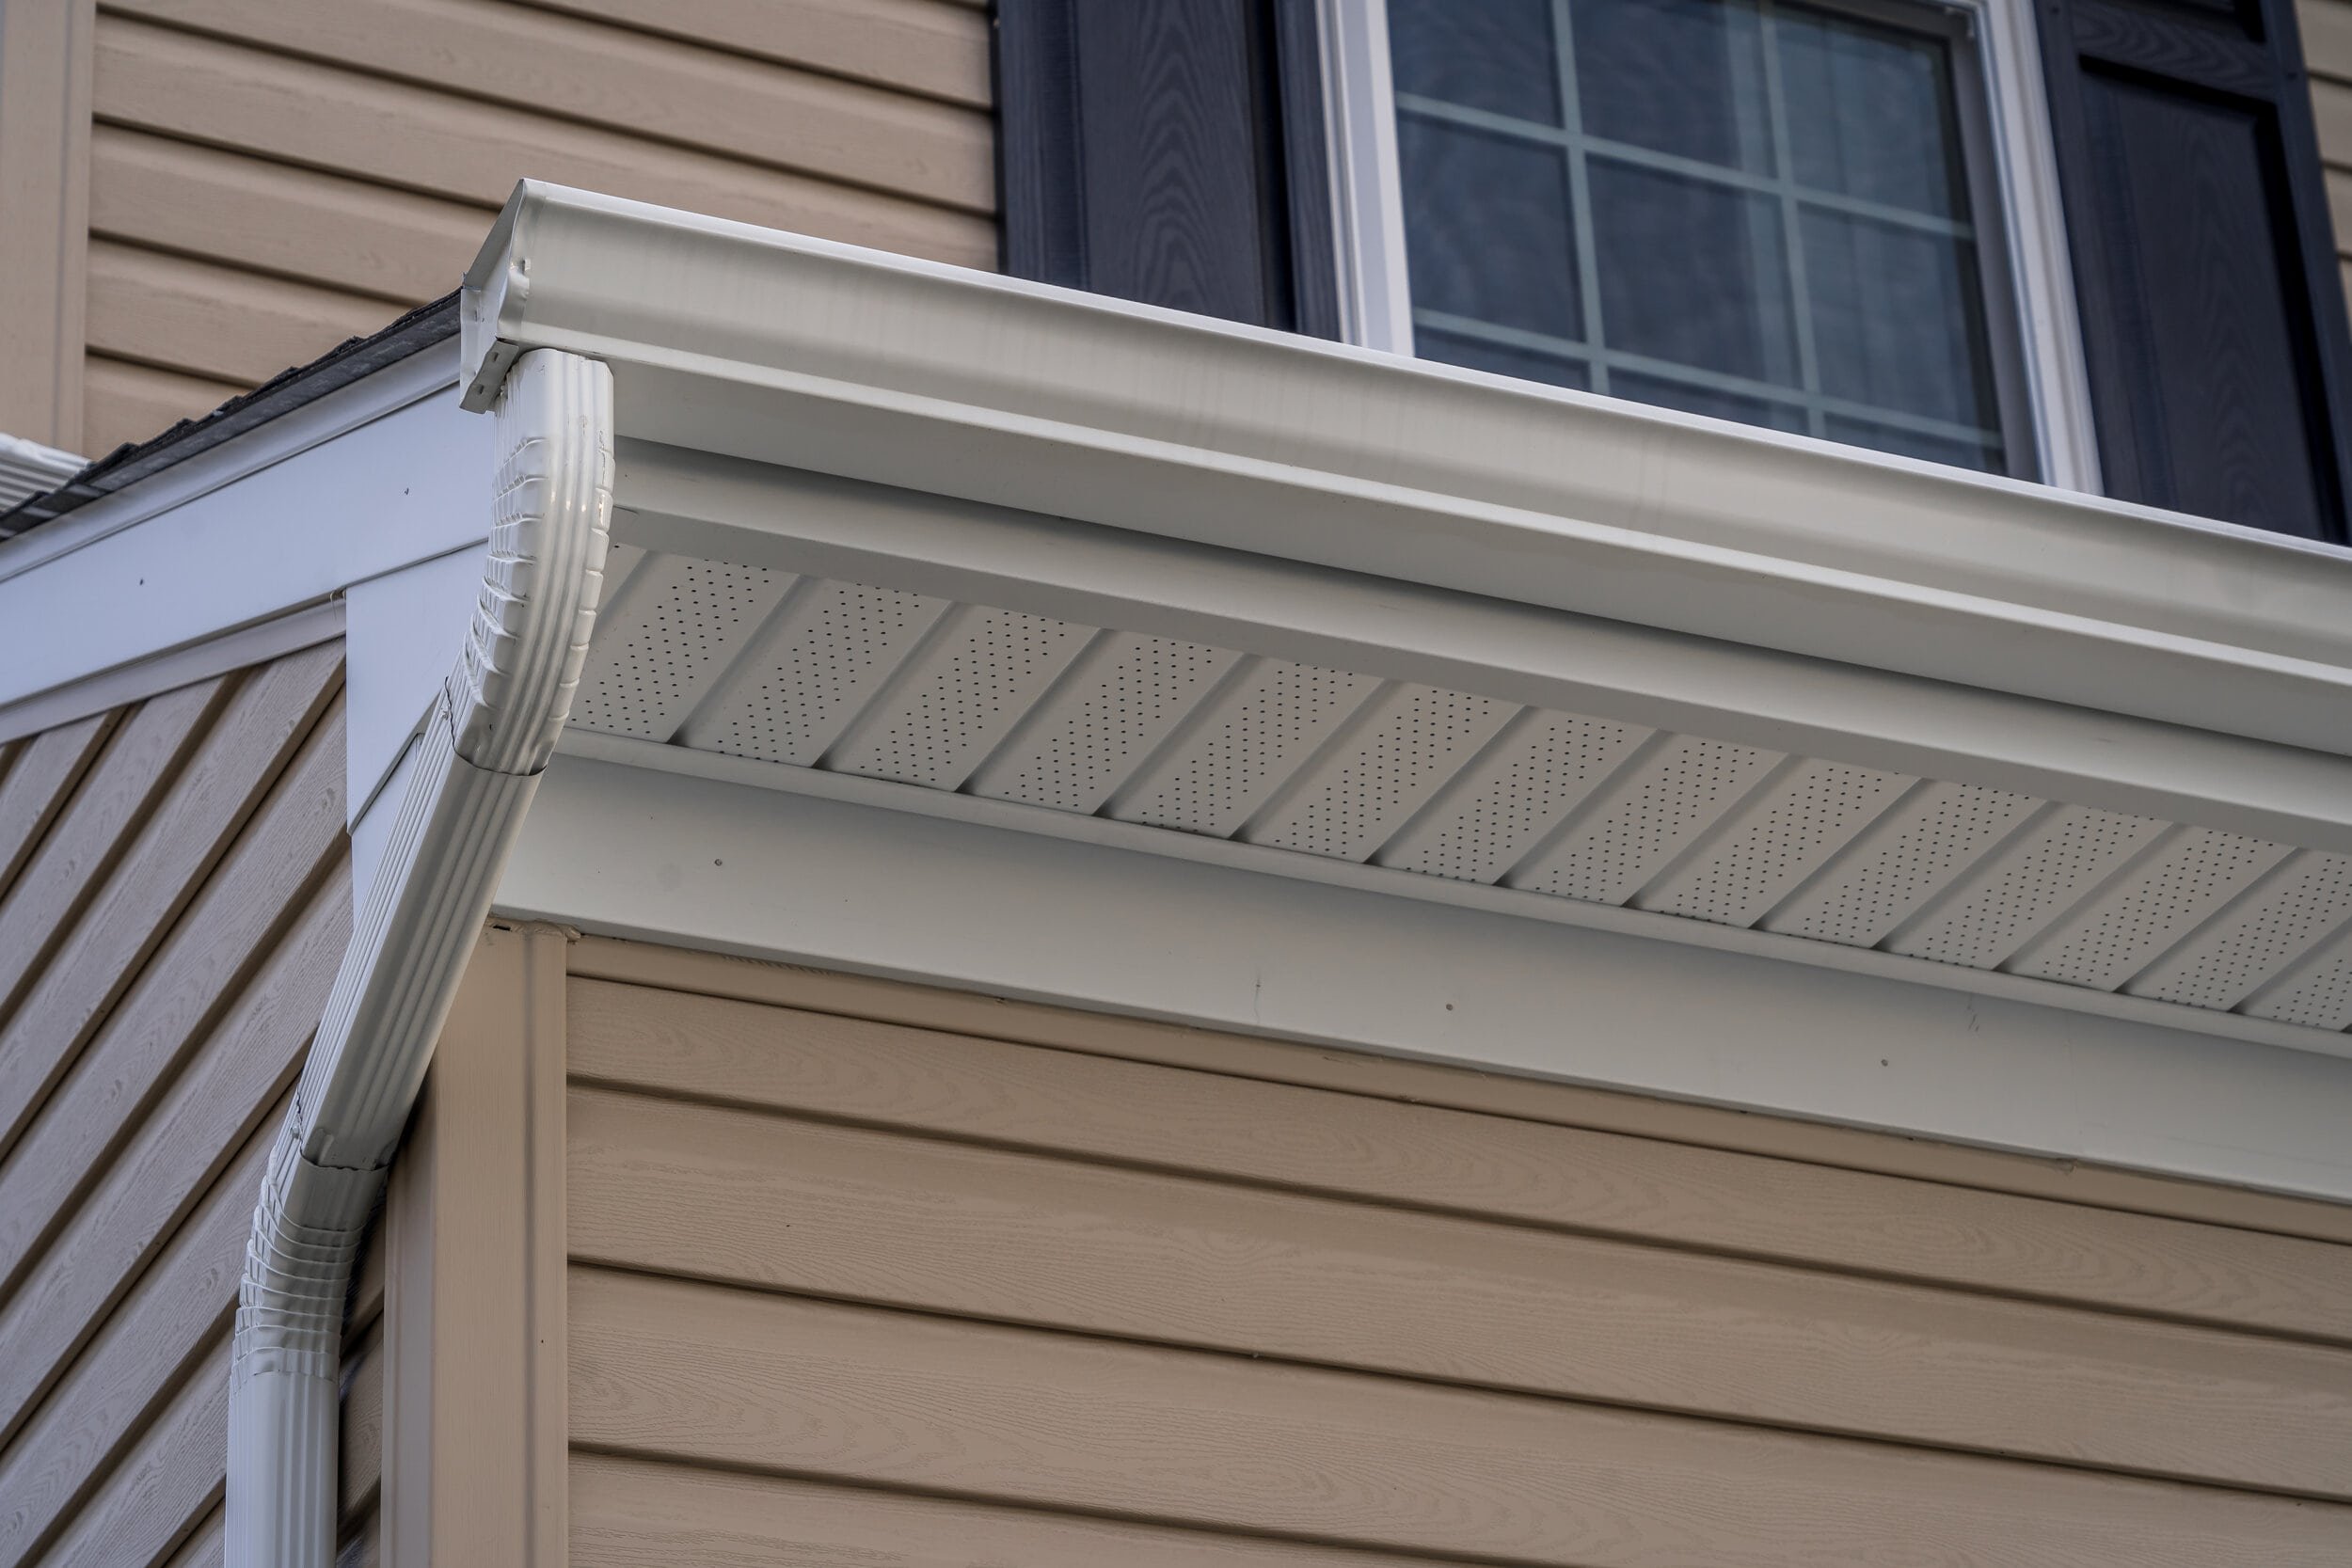
Soffit is the horizontal surface underneath the eaves — the part you see when you stand next to your house and look up. Soffit closes off the space between the fascia and the exterior wall, keeping pests out. But here's the critical part: soffit also provides ventilation for your attic. Those small perforations or vent strips aren't decorative — they allow air to flow into your attic, which prevents heat buildup in summer and moisture accumulation in winter.
Without proper soffit ventilation, your attic becomes a sweatbox in July and a condensation trap in January. That leads to mold, ice dams, and shortened shingle life. Michigan building code requires a minimum ventilation ratio of 1:150 (one square foot of vent area for every 150 square feet of attic space), and soffit vents are typically how you meet that requirement.
The Bottom Line: Fascia keeps water out. Soffit keeps pests out and air moving. Both are structural components, not cosmetic trim. When either fails, the damage spreads to your roof, insulation, and framing.
Why Michigan Weather Destroys Bad Installations
If you've lived in Southeast Michigan for more than one winter, you already know: our weather is brutal on exterior materials. The combination of freeze-thaw cycles, ice dams, summer humidity, and lake-effect snow creates conditions that expose every shortcut a contractor took.
Freeze-Thaw Cycles and Expansion
Michigan winters average 80-100 freeze-thaw cycles per season. Water gets into cracks, freezes, expands, and splits the material. Wood fascia that wasn't properly primed and painted will absorb moisture, freeze, and rot within a few years. Vinyl soffit that wasn't installed with expansion gaps will buckle and warp when temperatures swing from 10°F to 50°F in a single week.
We see this constantly in older homes around Royal Oak and Grosse Pointe Farms — fascia boards that were painted but never sealed at the ends. Water wicks into the grain, freezes, and the board splits vertically. By the time the homeowner notices, the rot has spread to the roof deck.
Ice Dams and Water Backup
Ice dams form when heat escapes through your attic, melts snow on the roof, and the water refreezes at the eaves. That ice buildup forces water under the shingles and behind the fascia. If your soffit ventilation is inadequate or blocked, you're creating the conditions for ice dams every winter.
Proper soffit and fascia installation includes continuous venting, proper insulation baffles in the attic, and flashing that directs water away from the fascia board. When contractors skip these steps, you get water damage, rotted fascia, and expensive Detroit roofing services repairs that could've been prevented.
Summer Humidity and Condensation
Michigan summers are humid. When your attic isn't properly ventilated, that humidity condenses on the underside of the roof deck and drips onto your insulation. Over time, this leads to mold, compressed insulation (which kills R-value), and rotted fascia from the inside out.
We've opened up soffits in Clinton Township homes where the wood was completely black with mold because the previous contractor installed solid soffit with no vents. The homeowner had no idea until they started smelling it through the ceiling.
Lake-Effect Snow and Wind Load
If you're near Lake St. Clair or in the northern parts of Macomb County, you know about lake-effect snow. Heavy, wet snow piles up on your eaves and puts serious weight on your fascia and gutters. If the fascia board is undersized, poorly fastened, or already weakened by rot, it'll sag or pull away from the house.
Proper installation uses 1x8 or 2x8 fascia boards (depending on rafter spacing and gutter size) and fastens them into solid blocking or rafter tails — not just into the old board. We see too many "repairs" where a contractor just nailed new fascia over rotted wood. That lasts about one winter.
Material Options for Southeast Michigan Homes
Not all soffit and fascia materials perform the same in Michigan's climate. Here's what we install, what we avoid, and why.
Vinyl Soffit and Fascia
Vinyl is the most common material for soffit and fascia in Metro Detroit, and for good reason: it's affordable, low-maintenance, and holds up well in freeze-thaw cycles when installed correctly. Quality vinyl won't rot, doesn't need painting, and resists moisture.
The key phrase is "when installed correctly." Vinyl expands and contracts with temperature changes. If a contractor doesn't leave proper expansion gaps (typically 1/4 inch), the panels will buckle in summer heat. If they over-fasten the panels (driving nails too tight), the vinyl can't move and will crack in winter cold.
We use CertainTeed and GAF vinyl soffit and fascia systems because they're engineered for thermal movement and come with vented options that meet Michigan code. The panels lock together, the vents are integrated, and the color goes all the way through — no fading or peeling.
Best for: Most residential applications, especially if you're also replacing siding and want a cohesive look. Works well with our house siding in Detroit projects.
Aluminum Soffit and Fascia
Aluminum is more durable than vinyl and doesn't expand or contract as much. It's also more expensive and harder to work with, which means installation costs are higher. Aluminum fascia is a good choice if you have wide eaves or need extra strength to support heavy gutters.
The downside: aluminum dents. If a ladder leans against it or a hailstorm comes through, you'll see the damage. It also requires proper painting or a factory finish — bare aluminum will oxidize and look chalky over time.
Best for: Commercial buildings, homes with wide overhangs, or situations where you need maximum durability and don't mind the higher cost.
Wood Fascia (And Why We Rarely Recommend It)
Traditional wood fascia — usually pine or cedar — was standard on older Michigan homes. It looks great when it's new, but it requires constant maintenance. You need to prime all six sides before installation, caulk every joint, and repaint every 5-7 years. Miss a step, and water gets in.
We still install wood fascia on historic homes in areas like Bloomfield Hills or Grosse Pointe where architectural guidelines require it. But for most homeowners, the maintenance burden isn't worth it. Wood rots, especially at the joints and where gutters attach. Once rot starts, it spreads fast.
If you're committed to wood, use a rot-resistant species like cedar or composite trim boards (like Azek or Versatex), which are cellular PVC and won't rot. They cost more upfront but eliminate the maintenance cycle. We often pair these with our Southeast Michigan painting professionals services for a complete exterior refresh.
Best for: Historic homes, high-end custom builds, or homeowners who don't mind ongoing maintenance and want a traditional look.
Signs Your Soffit and Fascia Need Replacement
Here's how to know if you're looking at a repair or a full replacement. Walk around your house and check for these warning signs:
1. Visible Rot or Water Damage
If you see dark stains, soft spots, or peeling paint on your fascia, you've got water infiltration. Press on the board with your finger — if it feels spongy or you can push into it, the wood is rotted and needs to be replaced. Don't just paint over it. The rot will continue spreading behind the paint.
2. Peeling Paint or Cracked Vinyl
Paint peeling off fascia boards is a sign that moisture is getting behind the finish. On vinyl, look for cracks, warping, or panels that have pulled loose. Both indicate the material has reached the end of its service life.
3. Pest Infiltration
If you're hearing scratching in your attic or seeing squirrels, bats, or birds around your roofline, check your soffit. Damaged soffit panels are a common entry point. Pests chew through rotted wood or push through loose vinyl to get into your attic. Once they're in, they damage insulation and wiring.
We've done soffit replacements in Lake Orion and Shelby Township where raccoons had torn through old wood soffit and built nests in the attic. The insulation was destroyed, and the homeowner had to deal with both the pest removal and the top-rated insulation contractor in Detroit repairs.
4. Gutters Pulling Away From the House
If your gutters are sagging or pulling away from the fascia, the fascia board is likely rotted and can't hold the fasteners anymore. This is especially common after heavy snow or ice buildup. Don't just reattach the gutters — you need to replace the fascia first, or it'll happen again. Our seamless gutters in Detroit, MI installations always include a fascia inspection first.
5. Poor Attic Ventilation
If your attic is hot and stuffy in summer or you're seeing condensation in winter, your soffit vents may be blocked or inadequate. Old soffit installations often used solid panels with no vents, or the vents were painted over. This creates moisture problems, shortens your roof's lifespan, and drives up cooling costs.
Pro Tip: If you're planning a roof replacement, that's the perfect time to upgrade your soffit and fascia. The roof deck is already exposed, and you can address any rot or ventilation issues before the new shingles go on. We coordinate this regularly on our Detroit roofing services projects.
What Proper Installation Looks Like
There's a right way and a fast way to install soffit and fascia. The fast way looks fine for a year or two. The right way lasts 20-30 years. Here's what proper installation includes:
Ventilation Calculations
Before we install soffit, we calculate your attic's ventilation requirements based on square footage. Michigan code requires 1:150 net free area (1 square foot of vent per 150 square feet of attic). We match soffit intake vents with ridge or gable exhaust vents to create continuous airflow. This prevents moisture buildup, reduces cooling costs, and extends your roof's lifespan.
If your attic doesn't have enough ridge vent, we'll recommend adding it during the roof replacement. Soffit vents alone don't work — you need both intake and exhaust for proper air circulation.
Fastening Methods for Michigan Wind
Vinyl soffit and fascia need to move with temperature changes, but they also need to stay put during windstorms. We use stainless steel or coated fasteners driven into solid blocking or rafter tails — never into old, rotted wood. Fasteners go in the center of the nailing slots (not the ends) and are left slightly loose so the panel can expand and contract.
Fascia boards get fastened every 16 inches into rafter tails or blocking. If the existing framing is rotted, we sister in new blocking before installing the fascia. This is the step most contractors skip because it takes time, but it's what keeps your gutters from pulling away three years later.
Flashing Integration
Proper installation includes drip edge flashing along the roof edge and behind the fascia. This directs water away from the fascia board and into the gutters, preventing water infiltration. If your roof has an ice and water shield membrane at the eaves (which it should), the flashing ties into that system.
We see a lot of installations where the drip edge was left off or installed incorrectly. Water runs behind the fascia, the wood rots, and the homeowner ends up with expensive repairs. Flashing is cheap. Rot repair is not.
Common Shortcuts Contractors Take
Here's what to watch out for when you're getting quotes:
- Installing new fascia over old, rotted boards. This hides the problem for a year, then everything fails again.
- Using solid soffit with no vents. Looks cleaner, creates moisture problems.
- Over-fastening vinyl panels. Causes cracking and buckling when temperatures change.
- Skipping the drip edge. Water runs behind the fascia and causes rot.
- Not sealing wood fascia ends. Water wicks into the grain and the board splits.
If a contractor's quote is significantly lower than others, ask what they're leaving out. We've been doing this since 1988, and the jobs we're called in to fix are almost always the result of someone taking shortcuts to hit a low price.
Cost Reality in Metro Detroit
Let's talk numbers. Soffit and fascia replacement costs vary based on material, linear footage, roof height, and the condition of the underlying structure. Here's what you can expect in Southeast Michigan in 2026:
Vinyl Soffit and Fascia
For a typical single-story home (1,500-2,000 sq ft), vinyl soffit and fascia replacement runs $3,500-$6,500, depending on the amount of trim, the number of corners, and whether we're replacing fascia boards or just covering them. Two-story homes or homes with complex rooflines (lots of gables, dormers, or bay windows) will be higher — typically $6,500-$10,000.
If the existing fascia boards are rotted and need full replacement (not just covering), add another $1,500-$3,000 for lumber, blocking, and labor. This is common on homes built before 1990 where the original fascia was never properly maintained.
Aluminum Soffit and Fascia
Aluminum runs about 20-30% more than vinyl. Expect $4,500-$8,000 for a single-story home, $8,000-$12,000 for a two-story. The material cost is higher, and installation takes longer because aluminum is less forgiving to work with.
Wood or Composite Fascia
If you're using real wood or composite trim boards (Azek, Versatex), material costs are significantly higher. Budget $6,000-$12,000 for a typical home, depending on the species and the amount of custom trim work. This is usually reserved for high-end homes or historic restorations.
What Affects the Cost?
- Roof height and pitch: Two-story homes and steep roofs require scaffolding or lift equipment, which increases labor costs.
- Extent of rot: If we need to replace fascia boards, blocking, or rafter tails, costs go up.
- Gutter removal and reinstallation: If your gutters are in good shape, we'll remove and reinstall them. If they're old or damaged, it's often more cost-effective to replace them at the same time.
- Custom colors or profiles: Standard white or almond vinyl is cheapest. Custom colors or specialty profiles cost more.
- Accessibility: Homes with landscaping, decks, or tight lot lines that limit access will take longer to work on.
When to Replace vs. Repair
If the damage is isolated to one section — say, a corner where a gutter leaked — you can often get away with a partial replacement for $800-$1,500. But if you're seeing rot or damage in multiple areas, it's usually more cost-effective to replace everything at once. Piecemeal repairs add up fast, and you'll end up with mismatched materials and colors.
We also recommend replacing soffit and fascia when you're doing other major exterior work — a roof replacement, new siding, or window upgrades. The scaffolding is already up, and you can coordinate materials and colors across the whole house. Our exterior services in Detroit often bundle these projects for efficiency and cost savings.
Real Talk: If a contractor quotes you $2,000 for a full soffit and fascia replacement on a two-story home, they're either skipping critical steps or using bottom-tier materials. Quality work costs what it costs. We're not the cheapest, but we're fair, and we do it right the first time.
Ready to Get Started?
NEXT Exteriors has been protecting Michigan homes since 1988. Whether you're dealing with rotted fascia, poor ventilation, or you just want to upgrade before the next storm season, we'll give you an honest assessment and a fair quote. No pressure, no gimmicks — just straight answers from a team that's been doing this for 35 years.
Get Your Free QuoteOr call us: (844) 770-6398
Other Ways NEXT Exteriors Protects Your Home
Soffit and fascia are just one part of your home's exterior system. If you're planning upgrades, here's how we can help with the rest:
Our Detroit window experts can replace drafty, inefficient windows that are costing you money every month. We install energy-efficient double-hung, casement, and bay windows that hold up in Michigan's climate and reduce your heating bills.
If your attic is under-insulated or you're dealing with ice dams, our insulation services in Southeast Michigan include blown-in cellulose, spray foam, and batt insulation that meet or exceed Michigan energy code. Proper insulation works hand-in-hand with soffit ventilation to keep your home comfortable year-round.
And if you're ready to refresh your home's curb appeal, our exterior painting professionals use Sherwin-Williams products exclusively — the best paint for Michigan weather. We handle surface prep, priming, and application so your paint job lasts 10-15 years, not 3-5.
We're a full-service exterior contractor, which means you work with one team, one point of contact, and one warranty. No subcontractors. No finger-pointing. Just honest work from a crew that's been doing this since 1988.
Frequently Asked Questions
Quality vinyl soffit and fascia should last 20-30 years in Michigan's climate when properly installed. Aluminum can last 30-40 years. Wood fascia requires repainting every 5-7 years and may need replacement after 15-20 years, depending on maintenance. The key is proper installation with ventilation, flashing, and expansion gaps. Cheap materials or poor installation will fail much sooner — we regularly replace soffit and fascia that's only 8-10 years old because it was done wrong the first time.
No. If the fascia is rotted or water-damaged, painting over it just hides the problem temporarily. Rot spreads behind the paint, and within a year or two, the damage will be worse. Paint also traps moisture in rotted wood, accelerating the decay. If the fascia is structurally sound but just needs a refresh, painting is fine — but it needs to be properly prepped, primed, and sealed. If there's any soft spots, spongy areas, or visible rot, replacement is the only real fix.
Not necessarily, but it's often the most cost-effective approach. We remove and reinstall gutters during soffit and fascia replacement, so if your gutters are old, leaking, or damaged, it makes sense to replace them at the same time. You'll save on labor costs since the crew is already there with scaffolding up. If your gutters are in good shape and less than 10 years old, we can work around them. But if they're showing rust, leaks, or sagging, bundling the replacement saves you money in the long run.
For most Michigan homeowners, vinyl is the best balance of cost, durability, and low maintenance. It handles freeze-thaw cycles well, doesn't rot, and never needs painting. We use CertainTeed and GAF vinyl systems because they're engineered for thermal expansion and come with integrated venting. Aluminum is more durable but costs more and can dent. Wood looks great but requires constant maintenance and is prone to rot. For high-end homes or historic properties, composite trim boards (Azek, Versatex) offer the look of wood without the rot risk, but they're expensive.
For a typical single-story home, installation takes 2-3 days. Two-story homes or homes with complex rooflines (multiple gables, dormers, or bay windows) can take 4-5 days. If we're replacing rotted fascia boards or dealing with extensive water damage, add another 1-2 days for structural repairs. Weather can also affect the timeline — we won't install in rain or freezing temperatures because materials need to acclimate and fasten properly. We'll give you a realistic timeline in your quote and keep you updated throughout the project.
Yes. Vinyl soffit and fascia come in a range of standard colors (white, almond, clay, gray), and we can usually match your existing trim or siding. If you're doing a partial replacement and need an exact match, we'll bring samples to compare. If you're replacing all the soffit and fascia, you can choose any color you want — we often coordinate with siding, shutters, and trim for a cohesive look. Custom colors cost a bit more, but the color goes all the way through the material, so it won't fade or peel like paint.
In most cases, no — soffit and fascia replacement is considered maintenance and doesn't require a permit in most Michigan municipalities. However, if we're doing structural repairs (replacing rafter tails, blocking, or roof framing), a permit may be required. We handle all permit applications and inspections as part of our service, so you don't have to deal with the township or county. We're licensed, insured, and familiar with building codes in Macomb, Oakland, and St. Clair counties, so you can trust the work will pass inspection if one is needed.
Siding Cost Metro Detroit: Real Pricing for Michigan Homes
What siding actually costs in Metro Detroit. Real 2026 pricing for vinyl, fiber cement, and engineered wood from a licensed Michigan contractor with 35+ years experience.
You've spent an hour searching "siding cost metro Detroit" and found nothing but vague ranges and calculator tools that spit out numbers with zero context. Here's what nobody's telling you: siding costs in Southeast Michigan depend on about a dozen variables, and the lowest bid you get will probably cost you more in the long run.
I've been running exterior services in Detroit since 1988. We've sided everything from 1960s ranches in Sterling Heights to brick Colonials in Grosse Pointe Farms. After 35 years and 500+ projects, I can tell you exactly what siding costs here — and more importantly, why.
This isn't a sales pitch. It's the conversation I have with homeowners in Macomb, Oakland, and St. Clair counties every week when they ask for straight answers about what new siding actually costs.
What Siding Actually Costs in Metro Detroit (2026)
Let's start with real numbers. These are what we're seeing for complete siding replacements on typical Michigan homes in 2026. Not material-only pricing. Not "starting at" gimmicks. Full installations by licensed contractors who pull permits and do the job right.
Vinyl Siding
Standard vinyl siding (0.042"–0.044" thickness) runs $7,500–$12,000 for a 1,500-square-foot ranch. Premium vinyl (0.046"–0.048" thickness with upgraded profiles) runs $10,000–$15,000 for the same house.
For a typical 2,200-square-foot Colonial in Troy or Rochester Hills, expect $12,000–$18,000 for standard vinyl, $15,000–$22,000 for premium.
Vinyl is the most common choice for house siding in Detroit because it handles Michigan's freeze-thaw cycles well when installed correctly, requires minimal maintenance, and comes in dozens of colors that won't fade for 20+ years.
Fiber Cement (James Hardie)
James Hardie fiber cement siding costs more upfront but lasts longer and performs better in Michigan's climate. For a 1,500-square-foot ranch, expect $14,000–$20,000. For a 2,200-square-foot Colonial, you're looking at $20,000–$30,000.
Hardie is what we recommend for homeowners in Bloomfield Hills, Lake Orion, and other areas where resale value matters and long-term performance justifies the investment. It won't warp, it resists woodpecker damage, and it's rated for 120-mph winds — which matters when summer storms roll through Southeast Michigan.
Engineered Wood (LP SmartSide)
LP SmartSide sits between vinyl and fiber cement in both cost and performance. For a 1,500-square-foot ranch, expect $11,000–$16,000. For a 2,200-square-foot Colonial, $16,000–$24,000.
SmartSide offers the look of real wood with better durability. It's treated to resist moisture and termites, and it's lighter than fiber cement, which makes installation faster. We use it frequently on homes in Shelby Township and Clinton Township where homeowners want a wood aesthetic without the maintenance headaches.
Why the ranges? Because a 1,500-square-foot ranch with simple gables costs less to side than a 1,500-square-foot Cape Cod with dormers, bay windows, and complex trim work. Square footage is just the starting point.
What Drives Siding Costs in Southeast Michigan
The material is just one piece. Here's what actually determines what you'll pay for new siding in Metro Detroit.
Material Choice and Quality Tiers
Not all vinyl is the same. Thin vinyl (0.040" or less) warps in Michigan summers and cracks in winter. It's cheaper upfront, but you'll replace it in 15 years instead of 30.
Premium vinyl from CertainTeed or GAF uses thicker panels, better colorants, and reinforced profiles. It costs 30% more than builder-grade vinyl but lasts twice as long and looks better the entire time.
Same goes for fiber cement. James Hardie costs more than generic fiber cement because their ColorPlus finish is baked on, not painted. It comes with a 15-year warranty and doesn't need repainting for decades.
Home Size and Architectural Complexity
A simple ranch with four corners and two gables is straightforward. A Colonial with bay windows, multiple roof lines, dormers, and brick accents takes longer to side and requires more trim work.
Every corner, every window, every door needs J-channel and trim. Every roof line needs flashing. Homes with brick on the first floor and siding on the second need transition pieces. All of that adds labor hours and material costs.
Trim, Soffit, and Fascia Work
Most siding jobs include replacing trim around windows and doors. Many include soffit and fascia replacement because the old wood is rotted or the aluminum is dented.
Aluminum-wrapped trim costs less than vinyl or fiber cement trim. PVC trim costs more but never rots and never needs painting. On older Michigan homes, we often find rot behind the old trim that needs repair before new siding goes up.
Insulation Backing and Prep Work
Insulated vinyl siding adds $1.50–$2.50 per square foot to the job. It's foam backing bonded to the vinyl that adds R-value and makes the siding more impact-resistant. We recommend it for homes built before 1980 that lack proper wall insulation — it's not a substitute for real insulation services in Southeast Michigan, but it helps.
Prep work matters too. If your old siding is asbestos (common on homes built before 1980), removal requires licensed abatement. That adds $3,000–$8,000 depending on square footage. If the sheathing underneath is damaged, it needs replacement before new siding goes up.
Removal and Disposal of Old Siding
Tearing off old siding, hauling it away, and disposing of it costs $1,000–$3,000 depending on the size of the house and what the old siding is made of. Vinyl and aluminum are easy. Wood siding is heavier. Asbestos requires special handling.
Some contractors include removal in their quote. Some don't. Always ask.
Vinyl vs. Fiber Cement vs. Engineered Wood: The Real Comparison
Here's the breakdown Michigan homeowners actually need — not marketing fluff, but real-world performance after 10, 20, 30 years in Southeast Michigan weather.
| Factor | Vinyl | Fiber Cement | Engineered Wood |
|---|---|---|---|
| Upfront Cost | Lowest | Highest | Middle |
| Lifespan | 25–40 years | 50+ years | 30–50 years |
| Maintenance | Wash yearly | Repaint every 15–20 years | Repaint every 10–15 years |
| Freeze-Thaw Performance | Excellent (if quality vinyl) | Excellent | Very good |
| Impact Resistance | Good (premium vinyl) | Excellent | Very good |
| Resale Value Boost | Moderate | High | Moderate to high |
Upfront Cost vs. Long-Term Value
Vinyl costs the least upfront. If you're planning to sell in 5–10 years or you're on a tight budget, premium vinyl is a smart choice. It looks good, it's low-maintenance, and buyers in Metro Detroit don't penalize vinyl siding the way they might in other markets.
Fiber cement costs more now but pays off if you're staying in the house. It adds more to resale value than vinyl, especially in higher-end neighborhoods. And because it lasts 50+ years without major maintenance, you're not replacing it or repainting it every decade.
Engineered wood splits the difference. It costs more than vinyl but less than Hardie. It looks like real wood, which appeals to buyers. But it needs repainting sooner than fiber cement, so factor that into your long-term budget.
Performance in Michigan's Freeze-Thaw Cycles
Michigan winters are brutal on siding. We get freeze-thaw cycles all winter — temperatures swing from 15°F at night to 35°F during the day. Water gets behind siding, freezes, expands, and cracks weak materials.
Quality vinyl handles this well because it's designed to expand and contract. Cheap vinyl cracks. Fiber cement doesn't absorb water, so freeze-thaw cycles don't affect it. Engineered wood is treated to resist moisture, but it's still wood-based, so proper installation and flashing matter.
We see the most problems with siding damage after a Michigan winter on homes where contractors cut corners on flashing, caulking, and trim work. The material matters, but installation matters more.
Hidden Costs Most Contractors Don't Mention Upfront
Here's where cheap quotes turn expensive. These costs aren't always included in the initial estimate, and they add up fast.
Rot Repair and Sheathing Replacement
On homes built before 1990, we find rot behind the old siding about 60% of the time. Water gets in around windows, doors, and trim. It sits against the sheathing for years. By the time you tear off the old siding, the OSB or plywood underneath is soft and needs replacement.
Sheathing replacement costs $3–$6 per square foot depending on the extent of the damage. On a typical job, we might replace 200–400 square feet of sheathing, adding $600–$2,400 to the project.
Good contractors identify this during the inspection and include it in the quote. Bad contractors lowball the estimate, then hit you with change orders once the old siding is off and you're committed.
Window and Door Trim Upgrades
Basic trim is included in most siding quotes. Upgraded trim — wider profiles, PVC instead of aluminum, decorative corner posts — costs extra.
If you're replacing windows in Detroit at the same time as siding, coordinate the two projects. New windows need proper flashing and integration with the new siding. Doing them separately costs more than doing them together.
Soffit and Fascia Replacement
Soffit and fascia are the boards under your roof overhang. They're often aluminum or wood. If they're damaged, dented, or rotted, they should be replaced when you do siding.
Aluminum soffit and fascia cost $8–$12 per linear foot installed. Vinyl costs about the same. PVC costs $12–$18 per linear foot but never rots and looks better long-term.
On a typical ranch with 150 linear feet of fascia and soffit, you're adding $1,200–$2,700 to the job. But if you don't replace rotted fascia, your new siding won't be properly supported, and you'll have problems within a few years.
Permit Fees in Macomb, Oakland, and St. Clair Counties
Most municipalities in Southeast Michigan require permits for siding replacement. Permit fees range from $100–$500 depending on the city and the scope of work.
Some contractors skip permits to save money. That's a problem if you sell the house and the buyer's inspector notices unpermitted work. It's also a problem if something goes wrong and your homeowner's insurance denies the claim because the work wasn't permitted.
We pull permits on every job. It's the right way to do business, and it protects you.
Color Upgrades and Premium Finishes
Standard colors are included in base pricing. Premium colors — deep blues, rich browns, custom blends — cost $500–$1,500 extra depending on the manufacturer and the square footage.
James Hardie's ColorPlus finish costs more than primed Hardie that you paint yourself. But it's factory-applied, baked on, and comes with a 15-year warranty. If you want siding colors that boost curb appeal in Metro Detroit, the upgrade is worth it.
When Cheap Siding Becomes Expensive
I've seen this play out dozens of times: homeowner gets three quotes, picks the lowest one, then calls us two years later to fix the mess.
Here's what cheap siding jobs look like after a Michigan winter or two.
Wavy Panels and Buckling
Vinyl siding needs to be nailed loosely so it can expand and contract with temperature changes. Nail it too tight, and it buckles when it heats up in summer. Nail it too loose, and it rattles in the wind.
Cheap contractors rush the job. They don't check nail placement. They don't leave expansion gaps. The siding looks fine for six months, then starts waving and buckling.
Water Infiltration and Rot
Siding is the first line of defense against water, but it's not waterproof. Water gets behind it. That's why flashing, caulking, and proper trim work matter.
Contractors who skip flashing around windows and doors let water into the wall cavity. It sits against the sheathing and studs. Within a few years, you've got rot. Within five years, you've got mold.
We've torn off siding installed three years earlier and found black mold on the sheathing because the contractor didn't flash the windows correctly. Fixing that costs more than doing it right the first time.
Poor Trim and Corner Work
Corners and trim are where siding jobs look professional or sloppy. Cheap jobs use thin trim, skip caulking, and leave gaps where water gets in.
Quality jobs use proper J-channel, caulk every seam, and make sure corners are square and tight. It takes longer. It costs more. But it lasts.
Why the Lowest Bid Costs More Long-Term
A cheap siding job might save you $3,000 upfront. But if it fails in five years and needs to be redone, you've paid for two siding jobs instead of one.
We're not the cheapest contractor in Metro Detroit. We're the contractor who does it right the first time, pulls permits, uses quality materials, and stands behind the work. That's worth more than a low bid.
If you're also considering other exterior work, our Detroit roofing services and seamless gutters in Detroit, MI follow the same philosophy — no shortcuts, no surprises.

How to Get an Accurate Siding Estimate
Here's what a proper siding estimate looks like — and what questions to ask before you sign anything.
What a Proper Inspection Includes
A contractor should measure your house, inspect the existing siding and sheathing (if accessible), check for rot around windows and doors, and look at soffit, fascia, and trim condition.
They should ask about your goals. Are you staying in the house long-term or selling soon? Do you want low-maintenance or high-end curb appeal? What's your budget?
They should explain material options, show you samples, and walk you through what the job includes — removal, disposal, sheathing repair, trim, soffit, fascia, permits, cleanup.
Questions to Ask Contractors
Here's what to ask every contractor who gives you a quote:
- Are you licensed and insured in Michigan? Ask for their builder's license number and proof of liability and workers' comp insurance.
- Do you pull permits? If they say permits aren't needed, they're wrong or cutting corners.
- What's included in the quote? Removal, disposal, sheathing repair, trim, soffit, fascia, flashing, caulking, cleanup? Get it in writing.
- What brand and thickness of siding? "Vinyl siding" isn't specific enough. Ask for the manufacturer, product line, and thickness.
- What's the warranty? Manufacturer warranties cover materials. Contractor warranties cover installation. You need both.
- How long will the job take? A typical house takes 5–10 days depending on size and complexity. If they say 2 days, they're rushing.
- Who's doing the work? In-house crews or subcontractors? If subs, are they insured?
Red Flags in Quotes and Contracts
Walk away if you see any of these:
- No written contract. Everything should be in writing — scope, materials, timeline, payment schedule.
- Full payment upfront. Standard is 30–50% down, rest on completion. If they want 100% upfront, they're not legitimate.
- Pressure to sign today. "This price is only good if you sign now" is a sales tactic, not a business practice.
- No permit mentioned. If the contract doesn't mention permits, ask why.
- Vague material specs. "Premium vinyl" means nothing. The contract should list the manufacturer, product line, color, and thickness.
If you're planning multiple exterior upgrades, consider bundling projects. Doing siding, exterior painting in Southeast Michigan, and gutter installation at the same time saves on setup, staging, and cleanup costs.
Ready to Get Started?
NEXT Exteriors has been protecting Michigan homes since 1988. We're CertainTeed Master Shingle Applicators, BBB A+ rated, and we've completed 500+ projects across Macomb, Oakland, and St. Clair counties. Get a free, no-pressure estimate from a team that shows up on time and does the job right.
Get Your Free QuoteOr call us: (844) 770-6398
Frequently Asked Questions
Installed siding costs $5–$8 per square foot for vinyl, $9–$14 per square foot for fiber cement, and $7–$11 per square foot for engineered wood in Metro Detroit. These prices include removal, disposal, trim, and labor. Material-only pricing is lower but doesn't reflect the real cost of a complete installation. Homes with complex architecture, extensive trim work, or rot repair cost more per square foot.
Yes, if you're staying in the house long-term or selling in a higher-end market. Fiber cement lasts 50+ years, resists woodpecker damage, handles freeze-thaw cycles better than any other material, and adds more to resale value than vinyl. It costs 40–60% more upfront than premium vinyl, but you won't replace it or repaint it as often. For homes in Bloomfield Hills, Grosse Pointe, or Rochester Hills, fiber cement is a smart investment.
A typical single-family home takes 5–10 days depending on size, complexity, and weather. A simple 1,500-square-foot ranch might take 5–6 days. A 2,500-square-foot Colonial with dormers, bay windows, and brick accents might take 10–12 days. Weather delays are common in Michigan — we can't install siding in rain, snow, or freezing temperatures. Quality contractors don't rush. If someone promises a full siding job in 2–3 days, they're cutting corners.
Not always, but often. If your soffit and fascia are aluminum or vinyl in good condition, they can stay. If they're wood and rotted, or if they're dented or damaged, replace them. Rotted fascia won't support new siding properly. And since the scaffolding is already up for the siding job, it's the most cost-effective time to replace soffit and fascia. We inspect them during the estimate and let you know what needs replacement.
Fiber cement and premium vinyl both perform well in Michigan winters. Fiber cement doesn't absorb water, so freeze-thaw cycles don't affect it. Premium vinyl (0.046" thickness or thicker) is designed to expand and contract with temperature changes without cracking. Engineered wood performs well too, but it needs proper flashing and caulking to prevent moisture infiltration. The material matters, but proper installation matters more. Poor installation ruins any siding material.
Insulated vinyl siding adds $1.50–$2.50 per square foot to the job. It's foam backing bonded to the vinyl that adds R-2 to R-3 insulation value and makes the siding more impact-resistant. It's worth it if your home was built before 1980 and lacks proper wall insulation. It's not a substitute for real insulation — if your walls are uninsulated, consider adding wall insulation during the siding project. For newer homes with adequate insulation, standard vinyl siding is fine.
Check three things: Michigan builder's license, insurance, and references. Every contractor doing siding work in Michigan needs a residential builder's license. Ask for the license number and verify it at michigan.gov/lara. Ask for proof of liability insurance and workers' comp. And ask for references from jobs completed in the last year. Check their BBB rating, Google reviews, and social media. If they can't provide any of this, walk away. Legitimate contractors are happy to show credentials.
Energy Efficient Windows Metro Detroit: What Works in Michigan
Learn which energy efficient windows actually perform in Metro Detroit's climate. A licensed contractor's guide to U-factor, SHGC, and choosing windows that cut heating costs.
I've been installing windows in Southeast Michigan since 1988, and I can tell you this: most homeowners shopping for energy efficient windows metro Detroit are asking the wrong questions. They want to know about brands and warranties, but they're not asking about U-factor for a heating-dominated climate or whether their installer knows how to flash a window opening in a 1960s brick Colonial.
Michigan winters are brutal on windows. We see freeze-thaw cycles that expand and contract frames, ice buildup that tests seals, and heating bills that punish any air leakage. The window that works great in North Carolina doesn't necessarily work here. You need windows engineered for our climate, and you need someone who knows how to install them properly in Michigan homes.
Here's what actually matters when you're shopping for Detroit window experts and replacement windows that'll cut your heating costs.
What Makes a Window Energy Efficient in Metro Detroit
Energy efficiency in windows comes down to four main components: the glass package, the frame material, the gas fill between panes, and the quality of installation. Let me break down what each of these means in Michigan's climate.
Low-E Coatings: The Invisible Layer That Matters
Low-E (low-emissivity) coatings are microscopically thin metallic layers applied to glass. They reflect heat back into your home during winter while still letting visible light through. In Metro Detroit, where we're heating homes from October through April, you want a Low-E coating optimized for heat retention, not solar control.
There are different Low-E formulations. A Low-E² coating (double layer) provides better insulation than a single layer. Some manufacturers like Andersen use Low-E4® with four layers of silver, which delivers a U-factor as low as 0.20. That's significantly better than the 0.30 you'll see in basic double-pane windows.
The coating placement matters too. For Michigan's heating-dominated climate, you want the Low-E coating on the inner pane's outer surface (surface #3 if you're counting from outside to inside). This maximizes heat retention while minimizing condensation risk.
Gas Fills: Argon vs. Krypton
The space between window panes gets filled with inert gas—either argon or krypton. Both are denser than air, which reduces heat transfer through the window. Argon is the standard fill and works well in typical ½-inch to ¾-inch gaps between panes. Krypton performs better in narrower gaps (around ¼ inch) and delivers slightly better insulation, but it costs more.
For most Sterling Heights or Troy homeowners, argon-filled windows hit the sweet spot between performance and cost. The U-factor improvement over air-filled windows is substantial—typically dropping from around 0.50 to 0.30 or lower. That translates to real savings on heating bills.
One warning: gas fills can leak over time if seals fail. This is why the quality of the window manufacturer and the installation matters. A poorly installed window will lose its gas fill within a few years, and you're back to air-filled performance.
Triple-Pane vs. Double-Pane: Is It Worth It?
Triple-pane windows add a third layer of glass and a second gas-filled chamber. They can achieve U-factors as low as 0.15 to 0.20, compared to 0.25 to 0.30 for quality double-pane windows. That's a meaningful improvement, especially if you're in a drafty 1920s brick home in Grosse Pointe Farms.
The downside? Weight, cost, and diminishing returns. Triple-pane windows are significantly heavier, which can stress older window frames and hardware. They cost 25-40% more than comparable double-pane units. And the payback period on that extra investment can stretch to 15-20 years in Michigan, depending on your heating costs.
I typically recommend triple-pane for north-facing windows, bedrooms where comfort matters most, or homes with exceptionally high heating bills. For most Metro Detroit homes, high-quality double-pane windows with Low-E coatings and argon fill deliver 90% of the performance at a much better price point.
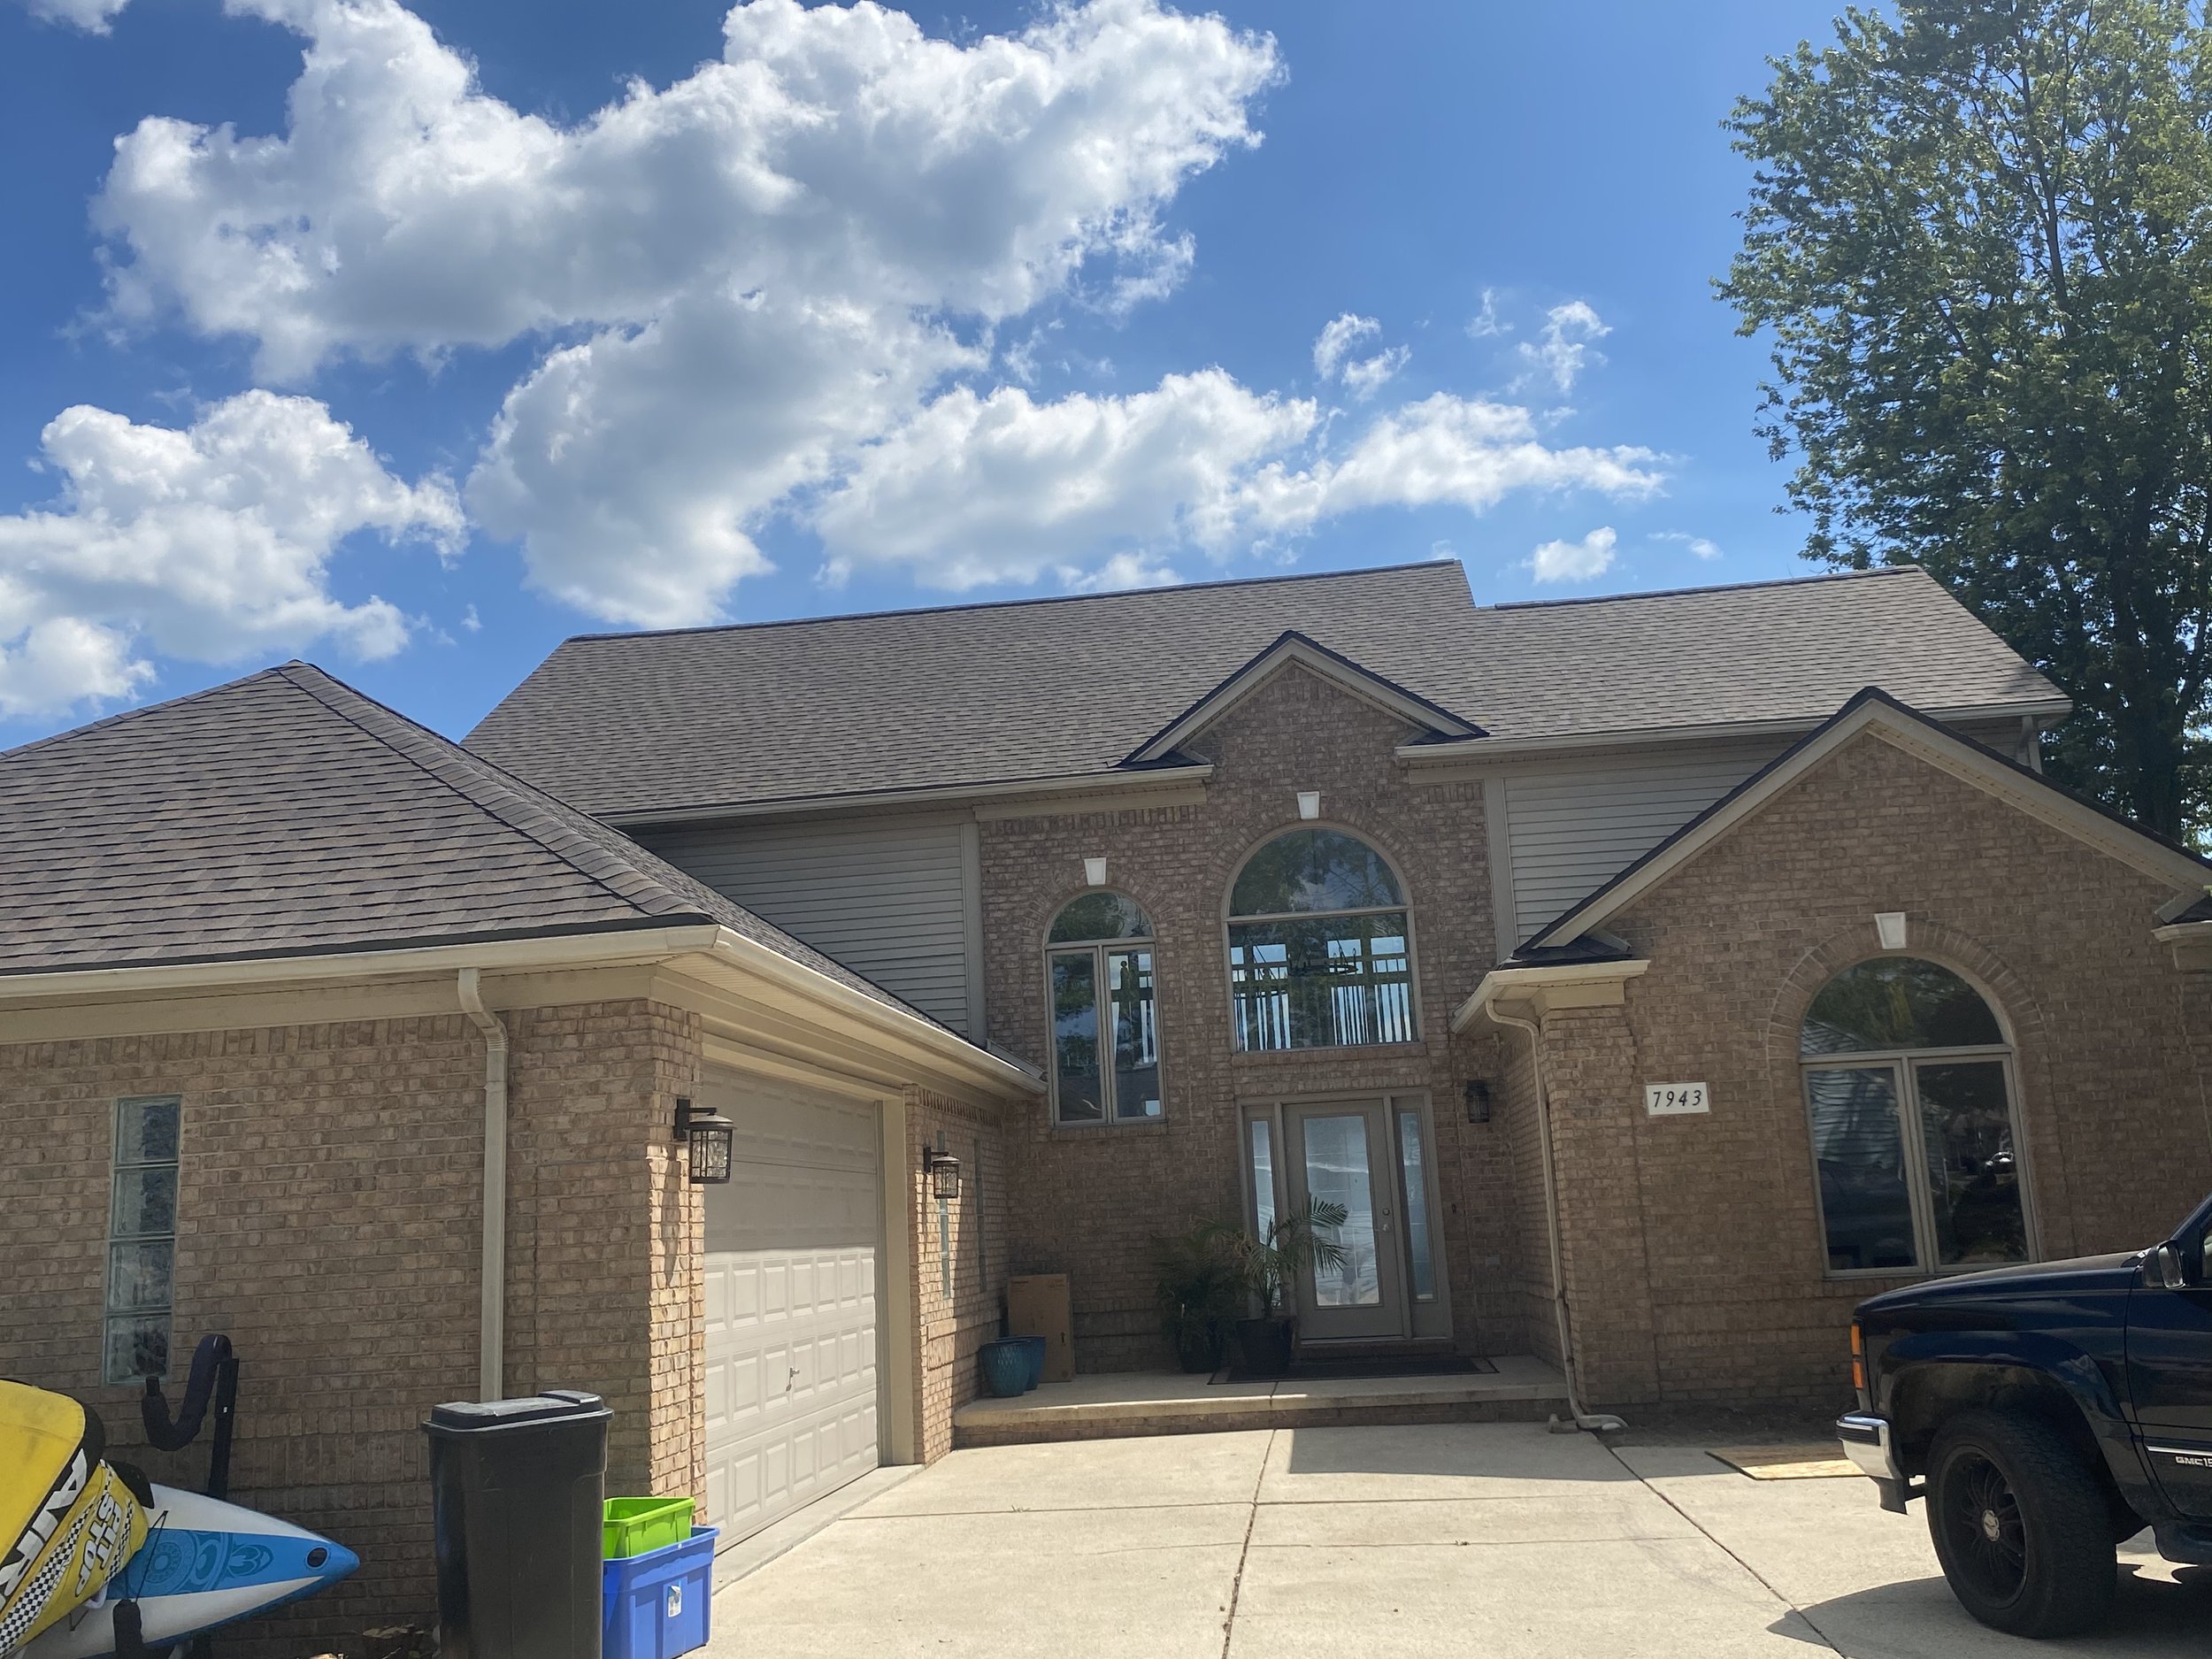
The Numbers That Actually Matter for Michigan Homeowners
When you're shopping for energy efficient windows metro Detroit, you'll see a lot of numbers on that NFRC (National Fenestration Rating Council) label. Most of them don't matter for our climate. Here's what does.
U-Factor: The Only Number That Matters for Heating
U-factor measures how well a window prevents heat from escaping. Lower is better. In Michigan, where heating costs dominate your energy bills, this is the single most important number on the label.
ENERGY STAR requirements for the Northern climate zone (which includes all of Michigan) specify a U-factor of 0.27 or lower. That's the baseline. Good windows hit 0.25. Excellent windows get down to 0.20 or lower.
Here's what that means in practical terms: replacing single-pane windows (U-factor around 0.90) with quality double-pane Low-E windows (U-factor 0.25) can cut window-related heat loss by 70%. On a 2,000-square-foot home in Rochester Hills with 15 windows, that might save $300-500 per year on heating costs, depending on your furnace efficiency and natural gas rates.
SHGC: Less Important in Michigan, But Still Relevant
Solar Heat Gain Coefficient (SHGC) measures how much solar radiation passes through the window. Higher numbers mean more free heat from the sun, which sounds great for Michigan winters. But there's a catch.
In summer, high SHGC means more cooling costs. Michigan summers are getting hotter, and air conditioning is no longer optional in most homes. You want a balanced SHGC—high enough to capture winter sun, low enough to avoid overheating in July.
For Michigan, I recommend SHGC between 0.30 and 0.40. This gives you some passive solar gain in winter without turning your home into a greenhouse in summer. South-facing windows can go slightly higher (0.40-0.50) to maximize winter heat gain.
Air Leakage: The Spec Nobody Talks About
Air leakage measures how much air infiltrates through the window assembly. The ENERGY STAR threshold is 0.3 cubic feet per minute per square foot of window area, but quality windows should be well below that—0.1 or less.
This is where installation quality becomes critical. A window rated at 0.1 air leakage can perform like 0.5 if it's installed poorly. Gaps around the frame, missing sealant, improperly shimmed units—all of these create air leakage that kills your energy efficiency.
When we install energy-efficient windows in Southeast Michigan, we use low-expansion foam, interior and exterior sealant, and proper flashing. The window itself is only half the equation.
Frame Materials: What Holds Up in Michigan Weather
The frame material affects both energy performance and longevity. Michigan's freeze-thaw cycles, humidity swings, and temperature extremes are hard on window frames. Here's what actually works.
Vinyl: The Practical Choice for Most Michigan Homes
Vinyl frames dominate the replacement window market in Metro Detroit, and for good reason. They don't rot, they don't need painting, and quality vinyl handles freeze-thaw cycles without cracking or warping.
The key word is "quality." Cheap vinyl windows use thin-walled extrusions that flex and warp. Look for multi-chambered vinyl frames with welded corners, not mechanical fasteners. Brands like Simonton, Alside, and Pella's vinyl lines use thick-walled extrusions (typically 0.080 inches or more) that stay rigid.
Vinyl's thermal performance is good but not great. The material itself has a higher U-factor than fiberglass or wood, but modern vinyl windows compensate with foam-filled chambers and thermal breaks. A quality vinyl window can hit U-factors of 0.25-0.27, which meets ENERGY STAR Northern zone requirements.
Vinyl expands and contracts with temperature changes more than other materials. In Michigan, where we swing from -10°F to 90°F, that movement can stress seals and hardware over time. This is why corner welds matter—mechanically fastened corners will eventually separate.
Fiberglass: Superior Performance, Higher Cost
Fiberglass frames are the best-performing option for Michigan's climate. The material expands and contracts at nearly the same rate as glass, which reduces seal stress. Fiberglass is stronger than vinyl, allowing for narrower frames and more glass area. And it's incredibly durable—fiberglass won't rot, warp, or corrode.
Brands like Marvin's Integrity line and Pella's Impervia use pultruded fiberglass that's reinforced with glass fibers. These windows routinely achieve U-factors of 0.20-0.22, better than comparable vinyl units.
The downside is cost. Fiberglass windows typically run 20-40% more than vinyl. For a full-house replacement in Shelby Township, that might mean $12,000-15,000 instead of $8,000-10,000. The payback on that premium is long—you're looking at 15-20 years to recover the cost difference through energy savings.
I recommend fiberglass for high-end homes, historic renovations where narrow sightlines matter, or situations where maximum energy performance justifies the cost. For most Metro Detroit homeowners, quality vinyl delivers better value.
Wood and Clad-Wood: Beautiful But High-Maintenance
Wood windows offer the best thermal performance of any frame material and unmatched aesthetics. Real wood frames are standard in historic districts and high-end renovations. But in Michigan's climate, they require maintenance.
Bare wood needs to be painted or stained every 3-5 years to prevent rot. Moisture infiltration is the enemy—once water gets into the wood, you're dealing with rot, mold, and structural failure. This is especially problematic in Michigan, where ice dams, wind-driven rain, and humidity create constant moisture challenges.
Clad-wood windows solve some of these problems. They use an aluminum or vinyl exterior cladding over a wood interior frame. Andersen, Marvin, and Pella all make excellent clad-wood lines. The cladding protects against moisture while preserving the wood's thermal performance and aesthetics on the interior.
Clad-wood windows cost as much or more than fiberglass—expect to pay 30-50% more than vinyl. They're worth it if you're renovating a 1920s Tudor in Birmingham or a lakefront home in Lake Orion where aesthetics matter. For most applications, the maintenance requirements and cost make them impractical.
Installation Quality Trumps Window Quality
I've seen $1,500 Andersen windows perform like $300 builder-grade units because they were installed by someone who didn't know what they were doing. And I've seen mid-grade vinyl windows outperform their specs because they were installed correctly.
Installation is everything. A window is only as good as the opening it's installed in and the care taken to seal, insulate, and flash it properly. Here's what separates good installations from bad ones in Michigan homes.
Proper Rough Opening Preparation
Before a window goes in, the rough opening needs to be square, level, and properly sized. In older Michigan homes—especially those 1960s brick ranches in Warren or St. Clair Shores—rough openings are often out of square, undersized, or damaged.
A good installer will check the opening with a level and square, shim it if necessary, and repair any rot or water damage before setting the window. Skipping this step means the window will be stressed from day one, leading to seal failure, air leakage, and operational problems.
Flashing: The Detail That Prevents Water Damage
Flashing directs water away from the window opening. In Michigan, where we get wind-driven rain, ice dams, and freeze-thaw cycles, proper flashing is non-negotiable.
The process starts with a sill pan—a waterproof membrane or metal pan at the bottom of the opening that catches any water that gets past the window and directs it outward. Then comes the window, followed by head flashing and side flashing that integrates with the house siding in Detroit or brick veneer.
I see a lot of installations where flashing is skipped or done incorrectly. The window looks fine for a year or two, then water starts infiltrating behind the siding, rotting the sheathing and framing. By the time the homeowner notices interior damage, there's thousands of dollars in repair work needed.
Insulation and Air Sealing
The gap between the window frame and the rough opening needs to be insulated and sealed. We use low-expansion foam specifically designed for window installation—not the high-expansion stuff you'd use for sealing large gaps. High-expansion foam can bow the window frame, making it difficult to operate and stressing the seals.
After the foam cures, we seal both the interior and exterior with a high-quality sealant. On the interior, this creates an air barrier. On the exterior, it's a water barrier. Both are critical in Michigan's climate.
Cheap installers skip the interior sealant or use a single bead on the exterior. You end up with air leakage that kills your energy efficiency. The difference between a properly sealed window and a poorly sealed one can be 20-30% in heating costs.
The Michigan-Specific Challenge: Brick Veneer Homes
A huge percentage of Metro Detroit homes—especially those built between 1950 and 1980—have brick veneer exteriors. Installing windows in brick requires different techniques than wood siding.
The window needs to be set back from the brick face to allow for proper flashing and sealant. The brick mold (exterior trim) needs to be sized correctly for the wall thickness. And the flashing needs to integrate with the brick's weep holes and the building paper behind the veneer.
I've seen installers try to caulk a window directly against brick. It fails within a year. The brick expands and contracts, the caulk separates, and water gets behind the window. Proper installation requires understanding how brick veneer walls are constructed and how water moves through them.
This is one reason why working with experienced exterior services in Detroit matters—we've been dealing with Michigan's brick homes since 1988.
Cost Reality: What Energy Efficient Windows Actually Cost in Metro Detroit
Let's talk numbers. Window replacement is expensive, and homeowners deserve honest pricing information before they start calling contractors.
Vinyl Windows: $450-$750 Per Window Installed
Quality vinyl replacement windows from brands like Simonton, Alside, or Pella's vinyl line typically run $450-$600 per window for standard double-hung units, including installation. Larger windows (bays, bows, picture windows) or specialty shapes (casements, awnings) run higher—$600-$900 installed.
For a typical 2,000-square-foot home in Clinton Township with 15 windows, you're looking at $7,500-$10,000 for a full-house vinyl window replacement. That includes removal of old windows, proper installation with flashing and insulation, interior and exterior trim, and cleanup.
Cheap vinyl windows—the $250-$350 installed quotes you see advertised—use thin-walled frames, lower-quality hardware, and often skip critical installation steps. They'll last 10-15 years instead of 20-25, and they won't deliver the energy performance you're paying for.
Fiberglass Windows: $600-$1,000 Per Window Installed
Fiberglass windows from Marvin, Pella, or Andersen's fiberglass lines run $600-$800 for standard sizes, up to $1,000-$1,200 for larger or specialty units. A full-house replacement with fiberglass might cost $10,000-$15,000.
The performance improvement over quality vinyl is real but modest—you might see U-factors of 0.20-0.22 instead of 0.25-0.27. That translates to maybe $50-$100 per year in additional energy savings on a typical home. At a $3,000-$5,000 premium for a full-house replacement, the payback period is 30-50 years. You're paying for durability and aesthetics as much as energy performance.
Wood and Clad-Wood Windows: $800-$1,500+ Per Window Installed
Wood and clad-wood windows are premium products with premium pricing. Expect $800-$1,200 for standard double-hungs, $1,200-$2,000 for larger units or specialty shapes. A full-house replacement can easily hit $15,000-$25,000.
These make sense for historic renovations, high-end homes, or situations where aesthetics justify the cost. The energy performance is excellent, but the maintenance requirements and cost make them impractical for most Metro Detroit homeowners.
Energy Savings and Payback Period
Replacing old single-pane or failed double-pane windows with modern energy efficient windows metro Detroit can save $300-$600 per year on heating and cooling costs, depending on your home's size, insulation levels, and HVAC efficiency.
At $8,000-$10,000 for a full-house vinyl window replacement, the payback period is 15-25 years through energy savings alone. That's longer than most homeowners expect. The real value comes from improved comfort (no more drafts, cold spots, or condensation), noise reduction, easier operation, and increased home value.
Windows are not a pure energy-savings investment like attic insulation in Metro Detroit, which might pay back in 5-7 years. They're a comfort and home improvement investment that also delivers energy savings.
Michigan Energy Rebates and Incentives: DTE Energy and Consumers Energy both offer rebates for energy-efficient window installations. As of 2026, you can get $50-$100 per window for ENERGY STAR-certified units. Check with your utility before starting your project—rebates change frequently and have specific requirements.
Signs Your Current Windows Are Costing You Money
Not sure if you need new windows? Here are the signs I look for when evaluating windows in Michigan homes.
Condensation Between Panes
If you see fog, condensation, or a cloudy film between the glass panes, the seal has failed. The inert gas has leaked out, and moisture has gotten in. That window is now performing like a single-pane unit, no matter what it was rated for originally.
Seal failure is common in windows older than 15-20 years, especially in Michigan's climate. The constant freeze-thaw cycling stresses seals. Once one window fails, others usually follow within a few years.
Drafts and Cold Spots
Stand next to your windows on a cold January day. If you feel a draft or notice the temperature drop near the window, you're losing heat. This could be failed weatherstripping, air leakage around the frame, or just poor-performing glass.
A simple test: hold a candle or incense stick near the window frame on a windy day. If the flame flickers or the smoke moves, you have air leakage.
Ice Buildup or Excessive Condensation on Interior Glass
Some condensation on windows is normal in Michigan winters when indoor humidity is high. But if you're seeing ice buildup on the interior glass or condensation that runs down and pools on the sill, your windows aren't performing.
This is common with old single-pane windows or failed double-pane units. The interior glass surface temperature drops below the dew point, and moisture condenses. Over time, this can rot window sills and frames.
Difficulty Operating Windows
Windows that stick, bind, or require force to open and close are often warped or damaged. In vinyl windows, this can indicate frame distortion from thermal expansion. In wood windows, it's usually moisture damage and swelling.
Operational problems aren't just annoying—they're a safety issue. If you can't open a window easily, it's not a functional emergency egress in case of fire.
High Heating Bills Without Other Explanation
If your heating bills have been creeping up and you haven't changed your thermostat settings, windows are a likely culprit. Compare your bills year-over-year. A 15-20% increase without explanation often points to window or insulation services in Southeast Michigan problems.
Windows account for 25-30% of heating loss in a typical Michigan home. Failed seals, air leakage, or single-pane glass can easily add $300-$500 per year to your heating costs.
Visible Damage: Rot, Mold, or Deteriorating Frames
Wood windows can rot, especially at the sills where water collects. Vinyl windows can crack or warp. Any visible damage to the frame or sash is a sign the window needs replacement.
Mold or water stains around the window frame indicate water infiltration, which could be a window problem or a flashing problem. Either way, it needs to be addressed before it causes structural damage.
When to Replace vs. Repair: If your windows are less than 10 years old and the issue is isolated (one failed seal, broken hardware), repair might make sense. If they're 15+ years old, multiple windows are failing, or you're seeing operational problems across the house, replacement is usually the better investment. Trying to patch old windows is throwing money away in Michigan's climate.
Other Services That Improve Your Home's Energy Envelope
Windows are just one part of your home's thermal envelope. For maximum energy efficiency and comfort, you need to address the whole system. NEXT Exteriors provides a full range of exterior services in Detroit that work together to reduce energy costs and improve home performance.
Proper top-rated insulation contractor in Detroit services can cut heating costs by 20-30%, especially in older homes with under-insulated attics. We've seen homes in Troy and Rochester Hills with R-19 attic insulation when they should have R-49 or higher for Michigan's climate. Adding insulation delivers faster payback than window replacement in most cases.
Your Detroit roofing services also affect energy performance. A well-ventilated attic with proper ridge and soffit vents prevents ice dams and reduces cooling costs in summer. When we replace roofs, we evaluate the entire attic ventilation system to ensure it's working correctly.
House siding in Detroit provides another layer of protection against air infiltration and moisture. Insulated vinyl siding or fiber cement siding with proper house wrap and flashing creates a weather barrier that complements your windows' performance.
Even seamless gutters in Detroit, MI play a role. Properly functioning gutters prevent water from running down your home's exterior, which can cause window leaks, foundation problems, and basement moisture issues. We install 6-inch seamless gutters that handle Michigan's heavy spring rains and snowmelt.
Finally, Southeast Michigan painting professionals can improve your home's weather resistance. Quality exterior paint with proper surface prep protects siding, trim, and window frames from moisture infiltration. We use Sherwin-Williams products exclusively because they hold up to Michigan's weather extremes.
Ready to Get Started?
NEXT Exteriors has been protecting Michigan homes since 1988. Get a free, no-pressure estimate from a team that shows up on time and does the job right.
Get Your Free QuoteOr call us: (844) 770-6398
Frequently Asked Questions About Energy Efficient Windows in Metro Detroit
For a full-house window replacement costing $8,000-$10,000, the payback period through energy savings alone is typically 15-25 years in Metro Detroit. You might save $300-$600 per year on heating and cooling costs, depending on what you're replacing and your home's size. The real value comes from improved comfort, reduced drafts, easier operation, and increased home value. Windows are a long-term home improvement investment, not a quick energy-savings play like attic insulation.
There's no single "best" brand—what matters is the window's performance specs and the quality of installation. Look for windows that meet ENERGY STAR Northern zone requirements (U-factor 0.27 or lower). Quality brands we install include Simonton, Alside, Pella, Andersen, and Marvin. A mid-grade window from any of these manufacturers, properly installed, will outperform a premium window that's installed poorly. Focus on U-factor, Low-E coatings, argon fill, and finding an installer who knows how to flash and seal windows in Michigan's brick veneer homes.
Replacing all windows at once usually delivers better pricing (contractors offer volume discounts) and ensures consistent performance throughout your home. However, if budget is tight, prioritize north-facing windows, bedrooms, and rooms where you spend the most time. These deliver the most immediate comfort improvement. Windows on the south and west sides contribute more to summer heat gain, so they're lower priority in Michigan's heating-dominated climate. Just be aware that phasing the project means you'll have mismatched windows for a period, which can affect curb appeal if you're planning to sell.
Window installation requires specialized knowledge, especially in Michigan's brick veneer homes. Proper flashing, air sealing, and integration with existing siding or brick are critical. A poorly installed window will leak air and water, negating any energy savings and potentially causing structural damage. Most window manufacturers also void warranties on DIY installations. Unless you have professional construction experience and understand Michigan building codes, hire a licensed contractor. The installation is more important than the window itself—a $400 window installed correctly will outperform a $800 window installed poorly.
As of 2026, the federal Energy Efficient Home Improvement Credit allows up to $600 per year for ENERGY STAR-certified windows and doors (part of a $1,200 annual limit for all qualifying improvements). DTE Energy and Consumers Energy offer rebates of $50-$100 per window for ENERGY STAR Northern zone certified units. Requirements change frequently, so check with your utility company before starting your project. The Inflation Reduction Act also extended tax credits for energy improvements through 2032, though specific amounts and requirements are subject to change. Keep all receipts and manufacturer certifications for tax filing.
In Michigan, any contractor working on projects over $600 must have a Residential Builder's License issued by the Department of Licensing and Regulatory Affairs (LARA). Ask to see the license number and verify it at michigan.gov/lara. Also check for proper insurance (general liability and workers' compensation) and BBB accreditation. NEXT Exteriors has been licensed in Michigan since 1988, carries full insurance, and maintains an A+ BBB rating since 2006. We're also a CertainTeed Master Shingle Applicator, which requires passing rigorous training and quality standards. Don't work with unlicensed contractors—if something goes wrong, you have no recourse.
Late spring through early fall (May through October) offers the best weather for window installation. Sealants and foams cure better in moderate temperatures, and there's less risk of weather delays. That said, we install windows year-round in Michigan. Winter installations are possible—we use cold-weather sealants and take extra care to minimize heat loss during the installation process. The advantage of winter scheduling is faster turnaround and sometimes better pricing, since it's off-season. Just avoid the coldest weeks (January-February) if possible. Fall is ideal because you can enjoy the improved comfort and energy savings through the upcoming heating season.
Storm Damage Roof Repair Metro Detroit | NEXT Exteriors
Fast, licensed storm damage roof repair in Metro Detroit. NEXT Exteriors handles insurance claims, emergency tarping, and complete roof restoration across Southeast Michigan.
You hear the storm roll through overnight — heavy winds rattling windows, hail hammering the roof, branches snapping somewhere in the dark. By morning, your neighbor's got shingles scattered across their lawn. You walk outside and spot a few in your own yard. Maybe there's a dark spot on the ceiling in the hallway that wasn't there yesterday.
Now what?
If you're a homeowner in Metro Detroit, you know Michigan weather doesn't mess around. Summer storms bring straight-line winds that peel shingles like Post-it notes. Hailstorms punch divots into roofs across Sterling Heights and Troy in fifteen minutes flat. Winter ice buildup can crack flashing and tear gutters clean off the fascia. And when damage happens, the clock starts ticking — on leaks, on insurance claims, and on finding a contractor who isn't a fly-by-night outfit that showed up the day after the storm.
We've been doing Detroit roofing services since 1988. We've climbed onto roofs the morning after every major storm that's hit Southeast Michigan in the last 35 years. We've worked with hundreds of insurance adjusters, documented thousands of damage claims, and repaired everything from a single torn shingle to complete roof replacements after tornadoes ripped through Macomb County.
This guide walks you through exactly what to do after storm damage — how to assess what happened, what your insurance company needs, when emergency repairs make sense, and how to choose a contractor who won't disappear after cashing your check.
How to Assess Storm Damage to Your Roof (From the Ground)
First rule: Don't climb onto your roof. Seriously. We've seen homeowners slip on wet shingles, step through soft spots they didn't know were there, and fall off ladders while trying to get a closer look. Leave the roof access to professionals with fall protection equipment and insurance.
Here's what you can safely check from ground level:
Walk the Perimeter
Circle your house and look for shingles in the yard, flowerbeds, or driveway. Check gutters for pieces of roofing material. If you've got binoculars, use them to scan the roof surface for obvious gaps, lifted edges, or areas where the color looks different (that's often bare underlayment showing through).
Pay special attention to roof edges, valleys, and ridges — that's where wind damage typically starts. High winds create uplift pressure that peels shingles from the edges inward. If you see curled or missing shingles along the rake edge (the sloped edge running from eave to ridge), that's a red flag.
Check Your Gutters
Look inside gutters and downspouts for granule accumulation. Asphalt shingles are coated with ceramic granules that protect the asphalt layer underneath from UV damage. Hail impact knocks these granules loose. A little granule loss is normal over time, but if your gutters look like they're full of coarse sand after a storm, that's hail damage.
Also check for dents in metal gutters, downspouts, or aluminum fascia. If hail dented your gutters, it probably dented your shingles too. This is especially common after storms in Rochester Hills and Bloomfield Hills, where mature tree canopies don't provide much overhead protection.
Look for Debris Impact
Tree branches, fence panels, patio furniture — storms turn everything into projectiles. If a branch landed on your roof, even if it didn't puncture through, the impact may have cracked shingles or damaged the decking underneath. Dark spots or depressions on the roof surface often indicate impact damage.
Check Inside the Attic
If you've got attic access, grab a flashlight and take a look. You're checking for three things:
- Daylight coming through the roof: If you can see sky, you've got a hole.
- Water stains on rafters or decking: Brown streaks or dark patches mean water's getting in, even if you haven't seen drips inside the house yet.
- Wet or compressed insulation: Insulation acts like a sponge. If it's damp, water's been coming through.
Don't ignore small leaks. What starts as a damp spot on a rafter can turn into rotted decking, mold growth, and a $15,000 repair bill if you wait six months to address it. We've seen this play out in older homes across Warren and St. Clair Shores, where decades-old roofs finally give up after one too many storms.
Important: If you spot active leaking — water dripping into your home right now — place a bucket under the leak, move valuables out of the way, and call a contractor immediately for emergency tarping. Don't wait for your insurance company to send an adjuster. Tarping is a temporary fix that prevents further damage while you work through the claims process. Most reputable contractors, including NEXT Exteriors' full range of services, offer emergency tarping as part of storm damage response.
What Michigan Storms Do to Roofing Systems
Understanding how storms damage roofs helps you spot problems and explain them to your insurance adjuster. Different types of weather cause different types of damage.
Wind Damage
Michigan gets straight-line winds that hit 60-80 mph during severe thunderstorms. These winds don't just blow shingles off — they create uplift pressure that literally sucks shingles upward from the roof deck.
Here's the mechanics: Wind hits the leading edge of your roof (usually the side facing the storm) and flows up and over. As it accelerates over the peak, it creates negative pressure on the back side. This pressure difference pulls shingles up from underneath, breaking the adhesive seal and tearing nails through the shingle tabs.
The damage pattern is predictable: You'll see missing or lifted shingles starting at the edges and working inward. Corners and ridges get hit hardest. Older roofs with brittle, sun-damaged shingles are especially vulnerable. We see this constantly after summer storms in Clinton Township and Shelby Township, where 15-20 year old roofs finally reach the end of their service life.
Wind ratings matter. Standard three-tab shingles are rated for winds up to 60 mph. Architectural shingles with proper installation (six nails per shingle, not four) can handle 110-130 mph winds. If you're replacing a roof after storm damage, ask your contractor about wind-rated shingles and proper installation techniques. This is where working with a CertainTeed Master Shingle Applicator makes a difference — we install to manufacturer specs that maximize wind resistance.
Hail Damage
Hail is tricky because the damage isn't always obvious from the ground. A 1-inch hailstone traveling at 50 mph hits with enough force to bruise asphalt shingles, crack fiberglass mats, and knock granules loose. The shingles might still be attached to the roof, but they're compromised.
Hail damage shows up as:
- Granule loss: Dark spots where the protective granule layer has been knocked off, exposing the black asphalt underneath
- Bruising: Soft spots or divots in the shingle surface that feel spongy when pressed (don't press them yourself — let the adjuster do this)
- Cracked shingles: Especially on older, brittle shingles that have lost flexibility from UV exposure
- Fractured fiberglass mat: This happens underneath the asphalt layer and isn't visible, but it weakens the shingle's structural integrity
Insurance adjusters count hail hits per 10x10 square section. If they find a certain number of impacts (usually 8-10 hits in a test square), they'll approve a full roof replacement. This is why documentation matters — you want the adjuster to see the same damage you're seeing.
Ice and Freeze-Thaw Damage
Michigan winters are brutal on roofs. Ice dams form when heat escaping through your attic melts snow on the upper roof. That meltwater runs down to the colder eaves, refreezes, and creates a dam of ice. Water backs up behind the dam, gets under shingles, and leaks into your house.
We've written extensively about ice dams in Michigan and why they form, but the storm damage angle is this: Ice dams can lift shingles, tear off gutters, and damage flashing around chimneys and vents. If you've had ice dam problems all winter and then a spring storm hits, you might already have compromised shingles that blow off more easily.
Freeze-thaw cycles also wreak havoc on roof flashing. Metal flashing expands and contracts with temperature swings. Over time, this movement loosens nails, cracks sealant, and opens gaps where water can penetrate. A storm that wouldn't damage a new roof can cause serious leaks in a roof with compromised flashing.
Debris Impact
Falling branches are the most common debris damage we see. A 6-inch diameter oak branch falling 30 feet carries enough momentum to punch through shingles, crack decking, and sometimes penetrate into the attic space.
Even if the branch doesn't puncture through, the impact can crack shingles, compress insulation underneath, and create a weak spot that fails during the next storm. This is especially common in older neighborhoods around Royal Oak and Grosse Pointe Farms, where mature trees overhang roofs.
If a branch hit your roof, don't just remove it and assume everything's fine. Have a contractor inspect the impact area for hidden damage. We've found cracked rafters, split decking, and compressed insulation under seemingly minor branch strikes.
Working With Your Insurance Company
Insurance claims for storm damage roof repair in Metro Detroit follow a predictable process. Understanding what your insurer needs — and what they're looking for — helps you get a fair settlement.
Document Everything Immediately
Before you touch anything, document the damage. Take photos and videos from every angle. Get wide shots showing the whole roof and close-ups of specific damage. Include reference points (a ruler next to hail dents, a quarter next to granule loss) to show scale.
Photograph:
- Shingles in the yard or gutters
- Missing or damaged shingles on the roof (use binoculars or zoom lens)
- Dents in gutters, downspouts, or metal vents
- Interior water damage (ceiling stains, wall discoloration, attic leaks)
- Debris impact points
- The overall condition of the roof before and after (if you have older photos)
Time-stamp everything. Note the date and time of the storm, when you discovered the damage, and when you took the photos. This creates a timeline that supports your claim.
File Your Claim Quickly
Most homeowners policies require you to report damage "promptly" or "as soon as reasonably possible." That's intentionally vague, but in practice, you should file within a few days of discovering damage. Waiting weeks or months gives the insurance company grounds to question whether the damage is actually storm-related or just normal wear and tear.
When you call to file a claim, you'll get a claim number and an assigned adjuster. Write down the claim number, the adjuster's name and contact info, and the date you filed. Keep all this information in one place — you'll reference it constantly over the next few weeks.
What the Adjuster Is Looking For
Insurance adjusters aren't your enemy, but they work for the insurance company, not for you. Their job is to assess damage and determine what the policy covers. They're trained to spot legitimate storm damage and distinguish it from pre-existing wear, poor maintenance, or installation defects.
The adjuster will:
- Inspect the roof surface: They'll look for hail hits, wind damage, missing shingles, and overall condition. They're counting impacts, measuring granule loss, and checking for patterns consistent with storm damage.
- Check for pre-existing damage: They'll note any areas with obvious age-related deterioration, curled shingles, or previous repairs. If your roof was already near end-of-life, they might argue the storm just accelerated inevitable failure.
- Measure the roof: They'll calculate square footage to estimate replacement costs. This measurement determines your settlement amount.
- Review your policy: They'll check your coverage limits, deductible, and any exclusions. Not all policies cover the same things.
You have the right to be present during the inspection. We strongly recommend it. Point out damage you've found, show them your photos, and ask questions. If they miss something, speak up.
Should You Get Your Own Estimate?
Yes. Always get an independent estimate from a licensed contractor before the adjuster shows up. This gives you a baseline for comparison and ensures you're not leaving money on the table.
A good contractor will provide a detailed estimate that includes:
- Square footage of the roof
- Type and quantity of materials needed
- Labor costs
- Removal and disposal of old roofing
- Replacement of damaged decking, flashing, or underlayment
- Permits and inspection fees
If the adjuster's estimate comes in significantly lower than your contractor's, ask why. Sometimes it's a difference in material quality (the adjuster might spec three-tab shingles when you have architectural shingles). Sometimes it's missing line items (they forgot to include decking replacement or flashing repairs). A reputable contractor can help you negotiate with the insurance company to get a fair settlement.
We work with insurance companies on storm damage claims every week. We know what adjusters look for, how to document damage properly, and how to present estimates that insurance companies accept. When you work with NEXT Exteriors, we'll walk you through the entire claims process and advocate for a settlement that covers the full scope of necessary repairs.
Common Claim Denials (and How to Avoid Them)
Insurance companies deny storm damage claims for predictable reasons. Here's what triggers denials and how to prevent them:
Lack of maintenance: If your roof was already in poor condition before the storm, the insurer might argue the damage is due to neglect, not weather. Keep records of regular maintenance (gutter cleaning, minor repairs, inspections). If you've had the roof inspected within the last year, provide that report to the adjuster.
Pre-existing damage: If the adjuster finds old damage mixed with new storm damage, they might deny the entire claim or only cover the new damage. This is why documentation matters — photos showing your roof's condition before the storm prove what's new.
Wear and tear: Roofs don't last forever. If your 25-year-old roof fails during a storm, the insurance company might argue it failed due to age, not storm damage. This is a gray area that often requires negotiation.
Installation defects: If the adjuster determines damage was caused by improper installation (wrong nails, inadequate sealing, missing underlayment), they'll deny the claim. This is why hiring a licensed, insured contractor for the original installation matters. And why working with a CertainTeed Master Shingle Applicator provides extra protection — our installations meet manufacturer specs and come with extended warranties.
Policy exclusions: Read your policy. Some policies exclude certain types of damage (cosmetic damage, gradual deterioration, damage from insects or animals). Know what's covered before you file a claim.
Emergency Repairs vs. Full Replacement
Not all storm damage requires a full roof replacement. Sometimes emergency repairs or partial fixes are the right call — at least temporarily. Here's how to decide.
When Emergency Tarping Makes Sense
If you've got active leaking and can't get a contractor out for permanent repairs immediately, tarping prevents further damage while you work through the insurance process.
Emergency tarping involves covering the damaged area with heavy-duty polyethylene sheeting, securing it with wood battens, and weighting it down to prevent wind uplift. It's not pretty, but it keeps water out.
Tarping makes sense when:
- You've got a puncture or large section of missing shingles and it's actively raining
- The insurance adjuster can't come out for several days and you need to prevent water damage
- You're waiting for materials to arrive for permanent repairs
- The damage is extensive and you need time to decide between repair and replacement
Most insurance policies cover reasonable emergency repairs to prevent further damage. Keep receipts. Take photos of the tarping. Document everything.
Don't leave a tarp on for months. Tarps degrade in UV light, wind can tear them loose, and water can pool on top and seep through seams. A tarp is a stopgap, not a solution.
When Patching Makes Sense
If the damage is localized — a few missing shingles, a torn valley, a damaged vent boot — patching might be the right move, especially if your roof is relatively new and in otherwise good condition.
Patching works when:
- The damage affects less than 10% of the roof surface
- You can get matching shingles (same color, style, and manufacturer)
- The surrounding shingles are in good condition and not brittle or curled
- The decking underneath isn't damaged
Patching doesn't work when:
- The damage is widespread (multiple areas across the roof)
- You can't get matching shingles (discontinued colors or styles)
- The rest of the roof is near end-of-life and likely to fail soon
- The decking is damaged or rotted in multiple areas
Here's the practical reality: If your roof is 15+ years old and you're patching storm damage, you're probably throwing good money after bad. You'll patch the storm damage now, then deal with another failure in six months, then another. At some point, replacement becomes the smarter financial decision.
We've patched thousands of roofs over 35 years. We'll tell you honestly whether a patch makes sense or whether you're better off replacing the whole thing. We're not interested in upselling you on a full replacement if a $500 patch solves the problem. But we're also not going to patch a roof that's going to fail next winter and leave you with a bigger mess.
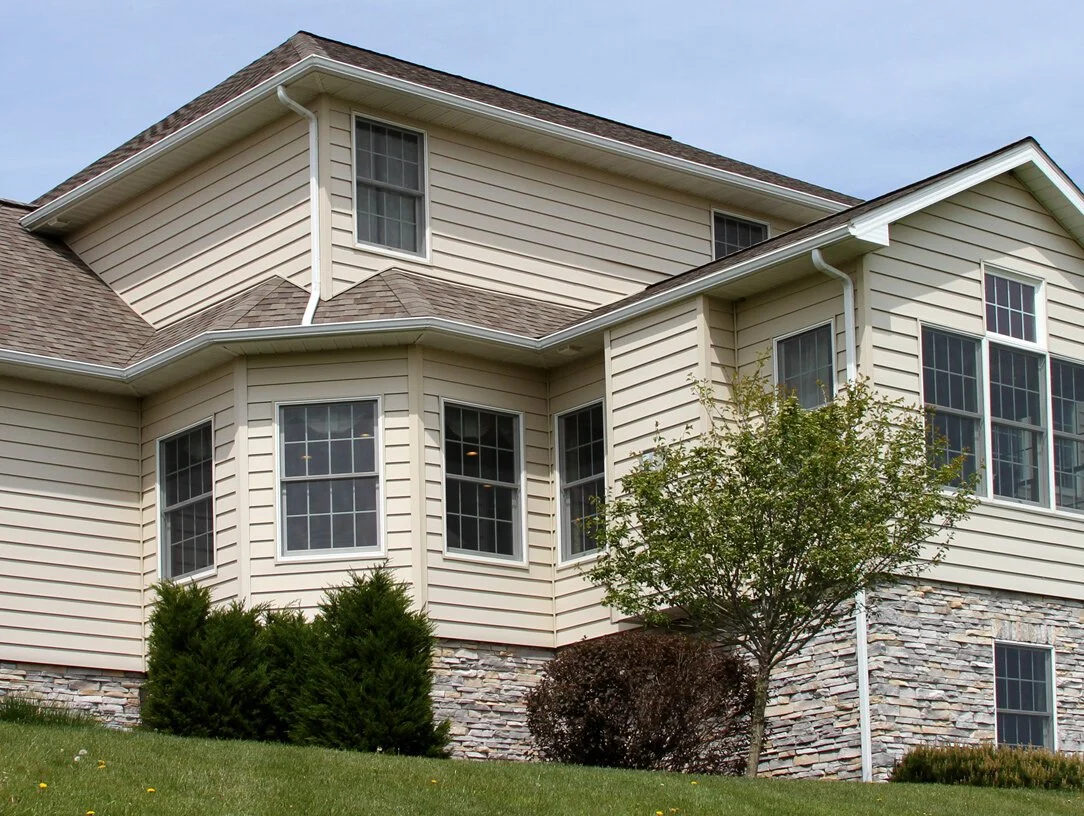
When Full Replacement Is Necessary
Full replacement is the right call when:
- The damage is widespread: Hail damage across the entire roof, wind damage affecting multiple sections, or extensive granule loss
- The roof is old: If your roof is 18-25 years old and showing signs of age (curled shingles, granule loss, brittle tabs), storm damage is often the final straw
- The decking is compromised: If the plywood or OSB decking is rotted, sagging, or cracked in multiple areas, you need more than shingle replacement
- You've got multiple leaks: If water's coming in from multiple points, the entire system is likely compromised
- The insurance company approves it: If your adjuster determines the damage warrants full replacement, take advantage of it. You're paying for that coverage.
Replacement timelines vary depending on weather, material availability, and contractor schedules. In Metro Detroit, expect 2-4 weeks from contract signing to completion during busy season (late spring through fall). Winter replacements take longer due to weather delays and temperature-dependent materials (shingle adhesive doesn't seal properly below 40°F).
Cost Reality for Michigan Homeowners
Storm damage repairs range from a few hundred dollars for minor patching to $8,000-$15,000+ for full replacement, depending on roof size, pitch, material choice, and extent of decking damage.
Insurance typically covers the cost of replacement minus your deductible. If your deductible is $1,000 and the replacement costs $12,000, you pay $1,000 and insurance covers $11,000. Some policies pay Actual Cash Value (ACV) initially, then Replacement Cost Value (RCV) after work is completed. Understand your policy before you start.
If you're paying out of pocket (no insurance claim or damage below your deductible), get multiple estimates. Prices vary, but the cheapest bid isn't always the best value. Look for licensed contractors with good reviews, proper insurance, and manufacturer certifications. We've written about roofing costs in Michigan and what drives the price up or down — it's worth understanding what you're paying for.
Choosing a Storm Damage Contractor in Metro Detroit
After every major storm, they show up: out-of-state contractors driving around neighborhoods, knocking on doors, offering "free inspections" and "insurance claim assistance." Some are legitimate. Many aren't.
Here's how to separate the pros from the storm chasers.
Red Flags to Watch For
They showed up at your door uninvited: Legitimate contractors don't need to cold-knock. They've got enough work from referrals and repeat customers. If someone's going door-to-door after a storm, they're probably not from around here and won't be around in six months when your roof starts leaking.
They offer to "waive your deductible": This is insurance fraud. Your deductible is your responsibility. A contractor who offers to waive it is either inflating the claim (fraud) or planning to cut corners to make up the difference (shoddy work). Either way, you lose.
They pressure you to sign immediately: "This price is only good today." "We've got a crew in the area right now." "Sign before the insurance adjuster gets here." These are sales tactics designed to prevent you from getting other estimates or thinking it through. A reputable contractor will give you time to make an informed decision.
They ask for full payment upfront: Never pay the full amount before work starts. Standard practice is a deposit (usually 10-30%) to order materials, then final payment upon completion. If they want 100% upfront, they're either desperate for cash flow or planning to disappear.
They don't have a local address or license: Ask for a physical business address (not a P.O. box). Check their Michigan Residential Builder's License. Verify their insurance. If they can't provide this information immediately, walk away.
They can't provide references: Any contractor who's been in business for more than a year should have a list of recent customers willing to vouch for their work. Ask for references in your area. Call them. Drive by the houses and look at the work.
What to Look For Instead
Local presence: A contractor based in Southeast Michigan has a reputation to protect. They're not leaving town after the storm. They'll be here when you need warranty work or have questions two years from now.
Proper licensing and insurance: Michigan requires a Residential Builder's License for roofing work. Verify the license at michigan.gov/lara. Confirm they carry general liability insurance and workers' compensation. If someone gets hurt on your property and the contractor doesn't have workers' comp, you could be liable.
Manufacturer certifications: CertainTeed Master Shingle Applicator, GAF Master Elite, Owens Corning Platinum Preferred — these aren't just marketing badges. They mean the contractor has met training requirements, maintains quality standards, and can offer extended warranties that regular contractors can't.
NEXT Exteriors holds CertainTeed Master Shingle Applicator status — the highest certification CertainTeed offers. We can provide warranties up to 50 years on materials and workmanship, which matters when you're investing $10,000+ in a roof replacement.
Clear, detailed estimates: A professional estimate breaks down materials, labor, disposal, permits, and timeline. It specifies shingle brand and model, underlayment type, flashing details, and ventilation requirements. If the estimate just says "roof replacement - $8,500," that's not enough detail to know what you're getting.
Good reviews and BBB rating: Check Google reviews, Better Business Bureau, and local contractor review sites. Look for patterns. One bad review isn't a dealbreaker (every contractor has an unhappy customer eventually), but multiple complaints about the same issue (poor communication, shoddy work, disappeared after payment) are red flags.
NEXT Exteriors has maintained an A+ BBB rating since 2006 and carries a 5.0-star average across 87+ reviews. We've completed 500+ projects in Southeast Michigan. We're not perfect, but we show up, do the work right, and stand behind it.
Transparent process: A good contractor explains what they're going to do, why they're doing it that way, and what you should expect at each stage. They answer questions without getting defensive. They provide written contracts with clear terms. They communicate proactively about delays, material changes, or unexpected issues.
Timeline Expectations
After a major storm, every roofing contractor in Metro Detroit is slammed. Expect delays. Here's a realistic timeline:
- Initial inspection: 1-3 days after you call (emergency tarping happens same-day or next-day)
- Estimate delivery: 2-5 days after inspection
- Insurance adjuster visit: 3-10 days after filing claim (varies by insurer and storm severity)
- Contract signing and material ordering: 1-2 days after insurance approval
- Material delivery: 1-2 weeks (can be longer after major storms when suppliers run low)
- Work completion: 1-3 days for typical residential roof, depending on size and complexity
Total timeline from initial call to finished roof: 3-6 weeks during busy season, 2-4 weeks during slower periods.
Materials That Hold Up to Michigan Weather
If you're replacing a roof after storm damage, this is your chance to upgrade to materials that'll handle the next storm better. Here's what actually matters in Southeast Michigan.
Wind Ratings
Shingles are tested for wind resistance using ASTM standards. The rating tells you how much wind the shingle can withstand when properly installed.
- Class D (60 mph): Minimum standard, typical for basic three-tab shingles
- Class G (90 mph): Mid-grade architectural shingles
- Class H (110-130 mph): High-performance architectural shingles with enhanced adhesive and reinforced construction
Metro Detroit sees straight-line winds of 60-80 mph a few times per year. Every 5-10 years, we get storms pushing 90+ mph. If you're replacing a roof, spec Class H shingles. The cost difference is minimal (maybe $500-$800 on a typical roof), and the performance difference is significant.
CertainTeed Landmark series, GAF Timberline HDZ, and Owens Corning Duration all offer Class H wind ratings with proper installation. We install all three brands and can help you choose based on color preference, warranty coverage, and budget.
Impact Resistance
Hail-resistant shingles are rated using UL 2218 impact testing, which drops steel balls of various sizes onto shingles to simulate hail strikes. Shingles are rated Class 1 through Class 4, with Class 4 being the most impact-resistant.
Class 4 shingles can withstand impacts from 2-inch steel balls (equivalent to 2-inch hail) without cracking or losing granules. They're built with reinforced asphalt formulations and impact-resistant mats.
Some insurance companies offer discounts (5-15%) for Class 4 shingles because they reduce the likelihood of future hail damage claims. Check with your insurer before specifying materials.
CertainTeed Northgate Class 4, GAF Timberline HDZ-RS, and Owens Corning Duration Storm are all solid Class 4 options we install regularly.
Underlayment Matters
Most homeowners focus on shingles and ignore underlayment, but underlayment is your roof's secondary water barrier. If shingles get damaged in a storm, good underlayment prevents leaks until repairs can be made.
Standard felt underlayment (15 lb or 30 lb) is cheap and meets code, but it tears easily and degrades in UV exposure. Synthetic underlayment (polypropylene or polyethylene-based) is stronger, lighter, and more durable. It won't tear during installation, resists UV damage for months if the roof installation gets delayed, and provides better water resistance.
We use synthetic underlayment on every roof we install. The cost difference is maybe $200-$300 on a typical residential roof, and the performance difference is worth it.
Proper Installation Techniques
The best shingles in the world won't perform if they're installed wrong. Here's what proper installation looks like:
- Six nails per shingle: Not four. Six nails (placed according to manufacturer specs) provide better wind resistance.
- Proper starter strip: A starter strip along the eaves and rakes provides a secure foundation for the first course of shingles and prevents wind uplift at the edges.
- Sealed shingles: Architectural shingles have an adhesive strip that bonds to the shingle below when heated by the sun. Proper installation ensures this bond forms correctly.
- Adequate ventilation: Ridge vents, soffit vents, and proper attic airflow prevent heat buildup that can prematurely age shingles and contribute to ice dam formation.
- Flashing details: Valleys, chimneys, vents, skylights — every penetration needs proper flashing to prevent leaks. We've covered roof flashing failures in Michigan extensively because it's one of the most common failure points.
This is why manufacturer certifications matter. A CertainTeed Master Shingle Applicator has been trained on proper installation techniques and is required to follow manufacturer specs. The result is a roof that performs as designed and qualifies for extended warranties.
Warranty Note: Manufacturer warranties cover defects in materials, not installation errors or storm damage. Workmanship warranties (provided by the contractor) cover installation defects. Extended warranties (available through certified contractors) often cover both materials and workmanship for 10-50 years. Read the fine print and understand what's covered.
Don't Forget the Rest of the Exterior
While you're dealing with storm damage to your roof, it's worth checking the rest of your home's exterior. Storms that damage roofs often damage siding, windows, and gutters too.
If your house siding in Detroit took a hit from flying debris, or if your windows cracked from hail, address it now while you're already working with insurance and contractors. Comprehensive exterior restoration — roof, siding, windows, and seamless gutters — done at the same time saves money and ensures everything is properly integrated.
We handle all of these services under one roof (no pun intended). When you work with NEXT Exteriors' full range of services, you get a single point of contact, coordinated scheduling, and a cohesive warranty that covers the entire exterior envelope. It's simpler, faster, and often more cost-effective than hiring separate contractors for each piece.
Need Storm Damage Roof Repair in Metro Detroit?
NEXT Exteriors has been handling storm damage restoration across Southeast Michigan since 1988. We work with your insurance company, provide detailed documentation, and deliver quality repairs backed by our A+ BBB rating and 5.0-star reviews. No pressure, no gimmicks — just honest work and fair pricing.
Get Your Free EstimateOr call us directly: (844) 770-6398
Frequently Asked Questions About Storm Damage Roof Repair
Most homeowners insurance policies require you to report damage "promptly" or "as soon as reasonably possible." While there's no hard deadline, insurance companies expect claims within days or weeks of the storm, not months. File as soon as you discover damage — ideally within 7-10 days. Waiting too long gives the insurer grounds to question whether the damage is actually storm-related or due to normal wear and tear. Document the damage immediately with photos and videos, even if you haven't filed the claim yet.
It depends on your policy and the extent of damage. If the adjuster determines the damage warrants full replacement, insurance typically covers the replacement cost minus your deductible. Some policies pay Actual Cash Value (ACV) initially — which factors in depreciation — then pay the remaining Replacement Cost Value (RCV) after work is completed. If your roof was very old or poorly maintained, the insurer might only cover partial replacement or apply significant depreciation. Review your policy and talk to your adjuster about coverage limits and depreciation schedules.
Not necessarily. If you didn't notice obvious damage (missing shingles, leaks, debris impact), a routine inspection after every minor storm isn't needed. However, after severe storms with high winds (60+ mph), large hail (1 inch or larger), or heavy debris, it's smart to have a professional inspection. Many contractors, including NEXT Exteriors, offer free storm damage inspections. Even if you don't see damage from the ground, a trained eye can spot issues like hail bruising, granule loss, or lifted shingles that will cause problems down the road.
Emergency tarping is a temporary fix to prevent further water damage while you arrange permanent repairs. A tarp covers the damaged area and is secured with wood battens and weights. It keeps rain out but isn't a long-term solution — tarps degrade in UV light, can tear loose in wind, and don't address underlying structural damage. Permanent repair involves replacing damaged shingles, repairing or replacing compromised decking, installing new underlayment and flashing, and restoring the roof to full functionality. Most insurance policies cover emergency tarping as part of preventing further damage, but it's just a stopgap until proper repairs can be completed.
Patching makes sense if the damage is localized (less than 10% of the roof), you can get matching shingles, and the rest of the roof is in good condition. Full replacement is necessary when damage is widespread (hail damage across the entire roof, multiple areas of wind damage), the roof is old (18-25 years) and showing signs of age, the decking is compromised in multiple areas, or you have multiple active leaks. A reputable contractor will assess the full scope of damage and give you an honest recommendation. If you're patching a roof that's near end-of-life, you're likely throwing money away — you'll be back in six months dealing with another failure.
In Metro Detroit, where hailstorms happen every few years, Class 4 impact-resistant shingles are worth considering. They cost about 10-15% more than standard architectural shingles but provide significantly better protection against hail damage. Many insurance companies offer premium
Fiber Cement Siding Metro Detroit: Why It Outperforms Vinyl
Fiber cement siding handles Michigan's freeze-thaw cycles better than vinyl. Learn what 35 years of installs in Metro Detroit taught us about durability and cost.

We've been installing siding in Southeast Michigan since 1988, and the question we hear most often is straightforward: "Should I go with vinyl or fiber cement?" The answer depends on your budget, how long you plan to stay in the house, and how much Michigan weather you're willing to let your siding endure without a fight.
Vinyl is cheaper upfront. Fiber cement costs more but lasts longer and handles our freeze-thaw cycles, hail storms, and summer humidity without warping, cracking, or fading the way vinyl does. If you're planning to stay in your home for 15+ years and want siding that won't need replacement or constant repairs, fiber cement is the better investment. If you're on a tight budget or planning to sell within five years, vinyl might make more sense.
This post breaks down what we've learned from house siding installations in Detroit and across Macomb, Oakland, and St. Clair counties. We'll cover material composition, real cost differences, installation challenges, maintenance expectations, and when vinyl still makes sense. No fluff — just what three decades of jobsite experience taught us about fiber cement siding in Metro Detroit.
Why Fiber Cement Beats Vinyl in Michigan Weather
Michigan throws everything at your home's exterior: January temperatures that drop below zero, freeze-thaw cycles that repeat 40+ times per winter, lake-effect snow that piles up against walls, spring hail storms, and summer humidity that hits 80% on a regular basis. Fiber cement handles all of it better than vinyl because of how the material responds to temperature swings and moisture.
Freeze-Thaw Cycle Resistance
Vinyl siding expands and contracts with temperature changes. In Michigan, that means it's constantly moving. When vinyl gets cold — below 20°F — it becomes brittle. A branch falls during an ice storm, or you accidentally hit it with a shovel while clearing snow, and it cracks. We see this every spring in Sterling Heights and Troy: homeowners who need panels replaced after winter damage.
Fiber cement doesn't have this problem. It's a composite material made from cement, sand, and cellulose fibers. It doesn't become brittle in cold weather, and it doesn't expand or contract the way vinyl does. The dimensional stability means fewer gaps around trim, fewer cracks at fasteners, and less chance of moisture getting behind the siding.
Impact Resistance From Hail and Debris
Southeast Michigan gets hail storms every summer. Vinyl dents. Fiber cement doesn't. James Hardie fiber cement has a Class 4 impact rating — the highest rating available. That means it can take a hit from a 2-inch steel ball dropped from 20 feet without cracking. Vinyl can't pass that test.
We've repaired vinyl siding in Rochester Hills after hail storms where every south-facing panel had dents. The homeowners had to file insurance claims and wait weeks for replacement panels. Fiber cement would have taken the same storm without damage.
Fire Resistance Ratings
Fiber cement is non-combustible. It won't ignite, and it won't contribute fuel to a fire. Vinyl melts. If your neighbor's house catches fire, or if embers from a nearby brush fire land on your siding, fiber cement gives you a layer of protection vinyl can't match. This matters more than most people think — especially in older neighborhoods with houses close together.
For comprehensive protection, many homeowners pair fiber cement with other exterior services in Detroit like updated roofing and proper insulation to create a fully resilient home envelope.
What Fiber Cement Actually Is (Material Science)
Fiber cement siding is a composite material. The base ingredients are Portland cement (the same stuff used in concrete), ground sand or fly ash (for bulk and strength), and cellulose fibers (usually from wood pulp or recycled paper). The fibers reinforce the cement matrix the same way rebar reinforces concrete — they prevent cracking and add tensile strength.
The manufacturing process matters. The raw materials are mixed with water, formed into sheets or planks, and then cured under heat and pressure. Some manufacturers use an autoclaving process (high-pressure steam curing), which creates a denser, more durable product. Others use air curing, which is faster but produces a slightly weaker panel.
James Hardie vs. LP SmartSide: What's the Difference?
James Hardie is true fiber cement — cement, sand, and cellulose. It's heavy (a 12-foot plank weighs about 70 pounds), non-combustible, and highly resistant to moisture, rot, and insects. It's also brittle, which means it requires careful handling during installation and specific fastening techniques to avoid cracking.
LP SmartSide is engineered wood siding — wood strands bonded with resin and treated with zinc borate for rot and insect resistance. It's lighter than James Hardie, easier to cut and install, and costs less. But it's still wood-based, which means it can absorb moisture if the factory coating gets damaged or if water gets behind the siding. In Michigan's wet springs and humid summers, that's a risk.
We install both, and both perform well when installed correctly. James Hardie is the better choice if you want maximum durability and fire resistance. LP SmartSide is the better choice if you want the look of wood siding without the weight and cost of fiber cement.
Michigan Detail: Fiber cement works especially well on brick Colonials and mid-century ranch homes common in Metro Detroit. The weight and rigidity of the material provide a solid, finished look that complements masonry and doesn't sag or warp around windows and trim the way vinyl can.
Real Cost Comparison: Fiber Cement vs. Vinyl in Metro Detroit
Let's talk numbers. Vinyl siding costs between $3.50 and $6.00 per square foot installed in Southeast Michigan, depending on the quality of the vinyl and the complexity of the job. Fiber cement costs between $8.00 and $12.00 per square foot installed. That's roughly double the upfront cost.
For a typical 2,000-square-foot home (about 1,500 square feet of siding after subtracting windows and doors), vinyl siding runs $5,250 to $9,000. Fiber cement runs $12,000 to $18,000. That's a significant difference, and it's why most homeowners start by looking at vinyl.
Why Fiber Cement Costs More
The material itself is more expensive. James Hardie planks cost more per square foot than vinyl panels. But labor is the bigger factor. Fiber cement is heavier, harder to cut, and requires more precise installation. Each plank needs to be cut with a fiber cement saw (not a standard circular saw), and every cut creates silica dust, which means the crew needs proper safety equipment and dust control.
Fastening is also more involved. Fiber cement requires blind nailing (nails hidden behind the next course) or face nailing with caulked nail heads. Vinyl uses a locking channel system that's faster to install. Trim work around windows and doors takes longer with fiber cement because the material doesn't flex — every cut has to be exact.
Long-Term ROI and Maintenance Costs
Vinyl siding lasts 20 to 30 years in Michigan if it's installed correctly and doesn't take storm damage. Fiber cement lasts 50+ years. The warranty on James Hardie products is 30 years non-prorated, which means if something fails in year 29, they replace it at full value. Most vinyl warranties are prorated, which means coverage decreases every year.
Maintenance costs also differ. Vinyl doesn't need painting, but it fades. After 10 to 15 years, the color shifts noticeably, especially on south- and west-facing walls. You can't paint vinyl effectively — the paint doesn't bond well and peels within a few years. Your only option is replacement.
Fiber cement can be painted. If you choose pre-finished James Hardie ColorPlus, the factory finish lasts 15 years before it needs a fresh coat. If you choose primed fiber cement and have it painted on-site, expect to repaint every 10 to 12 years. Either way, you have the option to refresh the look without replacing the siding.
Over 30 years, the total cost of ownership often favors fiber cement, especially if you factor in fewer repairs, no replacement due to fading, and better resale value. Homes with fiber cement siding in Metro Detroit typically sell for 5% to 10% more than comparable homes with vinyl, according to local real estate agents we work with.
Many homeowners also invest in Detroit window experts to upgrade to energy-efficient windows at the same time as siding replacement, maximizing both curb appeal and energy savings in one project.
Installation Differences That Matter
Fiber cement installation is not the same as vinyl installation. The material behaves differently, the fastening requirements are stricter, and the consequences of cutting corners are more severe. We've fixed plenty of bad fiber cement jobs in Royal Oak and Shelby Township — jobs done by crews who treated it like vinyl and ended up with cracked planks, water intrusion, and voided warranties.
Why Fiber Cement Requires Experienced Crews
Fiber cement is brittle. If you over-drive a nail, the plank cracks. If you don't leave the required 1/8-inch gap at butt joints, the planks expand slightly with moisture and crack at the joint. If you don't use the right blade on your saw, the cuts chip and look rough.
James Hardie requires installers to follow their Best Practices manual to maintain warranty coverage. That includes using corrosion-resistant fasteners (stainless steel or hot-dipped galvanized), nailing within 1 inch of the top edge, leaving proper clearances around trim and penetrations, and using approved flashing at all horizontal and vertical transitions.
We're a James Hardie Preferred Contractor, which means our crews are trained on these requirements and we're audited regularly to make sure we're following them. Not every contractor in Metro Detroit has that credential, and not every crew knows the difference between vinyl installation and fiber cement installation.
Flashing and Trim Details
Water management is critical with fiber cement. The siding itself is moisture-resistant, but if water gets behind it and sits against the sheathing or framing, you get rot. That means every window, door, and penetration needs proper flashing.
We use self-adhering flashing tape at all horizontal transitions (where siding meets trim or a different material), and we install drip edge above windows and doors to direct water away from the opening. Vinyl installers often skip these steps because vinyl is more forgiving — it drains water through the locking channels. Fiber cement doesn't have that built-in drainage, so the flashing has to do the work.
Trim is another detail that separates good jobs from bad jobs. Fiber cement trim (like James Hardie's Hardie Trim) is the best option because it matches the siding's durability and doesn't rot. Wood trim looks great initially, but it's the first thing to fail in Michigan's wet climate. We see rotted wood trim around windows and doors on 10-year-old homes all the time. Fiber cement trim eliminates that problem.
Proper installation also ties into other critical systems. For example, ensuring seamless gutters in Detroit, MI are functioning correctly prevents water from cascading down walls and compromising even the best siding installation.

Maintenance Reality: What You'll Actually Do
Fiber cement is low-maintenance, but it's not no-maintenance. Here's what you'll actually need to do over the life of the siding.
Cleaning
Wash the siding once a year with a garden hose and a soft brush. Use a mild detergent if you've got algae or mildew growth (common on north-facing walls in Michigan). Don't use a pressure washer — the high pressure can damage the finish and force water behind the siding. A regular hose works fine.
Painting Schedule
If you chose James Hardie ColorPlus (factory-finished), you won't need to paint for 15 years. After that, a fresh coat every 10 to 12 years keeps it looking new. If you chose primed fiber cement and had it painted on-site, expect to repaint every 10 to 12 years from the start.
Use 100% acrylic latex paint with a 25-year warranty. Sherwin-Williams Duration or Emerald are solid choices — we use them on all our Southeast Michigan painting projects. The better the paint, the longer it lasts, and the less often you'll need to repaint.
Caulking and Sealant
Check caulk joints around windows, doors, and trim every few years. Caulk degrades over time, especially in Michigan's freeze-thaw cycles. If you see gaps or cracking, scrape out the old caulk and apply fresh sealant. This takes an afternoon and costs almost nothing, but it prevents water intrusion that can lead to expensive repairs.
Warranty Expectations
James Hardie's warranty covers defects in the material for 30 years non-prorated. The ColorPlus finish is covered for 15 years. But the warranty only applies if the siding was installed according to Best Practices and if you maintain it properly. That means keeping records of any maintenance or repairs, and addressing problems as soon as you notice them.
LP SmartSide offers a 50-year prorated warranty on the product and a 5-year warranty on the factory finish. Again, proper installation and maintenance are required.
When Vinyl Still Makes Sense
Fiber cement isn't always the right choice. Here are the situations where vinyl makes more sense.
Budget Constraints
If you've got $8,000 to spend on siding and fiber cement would cost $15,000, vinyl is the practical choice. It's better to have new vinyl siding than to keep deteriorating wood siding or cracked old vinyl that's letting water into the walls. Vinyl isn't as durable as fiber cement, but it's a massive upgrade from failing siding.
Rental Properties
If you own rental properties in Detroit or Warren, vinyl makes financial sense. Tenants aren't going to appreciate the long-term durability of fiber cement, and they're not going to maintain it the way an owner-occupant would. Vinyl is cheaper upfront, easier to repair (you can pop out a damaged panel and replace it in 20 minutes), and good enough for a rental.
Short-Term Ownership Plans
If you're planning to sell within five years, you won't recoup the extra cost of fiber cement. Vinyl gives you the curb appeal boost you need to sell the house without the higher upfront investment. Most buyers won't know the difference between quality vinyl and fiber cement until they've lived in the house for a decade.
Homes With Minimal Weather Exposure
If your home is sheltered by mature trees, sits in a neighborhood with minimal wind exposure, and doesn't get hit by afternoon sun, vinyl will last longer and perform better than it would on an exposed site. In that scenario, the durability advantage of fiber cement is less significant.
For comprehensive exterior upgrades, homeowners often combine siding with other improvements. Learn more about our full range of options through our exterior services in Detroit.
Signs Your Current Siding Is Failing
Whether you have vinyl, wood, or old fiber cement, here are the signs that it's time to replace it.
Warping and Buckling
Vinyl warps when it gets too hot or when it's installed too tight without room for expansion. If you see wavy sections, bulging panels, or areas where the siding has pulled away from the wall, it's failing. Wood siding warps when it absorbs moisture and dries repeatedly. Either way, warped siding doesn't protect the house, and it looks terrible.
Cracks and Holes
Cracks in vinyl siding let water and insects into the wall cavity. Small cracks turn into big cracks over one or two winters. Holes from woodpeckers, hail damage, or impact from debris are also entry points for moisture. If you've got multiple cracks or holes, it's time to replace the siding.
Fading and Discoloration
Vinyl fades over time, especially on south- and west-facing walls. If your siding looks noticeably lighter or has chalky residue when you rub it, the color is breaking down. You can't fix this — the color is part of the vinyl itself. Replacement is the only option.
Moisture Intrusion and Rot
If you see water stains on interior walls, peeling paint inside the house, or soft spots in the sheathing when you press on the siding, you've got moisture intrusion. This is serious. Water in the walls leads to rot, mold, and structural damage. Pull off a section of siding and check the sheathing and framing. If it's wet or rotted, you need to address it immediately.
Higher Energy Bills
Failing siding doesn't insulate your home properly. If your heating bills have gone up over the past few winters and your furnace is running more often, air is leaking through gaps in the siding or through damaged areas. New siding — especially fiber cement with proper flashing and air sealing — will reduce those leaks and lower your energy bills.
Pairing new siding with upgraded insulation services in Southeast Michigan creates a complete thermal envelope that maximizes energy efficiency and comfort year-round.
When to Call a Contractor: If you're seeing any of these signs, get an inspection. We'll pull a few sections of siding, check the sheathing and framing, and give you an honest assessment of what needs to be done. Sometimes it's a small repair. Sometimes it's a full replacement. Either way, you'll know what you're dealing with.
Ready to Get Started?
NEXT Exteriors has been protecting Michigan homes since 1988. Get a free, no-pressure estimate from a team that shows up on time and does the job right.
Get Your Free QuoteOr call us: (844) 770-6398
Frequently Asked Questions
Fiber cement siding lasts 50+ years in Michigan when installed correctly and maintained. James Hardie offers a 30-year non-prorated warranty, and we've seen fiber cement installations from the 1990s that still look and perform like new. The material doesn't rot, doesn't warp in freeze-thaw cycles, and holds paint well, which extends its lifespan significantly compared to vinyl or wood.
No, and you shouldn't try. Fiber cement needs a flat, solid substrate to prevent cracking. Installing it over old siding means you're nailing into uneven surfaces, which leads to stress points and cracks. We always remove old siding, inspect the sheathing for damage, make any necessary repairs, and then install fiber cement over properly prepared walls. This also gives us a chance to upgrade insulation and air sealing, which improves energy efficiency.
Yes. Homes with fiber cement siding typically sell for 5% to 10% more than comparable homes with vinyl siding in Southeast Michigan. Buyers recognize the durability, fire resistance, and low maintenance of fiber cement, and they're willing to pay for it. Realtors we work with also report that homes with fiber cement spend less time on the market because they show better and have fewer deferred maintenance concerns.
James Hardie is true fiber cement (cement, sand, cellulose). It's non-combustible, highly durable, and heavy. LP SmartSide is engineered wood siding treated for rot and insect resistance. It's lighter, easier to install, and costs less, but it's still wood-based, which means it can absorb moisture if the coating is damaged. Both perform well in Michigan when installed correctly. James Hardie is the better choice for maximum durability and fire resistance. LP SmartSide is better if you want the look of wood at a lower cost.
Fiber cement siding costs between $8.00 and $12.00 per square foot installed in Southeast Michigan. For a typical 2,000-square-foot home (about 1,500 square feet of siding after subtracting windows and doors), expect to pay $12,000 to $18,000. That includes removal of old siding, repairs to sheathing if needed, installation of new fiber cement, trim, and cleanup. Vinyl siding costs $5,250 to $9,000 for the same house, so fiber cement is roughly double the upfront cost but lasts twice as long.
It depends on what you choose. James Hardie ColorPlus is factory-finished and doesn't need painting for 15 years. After that, a fresh coat every 10 to 12 years keeps it looking new. If you choose primed fiber cement and have it painted on-site, expect to repaint every 10 to 12 years from the start. Either way, fiber cement holds paint better than wood and doesn't fade the way vinyl does, so you have the option to refresh the color without replacing the siding.
Fiber cement doesn't become brittle in cold weather the way vinyl does, but it can crack if it's installed incorrectly. Over-driven nails, insufficient expansion gaps at butt joints, and improper fastening all cause cracks. That's why proper installation matters. When installed according to manufacturer specifications — with the right fasteners, proper spacing, and correct nailing patterns — fiber cement handles Michigan's freeze-thaw cycles without cracking. We've never had a properly installed James Hardie job crack due to cold weather.
Gutter Installation Cost Metro Detroit: Real Pricing 2026
What gutter installation actually costs in Metro Detroit. Real pricing for seamless gutters, materials, labor, and what affects your quote from a licensed Michigan contractor.
You're researching gutter installation costs in Metro Detroit because your gutters are failing, you're finishing a roof replacement in Southeast Michigan, or you're tired of water pouring over the sides every time it rains. You want a straight answer: what does this actually cost?
After 35 years installing seamless gutters in Detroit, MI, we've quoted thousands of homes across Macomb County, Oakland County, and St. Clair County. Here's what gutter installation actually costs in 2026—and what separates a quality job from one that fails in three years.
This isn't a national average pulled from some database. These are real numbers from real projects in Sterling Heights, Rochester Hills, Grosse Pointe Farms, and Clinton Township.
What Gutter Installation Actually Costs in Metro Detroit (2026)
Gutter installation pricing in Southeast Michigan breaks down into three components: materials, labor, and accessories. Here's what you're actually paying for.
Material Costs: Aluminum, Steel, and Copper
Aluminum gutters are the standard in Michigan—and for good reason. They don't rust, they're lightweight enough to avoid fascia stress during heavy snow loads, and they handle freeze-thaw cycles without cracking. Most residential installations use .027 or .032 gauge aluminum.
Cost per linear foot for materials (aluminum, seamless):
- .027 gauge: $3.50–$5.00 per foot
- .032 gauge (thicker, more durable): $4.50–$6.50 per foot
Steel gutters are heavier and more resistant to dents from ladders or falling branches, but they will rust over time—especially in Michigan's salt-heavy winters. Material cost: $6–$9 per foot.
Copper gutters are the premium option. They don't rust, they develop a natural patina, and they last 50+ years. But they're expensive. Material cost: $25–$40 per foot. We install copper on historic homes in Bloomfield Hills and Grosse Pointe, but it's overkill for most residential projects.
Labor Costs in Southeast Michigan
Professional gutter installation isn't just hanging a trough. It requires precise pitch calculation (1/4 inch drop per 10 feet of run), secure fascia attachment, corner mitering, downspout placement, and on-site fabrication for seamless systems.
Labor typically runs $3–$6 per linear foot depending on:
- Roof height (single-story vs. two-story)
- Roofline complexity (multiple valleys, dormers, bay windows)
- Fascia condition (if repairs are needed, add $8–$15 per foot)
- Accessibility (tight side yards, landscaping obstacles)
Total Project Costs: Real Examples
Here's what complete gutter installations cost for typical Metro Detroit homes in 2026:
| Home Type | Linear Feet | Material | Total Cost |
|---|---|---|---|
| Single-story ranch (1,200 sq ft) | 120–140 feet | .027 aluminum | $900–$1,400 |
| Two-story Colonial (2,000 sq ft) | 160–200 feet | .032 aluminum | $1,600–$2,600 |
| Large two-story (2,800 sq ft) | 220–260 feet | .032 aluminum | $2,400–$3,600 |
| Historic brick Colonial | 180 feet | Copper | $6,500–$9,000 |
These numbers include removal and disposal of old gutters, downspouts, extensions, and basic fascia inspection. If your fascia boards are rotted—common on homes with long-term gutter failure—add $800–$2,500 for fascia replacement depending on how much needs work.
Michigan-Specific Note: Homes in Lake Orion, Rochester Hills, and other areas with mature trees often need additional downspouts to handle leaf volume and prevent overflow. Each additional downspout adds $75–$150 to the total.
What Affects Your Gutter Installation Quote
Two homes on the same street can get wildly different quotes. Here's why.
Roofline Complexity
A simple ranch with a straightforward gable roof is fast to measure and install. A home with multiple roof valleys, dormers, or a wraparound porch requires more corners, more cuts, more downspouts, and more time. Every inside or outside corner adds material waste and labor.
Material Gauge and Quality
The difference between .027 and .032 gauge aluminum is about $1.50 per foot—but that thicker material resists denting, handles snow load better, and lasts longer in Michigan winters. We recommend .032 for two-story homes or homes with heavy snow accumulation from valley roofs.
Fascia Condition
If your fascia boards are soft, rotted, or pulling away from the house, new gutters won't solve the problem—they'll just fail faster. Fascia replacement is common on homes where gutters have been leaking for years. On a typical two-story Colonial in Troy or Warren, fascia replacement adds $1,200–$2,000 to the project.
Downspout Placement and Extensions
Proper downspout placement isn't arbitrary. We calculate roof area, pitch, and drainage zones to determine how many downspouts you need and where they go. Undersized or poorly placed downspouts cause overflow, ice dams, and foundation problems.
Each downspout includes:
- Outlet fitting and drop
- Elbows to route around eaves
- Ground-level extension (minimum 4 feet from foundation)
- Straps and fasteners
Cost per downspout: $75–$150 installed.
Removal and Disposal
If you have existing gutters, they need to come down. Most quotes include removal and haul-away, but confirm this upfront. Sectional gutters come down fast. Old steel gutters that are screwed and caulked to wood fascia take longer.
Seamless vs. Sectional Gutters: The Cost Difference
Seamless gutters cost 20–30% more than sectional gutters upfront. But in Michigan, that extra cost pays off.
Why Seamless Costs More
Seamless gutters are fabricated on-site using a portable gutter machine. We measure your roofline, feed coil stock through the machine, and create continuous runs with no seams except at corners. This requires specialized equipment, skilled labor, and precise measurement.
Sectional gutters are pre-cut 10-foot sections joined with connectors and sealed with caulk. They're cheaper and easier to install, but every seam is a future leak point.
Why Seamless Wins in Michigan
Michigan's freeze-thaw cycles are brutal on gutter seams. Water gets into the joints, freezes, expands, and breaks the seal. By March, you've got leaks. Seamless gutters eliminate 90% of those failure points.
We've replaced hundreds of sectional gutter systems in Macomb and St. Clair counties—most of them failing at the seams within 5–8 years. Seamless systems last 20–30 years with minimal maintenance.
For a detailed comparison of how seamless gutters handle Michigan storms, read our guide on seamless vs. sectional gutters for Michigan weather.
Real Cost Comparison (160-foot two-story home):
Sectional aluminum gutters: $1,100–$1,600
Seamless aluminum gutters: $1,600–$2,200
Difference: $500–$600 upfront. But the seamless system will outlast the sectional by 10+ years and require far fewer repairs.
Signs You Need New Gutters (Not Just Repairs)
Not every gutter problem requires replacement. A loose hanger or a single leak can be fixed. But if you're seeing multiple issues, replacement is the smarter move.
Pulling Away From the Fascia
If your gutters are sagging or separating from the fascia, the fasteners have failed. This happens when:
- Gutters were installed with spikes instead of hidden hangers (spikes work loose over time)
- The fascia is rotted and can't hold fasteners
- The gutters are overloaded from debris or ice
You can re-hang gutters, but if the fascia is soft or the gutter profile is bent, replacement is the better option.
Rust, Holes, or Visible Cracks
Aluminum doesn't rust, but steel does. If you have steel gutters with visible rust or pinholes, they're done. Patching buys you a season, maybe two.
Cracks in aluminum gutters—usually at corners or seams—can't be reliably sealed long-term. Michigan winters will reopen them.
Sagging Sections or Improper Pitch
Gutters need a consistent 1/4-inch slope per 10 feet to drain properly. If sections are sagging or holding standing water, they'll overflow during heavy rain and breed mosquitoes in summer.
Sagging usually means the hangers are spaced too far apart (should be every 24 inches in Michigan for snow load) or the fascia is failing.
Water Damage to Siding or Foundation
If you're seeing water stains on your house siding in Detroit, soil erosion at the foundation, or basement moisture, your gutters aren't doing their job. That's often a combination of clogs, improper pitch, and undersized downspouts.
Frequent Overflow During Michigan Storms
If your gutters overflow every time it rains hard—even when they're clean—you either have undersized gutters (5-inch gutters can't handle Michigan's summer downpours on large roof areas) or too few downspouts.
Upgrading to 6-inch gutters or adding downspouts solves this, but if your existing system is old and failing anyway, replacement is the time to fix it right.
What's Included in a Professional Gutter Installation
A professional gutter installation from NEXT Exteriors includes more than just hanging metal. Here's what you're paying for.
Site Assessment and Measurement
We measure your roofline, calculate roof area and pitch, identify drainage zones, and determine downspout placement. This isn't guesswork—it's building science.
Custom Fabrication On-Site
For seamless systems, we bring the gutter machine to your home in Sterling Heights, Shelby Township, or wherever you are in Southeast Michigan. We fabricate each run to exact length, eliminating seams and reducing leak points.
Proper Pitch and Slope Calculation
Every gutter run is installed with a consistent 1/4-inch slope per 10 feet toward the downspouts. We use a laser level to ensure accuracy—not eyeballing it.
Downspout Placement and Extensions
Downspouts are placed to maximize drainage efficiency and minimize overflow. Extensions carry water at least 4 feet from your foundation to prevent basement moisture and soil erosion.
Cleanup and Haul-Away
We remove old gutters, clean up debris, and haul everything away. Your property looks better than when we arrived.
Warranty Coverage
Our gutter installations include a workmanship warranty. Materials are backed by manufacturer warranties (typically 20–30 years for aluminum).
Beyond gutters, NEXT Exteriors offers a full range of exterior services in Detroit—including roofing, siding, windows, insulation, and painting—so if your project expands, we're already on-site.
Why Cheap Gutter Quotes Cost More Later
We've been called to fix cheap gutter jobs more times than we can count. Here's what goes wrong when you chase the lowest bid.
Thin-Gauge Materials That Dent and Fail
Some contractors use .025 gauge aluminum or thinner to cut costs. It's cheaper, but it dents from ladder contact, bends under snow load, and doesn't hold fasteners as well. You'll be replacing it in 10 years instead of 25.
Improper Pitch Causing Standing Water
If the installer doesn't use a level and just "eyeballs" the pitch, you end up with low spots that hold water. Standing water breeds mosquitoes, accelerates corrosion, and overflows during rain.
Inadequate Fasteners in Michigan Freeze-Thaw
Old-school gutter spikes work loose over time—especially in freeze-thaw cycles. Professional installations use hidden hangers every 24 inches, screwed into fascia or rafter tails. Cheap jobs use spikes every 36 inches. By year three, the gutters are sagging.
No Warranty or Callback Service
The lowest-bid contractor often disappears after the job. When a seam starts leaking or a downspout pulls loose, you're on your own.
We've replaced gutter systems in Royal Oak and St. Clair Shores that were only 4–5 years old because they were installed wrong from day one. The homeowner paid twice—once for the cheap job, once for the right one.
What We've Seen: A homeowner in Clinton Township paid $800 for a "bargain" gutter install. Within two years, seams were leaking, the fascia was rotting from overflow, and the pitch was so bad that water pooled in the middle of every run. The replacement cost $2,200—and included $900 in fascia repairs. Saving $400 upfront cost them $1,400 in the end.
How NEXT Exteriors Handles Gutter Installation
We've been installing gutters in Southeast Michigan since 1988. We're a Michigan-licensed contractor with an A+ BBB rating, and we've completed 500+ exterior projects across Macomb, Oakland, and St. Clair counties.
Here's how we approach every gutter installation:
- Free on-site estimate: We measure your home, assess fascia condition, and provide a detailed quote—no pressure, no gimmicks.
- Seamless systems fabricated on-site: We bring the gutter machine to your home and custom-fabricate each run.
- Proper pitch and placement: Laser-level accuracy, hidden hangers every 24 inches, and downspouts sized and placed for maximum drainage.
- Quality materials: We use .032 gauge aluminum as standard for durability in Michigan winters.
- Workmanship warranty: Our installations are backed by a warranty—and we've been in business long enough to honor it.
We also coordinate gutter installation with other exterior work. If you're replacing your roof in Detroit, upgrading your siding in Southeast Michigan, or improving your home's insulation in Metro Detroit, we handle it all—one crew, one timeline, no coordination headaches.
For painting projects, we're exclusive partners with Sherwin-Williams. Learn more about our Southeast Michigan painting professionals and how we handle exterior painting alongside gutter and siding work.
If you're upgrading windows at the same time, our Detroit window experts can handle that too—ensuring proper flashing integration with your new gutters.
Ready to Get Started?
NEXT Exteriors has been protecting Michigan homes since 1988. Get a free, no-pressure estimate from a team that shows up on time and does the job right.
Get Your Free QuoteOr call us: (844) 770-6398
Frequently Asked Questions
In 2026, seamless aluminum gutter installation in Southeast Michigan runs $8–$12 per linear foot installed, including materials and labor. That breaks down to $3.50–$6.50 per foot for materials (.027 or .032 gauge aluminum) and $3–$6 per foot for labor. Total project costs for a typical two-story home (160–200 linear feet) range from $1,600–$2,600. Homes requiring fascia repair, additional downspouts, or premium materials like copper will cost more.
Yes. Seamless gutters cost 20–30% more upfront than sectional gutters, but they eliminate 90% of the seam failure points that cause leaks in Michigan's freeze-thaw cycles. Sectional gutters typically fail at the seams within 5–8 years. Seamless systems last 20–30 years with minimal maintenance. For a typical Metro Detroit home, the $500–$600 upfront difference saves you thousands in repairs and early replacement.
Most residential gutter installations in Southeast Michigan take 4–8 hours for a single crew. A simple ranch home with straightforward rooflines can be done in half a day. A large two-story Colonial with multiple valleys, dormers, and complex downspout routing may take a full day. If fascia repair is needed, add another half-day to a full day depending on the extent of the damage.
Not always—but it's common on homes where gutters have been leaking for years. If the fascia boards are soft, rotted, or pulling away from the house, they need to be replaced before new gutters go up. Installing gutters on bad fascia just transfers the problem—the new gutters will sag and fail within a few years. During our free estimate, we inspect fascia condition and let you know if replacement is needed. Fascia replacement typically adds $8–$15 per linear foot.
Aluminum is the best all-around choice for Michigan. It doesn't rust, it handles freeze-thaw cycles without cracking, and it's light enough to avoid stressing fascia during heavy snow loads. We recommend .032 gauge aluminum for durability—it resists denting and holds up better under ice and snow. Steel gutters are stronger but will rust over time, especially with Michigan's road salt. Copper is premium and lasts 50+ years, but it's expensive and typically reserved for historic or high-end homes.
If you have mature trees near your home—common in Lake Orion, Rochester Hills, and Bloomfield Hills—gutter guards can reduce maintenance. But they're not magic. Cheap mesh guards clog with shingle grit and pine needles. Quality systems like micro-mesh or reverse-curve guards work better but add $8–$15 per foot to the installation cost. We recommend guards for homes with heavy leaf volume, but they're not necessary for every house. Cleaning gutters twice a year is often more cost-effective than a $2,000+ guard system.
Seamless aluminum gutters last 20–30 years in Michigan with proper maintenance. Sectional gutters typically last 10–15 years before seam failures require replacement. Steel gutters last 15–20 years before rust becomes a problem. Copper gutters can last 50+ years. Lifespan depends on installation quality, material gauge, and maintenance. Gutters that are cleaned regularly, have proper pitch, and were installed with hidden hangers on solid fascia will outlast systems that were installed cheap and neglected.
Roof Replacement Cost Michigan 2026: Real Numbers
What Michigan homeowners actually pay for roof replacements in 2026. Material costs, labor rates, and hidden factors that affect your final price in Southeast Michigan.
Let's talk money. If you're researching roof replacement cost Michigan 2026, you've probably already seen the vague ranges online — "$5,000 to $15,000" or "depends on your roof." That's not helpful when you're trying to budget for one of the biggest investments in your home.
After 35 years installing roofs across Southeast Michigan — from brick Colonials in Bloomfield Hills to 1960s ranches in Sterling Heights — we've learned that Michigan homeowners want straight answers. So here's what roof replacements actually cost in 2026, broken down by material, size, and the hidden factors that move the needle on your final invoice.
This isn't a sales pitch. It's the pricing reality from a Detroit roofing services contractor who's been doing this since 1988 and holds the CertainTeed Master Shingle Applicator credential — the highest certification in the roofing industry.
What Roofing Materials Actually Cost in Michigan
Material choice drives the biggest cost variation in roof replacements. Here's what we're installing in Metro Detroit in 2026, with real pricing per square (100 square feet of roof area).
Asphalt Shingles: The Michigan Workhorse
Asphalt shingles make up 85% of residential roofs in Southeast Michigan. They handle freeze-thaw cycles well, come in dozens of colors, and offer solid value. But not all asphalt shingles are created equal.
| Shingle Type | Cost Per Square (Material Only) | Lifespan in Michigan | Best For |
|---|---|---|---|
| 3-Tab Shingles | $90 - $120 | 15-20 years | Budget-conscious projects, rental properties |
| Architectural Shingles | $140 - $200 | 25-30 years | Most residential homes — best value |
| Designer/Premium Shingles | $250 - $400 | 30-50 years | High-end homes, historic districts, curb appeal focus |
We install CertainTeed Landmark, GAF Timberline HDZ, and Owens Corning Duration shingles most often. These architectural shingles hit the sweet spot for Michigan weather — thick enough to resist wind uplift during summer storms, flexible enough to handle winter contraction, and backed by strong warranties.
Michigan Reality Check: The cheapest shingle isn't always the best deal. A 3-tab roof that fails at year 18 costs you more over 30 years than an architectural shingle that lasts the full warranty period. We've replaced hundreds of budget roofs that should've been spec'd differently from day one.
Metal Roofing: Long-Term Investment
Metal roofs are gaining traction in Oakland and Macomb counties, especially on lakefront properties and modern builds. Material costs run $400-$800 per square for standing seam systems, with lifespans pushing 50+ years. Installation requires specialized skills — not every roofing crew can handle metal correctly, and bad installs lead to leaks at the seams.
Metal makes sense if you're planning to stay in the home long-term, want superior snow shedding, or need something that laughs at Michigan hail. But the upfront cost is 2-3x asphalt, so it's not the right call for every budget.
Clay and Concrete Tile: Rare in Michigan
We see tile roofs occasionally in Grosse Pointe and Birmingham — usually on Mediterranean-style homes. Material costs start around $600 per square, but the real expense is structural reinforcement. Tile is heavy, and many Michigan homes weren't framed to carry that load. You're often adding $3,000-$8,000 in structural work before the first tile goes down.
Labor and Installation Rates in Southeast Michigan
Material is only half the equation. Labor accounts for 40-60% of your total roof replacement cost in Michigan, and rates vary based on crew skill, project complexity, and timing.
In 2026, expect to pay $150-$250 per square for labor on a standard asphalt shingle installation in Metro Detroit. That includes tear-off of the old roof, disposal, installation of new underlayment and shingles, flashing work, and cleanup.
What Drives Labor Costs Higher?
- Roof pitch: Anything steeper than 6/12 pitch requires additional safety equipment and slows down installation. Expect a 15-25% premium on steep roofs.
- Roof complexity: Multiple valleys, dormers, skylights, and chimneys add time. A simple gable roof installs faster than a hip roof with six dormers.
- Height: Two-story homes cost more than ranches. Three-story Victorians in Royal Oak? Even more.
- Access: Tight lots, mature trees blocking crane access, and homes surrounded by landscaping all slow down material delivery and debris removal.
- Season: Spring and fall are peak roofing seasons. If you need work done in July or November, you might negotiate better rates when crews have openings.
Our crews at NEXT Exteriors have been working together for years — we're not hiring day laborers off Craigslist. That consistency shows up in clean installs, minimal callbacks, and projects that finish on schedule. You pay a bit more for experienced crews, but you're not paying twice to fix mistakes.
The Hidden Costs Most Contractors Don't Mention Upfront
Here's where roof replacement estimates get messy. A contractor quotes you $8,000, you sign the contract, and suddenly there's an extra $2,500 in "unforeseen issues." Let's pull back the curtain on what actually drives costs up mid-project.
Decking Replacement
Once we tear off your old shingles, we inspect the roof decking (usually plywood or OSB sheathing). In Michigan, it's common to find rot around chimneys, valleys, and eaves — especially on homes built in the 1970s-1990s when builders skimped on ice and water shield.
Decking replacement runs $3-$5 per square foot. On a typical 2,000-square-foot roof, replacing 200 square feet of rotted decking adds $600-$1,000 to your bill. Honest contractors mention this possibility upfront. Sketchy ones lowball the estimate and hit you with the upcharge once your roof is torn off.
Ice and Water Shield
Michigan building code requires ice and water shield (a self-sealing underlayment) along eaves and in valleys to prevent ice dam damage. Good contractors install it 3-6 feet up from the eave line. Great contractors run it up the entire roof deck on low-pitch roofs or homes with a history of ice dams.
Ice and water shield costs $80-$120 per roll (covers about 200 square feet). Adding extra coverage beyond code minimum adds $300-$800 to the project, but it's worth every penny if you've dealt with ice dam leaks before.
Ventilation Upgrades
Attic ventilation is critical in Michigan. Poor ventilation leads to ice dams in winter, shingle failure in summer, and moisture problems year-round. If your home has inadequate ridge vents, soffit vents, or gable vents, we'll recommend upgrades during the roof replacement.
Adding ridge vents runs $8-$15 per linear foot. Installing new soffit vents costs $150-$300 per vent. Budget an extra $800-$1,500 if your attic ventilation needs a complete overhaul. It's not optional if you want your new roof to last — trapped heat and moisture will cook shingles from below and void your warranty.
We've written extensively about attic ventilation issues and how they destroy roofs prematurely. If you're spending $12,000 on a new roof, don't skip the $1,200 fix that makes it last 30 years instead of 18.
Pipe Boot Replacement
Plumbing vent pipes stick through your roof, and they're sealed with rubber boots. After 15-20 years, those boots crack and leak. Replacing them during a roof job is cheap insurance — $30-$60 per boot. We've seen homeowners skip this to save $200, then call us back two years later with water stains on the ceiling. Pipe boots cause more leaks than most people realize.
Chimney Flashing and Repairs
Brick chimneys are everywhere in Southeast Michigan, and the flashing around them is a common failure point. If your chimney needs repointing (replacing deteriorated mortar) or new counter-flashing, add $400-$1,200 depending on chimney size and brick condition.
We coordinate with masons when needed — it's not worth installing a perfect roof around a crumbling chimney that'll leak in three years.
Roof Replacement Cost by Square Footage (Real Examples)
Let's get specific. Here's what homeowners in Macomb, Oakland, and St. Clair counties actually paid for roof replacements in 2025-2026, based on projects we completed.
1,200 Square Foot Ranch in Warren
- Roof Area: 14 squares (1,400 sq ft including overhangs)
- Material: GAF Timberline HDZ architectural shingles (Charcoal)
- Scope: Full tear-off, new underlayment, ice and water shield on eaves and valleys, ridge vent installation, 3 pipe boot replacements
- Total Cost: $7,800
- Timeline: 1.5 days
This is a straightforward job — simple gable roof, easy access, no structural issues. The homeowner got a 25-year shingle with a 50-year warranty on a budget that worked for a young family.
2,400 Square Foot Colonial in Troy
- Roof Area: 28 squares (2,800 sq ft)
- Material: CertainTeed Landmark architectural shingles (Weathered Wood)
- Scope: Full tear-off, replaced 180 sq ft of rotted decking, ice and water shield on entire lower roof section, new ridge vents, new soffit vents, chimney flashing replacement, 5 pipe boots
- Total Cost: $14,200
- Timeline: 3 days
The decking damage added $900 to the original estimate, but the homeowner appreciated that we caught it before it became a bigger problem. The extra ventilation work solved chronic ice dam issues they'd dealt with for years.
3,200 Square Foot Custom Home in Bloomfield Hills
- Roof Area: 38 squares (3,800 sq ft)
- Material: CertainTeed Grand Manor designer shingles (Gatehouse Slate)
- Scope: Full tear-off, premium underlayment, extensive ice and water shield coverage, custom copper valley flashing, new ridge vents, 8 pipe boots, chimney counter-flashing coordination with mason
- Total Cost: $26,400
- Timeline: 5 days
This was a high-end install with premium materials and custom details. The designer shingles alone cost twice as much as standard architectural shingles, but the curb appeal matched the neighborhood and the home's resale value.
Cost Per Square Foot Reality: Most Michigan roof replacements cost between $5.50 and $9.50 per square foot of roof area, all-in. That includes materials, labor, tear-off, disposal, and typical extras. Go below $5/sq ft and you're either getting a screaming deal or cutting corners. Go above $10/sq ft and you're either on a complex roof or choosing premium materials.
When to Repair vs. Replace: The Cost Decision
Not every roof problem requires a full replacement. But homeowners waste money on repairs when replacement makes more financial sense. Here's how we think through the decision.
Repair Makes Sense When:
- Your roof is less than 12 years old and damage is localized (storm damage to one section, a few missing shingles, isolated leak around a chimney)
- The repair cost is less than 20% of a full replacement cost
- You're planning to sell within 2-3 years and just need to get past the home inspection
- The underlying structure (decking, ventilation) is solid
Replacement Makes Sense When:
- Your roof is 18+ years old, even if it's not actively leaking yet
- You're seeing widespread shingle curling, granule loss, or cracking
- You've had multiple repairs in the past 3-5 years
- The repair cost exceeds 25% of replacement cost
- You're planning major renovations (adding a dormer, finishing an attic) — do the roof first
We've written a detailed breakdown on when to repair vs. replace your roof and how long roofs actually last in Michigan. The short version: if your roof is past the 2/3 mark of its expected lifespan, replacement is usually the smarter financial move.
How to Budget for a Roof Replacement in 2026
Roof replacements aren't cheap, but they're also not emergencies you should panic-finance. Here's how to approach the budget conversation.
Get Multiple Estimates (But Don't Chase the Lowest Bid)
Talk to 3-4 licensed contractors. Compare not just price, but scope of work, materials specified, warranty coverage, and timeline. A $9,000 bid using 3-tab shingles with a 2-year workmanship warranty isn't comparable to a $12,000 bid using architectural shingles with a 10-year workmanship warranty.
We provide detailed written estimates that break down materials, labor, and extras. If a contractor gives you a number on a napkin, walk away.
Understand Warranty Coverage
Shingle manufacturers offer material warranties (25-50 years), but those don't cover installation defects. You need a strong workmanship warranty from your contractor — we offer 10 years on all roofing installations. That means if a valley leaks or flashing fails due to our work, we fix it at no cost.
Cheap contractors offer 1-2 year workmanship warranties, then disappear when problems surface in year three. Pay a bit more for a contractor with a track record — we've been in business since 1988 and hold an A+ BBB rating since 2006.
Financing Options
Most homeowners finance roof replacements through:
- Home equity line of credit (HELOC): Lowest interest rates if you have equity and good credit
- Personal loan: Faster approval, higher rates, no collateral required
- Contractor financing: We work with lenders who specialize in home improvement loans — often 0% interest for 12-18 months if you qualify
- Insurance claim: If storm damage is involved, file a claim. We work with adjusters regularly and can help document damage.
Don't put a roof on a high-interest credit card unless you can pay it off in 3-4 months. The interest will cost you more than the roof itself over time.
Timing Your Replacement
Spring and fall are busy seasons — everyone wants their roof done when the weather's nice. If you have flexibility, consider:
- Late fall (November): Crews have openings, shingles seal fine in cool weather, you're ready for winter
- Early spring (March-April): Before the rush, after the worst freeze-thaw cycles
- Winter (December-February): We do winter installs when temperatures are above 40°F. Shingles are more brittle in cold weather, but experienced crews handle it fine. You might negotiate better pricing.
Avoid peak summer (June-August) unless you're dealing with active leaks. You'll wait longer for scheduling and pay peak-season rates.
Beyond the Roof: Related Exterior Work
If you're replacing your roof, consider bundling other exterior projects to save on mobilization costs and scaffolding setup:
- Gutters: Old seamless gutters in Detroit, MI homes often need replacement when the roof goes. We install new gutters at a discount when bundled with roofing.
- Siding: If your house siding in Detroit is showing age, tackle both projects together. Scaffolding is already up, and you'll transform the whole exterior.
- Windows: Our Detroit window experts often coordinate window replacement with roofing projects — new flashing integrates better when done simultaneously.
- Insulation: If attic insulation is lacking, upgrade it before the new roof goes on. Our top-rated insulation contractor in Detroit services can improve energy efficiency and prevent ice dams.
- Painting: Once the roof and trim are fresh, Southeast Michigan's go-to painting professionals can finish the exterior with Sherwin-Williams coatings for a complete refresh.
We offer comprehensive exterior services in Detroit and throughout Southeast Michigan, so you're working with one trusted team instead of coordinating multiple contractors.
Ready to Get Started?
NEXT Exteriors has been protecting Michigan homes since 1988. Get a free, no-pressure estimate from a team that shows up on time and does the job right.
Get Your Free QuoteOr call us: (844) 770-6398
Common Questions About Roof Replacement Costs in Michigan
Most residential roof replacements in Southeast Michigan cost between $8,000 and $16,000 for a standard 2,000-2,500 square foot home with architectural shingles. Simple ranch homes with easy access run on the lower end. Two-story Colonials with complex rooflines, multiple valleys, and dormers run higher. Premium materials (designer shingles, metal roofing) can push costs to $20,000-$30,000+.
Repairs are cheaper upfront, but replacement is often smarter long-term. If your roof is under 12 years old and damage is localized, repair makes sense. If your roof is 18+ years old or you're facing multiple problem areas, replacement saves you from throwing money at a failing system. A good rule: if repair costs exceed 25% of replacement cost, replace the whole roof.
3-tab shingles are flat, single-layer shingles that last 15-20 years and cost less upfront ($90-$120 per square). Architectural shingles are thicker, multi-layered, and last 25-30 years ($140-$200 per square). They look better, resist wind and impact better, and come with stronger warranties. In Michigan's harsh climate, architectural shingles are worth the extra cost for most homeowners.
Most residential roof replacements take 1-3 days depending on size and complexity. A simple 1,200 sq ft ranch might be done in a day. A 2,500 sq ft Colonial with multiple roof planes takes 2-3 days. Weather delays, decking repairs, and custom flashing work can extend the timeline. We give you a realistic schedule upfront and communicate if anything changes.
Not always, but it's common to find some rotted decking once the old shingles come off — especially around chimneys, valleys, and eaves. We inspect the decking during tear-off and replace damaged sections. Decking replacement costs $3-$5 per square foot. Honest contractors mention this possibility upfront rather than surprising you with a bill mid-project.
Ice and water shield is a self-sealing underlayment that prevents leaks from ice dams and wind-driven rain. Michigan building code requires it along eaves and in valleys. We recommend extending coverage on low-pitch roofs or homes with a history of ice dam problems. It costs $80-$120 per roll and adds $300-$800 to most projects, but it's cheap insurance against winter leaks.
If your roof is visibly worn or past 20 years old, yes — buyers will either negotiate the price down or walk away. A new roof adds curb appeal, passes inspection cleanly, and can return 60-70% of the cost in resale value. If your roof is 10-15 years old and in decent shape, you can usually sell as-is. We work with realtors regularly and can advise on whether replacement makes sense for your situation.
Copper Gutters Installation Metro Detroit | NEXT Exteriors
Copper gutters add lasting beauty and value to Southeast Michigan homes. Learn costs, benefits, and installation from Metro Detroit's trusted exterior contractor since 1988.
We've been installing seamless gutters in Detroit, MI since 1988, and homeowners ask us about copper gutters more than any other premium material. It makes sense. Copper adds a level of craftsmanship and visual warmth that aluminum or vinyl can't touch. But it's also a significant investment — one that deserves a straight answer about costs, benefits, and whether it's the right choice for your Metro Detroit home.
If you're considering copper gutters for a brick Colonial in Grosse Pointe Farms, a historic home in Mount Clemens, or a custom build in Bloomfield Hills, here's what 35+ years of Michigan exterior work has taught us about this material.
Why Copper Gutters Work Well in Metro Detroit
Michigan's freeze-thaw cycles are brutal on exterior materials. We see temperatures swing from single digits in January to 90°F summer storms in July. That constant expansion and contraction destroys weaker gutter systems — seams split, brackets pull loose, and thin aluminum warps under ice load.
Copper doesn't care. It's one of the most durable gutter materials available, and it handles Michigan weather with zero complaint. The material itself is naturally resistant to corrosion, which means it won't rust out like steel or degrade like vinyl in UV exposure. After three decades of freeze-thaw cycles, a properly installed copper gutter system looks better than most aluminum systems do after five years.
The patina development is another Michigan-specific advantage. Copper starts out bright and reflective, then gradually oxidizes to a rich brown, and eventually develops that classic green-blue patina. In our humid summers and wet springs, this process happens faster than in drier climates — usually reaching full patina within 15-20 years depending on sun exposure and proximity to Lake St. Clair or other water sources.
Architecturally, copper gutters complement the brick Colonials, Tudor revivals, and Craftsman homes common throughout Oakland and Macomb counties. We've installed copper systems on homes in Rochester Hills where the warm tones match existing copper roofing accents, and on historic properties in downtown Mount Clemens where the material fits the period-appropriate aesthetic better than modern alternatives.
Michigan-Specific Consideration: Lake-effect moisture from the Great Lakes accelerates patina development. Homes closer to Lake St. Clair or in communities like St. Clair Shores will see faster color changes than inland properties in Troy or Sterling Heights.
The Real Cost of Copper Gutter Installation
Let's address the number everyone wants to know: copper gutters cost significantly more than aluminum or vinyl. In Metro Detroit, expect to pay between $25-$40 per linear foot for materials and professional installation. That's roughly 3-5 times the cost of a standard aluminum seamless gutter system.
For a typical 2,000 square foot home with 150-180 linear feet of gutter, you're looking at $3,750-$7,200 for a complete copper installation including downspouts, hangers, and end caps. Larger homes or properties with complex rooflines can push that higher.
Here's the cost breakdown we give homeowners:
- Material costs: Copper itself runs $15-$25 per linear foot depending on thickness (16 oz. vs. 20 oz. copper) and current metal market prices
- Labor costs: Professional installation adds $10-$15 per linear foot — copper requires specialized soldering and fabrication skills that standard gutter installers may not have
- Accessories: Copper downspouts, hangers, and decorative elements add another 15-20% to total project cost
- Fascia work: If your existing fascia needs repair or replacement before installation, budget an additional $5-$8 per linear foot
That's a significant upfront investment compared to aluminum systems that typically run $8-$12 per linear foot installed. But copper's lifespan and minimal maintenance requirements change the long-term math considerably.
Budget Reality: Copper makes the most financial sense on homes you plan to own for 20+ years, or on high-value properties where the aesthetic and resale impact justifies the premium. For homes in the $400K+ range in communities like Bloomfield Hills or Grosse Pointe, copper gutters are often expected by buyers and contribute to perceived home quality.
Beyond gutters, many homeowners invest in comprehensive exterior services in Detroit that complement premium materials — pairing copper gutters with quality Detroit roofing services and architectural shingles creates a cohesive, high-end exterior package.
Copper Gutter Benefits Beyond Curb Appeal
Yes, copper gutters look exceptional. But the practical benefits matter more for most Michigan homeowners we work with.
Lifespan That Outlasts Your Mortgage
A properly installed copper gutter system lasts 50+ years. We've repaired copper gutters on homes in Royal Oak that were installed in the 1960s and are still structurally sound. Compare that to aluminum gutters (20-25 years) or vinyl (10-15 years in Michigan's climate), and the cost-per-year calculation starts looking reasonable.
That longevity comes from copper's material properties. It doesn't rust, doesn't corrode in acid rain or road salt spray, and maintains structural integrity through decades of thermal cycling. The only real enemy is physical damage — falling tree limbs or ladder impacts — which can happen to any gutter material.
Low Maintenance Requirements
Copper gutters need the same seasonal cleaning as any gutter system — removing leaves, clearing downspouts, checking for proper drainage. But they don't require the repainting, resealing, or bracket replacement that aluminum and steel systems often need after 10-15 years.
The patina that develops on copper actually serves as a protective layer, preventing further oxidation and maintaining the material's integrity. You don't need to treat it, seal it, or maintain it beyond basic cleaning.
Natural Antimicrobial Properties
Copper has natural antimicrobial properties that inhibit algae, moss, and fungal growth. In Michigan's humid climate where organic growth on roofs and gutters is common, this means less biological buildup and fewer maintenance headaches. We see significantly less black streaking and green algae on copper gutters compared to aluminum systems on similar homes.
Weather Resistance in Michigan Storms
Michigan summers bring severe thunderstorms with high winds and heavy rainfall. Copper's weight and structural strength help it stay attached to fascia boards during these events. The material doesn't flex or vibrate like thinner aluminum, which reduces stress on mounting brackets and prevents the slow pulling-away that causes gutter failure.
During winter, copper handles ice load better than most alternatives. A 6-inch copper gutter can support significant snow and ice accumulation without sagging or pulling loose — critical in areas like Lake Orion or Chesterfield where heavy lake-effect snow is common.
Homeowners investing in copper gutters often pair them with other premium exterior upgrades. Our Detroit siding company services include James Hardie fiber cement and LP SmartSide engineered wood that match copper's durability and aesthetic quality.
Installation Considerations for Southeast Michigan Homes
Copper gutter installation isn't a DIY project. The material requires specialized fabrication skills, proper soldering techniques, and an understanding of thermal expansion that most general contractors don't have. Here's what proper installation involves for Michigan homes.
Proper Pitch and Drainage
Every gutter system needs correct slope — typically 1/4 inch per 10 feet of run — to ensure water flows toward downspouts. With copper, getting this right matters even more because you're making a 50-year investment. We use laser levels to establish precise pitch, accounting for fascia irregularities common in older Michigan homes.
Michigan's heavy spring rains and summer thunderstorms can overwhelm undersized gutters. We typically recommend 6-inch copper gutters for most residential applications in Southeast Michigan, with 3x4-inch rectangular downspouts spaced every 30-40 feet depending on roof area and pitch.
Ice Dam Prevention
Ice dams are a constant concern in Michigan winters. While gutters don't cause ice dams (inadequate attic insulation and ventilation do), they're often where the damage shows up first. When installing copper gutters, we evaluate the entire roof-to-attic system to identify ice dam risk factors.
Proper attic insulation in Metro Detroit is critical for preventing the heat loss that creates ice dams. We often recommend spray foam insulation or additional blown-in cellulose to bring attics up to R-49 or higher — Michigan's recommended value for our climate zone.
For copper gutter installations on homes with existing ice dam problems, we sometimes install heat cable systems or recommend roof edge ventilation improvements before the gutter work begins. There's no point installing premium gutters if winter ice is going to rip them off the fascia every February.
Fascia Compatibility and Condition
Copper gutters are heavy — roughly three times the weight of equivalent aluminum gutters. Your fascia boards need to be structurally sound to support this weight plus snow and ice load. On older homes in Clinton Township or Warren, we often find rotted fascia that needs replacement before copper installation.
We use hidden hangers or copper brackets spaced every 24 inches maximum for proper support. On homes with decorative rafter tails or exposed eaves common in Craftsman and Prairie-style architecture, we fabricate custom copper brackets that become architectural features themselves.
Downspout Placement and Sizing
Downspouts need to discharge water at least 6-10 feet from the foundation to prevent basement water problems — a common issue in Michigan's clay-heavy soil. We evaluate grading, existing drainage, and foundation waterproofing before finalizing downspout locations.
Copper downspouts can be round (typically 3-4 inches) or rectangular (3x4 or 4x5 inches). Rectangular downspouts handle higher water volume and are less likely to clog with debris, making them our default recommendation for Michigan's heavy leaf fall and spring runoff conditions.
Professional Installation Requirements
Quality copper gutter installation requires:
- Proper soldering: All seams and joints should be soldered, not caulked or riveted, for maximum strength and longevity
- Thermal expansion accommodation: Copper expands and contracts more than aluminum — installations need expansion joints on runs longer than 40 feet
- Dissimilar metal protection: Copper in contact with aluminum or galvanized steel causes galvanic corrosion — proper isolation is critical
- Correct fastener selection: Copper or stainless steel fasteners only — regular steel screws will rust and fail
This level of detail is why copper gutter installation costs more. It's not just hanging metal — it's precision metalwork that needs to last half a century through Michigan's weather extremes.
Many homeowners coordinating multiple exterior projects appreciate working with a contractor who handles everything. Our Detroit window experts can replace aging windows while copper gutters are being installed, creating a complete exterior upgrade with a single point of contact.
Copper vs. Other Gutter Materials
Copper isn't the only option for Metro Detroit homes. Here's how it compares to the alternatives we install most often.
Copper vs. Aluminum
Aluminum is the most common gutter material we install — it's affordable, lightweight, and available in dozens of colors to match any home. Seamless aluminum gutters cost $8-$12 per linear foot installed and last 20-25 years with proper maintenance.
The tradeoff: aluminum dents easily (hail, ladders, falling branches), can pull away from fascia under heavy ice load, and eventually needs repainting or replacement as the finish deteriorates. In Michigan's climate, we see aluminum gutter failure most often at seams and mounting points after 15-20 years.
Copper costs 3-4 times more upfront but lasts twice as long with minimal maintenance. For budget-conscious homeowners or those planning to sell within 10 years, aluminum makes sense. For long-term owners prioritizing durability and aesthetics, copper wins.
Copper vs. Steel
Galvanized steel gutters offer strength comparable to copper at a lower price point — typically $10-$16 per linear foot installed. Steel handles ice load well and won't dent as easily as aluminum.
The problem: rust. Even galvanized steel eventually corrodes in Michigan's wet climate, especially where the protective zinc coating gets scratched or worn. We've replaced countless steel gutter systems in Macomb and St. Clair counties where rust-through occurred after 15-20 years, often starting at seams or where debris held moisture against the metal.
Copper never rusts. The patina that develops is protective, not destructive. If you're considering steel for its strength, copper delivers the same structural benefits without the corrosion concerns.
Copper vs. Vinyl
Vinyl gutters are the budget option — $3-$6 per linear foot installed. They don't rust, dent, or require painting. For rental properties or homes where budget is the primary concern, vinyl serves a purpose.
But vinyl has serious limitations in Michigan. The material becomes brittle in cold temperatures and can crack during winter ice events. UV exposure causes fading and degradation over time. Most vinyl gutter systems we see in Southeast Michigan need replacement within 10-15 years, and many fail sooner if installation quality was poor.
Vinyl also lacks the structural strength to handle heavy snow and ice load. We've responded to emergency calls after winter storms where vinyl gutters simply snapped off homes under ice weight — something that doesn't happen with properly installed copper or even aluminum systems.
When Copper Makes Sense for Your Home
Copper gutters are the right choice when:
- You're planning to own the home for 20+ years and want a permanent solution
- The home's architecture and value justify premium materials (typically $400K+ in Metro Detroit)
- You're already investing in other high-end exterior materials (slate roofing, stone veneer, James Hardie siding)
- Historic preservation or neighborhood character is a priority
- You want to eliminate gutter maintenance and replacement from your long-term home care schedule
Copper doesn't make sense when budget constraints are tight, when you're planning to sell within 5-10 years, or when the home's overall quality doesn't align with premium materials.
For comprehensive exterior planning, our team can help coordinate Southeast Michigan painting professionals to refresh trim and fascia alongside gutter installation, creating a cohesive exterior upgrade that maximizes curb appeal and property value.
Maintaining Copper Gutters in Michigan
One of copper's biggest advantages is low maintenance. But "low maintenance" doesn't mean "no maintenance." Here's what Michigan homeowners need to know about keeping copper gutters functional for decades.
Seasonal Cleaning Schedule
Clean copper gutters twice a year minimum — once in late fall after leaves drop, and again in early spring after winter debris accumulates. Homes near heavy tree cover in areas like Rochester Hills or Lake Orion may need more frequent cleaning.
The cleaning process is straightforward: remove debris by hand or with a gutter scoop, flush downspouts with a garden hose, check for proper water flow. Unlike aluminum gutters that can dent if you're not careful, copper can handle normal cleaning without damage.
Debris Management
Michigan's oak, maple, and pine trees drop significant debris. Gutter guards can help reduce cleaning frequency, but they're not foolproof — pine needles and small debris still get through most systems.
If you're installing copper gutters, consider the long-term maintenance access. Make sure you have safe ladder placement points and that roof pitch allows safe cleaning. On two-story homes, professional gutter cleaning services are often worth the cost versus the fall risk of DIY work.
Patina: Preserve or Polish?
This is personal preference. The green-blue patina that develops on copper is protective and historically authentic. Most homeowners installing copper gutters specifically want this aged appearance.
If you prefer the bright copper look, you can slow patina development with specialized copper cleaners and sealers. This requires annual maintenance and eventually becomes impractical — the patina will win. Our recommendation: embrace it. The patina is part of copper's character and contributes to the material's longevity.
When to Call for Repairs
Copper gutters rarely need repairs if properly installed, but watch for:
- Separation from fascia: Usually caused by fascia rot or inadequate fasteners — address immediately to prevent further damage
- Leaking seams: Rare with soldered copper, but can happen if installation quality was poor — requires professional resoldering
- Sagging sections: Indicates inadequate support or hanger failure — add additional brackets
- Downspout clogs: Often caused by debris buildup or ice formation — clear blockages before water backs up into gutters
Physical damage from falling tree limbs or ladder impacts may require section replacement. Because copper is a standard material, matching replacement sections is straightforward even decades after initial installation.
Ready to Get Started?
NEXT Exteriors has been protecting Michigan homes since 1988. Get a free, no-pressure estimate from a team that shows up on time and does the job right.
Get Your Free QuoteOr call us: (844) 770-6398
Frequently Asked Questions About Copper Gutters
Properly installed copper gutters last 50+ years in Michigan's climate. We've seen copper gutter systems from the 1960s still functioning perfectly on homes throughout Metro Detroit. The material doesn't rust, corrode, or degrade from freeze-thaw cycles, making it one of the longest-lasting gutter options available. With minimal maintenance — just seasonal cleaning — copper gutters can easily outlast your mortgage and may never need replacement during your ownership.
Yes, copper gutters develop a green-blue patina over time through natural oxidation. In Michigan's humid climate with lake-effect moisture, this process typically takes 15-20 years to reach full patina. The patina isn't damage — it's a protective layer that prevents further oxidation and is part of copper's aesthetic appeal. Homes closer to Lake St. Clair or in areas with higher humidity will see faster patina development. The color progression goes from bright copper to brown to eventually green-blue, similar to the Statue of Liberty.
Copper gutters make financial sense for homeowners planning to stay in their homes 20+ years, or for higher-value properties ($400K+) where the aesthetic and resale impact justify the premium. The upfront cost is 3-5 times higher than aluminum, but copper's 50+ year lifespan, minimal maintenance requirements, and superior durability in Michigan's freeze-thaw cycles provide long-term value. For homes in communities like Bloomfield Hills, Grosse Pointe, or Rochester Hills, copper gutters are often expected by buyers and contribute to perceived home quality. If you're selling within 5-10 years, aluminum gutters offer better cost-to-benefit ratio.
Technically yes, but copper gutters look best on certain architectural styles common in Southeast Michigan. They're ideal for brick Colonials, Tudor revivals, Craftsman homes, and historic properties where the material complements existing architectural details. Copper also works well on custom builds and high-end contemporary homes where premium materials are part of the overall design. On basic ranch homes or builder-grade properties, copper gutters may look out of place or represent an over-investment relative to the home's overall value. The fascia must be structurally sound to support copper's weight, which can require repairs or reinforcement on older homes.
Expect to pay $25-$40 per linear foot for copper gutter materials and professional installation in Southeast Michigan. For a typical home with 150-180 linear feet of gutter, total project cost runs $3,750-$7,200 including downspouts, hangers, and accessories. Larger homes or complex rooflines cost more. Material costs fluctuate with copper market prices but typically run $15-$25 per linear foot, with labor adding $10-$15 per foot. Fascia repairs or replacement add $5-$8 per linear foot if needed. Compare this to aluminum seamless gutters at $8-$12 per linear foot installed.
Copper gutters need the same basic maintenance as any gutter system — seasonal cleaning to remove leaves and debris, clearing downspouts, and checking for proper drainage. The difference is copper doesn't require the repainting, resealing, or bracket replacement that aluminum and steel systems need after 10-15 years. Clean gutters twice yearly (late fall and early spring) to maintain proper function. The patina that develops serves as a protective layer and doesn't need treatment. Unlike aluminum, copper won't dent during normal cleaning, making maintenance easier. No special cleaners or treatments are required unless you want to slow patina development, which requires annual polishing and sealing.
Copper gutters contribute to perceived home quality and curb appeal, which can positively impact resale value, particularly in higher-end markets like Bloomfield Hills, Grosse Pointe, or Rochester Hills. Buyers in the $400K+ range often expect premium materials and appreciate the longevity and low maintenance copper provides. However, you typically won't recoup the full installation cost at resale — copper gutters are more about long-term ownership value than immediate return on investment. They're most valuable when paired with other quality exterior materials (architectural shingles, James Hardie siding, quality windows) that create a cohesive, well-maintained exterior presentation.
Seamless vs Sectional Gutters for Michigan Storms
Seamless gutters handle Michigan's heavy rain and snow better than sectional systems. Learn why from a contractor who's installed both for 35+ years in Southeast Michigan.
NEXT Exteriors
•
February 19, 2026
•
9 min read
Why Michigan Weather Demands Better Gutters
I've been installing gutters in Southeast Michigan since 1988, and I'll tell you straight: if you're still running sectional gutters on your house in Sterling Heights or Rochester Hills, you're fighting a losing battle against Michigan weather.
We get hit with everything here. Lake-effect snow dumps 2 feet overnight. Spring thunderstorms drop 2 inches of rain in an hour. Then you've got 40 to 60 freeze-thaw cycles every winter — water gets into those sectional seams, freezes, expands, and slowly tears your gutter system apart.
Southeast Michigan receives 30 to 35 inches of precipitation annually, and your gutters are the only thing standing between that water and your foundation. When gutters fail here, you're not just dealing with cosmetic problems. You're looking at basement flooding, foundation cracks, rotted fascia boards, and ice dams that can peel shingles right off your roof.
The question isn't whether you need quality gutters — it's which type will actually survive more than a few Michigan winters. That's what we're here to answer, using 35+ years of real installation experience across Macomb, Oakland, and St. Clair counties.
Our team at NEXT Exteriors specializes in seamless gutters in Detroit, MI and throughout Southeast Michigan because we've seen firsthand what works and what fails when the weather turns brutal.
What Makes Seamless Gutters Different
Seamless gutters are exactly what the name says: one continuous piece of aluminum formed on-site to the exact length of your roofline. No joints. No seams. No weak points — except at the corners and downspouts, which we seal properly with commercial-grade sealant.
Here's how the installation works: We pull up to your house in Troy or Shelby Township with a gutter machine mounted on our truck. We feed in a coil of aluminum, program your measurements, and the machine extrudes a custom-formed gutter section that's 30, 40, even 60 feet long if needed. We cut it to exact length, attach it to your fascia with hidden hangers every 24 inches, and seal the corners.
The advantages are structural, not cosmetic:
Fewer leak points: Sectional gutters have a seam every 10 feet. That's 8 to 10 potential failure points on an average house. Seamless systems cut that down to 4 to 6 corner joints total.
Better water flow: No seams means no ridges or lips where debris catches. Water moves through the system faster, which matters during Michigan's heavy spring rains.
Stronger structure: Continuous aluminum doesn't flex and separate at joints during freeze-thaw cycles. The gutter acts as one solid piece.
Custom fit: Every section is cut to your exact measurements on-site. No trying to make 10-foot sections work on a 47-foot roofline.
The material itself is typically .032-inch aluminum (the industry standard for residential gutters), available in dozens of colors that are baked into the finish — not painted on. We use the same gauge aluminum for both seamless and sectional systems when we install them, so the difference isn't the metal quality. It's the engineering.
Seamless gutters are part of our comprehensive exterior services in Detroit and surrounding areas, and they integrate seamlessly with our Detroit roofing services to create a complete water management system for your home.
The Sectional Gutter Problem in Freeze-Thaw Cycles
Sectional gutters are the ones you see at big-box stores: pre-formed 10-foot sections that snap together with connector brackets and rely on sealant to stay watertight. They're cheaper upfront, easier to transport, and simpler for DIY installation. That's why they exist.
But here's what happens in Michigan:
Water gets into the seams — and it always does, because sealant degrades in UV exposure and temperature swings. When that water freezes, it expands with about 1,700 pounds per square inch of force. That's enough to push the sections apart, crack the sealant, and warp the connector brackets.
By spring, you've got gaps. Water starts dripping behind the gutter, soaking your fascia board. The wood rots. The gutter pulls away from the house. Now you're not just replacing gutters — you're replacing fascia, maybe even the rafter tails if the rot spread.
Real example: We replaced sectional gutters on a 1970s Colonial in Clinton Township last fall. The homeowner had them installed 6 years prior by a handyman. Every single seam was separated. The fascia board was black with rot for 15 feet on the north side of the house. Total repair cost: $4,200 for new seamless gutters, fascia replacement, and repainting. The original sectional install cost him $1,800.
The other issue is debris buildup. Those seams create little ridges inside the gutter where leaves, shingle grit, and pine needles catch. You get clogs faster, which means more frequent cleaning — or overflowing gutters during storms.
Sectional systems aren't inherently bad. They work fine in climates with mild weather and minimal freeze-thaw cycles. But Michigan isn't that climate. We're hard on gutters, and sectional systems just don't hold up long-term here.
If you're dealing with other exterior issues alongside failing gutters, our team can help with everything from house siding in Detroit to window replacement in Detroit — all designed to withstand Michigan's demanding weather.
How Michigan Storms Test Your Gutter System
Let's talk about what actually happens during a typical Southeast Michigan storm season, because this is where theory meets reality.
Spring: The Deluge
April and May bring heavy, sustained rainfall. We're talking 2 to 3 inches in a few hours during severe thunderstorms. Your gutters need to handle high-volume water flow without overflowing.
Seamless gutters move water faster because there are no seams to slow it down. Sectional gutters create turbulence at every joint, which reduces flow capacity. When the gutter overflows, water pours down your foundation wall. That's how you get wet basements in Grosse Pointe Farms and Warren.
Summer: Heat and Expansion
Aluminum expands and contracts with temperature changes. In July, your gutters can hit 140°F in direct sunlight. At night, they cool back down to 70°F. That's a 70-degree swing.
Seamless gutters are designed to expand and contract as one piece. Sectional gutters expand and contract at every joint, which stresses the connectors and sealant. Over a few summers, those joints loosen.
Fall: Debris Overload
Oak trees, maples, and pines drop tons of leaves and needles. If your gutters have seams, that's where the debris piles up first. You get clogs, standing water, and mosquito breeding grounds.
We recommend gutter guards for both seamless and sectional systems if you've got heavy tree cover, but seamless gutters clog less frequently even without guards because the smooth interior lets debris wash through more easily.
Winter: Freeze-Thaw Destruction
This is the real test. Water sits in your gutters after a snowmelt. Temperatures drop overnight. Ice forms. The ice expands.
In seamless gutters, the ice has nowhere to push except up and out — which isn't great, but it doesn't compromise the gutter structure. In sectional gutters, the ice pushes against the seams, forcing the sections apart. By March, you've got leaks.
Ice dams are another issue. When your attic insulation is inadequate (which we see constantly in 1960s ranch homes across Macomb County), heat escapes through the roof, melts snow, and the water refreezes at the eave. Ice dams can rip gutters right off the house.
Proper attic insulation in Metro Detroit is critical for preventing ice dams, and it's something we address as part of our comprehensive approach to home exterior protection.
Cost Reality: Seamless vs Sectional
Let's talk numbers, because this is where most homeowners make their decision.
Sectional gutters: $3 to $6 per linear foot installed if you hire a handyman or general contractor. DIY materials cost $1.50 to $3 per linear foot if you're doing it yourself. For a typical 150-foot gutter run, you're looking at $450 to $900 installed.
Seamless gutters: $6 to $12 per linear foot installed by a licensed contractor with a gutter machine. Same 150-foot run costs $900 to $1,800 installed.
So yes, seamless costs roughly double upfront. But here's the math that actually matters:
Sectional gutters typically last 8 to 12 years in Michigan before they need replacement due to seam failure and corrosion. Seamless gutters last 20 to 30 years with minimal maintenance. Over a 30-year period:
Sectional: 3 replacements at $750 each = $2,250
Seamless: 1 installation at $1,350 = $1,350
You save $900 over 30 years, plus you avoid the fascia rot repairs, basement waterproofing, and foundation work that failed gutters cause. Those repairs cost thousands.
We're not trying to upsell you. We install both types when customers request them. But after 35+ years in this business, I can tell you that seamless gutters are the better investment for Michigan homes, and most of our clients in Lake Orion, Royal Oak, and Bloomfield Hills choose seamless once they understand the long-term costs.
When you're budgeting for exterior improvements, it's worth considering the full picture — which is why we offer transparent pricing for all our exterior services in Detroit, from gutters to complete home renovations.
When to Replace Your Gutters
Here's how to know if your current gutters — seamless or sectional — are due for replacement:
Visible Signs
Sagging sections: Gutters should be straight and level (with a slight slope for drainage). If they're sagging or pulling away from the fascia, the hangers have failed or the fascia is rotted.
Cracks or holes: Small cracks turn into big leaks. Aluminum doesn't rust, but it can corrode and develop pinhole leaks over time.
Separated seams: If you've got sectional gutters and you can see daylight through the seams, they're done.
Peeling paint or rust stains: Rust stains on the gutter exterior mean water is getting behind the gutter and running down your siding. That's a fascia problem waiting to happen.
Water damage below: If you've got eroded soil, stained siding, or water stains in your basement directly below a gutter section, the gutter isn't doing its job.
Performance Issues
Overflowing during rain: Could be a clog, or it could be improper slope. Gutters should slope 1/4 inch per 10 feet toward the downspout. If they're level or back-sloped, water pools and overflows.
Ice dams every winter: This is usually an attic insulation problem, not a gutter problem — but gutters that don't drain properly make ice dams worse.
Frequent clogs: If you're cleaning your gutters 3+ times a year and they still clog, the system isn't working. Time for seamless gutters with gutter guards.
Age
If your sectional gutters are more than 10 years old, start planning for replacement. If your seamless gutters are more than 20 years old, get them inspected. Aluminum doesn't last forever, especially in Michigan's climate.
We offer free inspections for homeowners in Macomb, Oakland, and St. Clair counties. We'll tell you straight whether you need new gutters or just maintenance — no sales pitch, no pressure. That's part of our commitment to changing contractor culture.
Sometimes gutter issues are symptoms of larger problems. If you're seeing water damage, it's worth getting a full exterior assessment that includes your roof, siding, and windows to catch problems before they get expensive.
Why Installation Quality Matters More Than Material
Here's something most homeowners don't realize: the difference between seamless and sectional gutters matters less than the quality of the installation.
I've seen seamless gutters fail in 5 years because they were installed by a crew that didn't know what they were doing. Wrong slope. Hangers spaced too far apart. Corners sealed with cheap caulk. Downspouts dumping water right next to the foundation.
And I've seen well-installed sectional gutters last 15 years because the contractor used hidden hangers, commercial-grade sealant, and proper slope calculations.
Here's what proper installation looks like:
Slope and Pitch
Gutters must slope 1/4 inch per 10 feet toward the downspouts. Not 1/8 inch. Not level. Exactly 1/4 inch. We use a laser level to set this. Too little slope and water pools. Too much slope and the gutters look crooked.
Hanger Spacing
Hidden hangers should be installed every 24 inches maximum — closer if you're in a heavy snow area. The hangers attach to the fascia board (or rafter tails if the fascia is rotted), and they support the gutter weight plus snow and ice load.
We see a lot of sectional gutter installs with hangers every 36 inches or more. That's not enough. The gutters sag under snow load, which creates standing water, which freezes and damages the system.
Downspout Placement
You need one downspout for every 35 to 40 feet of gutter run. The downspouts should discharge at least 6 feet away from the foundation — preferably into an underground drain system or onto a splash block that directs water away from the house.
We see too many gutters with downspouts dumping right next to the foundation. That defeats the entire purpose of the gutter system.
Corner Sealing
Corners are the weak point in any gutter system. We use miter joints with commercial-grade sealant (not hardware store caulk) and rivet the corners together. Some installers just rely on sealant. That's not enough in Michigan.
Fascia Condition
If your fascia board is rotted, no gutter system will hold. We inspect the fascia before every gutter install and replace rotted sections. It adds to the cost, but it's the only way to ensure the gutters stay attached to your house.
This is why we recommend hiring a licensed contractor with gutter installation experience — not a handyman, not a roofing crew that does gutters as a side job. Gutters are a specialized trade, and installation quality makes or breaks the system.
At NEXT Exteriors, we've been doing this since 1988. We're a CertainTeed Master Shingle Applicator, BBB A+ Accredited since 2006, and we've completed 500+ projects across Southeast Michigan. We know what works here because we've seen what fails.
If you're planning other exterior work alongside gutter replacement, our team can coordinate everything from exterior painting in Southeast Michigan to complete home makeovers, ensuring every component works together to protect your home.
Ready to Get Started?
NEXT Exteriors has been protecting Michigan homes since 1988. Get a free, no-pressure estimate from a team that shows up on time and does the job right.
Or call us: (844) 770-6398
Frequently Asked Questions
How long do seamless gutters last in Michigan?
+
Seamless aluminum gutters typically last 20 to 30 years in Michigan with proper installation and minimal maintenance. The key factors are installation quality (proper slope, hanger spacing, and sealing) and fascia condition. Gutters installed on rotted fascia will fail early regardless of type.
Can I install seamless gutters myself?
+
No. Seamless gutters require a specialized gutter machine that forms the aluminum on-site. These machines cost $5,000 to $15,000 and require training to operate. You'd need to rent one (if you can find a rental) and learn to use it for a one-time project. It's not practical for DIY. Sectional gutters are DIY-friendly, but seamless gutters are a professional-only job.
Do seamless gutters prevent ice dams?
+
No. Ice dams form when heat escapes through your attic, melts snow on the roof, and the water refreezes at the eave. The root cause is inadequate attic insulation and ventilation — not your gutters. However, properly installed gutters (seamless or sectional) drain water efficiently, which reduces the severity of ice dams. If you're getting ice dams every winter, you need to address your attic insulation first.
What's the best gutter color for a Michigan home?
+
Most homeowners match their gutters to either the trim color or the roof color. White and brown are the most common choices in Southeast Michigan. The color is baked into the aluminum finish, so it won't peel or fade like paint. Choose a color that blends with your home's exterior — gutters should be functional, not a focal point.
How often should I clean my gutters in Michigan?
+
Twice a year minimum: once in late fall after the leaves drop, and once in early spring after the snowmelt. If you have pine trees or heavy oak coverage, you may need to clean them 3 to 4 times per year. Gutter guards reduce cleaning frequency but don't eliminate it — you'll still need to clear debris from the guards themselves.
Are 5-inch or 6-inch gutters better for Michigan?
+
5-inch gutters are standard for most residential homes and handle Michigan's rainfall just fine. 6-inch gutters are recommended if you have a steep roof pitch, large roof area, or heavy tree coverage — they move more water and clog less frequently. We evaluate your roof pitch and drainage needs during the estimate and recommend the right size for your home.
Can you install seamless gutters in winter?
+
Yes, but not during freezing temperatures. The sealant we use for corners and end caps won't cure properly below 40°F. We can install gutters in late fall and early spring when temperatures are above freezing during the day. Deep winter installs (December through February) are risky and we don't recommend them unless it's an emergency repair.
Seasonal Roof + Gutter Maintenance Saves Thousands | MI
Two annual roof and gutter inspections prevent costly damage in Michigan's harsh climate. Learn what to check in spring and fall from a licensed contractor with 35+ years experience.
Author:
NEXT Exteriors
Published:
February 19, 2026
Reading Time:
12 minutes
I've been doing Detroit roofing services since 1988, and I can tell you exactly what separates the homeowners who get 25 years out of their roof from those who need a replacement at 15: two simple inspections per year.
Most people in Sterling Heights or Rochester Hills treat their roof like it's maintenance-free. They install it, forget about it, and then act shocked when a $300 gutter repair turns into a $12,000 roof replacement because water's been sitting against the fascia for three winters.
Michigan's climate is brutal on roofing systems. We get freeze-thaw cycles that crack sealant, lake-effect snow that overloads gutters, ice dams that force water under shingles, and summer storms that rip off loose materials. Your roof needs attention twice a year — spring and fall — or you're gambling with one of your home's most expensive components.
Why Michigan's Climate Demands Twice-Yearly Inspections
Southeast Michigan puts roofing systems through hell. We're not talking about gentle, predictable weather. We're talking about temperatures that swing from -10°F to 90°F in the same year, sometimes 40 degrees in the same week during spring.
Here's what that does to your roof:
Freeze-thaw cycles destroy sealant integrity. Every time water seeps into a tiny crack, freezes, and expands, it widens that crack. By March, what started as a hairline gap in your flashing has become a leak pathway. The asphalt sealant on shingles gets brittle in cold, then softens in heat. After 35 Michigan winters, I can spot a roof that's been through too many cycles without maintenance — the shingles look wavy, the granules are washing off in patches, and the valleys show water staining.
Lake-effect snow dumps massive loads on gutters. If you're in Lake Orion or anywhere near the lakes, you know what I'm talking about. Two feet of wet snow weighs about 40 pounds per cubic foot. Your gutters weren't designed to hold that if they're already full of fall leaves and ice. I've seen gutters ripped completely off houses in Grosse Pointe Farms because nobody cleaned them before the first snowfall.
Ice dams form when attic heat escapes. This is the big one. Snow melts on your warm roof, runs down to the cold eaves, refreezes, and creates a dam. Water backs up under the shingles and into your attic. By the time you see the ceiling stain in your bedroom, you've got mold in the insulation and rotted roof decking. Our top-rated insulation contractor in Detroit services fix the root cause — inadequate attic insulation and ventilation — but the damage still costs thousands to repair.
Summer storms test every weak point. June through August, we get high winds and heavy rain. If your shingles are already compromised from winter, a 50 mph gust will finish the job. I've responded to calls in Clinton Township where homeowners lost 20-30 shingles in a single storm — not because the shingles were defective, but because the sealant had failed and nobody caught it during a spring inspection.
This isn't California or Arizona where your roof just sits there baking in the sun for 30 years. Michigan roofs are active systems under constant stress. Two inspections per year — one after winter damage, one before winter preparation — are the minimum for responsible homeownership.
Spring Inspection: What to Look For After Winter
Timing matters. Don't inspect in March when there's still snow on the roof. Wait until mid-April to early May when temperatures are consistently above freezing and the roof is completely dry. Here's what you're looking for:
Shingle Damage from Ice and Wind
Walk around your property with binoculars (do NOT get on the roof yourself — I'll explain why later). Look for:
Missing shingles: Obvious, but check carefully around roof penetrations (chimneys, vents, skylights)
Curled or lifted edges: This means the sealant failed; the next wind event will take them off
Cracked or split shingles: Common on south-facing slopes that get the most sun exposure
Granule loss: Check your gutters — if they're full of the sand-like granules from the shingle surface, your roof is aging fast
With quality products like CertainTeed Landmark or GAF Timberline HDZ shingles (both of which we install regularly), you shouldn't see significant granule loss for 10-15 years. If you're seeing it earlier, something's wrong with ventilation or installation.
Gutter Separation and Fascia Rot
This is where most homeowners lose money. Your seamless gutters in Detroit, MI are only as good as the fascia board they're attached to. After a winter of ice buildup, check:
Gutter pitch: Stand back and sight down the gutter line — it should slope consistently toward downspouts, not sag in the middle
Fascia condition: Look for soft spots, dark staining, or visible rot where gutters attach
Loose fasteners: Gutters pulling away from the house, even slightly, mean water's getting behind them
Downspout discharge: Make sure extensions are in place and directing water at least 6 feet from your foundation
I replaced a complete gutter system in Troy last spring because the homeowner ignored a small separation for three years. Water ran behind the gutter, rotted the fascia and the first foot of roof decking, and required $4,800 in repairs that could've been prevented with a $200 gutter re-securing.
Attic Moisture and Ventilation Issues
Go into your attic on a sunny day. Bring a flashlight. Look for:
Water stains on roof decking: Dark streaks or rings indicate active or past leaks
Mold or mildew: Musty smell or black spots on wood mean moisture problems
Wet or compressed insulation: Should be dry and fluffy; if it's matted down, water got in
Daylight through roof boards: Small holes mean nail pops or gaps that need sealing
Frost on nails in winter/spring: Sign of inadequate ventilation
Proper attic ventilation — soffit intake vents and ridge or gable exhaust vents — is critical in Michigan. Without it, heat and moisture build up, cooking your shingles from below and voiding most manufacturer warranties. Our exterior services in Detroit always include ventilation assessment because it affects every other component.
Flashing Integrity Around Chimneys and Valleys
Flashing — the metal pieces that seal roof intersections — is where most leaks start. Check:
Chimney flashing: Should be tight against brick with no gaps; sealant should be intact
Valley flashing: Metal valleys should be clean and free of debris; no rust or separation
Pipe boot seals: Rubber boots around vent pipes crack after 10-15 years; look for splits
Step flashing along walls: Where roof meets siding, flashing should be layered under siding, not caulked over
We use ice and water shield underlayment (a self-sealing membrane) in all valleys and around penetrations on every roof we install. It's required by Michigan code in vulnerable areas, but cheap contractors skip it. If you're buying a house in Shelby Township, have the inspector specifically verify this during the roof assessment.
Fall Inspection: Preparing for Michigan Winter
Your fall inspection is preventive. You're not looking for damage — you're eliminating problems before they happen. Schedule this for late October, after most leaves have fallen but before the first hard freeze.
Debris Removal Before First Freeze
Leaves, twigs, and seed pods trap moisture. When that freezes, it creates ice pockets that lift shingles and block drainage. Clean:
All gutters and downspouts: Remove every leaf; flush with a hose to verify flow
Roof valleys: These collect the most debris and are critical drainage paths
Behind chimneys: Debris piles up on the upslope side; it's a hidden rot zone
Around skylights: Leaves dam up water; inspect seals while you're there
If you have mature oaks or maples, you might need to clean gutters twice in fall — once in mid-October, again in early November. It's tedious, but it's cheaper than replacing rotted fascia.
Downspout Drainage Verification
Michigan clay soil doesn't drain well. If your downspouts dump water right at the foundation, you're asking for basement problems. Before winter:
Extend all downspouts 6-10 feet from foundation: Use rigid extensions, not the flexible accordion type that collapse
Verify positive slope away from house: Water should run away, not pool
Check underground drains if you have them: Flush with a hose; if water backs up, they're clogged
Consider splash blocks or dry wells: Distribute water across lawn, not in one spot
I've seen foundation cracks and basement flooding in Warren that traced directly to clogged or missing downspout extensions. It's a $30 fix that prevents $10,000+ foundation repairs.
Seal Integrity Before Snow Season
Cold weather makes sealants brittle. Check and re-seal if needed:
Chimney flashing: Use high-quality polyurethane or rubberized sealant, not cheap latex
Roof penetrations: Vent pipes, satellite mounts, anything that breaks the roof plane
Skylight frames: Should be sealed with manufacturer-approved materials
Gable end trim: Where siding meets roof, gaps let wind-driven snow in
Don't use regular caulk on roofs. It fails in 1-2 years. Use products rated for exterior roofing applications — brands like Geocel, OSI, or DAP's high-performance lines. If you're not sure what to use, a professional from our roof replacement in Metro Detroit team can assess and recommend the right materials.
Identifying Vulnerable Areas Before Ice Dams Form
Ice dams form at the eaves where your roof is coldest. Before winter, identify risk zones:
North-facing eaves: Get the least sun; ice lingers longest
Areas above unheated spaces: Porches, garages, overhangs — these stay cold while the main roof warms
Complex roof lines: Multiple valleys and intersections create ice pockets
Inadequate attic insulation: If your attic is warm, heat escapes through the roof and melts snow unevenly
The permanent fix is better insulation and ventilation. We install blown-in cellulose or spray foam to bring attics up to R-49 or higher (Michigan code minimum is R-49 for attics). Short-term, you can install heat cables along eaves — they're not elegant, but they work.
Pro Tip: If you seeicicles hanging from your gutters in winter, you have an ice dam problem. The icicles are pretty, but they mean water is backing up under your shingles. Don't ignore them.
The Real Cost: Maintenance vs. Major Repairs
Let's talk money. Homeowners skip maintenance because they don't want to spend $200-400 twice a year. Then they spend $8,000 on emergency repairs. It's backwards.
Here's what seasonal maintenance actually costs in Southeast Michigan (2026 pricing):
Professional roof inspection: $150-300 (often free if you use the same contractor who installed your roof)
Gutter cleaning: $100-200 for average single-story home
Minor repairs during inspection: $200-500 (re-sealing flashing, replacing a few shingles, re-securing gutters)
Total annual cost for two visits: $500-1,000
Now compare that to what you pay when you skip maintenance:
Fascia board replacement: $15-25 per linear foot ($600-1,000 for typical section)
Roof decking replacement: $3-5 per square foot for water-damaged areas
Ice dam removal (emergency): $400-800 per occurrence
Interior ceiling/wall repair from leaks: $500-2,000 depending on damage
Mold remediation: $1,500-4,000 for attic mold from chronic moisture
Premature roof replacement: $8,000-15,000 (vs. getting full lifespan from your roof)
I replaced a roof in St. Clair Shores last year that was only 12 years old — CertainTeed Landmark shingles that should've lasted 25-30 years. The homeowner never cleaned gutters, never inspected the roof. Water backed up every winter, rotted the decking in three places, and created a leak that destroyed the attic insulation. Total cost: $13,500. If he'd spent $600/year on maintenance, that roof would still be fine.
Insurance Claim Complications from Neglect
Here's something most homeowners don't know: if your insurance adjuster determines that damage resulted from lack of maintenance, they can deny your claim.
I've been on-site for dozens of insurance inspections. When the adjuster sees gutters overflowing with years of debris, rotted fascia, or obvious long-term leak staining, they document it as "homeowner neglect." Storm damage gets covered. Neglect doesn't.
Your homeowner's insurance policy requires you to maintain your property. Keep records of your inspections and maintenance. Take photos. Save receipts. If a storm does cause damage, you can prove you were maintaining the roof properly and the damage was truly from the event, not from deferred maintenance.
Roof Lifespan Extension Through Regular Care
Asphalt shingles are rated for specific lifespans — 25, 30, 50 years depending on the product. But those ratings assume proper installation, adequate ventilation, and regular maintenance.
In real-world Michigan conditions, here's what we see:
3-tab shingles with no maintenance: 12-15 years before replacement needed
3-tab shingles with regular maintenance: 18-22 years
Architectural shingles (GAF, CertainTeed, Owens Corning) with no maintenance: 18-22 years
Architectural shingles with regular maintenance: 25-30+ years
Premium shingles (CertainTeed Grand Manor, GAF Camelot) with maintenance: 35-40+ years
Maintenance adds 30-50% to your roof's lifespan. On a $12,000 roof, that's like getting $4,000-6,000 in free roofing just by spending $500/year on inspections and cleaning.
What Professional Inspections Catch That Homeowners Miss
I'm all for homeowners being involved in their home maintenance. But there are things you can't see from the ground, and things you won't recognize even if you do see them. That's what you pay a licensed contractor for.
Granule Loss Patterns Indicating Shingle Failure
Shingles lose granules over time — that's normal. But the pattern of loss tells you what's wrong.
Even loss across the roof: Normal aging; monitor but not urgent
Heavy loss in specific areas: Usually indicates poor ventilation or a manufacturing defect
Loss along edges/ridges: Wind damage; shingles are lifting
Loss in vertical streaks: Water channeling from a leak or failed flashing above
We see this stuff every day. A homeowner sees "some granules in the gutter." We see "this section is failing 10 years early because there's a vent boot leak three feet upslope." That's the difference.
Subtle Gutter Pitch Problems
Gutters should slope 1/4 inch per 10 feet of run toward downspouts. That's subtle — you can't see it from the ground without a level.
When gutters lose their pitch (from ice weight, loose fasteners, or settling), water pools. Pooled water:
Grows mosquitoes in summer
Freezes solid in winter, adding hundreds of pounds of load
Overflows during rain, defeating the entire purpose of gutters
Accelerates rust and corrosion in aluminum gutters
We use laser levels to verify gutter pitch during installation. Most homeowners don't own a laser level. That's a $300 tool for a twice-a-year check — not practical. Hire someone who already has the tools and knows what to look for.
Early-Stage Fascia Rot
By the time fascia rot is visible from the ground, it's advanced. Early-stage rot looks like slightly darker wood or minor paint peeling. You might not even notice it.
We probe fascia boards with an awl during inspections. If the wood is soft or the awl sinks in easily, that board is rotting from behind. Caught early, we can replace a 6-foot section for $200. Caught late, we're replacing 30 feet of fascia, soffit, and possibly roof decking for $2,500.
Fascia rot is almost always caused by gutter problems — overflowing gutters, leaking seams, or water running behind the gutter. It's preventable, but only if someone who knows what to look for actually looks.
Ventilation Deficiencies Causing Ice Dams
Most homeowners don't understand attic ventilation. They see vents and assume it's fine. But ventilation is a system — you need balanced intake (soffit vents) and exhaust (ridge vents or gable vents). If intake is blocked by insulation or exhaust is inadequate, the system fails.
We calculate required ventilation based on attic square footage (1 square foot of net free ventilation per 150 square feet of attic space, per Michigan code). Then we verify that soffit vents aren't blocked, insulation baffles are in place, and exhaust vents are actually open (I've found painted-shut ridge vents on multiple occasions).
Fixing ventilation prevents ice dams, extends shingle life, reduces cooling costs in summer, and prevents mold. But you need to know what you're looking at. Our insulation services in Southeast Michigan always include ventilation assessment because they're inseparable issues.
Building Science Reality: A roof is not just shingles. It's a system — shingles, underlayment, decking, flashing, ventilation, insulation, and drainage. When one component fails, it stresses the others. That's why professional inspections look at the whole system, not just the visible surface.
When to Call a Professional vs. DIY Maintenance
I'm going to be blunt: most homeowners should not be on their roof. I've been doing this for 35+ years, I have fall protection equipment, and I still treat every roof like it's trying to kill me. Because it is.
Safe Homeowner Tasks
You can safely handle:
Ground-level gutter cleaning: If you can reach from a stable ladder without leaning or overreaching, clean away. Use a gutter scoop, not your hands (you'll slice your fingers on metal edges or hidden screws).
Downspout flushing: Hose in the top, verify water flows out the bottom.
Visual inspection from ground: Binoculars work great. Look for obvious damage, missing shingles, sagging areas.
Attic inspection: Flashlight and careful walking on joists (not between them — you'll fall through the ceiling). Look for leaks, moisture, proper insulation.
Trimming overhanging branches: Keeps debris off roof and prevents damage during storms. But hire a tree service for anything over 10 feet high or near power lines.
That's it. Everything else requires professional equipment, training, or licensing.
Dangerous DIY Attempts
Do NOT attempt:
Walking on steep roofs (over 6/12 pitch): You will slide off. I don't care how careful you are.
Roof work when wet, icy, or windy: Even pros won't work in these conditions.
Repairs involving flashing or underlayment: If you don't do it right, you've just created a leak that will cost 5x more to fix later.
Using a pressure washer on shingles: This destroys granules and voids warranties. Never do this.
Climbing on roofs over 1 story without fall protection: Falls from 15+ feet are often fatal or life-altering injuries.
Every year, we get calls from homeowners who tried to save money on a simple repair and ended up in the ER or causing more damage. A $200 repair becomes a $2,000 repair plus medical bills. It's not worth it.
Signs Requiring Immediate Professional Assessment
Call a licensed contractor immediately if you see:
Water stains on ceilings or walls: Active leak; damage is happening right now
Sagging roof sections: Structural failure; could collapse
Large sections of missing shingles: Roof deck is exposed to weather
Daylight visible through roof from attic: Holes in roof deck
Heavy granule loss (gutters full of granules): Shingles are failing fast
Gutters pulling away from house: Fascia is failing; will get worse quickly
Ice dams with interior leaking: Water is inside your walls/attic
Mold or mildew smell in attic: Chronic moisture problem
These aren't "wait until spring" problems. These are "call today" problems. We offer emergency services for active leaks because we know that 24 hours of water intrusion can cause thousands in additional damage.
For routine maintenance, you don't need emergency service, but you do need a licensed, insured contractor. In Michigan, that means a Residential Builder's License. We've held ours since 1988. We're also a CertainTeed Master Shingle Applicator — the highest credential in roofing. That's not bragging; that's verification that we know what we're doing and we're accountable to manufacturers and the state.
When you're comparing contractors, ask for:
Michigan Residential Builder's License number (verify at michigan.gov/lara)
Proof of liability and workers' comp insurance
Manufacturer certifications (CertainTeed, GAF, Owens Corning, James Hardie for house siding in Detroit)
References from recent projects in your area
Written estimates with material specifications and warranty details
Don't hire based on price alone. The cheapest bid is usually cheap for a reason — unlicensed workers, substandard materials, no insurance, or corners cut on installation. You'll pay more later to fix what they did wrong.
Ready to Get Started?
NEXT Exteriors has been protecting Michigan homes since 1988. We offer comprehensive seasonal roof and gutter inspections that catch problems before they become expensive emergencies. Our licensed team serves Macomb, Oakland, and St. Clair counties with honest assessments, fair pricing, and quality work.
Or call us: (844) 770-6398
Beyond roofing and gutters, we're your complete exterior partner. Need Detroit window experts to replace drafty windows before winter? We install energy-efficient double-hung, casement, and bay windows from top manufacturers. Looking for durable siding installation in Southeast Michigan? We work with James Hardie fiber cement, LP SmartSide engineered wood, and premium vinyl. Planning exterior updates? Our Southeast Michigan painting professionals use exclusively Sherwin-Williams products for lasting curb appeal.
Every service we offer — from exterior services in Detroit to specialized attic insulation in Metro Detroit — is backed by our commitment to changing contractor culture. No pressure, no gimmicks, just honest work done right.
Frequently Asked Questions
How much does a professional roof inspection cost in Southeast Michigan?
+
Professional roof inspections typically cost $150-300 for a standard residential home in Macomb, Oakland, or St. Clair counties. Many contractors (including NEXT Exteriors) offer free inspections if they installed your roof or if you're considering repairs/replacement. The inspection should include a complete roof surface examination, gutter assessment, attic ventilation check, and a written report of findings. Avoid contractors who offer "free inspections" but then pressure you into unnecessary replacements — that's a red flag.
Can I clean my own gutters or should I hire a professional?
+
You can safely clean your own gutters if your home is single-story, you have a stable ladder, and you're comfortable with heights. Use a gutter scoop (not your bare hands) and work slowly. However, hire a professional if you have a two-story home, steep roof pitch, or gutters that require walking on the roof to access. Falls from ladders are one of the most common home improvement injuries. Professional gutter cleaning costs $100-200 and includes disposal of debris and downspout flushing — it's worth it for safety and thoroughness.
What time of year should I schedule roof and gutter maintenance in Michigan?
+
Schedule your spring inspection in mid-April to early May after the final thaw, and your fall inspection in late October after most leaves have fallen but before the first hard freeze. These timing windows let you assess winter damage in spring and prepare for winter in fall. If you have heavy tree coverage, you might need a second fall cleaning in early November. Avoid inspections during wet, icy, or windy conditions when roof work is dangerous and findings may be obscured by weather.
How do I know if my roof has ice dam damage?
+
Signs of ice dam damage include: icicles hanging from gutters (indicates water backup), water stains on exterior walls just below the roofline, interior ceiling or wall stains in upper-floor rooms, peeling paint or wallpaper near the ceiling, or visible sagging in the roof edge. Ice dams form when heat escapes from your attic, melts snow on the roof, and that water refreezes at the cold eaves. The permanent solution is better attic insulation (to R-49 or higher) and proper ventilation, not just removing the ice. If you see these signs, have a professional assess both your roof and your attic immediately.
Will my homeowners insurance cover roof damage from lack of maintenance?
+
No. Homeowners insurance covers sudden, accidental damage (storms, falling trees, fire), not damage from deferred maintenance or normal wear. If an insurance adjuster determines that your roof leaked because you never cleaned gutters, allowed fascia to rot, or ignored obvious maintenance needs, they will deny the claim. Keep records of all inspections, maintenance, and repairs. Take dated photos annually. This documentation proves you maintained your property and helps distinguish storm damage from neglect if you ever need to file a claim.
How long should a roof last in Michigan with proper maintenance?
+
With proper maintenance (twice-yearly inspections, prompt repairs, adequate ventilation), architectural shingles from quality manufacturers like CertainTeed, GAF, or Owens Corning should last 25-30+ years in Michigan. Premium shingles can reach 35-40 years. Without maintenance, expect 18-22 years from architectural shingles and 12-15 years from basic 3-tab shingles. The key factors are: proper installation with adequate underlayment, balanced attic ventilation, regular debris removal, and addressing small problems before they become leaks. Michigan's freeze-thaw cycles are hard on roofs, but maintenance dramatically extends lifespan.
What should I look for when hiring a roofing contractor in Southeast Michigan?
+
Verify the contractor holds a valid Michigan Residential Builder's License (check at michigan.gov/lara), carries liability and workers' compensation insurance, and has manufacturer certifications from brands like CertainTeed, GAF, or Owens Corning. Ask for local references from the past year and check their BBB rating. Get written estimates that specify exact materials (brand, model, color), labor details, warranty coverage, and project timeline. Avoid contractors who require large upfront deposits, pressure you to decide immediately, or offer prices significantly lower than other bids. NEXT Exteriors has been licensed since 1988, maintains an A+ BBB rating, and holds CertainTeed Master Shingle Applicator certification — the highest credential in roofing.
Downspout Extensions: The Cheapest Fix for Water Near Your Foundation
Water pooling near your foundation? Downspout extensions are the simplest, cheapest fix. Learn how they work, what they cost, and why every Michigan home needs them.
By:
NEXT Exteriors
Published:
February 19, 2026
Reading Time:
8 minutes
You walk outside after a Michigan rainstorm and there it is again: a puddle sitting right next to your foundation. Maybe it's near the basement window. Maybe it's soaking into the soil where your foundation meets the ground. You know it's not good, but foundation work sounds expensive, and waterproofing quotes make your head spin.
Here's the truth: most foundation water problems don't start with a foundation issue. They start with water that's supposed to be carried away by your gutters — but isn't going far enough. And the fix? It's about as simple as home improvement gets.
Downspout extensions are the cheapest, most effective way to protect your foundation from water damage. For $10 to $50 in materials per downspout — or a few hundred dollars if you hire a pro — you can redirect thousands of gallons of water away from your home every year. After 35+ years installing seamless gutters in Detroit, MI and across Southeast Michigan, we've seen this simple fix prevent tens of thousands of dollars in foundation repairs.
Let's talk about why water near your foundation is a problem, how downspout extensions work, what your options are, and what you need to know if you're dealing with Michigan's clay soil and freeze-thaw cycles.
Why Water Near Your Foundation Is a Problem
Your roof is designed to shed water. Your gutters are designed to collect it. But if that water dumps out right next to your foundation, you've just moved the problem from your roof to the most expensive part of your house to fix.
Here's what happens when water pools near your foundation:
Foundation settling and cracks. Michigan soil — especially the heavy clay we have across Macomb County, Oakland County, and St. Clair County — expands when it gets wet and contracts when it dries. That constant movement puts pressure on your foundation walls. Over time, you get cracks. Those cracks let water into your basement. Now you're not just dealing with wet soil — you're dealing with a wet basement.
Basement flooding. Water follows the path of least resistance. If it's sitting next to your foundation, it's going to find a way in — through cracks, through the joint where your foundation wall meets the footing, or through porous concrete. We've been in plenty of basements in Sterling Heights and Clinton Township where the "mysterious" water problem was just a downspout dumping water three feet from the house.
Erosion and landscaping damage. That constant flow of water washing over the same spot? It's carving channels in your soil, washing away mulch, killing plants, and creating low spots that hold even more water. You'll spend more money replacing landscaping every spring than you would've spent on extensions in the first place.
Ice dams and winter damage. In Michigan winters, water near your foundation doesn't just sit there — it freezes. That ice expands, putting even more pressure on foundation walls. And if it's freezing and thawing repeatedly (which it does every March), you're accelerating damage. Ice buildup near the foundation also creates slip hazards and can damage exterior siding or exterior paint in Southeast Michigan.
Real Talk: We've seen foundation repair quotes ranging from $3,000 to $15,000+ for problems that could have been prevented with $100 worth of downspout extensions. This isn't a "nice to have" — it's basic home maintenance that saves you serious money.
How Downspout Extensions Work
The concept is dead simple: move water farther away from your house.
Your gutters collect water from your roof and channel it to downspouts. Those downspouts drop the water at ground level. If there's nothing attached to the bottom of the downspout, that water lands right next to your foundation. A downspout extension is just a pipe or tube that carries that water 6, 10, or even 20 feet away from your house, where it can soak into the ground safely.
How far is far enough? The minimum is 6 feet from your foundation. That's the bare minimum to keep water from immediately soaking back toward the house. But 10 feet is better, especially if you have clay soil (which most of Southeast Michigan does). Clay doesn't absorb water quickly, so you need more distance to give it time to percolate down instead of pooling up.
Slope matters. Extensions need to slope away from the house — at least a 2% grade (that's about 1/4 inch of drop per foot). If your extension is flat or slopes back toward the house, water will sit in the pipe or flow backward. Gravity does the work, but only if you give it a path.
Where does the water go? Ideally, it drains into your yard, a drainage swale, or a rain garden. Some homeowners connect extensions to underground drains that empty into the street or a storm sewer (check local codes first — some municipalities have rules about this). The goal is to get water away from the structure and let it soak into the ground or flow to an appropriate drainage point.
Types of Downspout Extensions
Not all extensions are created equal. Here's what you'll find at the hardware store or what a contractor might recommend, along with the pros and cons of each:
Flexible Corrugated Extensions
These are the accordion-style tubes you see everywhere — usually black, white, or green plastic. They're cheap (around $10-15), easy to install, and flexible enough to route around obstacles like shrubs or walkways.
Pros: Inexpensive, easy DIY install, flexible routing.
Cons: They're ugly. They get kinked. They crack in Michigan winters if you don't remove them before the ground freezes. Lawnmowers destroy them. They're a temporary solution at best.
Best for: Quick fixes, renters, or temporary drainage while you plan a permanent solution.
Rigid PVC or Vinyl Extensions
These are solid plastic pipes that attach to the bottom of your downspout and extend out in a fixed direction. They're more durable than flexible extensions and look cleaner. Cost: $15-30 per downspout.
Pros: More durable than flexible, better appearance, can handle Michigan winters if installed correctly.
Cons: Less flexible routing, can be tripping hazards if they extend across walkways, still visible.
Best for: Homeowners who want a cleaner look and don't mind a visible extension.
Roll-Out or Retractable Extensions
These are flat tubes that roll out when it rains and retract when dry. They attach to the downspout and unroll automatically with water pressure. Cost: $20-40.
Pros: Out of sight when not in use, no tripping hazard, decent for mowing around.
Cons: They don't always roll out fully, can get clogged with debris, and Michigan freeze-thaw cycles can damage the mechanism. They're clever but not always reliable.
Best for: Homeowners who want something less visible but aren't ready to go underground.
Underground Drainage Pipes
This is the permanent solution. A buried PVC pipe runs from the downspout underground to a pop-up emitter, drainage swale, or storm sewer connection 10-20+ feet away. Cost: $200-500+ per downspout, depending on distance and excavation.
Pros: Completely invisible, no tripping hazards, won't get damaged by lawnmowers or weather, permanent fix.
Cons: More expensive, requires excavation (which can damage landscaping), needs proper slope and installation to avoid clogs.
Best for: Homeowners planning long-term, especially if you're already doing landscaping work or have serious drainage issues.
Pop-Up Emitters
These work with underground drainage. The pipe terminates in a pop-up emitter — a small plastic cap that sits flush with the ground when dry and "pops up" to release water when it flows through. Cost: $10-20 per emitter.
Pros: Clean look, prevents debris from entering the pipe, mower-friendly.
Cons: Can freeze shut in winter, may need to be cleared of leaves in fall.
Best for: Pairing with underground drainage systems.
What we recommend: For most Michigan homeowners, start with rigid PVC extensions if you're doing it yourself and want something that works now. If you're serious about a permanent fix and have the budget, underground drainage with pop-up emitters is the gold standard. We install both as part of our exterior services in Detroit and across Southeast Michigan.
Cost Reality: What You'll Actually Pay
Let's talk numbers. Downspout extensions are one of the few home improvements where the DIY and professional options are both genuinely affordable.
DIY Materials Cost
Flexible corrugated extensions: $10-15 per downspout
Rigid PVC extensions: $15-30 per downspout
Roll-out extensions: $20-40 per downspout
Underground drainage (DIY): $50-150 per downspout (pipe, fittings, emitter, gravel)
Most homes have 4-8 downspouts, so you're looking at $40-$320 for a whole-house DIY solution using above-ground extensions, or $200-$1,200 if you're burying pipes yourself.
Professional Installation Cost
Above-ground extensions: $100-200 per downspout (includes materials, labor, proper slope setup)
Underground drainage: $300-600 per downspout (includes excavation, pipe, gravel, pop-up emitter, backfill, and cleanup)
For a typical Michigan home with 6 downspouts, professional installation of underground drainage might run $1,800-$3,600 total. That sounds like a lot until you compare it to foundation repair.
What Foundation Repairs Actually Cost
Here's the reality check:
Minor foundation crack repair: $500-$1,500
Basement waterproofing (interior): $3,000-$7,000
Exterior waterproofing and drainage: $8,000-$15,000+
Foundation underpinning or stabilization: $10,000-$30,000+
Spending $300 on downspout extensions now can save you $10,000+ in foundation work later. That's not an exaggeration — we've watched it happen on jobs across Royal Oak, Troy, and Warren for decades. The homeowners who take drainage seriously upfront are the ones who aren't calling foundation contractors five years later.
Michigan-Specific Considerations
Michigan weather isn't kind to half-done drainage solutions. If you're installing downspout extensions in Southeast Michigan, here's what you need to account for:
Freeze-Thaw Cycles
We freeze. We thaw. We freeze again. Sometimes in the same week. That cycle is brutal on anything that holds water — including downspout extensions. Flexible extensions crack. Rigid extensions can heave if they're not anchored properly. Underground pipes can freeze solid if they're not sloped correctly or if water sits in them.
What to do: If you're using above-ground extensions, remove flexible ones before winter or accept that you'll replace them every couple years. Rigid extensions should be secured with stakes so frost heave doesn't shift them. Underground drainage must have proper slope so water doesn't sit in the pipe and freeze.
Clay Soil Drainage
Most of Southeast Michigan sits on heavy clay soil. Clay is terrible at absorbing water quickly — it holds moisture, expands, and creates drainage problems. That's why the "6 feet minimum" rule isn't enough here. You need 10+ feet, and you need to think about where that water is actually going.
What to do: Extend farther than you think you need to. If your yard has a natural slope, use it — route extensions so water flows downhill away from the house. If your yard is flat or slopes toward the house, consider underground drainage to a lower point or a rain garden designed to handle clay soil.
Ice Buildup and Winter Drainage
In winter, water doesn't stop flowing just because it's cold. Snowmelt from your Detroit roofing during sunny days or mild spells runs into gutters and down downspouts. If that water dumps next to your foundation and freezes, you've got an ice problem. Ice buildup can damage house siding in Detroit, create slip hazards, and put pressure on foundation walls.
What to do: Make sure extensions drain to an area where ice buildup won't be a problem — away from walkways, driveways, and the foundation. If you're burying drainage, ensure it's below the frost line (about 42 inches in Michigan) so it doesn't freeze solid.
Landscaping and Grading
Michigan homes — especially the brick Colonials and 1960s ranches common in Macomb and Oakland counties — often have landscaping that slopes the wrong way or flat yards with poor drainage. Adding downspout extensions doesn't help if the water just pools 10 feet away instead of 3 feet away.
What to do: Check your yard grading. Water should flow away from the house. If it doesn't, you may need to regrade or add a drainage swale. This is where a professional assessment helps — we've solved plenty of drainage problems in Shelby Township and Chesterfield that required more than just extensions.
Signs You Need Downspout Extensions
Not sure if you need extensions? Here are the clear signs:
Water pooling near the foundation after rain. If you see puddles within a few feet of your house, your downspouts aren't moving water far enough.
Basement moisture, dampness, or flooding. If your basement smells musty, has water stains on the walls, or floods during heavy rain, poor drainage is often the culprit.
Soil erosion or channels near downspouts. If water is carving paths in your mulch or soil, it's washing away the ground near your foundation.
Foundation cracks. New or widening cracks in your foundation walls or floor can be a sign of water pressure and soil movement.
Mold or mildew smell in the basement. Moisture in the basement creates mold. If you smell it, you have a water problem.
Ice buildup near the foundation in winter. If you see ice forming where your downspouts drain, that water is too close to the house.
Gutters that overflow but downspouts that drain right next to the house. Your gutters might be working fine — they're just dumping water in the wrong place.
If you're seeing any of these signs, downspout extensions are a good first step. They won't fix everything (you might also need attic insulation in Metro Detroit if ice dams are part of the problem, or window replacement in Detroit if moisture is getting in around old frames), but they'll address the biggest source of foundation water problems.
When to Call a Professional
You can DIY simple above-ground extensions. But call a contractor if:
You want underground drainage (excavation and proper slope are critical)
Your yard has complicated grading or drainage issues
You're already seeing foundation cracks or basement water
You're not sure where the water should drain to
You're doing other exterior work (new gutters, siding, landscaping) and want to handle drainage at the same time
We've installed seamless gutters and drainage solutions on hundreds of Michigan homes. A proper assessment takes 20 minutes, and we'll tell you exactly what you need — not what we want to sell you. That's the NEXT Exteriors difference.
Ready to Protect Your Foundation?
NEXT Exteriors has been solving drainage problems for Michigan homeowners since 1988. Whether you need simple extensions or a full underground drainage system, we'll give you an honest assessment and a fair price. No gimmicks. No pressure. Just straight answers from people who've been doing this for 35+ years.
Or call us: (844) 770-6398
Frequently Asked Questions
How far should downspout extensions be from the foundation?
+
Minimum 6 feet, but 10 feet is better for Michigan's clay soil. The goal is to give water enough distance to soak into the ground before it can flow back toward the foundation. If your yard slopes toward the house or has poor drainage, you may need even more distance or underground drainage to a lower point.
Can I install downspout extensions myself?
+
Yes, above-ground extensions are easy DIY projects. You can buy flexible or rigid extensions at any hardware store and attach them to your existing downspouts in under an hour. Just make sure they slope away from the house and extend at least 6-10 feet. Underground drainage is more complex and usually requires professional excavation and installation to ensure proper slope and drainage.
Do downspout extensions work in Michigan winters?
+
Yes, but they need to be installed correctly. Flexible extensions can crack in freezing temps and should be removed before winter or replaced as needed. Rigid PVC extensions hold up better if they're secured properly. Underground drainage works year-round as long as it's sloped correctly so water doesn't sit and freeze in the pipes. Expect some ice buildup at the outlet during freeze-thaw cycles — that's normal.
What if I don't have space to extend my downspouts?
+
If your yard is tight or landscaping is in the way, underground drainage is your best option. A buried pipe can run under walkways, gardens, or driveways to reach a safe drainage point. You can also use pop-up emitters that sit flush with the lawn so they're not visible or in the way. We've solved drainage problems on small lots in St. Clair Shores and Grosse Pointe Farms where space was tight — there's almost always a solution.
How often should I check my downspout extensions?
+
Check them twice a year — once in spring after snowmelt and once in fall after leaves drop. Make sure they're still connected, sloped correctly, and not clogged with debris. If you have underground drainage, check the pop-up emitters to make sure they're not blocked by leaves or dirt. After heavy storms, do a quick walk around the house to confirm water is draining away from the foundation, not pooling near it.
Will downspout extensions fix my basement flooding?
+
If the flooding is caused by water pooling near the foundation, yes — extensions will help significantly. But if you have other issues like foundation cracks, a high water table, or poor yard grading, you may need additional solutions like interior or exterior waterproofing, sump pump installation, or regrading. Extensions are the first step and often solve 80% of basement water problems, but they're not a cure-all. We'll assess your specific situation and tell you what you actually need.
Can I connect downspout extensions to the storm sewer?
+
Maybe — it depends on your local municipality. Some cities in Southeast Michigan allow it, others don't. In many areas, you're required to manage stormwater on your own property rather than directing it to the street or storm sewer. Check with your city's building or public works department before connecting extensions to any public drainage system. We can help you figure out what's allowed in your area.
Spring Gutter Cleaning After Michigan Snow Season | NEXT Exteriors
Expert spring gutter cleaning checklist for Southeast Michigan homes after winter snow and roof debris. Learn what to inspect, clean, and repair from licensed contractors.
By NEXT Exteriors
|
February 19, 2026
|
10 min read

If you've lived through a Michigan winter, you know what it does to your home's exterior. The freeze-thaw cycles, the lake-effect snow dumps, the ice dams creeping up from your eaves — it all takes a toll. And your gutters? They've been working overtime for months, channeling melting snow, catching shingle granules, and dealing with debris that's been frozen in place since November.
Now that spring is here, your gutters need attention. Not the "maybe I'll get to it" kind — the "this could cost me thousands if I ignore it" kind. After 35+ years installing and repairing seamless gutters in Detroit, MI and throughout Southeast Michigan, we've seen what happens when homeowners skip the spring gutter cleaning checklist. Foundation damage. Basement flooding. Rotted fascia boards. Landscape erosion.
This guide walks you through exactly what to check, clean, and repair after the snow and roof debris season. We're not talking about a quick leaf scoop — we're talking about a thorough inspection that protects your biggest investment.
What Michigan Winter Does to Your Gutters
Before we get into the spring gutter cleaning checklist, you need to understand what just happened to your drainage system over the past four months. Michigan winters are uniquely destructive to gutters — and it's not just the cold.
Ice Dam Formation and Gutter Stress
Ice dams form when heat escapes through your attic (usually because of poor insulation services in Southeast Michigan), melting snow on your roof. That meltwater runs down to the cold eaves and refreezes, creating a dam. As the ice builds up, it pushes under shingles and backs up into gutters.
The weight alone is a problem — a foot of ice in a 20-foot gutter section can weigh over 200 pounds. That's enough to pull gutters away from the fascia, bend hangers, and create sags that prevent proper drainage once the thaw comes.
Freeze-Thaw Expansion Damage
Water expands by about 9% when it freezes. In gutters, this means any trapped water — from poor pitch, clogged downspouts, or debris dams — becomes a destructive force. Small cracks become big cracks. Seams separate. Aluminum gutters can actually split along the back seam if water freezes repeatedly in the same spot.
We see this constantly in Sterling Heights and Clinton Township — homes where gutters looked fine in November but are leaking at every seam by March.
Shingle Granule Accumulation
Your Detroit roofing services include installing architectural shingles from CertainTeed, GAF, and Owens Corning. All of these shingles shed granules — it's normal. But winter accelerates it.
Freeze-thaw cycles loosen granules. Ice scraping across shingles during expansion pulls more off. By spring, your gutters are often filled with a gritty, sand-like layer that blocks proper drainage. Left in place, this material holds moisture against the gutter bottom, accelerating rust and corrosion.
Debris Compaction from Snow Weight
Fall leaves that you didn't quite get to? The snow compressed them into a dense, matted layer that doesn't wash away easily. Add in twigs, seed pods, and pine needles, and you've got a dam that blocks water flow even after the snow melts.
This is especially common in wooded areas of Rochester Hills and Bloomfield Hills, where mature trees drop debris year-round.
The Complete Spring Gutter Cleaning Checklist
Here's the step-by-step process we use on every gutter maintenance job. You can do most of this yourself if you're comfortable on a ladder — but know when to call in professionals.
Safety First: Ladder Setup on Thawing Ground
Michigan ground in March and April is unpredictable. The surface might look solid, but underneath it's often soft from frost heave and snowmelt. Before you climb:
Use a stable extension ladder — not a step ladder leaned against the house
Position on firm, level ground — avoid soft soil near downspouts where water pools
Use ladder stabilizers — these arms keep the ladder off the gutters and prevent damage
Extend 3 feet above the roofline — gives you a safe handhold when stepping on/off
Have a spotter if possible — especially on taller homes or when working alone
Pro tip: Never lean an aluminum ladder directly against gutters. The pressure from your body weight can bend the gutter lip or crack joints. Always use stabilizer arms or a standoff.
Step 1: Visual Inspection from the Ground
Before you climb, walk the perimeter of your home and look for obvious problems:
Gutters pulling away from the fascia board
Visible sags or sections that aren't level
Rust stains on siding below gutters (indicates overflow)
Peeling paint on fascia or soffit (water damage)
Downspouts that have separated or pulled loose
Standing water in gutters (means poor pitch)
Step 2: Remove Large Debris
Once you're safely positioned on the ladder:
Wear heavy-duty gloves — gutter debris contains sharp objects, decomposed organic matter, and often nails or roofing staples
Scoop out debris by hand — work in 3-4 foot sections, moving the ladder frequently
Use a gutter scoop or small garden trowel — makes the job faster and keeps your hands cleaner
Drop debris into a bucket — hook it to the ladder with an S-hook rather than throwing debris on the ground (you'll just have to pick it up later)
Pay special attention to valleys and areas near downspouts — these collect the most debris.
Step 3: Flush Gutters with Water
After removing the bulk of debris, use a garden hose to flush the gutters:
Start at the end farthest from the downspout — let water push remaining debris toward the outlet
Use moderate pressure — you want flow, not force that could damage gutter seams
Watch where the water goes — it should flow steadily toward downspouts without pooling
Check for leaks at seams and corners — mark any spots that drip for later repair
If water pools in sections, your gutters have lost their pitch. This is a common result of ice dam weight and needs professional correction.
Step 4: Clear Downspouts and Test Drainage
Clogged downspouts are the #1 cause of gutter overflow. Here's how to clear them:
Run water from the top — if it backs up, there's a blockage
Use a plumber's snake from the top — feed it down until you hit the clog, then twist and push
Flush from the bottom — sometimes easier to remove the elbow at ground level and push a hose up
Check underground drainage — if you have buried downspout extensions, make sure they're flowing freely
In Macomb and St. Clair counties, we often find downspouts clogged with compacted shingle granules — they form a cement-like plug that requires physical removal.
Step 5: Inspect Hangers and Fasteners
While you're up there, check the hardware that holds your gutters to the house:
Spike-and-ferrule systems — old-school fasteners that often pull out after ice dam stress. Look for loose spikes or missing ferrules.
Hidden hangers — modern systems that hook into the gutter lip and screw into the fascia. Check that screws are tight and hangers aren't bent.
Fascia condition — if hangers are pulling out, the fascia board may be rotted. Poke it with a screwdriver — if it sinks in easily, you've got wood rot that needs addressing before gutter repair.
Step 6: Check Pitch and Slope
Gutters should slope about 1/4 inch per 10 feet toward downspouts. After a Michigan winter, this pitch is often compromised. Here's how to check:
Pour a bucket of water in the high end — watch how it flows
Look for standing water after 10 minutes — any pooling means the pitch is wrong
Use a level if you want precision — but the water test is usually enough
Correcting pitch requires adjusting hangers — not a DIY job unless you're experienced. Improper pitch leads to mosquito breeding, ice formation, and premature gutter failure.
Signs Your Gutters Need Professional Repair
Some gutter problems you can handle yourself. Others require the tools, materials, and experience of a licensed contractor. Here's when to call NEXT Exteriors:
Persistent Sagging Despite Cleaning
If gutters still sag after you've removed all debris, the hangers are either failed or spaced too far apart. This is especially common on older homes where gutters were installed with spike-and-ferrule systems every 32 inches instead of the modern standard of 24 inches.
Sagging gutters don't drain properly, which means standing water, mosquitoes, and accelerated corrosion. We typically replace old fasteners with hidden hangers and add intermediate supports.
Separation from Fascia Board
When gutters pull away from the house, water runs behind them and soaks the fascia board. Over time, this causes wood rot that spreads to soffit and even roof decking.
Reattaching gutters without addressing the underlying fascia damage is a temporary fix at best. We often find that homes in Royal Oak and Grosse Pointe Farms with original 1960s gutters have significant hidden fascia rot that only becomes visible when we remove the gutters.
Rust Holes or Corrosion
Small rust spots can be patched temporarily, but once aluminum or steel gutters develop holes, they're near the end of their service life. Patch kits from the hardware store might buy you a season, but you're better off budgeting for replacement.
We install seamless aluminum gutters that won't rust — they're formed on-site to the exact length needed, eliminating the seams where corrosion typically starts.
Cracked or Split Seams
Sectional gutters (the kind you buy in 10-foot lengths at big-box stores) have seams every few feet. These seams are sealed with caulk or rivets, and Michigan's freeze-thaw cycles destroy them.
Once seams start leaking, you're fighting a losing battle. Recaulking works for a year or two, but the underlying problem — thermal expansion and contraction — keeps happening. Seamless gutters solve this permanently.
Foundation Pooling or Basement Leaks
If you're seeing water pooling next to your foundation after rainstorms, or if your basement suddenly started leaking this spring, gutters are the likely culprit.
Gutters exist to move water away from your foundation. When they fail — through clogs, poor pitch, or missing downspout extensions — thousands of gallons of water end up right where you don't want it. In Southeast Michigan's clay-heavy soil, this leads to foundation settlement, basement seepage, and crawl space flooding.
This is an emergency repair situation. The longer water sits against your foundation, the more damage it causes. We can usually get an emergency gutter repair crew out within 48 hours.
Gutter Maintenance Schedule for Michigan Homes
Spring cleaning is critical, but it's not the only time your gutters need attention. Here's the maintenance schedule we recommend for Southeast Michigan homeowners:
Spring (Late March to April)
Priority: Post-winter damage assessment and debris removal
Complete the full cleaning checklist outlined above
Repair any damage from ice dams or freeze-thaw cycles
Replace missing or damaged hangers
Seal any leaks at seams or corners
Extend downspouts if spring runoff reveals drainage problems
Late Fall (October to November)
Priority: Remove leaves before first freeze
Clean gutters after trees drop their leaves but before snow
Check that downspouts are clear and water flows freely
Inspect for any damage that developed over summer
Consider gutter guards if you're tired of twice-yearly cleaning (we'll discuss this in the FAQ)
Mid-Season Spot Checks (June and January)
Priority: Catch small problems before they become big ones
After major storms, do a visual inspection from the ground
In winter, check for ice dam formation — if you see it, you've got an attic insulation problem
Look for signs of overflow (rust stains, erosion below downspouts)
If you're not comfortable with heights or don't have time for this maintenance, we offer seasonal gutter cleaning contracts that handle everything. Many of our clients in Troy and Warren have been on our maintenance program for years — we show up twice a year, do the work, and send a condition report.
What Gutter Cleaning and Repair Actually Costs
Let's talk numbers. Michigan homeowners are practical people — you want to know what you're looking at before you pick up the phone.
DIY Spring Gutter Cleaning
If you're doing it yourself:
Time investment: 3-6 hours for an average single-story home, 6-10 hours for two stories
Equipment needed: Extension ladder ($150-$300 if you don't own one), ladder stabilizer ($30-$50), heavy-duty gloves ($10), gutter scoop ($8), bucket ($5)
Repair materials: Gutter sealant ($8-$12 per tube), replacement hangers ($3-$8 each), downspout extensions ($10-$30)
Total DIY cost: $50-$100 if you have basic equipment, $200-$400 if you're starting from scratch
Professional Gutter Cleaning
For professional service in Southeast Michigan:
Average single-story home: $125-$200
Two-story home: $175-$300
Large or complex homes: $300-$500+
This includes complete cleaning, flushing, minor adjustments, and a condition report. We also haul away the debris — you don't have to deal with 15 bags of wet leaves and shingle granules.
Gutter Repair Costs
Common spring repairs and typical costs:
Reattaching separated sections: $75-$150 per section
Replacing damaged hangers: $5-$12 per hanger installed
Sealing leaking seams: $50-$100 per seam
Adjusting pitch: $100-$250 per gutter run
Fascia board replacement: $15-$30 per linear foot (material and labor)
Downspout replacement: $75-$150 per downspout
Full Gutter Replacement
When repair costs start approaching 50% of replacement cost, it's time to consider new gutters:
Seamless aluminum gutters (5-inch): $8-$12 per linear foot installed
Seamless aluminum gutters (6-inch): $10-$15 per linear foot installed
Average home (150-200 linear feet): $1,200-$3,000 total
We form seamless gutters on-site using commercial-grade equipment, which eliminates the leak-prone seams found in sectional systems. They're available in over 20 colors to match your home's trim or house siding in Detroit.
Budget tip: Spring and fall are our busiest seasons for gutter work. If your gutters aren't in emergency condition, scheduling work in June or February often gets you faster service and sometimes better pricing.
When to Replace vs. Repair Your Gutters
This is the question we get most often after a spring inspection. Here's how we think about it:
Repair Makes Sense When:
Gutters are less than 15 years old
Damage is isolated to one or two sections
The fascia board is in good condition
Repair cost is less than 30% of replacement cost
You're planning to sell within 2-3 years (buyers just want functional gutters)
Replacement Makes Sense When:
Gutters are 20+ years old
You're repairing the same sections every year
Multiple seams are leaking
Fascia damage requires board replacement anyway (might as well upgrade gutters at the same time)
You're doing other exterior work — roof replacement in Metro Detroit, new siding, or window replacement in Detroit — and want everything to match
You're tired of constant maintenance and want a permanent solution
The Seamless Gutter Advantage
We install seamless gutters for about 80% of our replacement jobs. Here's why homeowners choose them:
No seams to leak: Formed in continuous runs up to 100+ feet
Custom fit: Made on-site to exact measurements, including custom corners
Cleaner appearance: No visible joints or fasteners on the front
Better performance: Smooth interior means debris flows out instead of catching on seam ridges
Longer lifespan: 25-30 years vs. 10-15 for sectional gutters
We use .032-inch aluminum (commercial grade, thicker than most residential gutters) and back it with a workmanship warranty. The gutter machine comes to your driveway — you can watch us form your gutters from coil stock.
Beyond Gutters: Related Spring Exterior Maintenance
While you're inspecting gutters, it's the perfect time to check other exterior systems that took a beating over winter:
Roof Inspection
Look for missing or damaged shingles, especially in valleys and along the ridge. Ice dams can lift shingles and break the seal. If you're seeing granules in your gutters, your roof is aging — plan for replacement in the next few years.
Our professional roofing in Southeast Michigan includes free roof inspections. We're CertainTeed Master Shingle Applicators — the highest credential in residential roofing — and we can spot problems before they become leaks.
Siding Check
Freeze-thaw cycles can crack vinyl siding, warp engineered wood, and loosen fiber cement boards. Walk your home's perimeter and look for:
Cracks or holes
Warped or buckled panels
Loose or missing pieces
Water stains or mold growth
We install James Hardie fiber cement and LP SmartSide engineered wood — both handle Michigan winters better than vinyl. If your siding is showing age, consider an upgrade. Modern materials offer better insulation, lower maintenance, and longer warranties.
Window and Door Seals
Check caulking around windows and doors. Michigan's temperature swings cause caulk to crack and fail. Drafty windows waste energy and make your HVAC system work harder.
If you're feeling drafts or seeing condensation between panes, it might be time for energy-efficient windows in Southeast Michigan. We install double-hung, casement, and bay windows with Low-E glass and argon fill — they pay for themselves through energy savings.
Foundation Drainage
Spring is when foundation problems reveal themselves. Check for:
Cracks in basement walls
Water seepage or damp spots
Efflorescence (white mineral deposits)
Soil settlement near the foundation
Most foundation water problems trace back to gutters and grading. Make sure downspouts extend at least 6 feet from the foundation, and the ground slopes away from the house.
Other Services from NEXT Exteriors
Gutters are just one part of your home's exterior protection system. NEXT Exteriors offers comprehensive exterior services in Detroit and throughout Southeast Michigan:
Attic and wall insulation: Our insulation services in Southeast Michigan include blown-in cellulose, spray foam, and batt insulation. Proper attic insulation prevents ice dams — the root cause of most winter gutter damage.
Exterior painting: We're Sherwin-Williams exclusive contractors. Our Southeast Michigan painting professionals handle everything from trim touch-ups to full exterior repaints.
Complete exterior renovations: Planning a whole-house update? We coordinate roofing, siding, windows, gutters, and painting as a single project with one point of contact.
We've been protecting Michigan homes since 1988. BBB A+ rated, 5.0-star average across 87+ reviews, and we're one of the few contractors in the state with CertainTeed Master Shingle Applicator certification. We show up on time, work clean, and do the job right.
Ready to Get Started?
NEXT Exteriors has been protecting Michigan homes since 1988. Get a free, no-pressure estimate from a team that shows up on time and does the job right.
Or call us: (844) 770-6398
Frequently Asked Questions
How often should Michigan homeowners clean their gutters?
+
At minimum, twice a year — late fall after leaves drop and spring after snowmelt. Homes with mature trees nearby may need quarterly cleaning. Pine trees and oak trees are especially problematic because they drop debris year-round. If you're seeing overflow during rainstorms or plants growing in your gutters, you're overdue.
We offer seasonal maintenance contracts that handle this automatically. We show up in April and November, clean everything, check for damage, and send you a condition report. No ladders, no mess, no remembering to schedule it.
Can I clean gutters myself or should I hire a professional?
+
DIY is fine for single-story homes if you're comfortable on ladders and have the right equipment. You'll save $150-$200 but invest 3-6 hours of work. Two-story homes are more dangerous — ladder work at 20+ feet requires experience and proper safety equipment.
Hire a pro if: you have a steep roof pitch, your home is two stories or taller, you have health conditions that make ladder work risky, or you just don't want to deal with it. Professional cleaning includes a damage inspection — we often catch small problems before they become expensive repairs.
What causes gutters to pull away from the house after winter?
+
Ice dam weight is the primary culprit. A foot of ice in a 20-foot gutter section weighs 200+ pounds — enough to bend hangers and pull fasteners out of the fascia board. Freeze-thaw expansion also stresses the attachment points.
Old spike-and-ferrule fastening systems are especially vulnerable. The spikes pull out of the fascia over time, and once one pulls out, the adjacent ones take more stress and fail faster. Modern hidden hanger systems distribute weight better and resist ice dam damage.
If gutters are pulling away, check the fascia board for rot. Soft or spongy wood won't hold fasteners — you'll need to replace the damaged section before reattaching gutters.
How much does gutter cleaning cost in Southeast Michigan?
+
Professional gutter cleaning in Metro Detroit typically runs $125-$200 for single-story homes and $175-$300 for two-story homes. Larger or complex homes (multiple roof lines, steep pitch, heavy tree coverage) can run $300-$500+.
This includes complete debris removal, flushing, downspout clearing, and a condition inspection. We haul away the debris — you don't have to bag 15 loads of wet leaves and shingle granules.
Spring pricing is sometimes higher due to demand. If your gutters aren't in emergency condition, scheduling in June or late winter can save you money and get faster service.
Should I install gutter guards to avoid cleaning?
+
Gutter guards reduce cleaning frequency but don't eliminate it. They work best in areas with large leaves (oak, maple) and struggle with pine needles, seed pods, and shingle granules — all common in Michigan.
Mesh and screen guards ($3-$8 per linear foot installed) block most debris but require occasional brushing. Reverse-curve guards ($15-$25 per linear foot) use surface tension but can ice over in winter, creating problems worse than the ones they solve.
Our honest take: if you have minimal tree coverage, guards aren't worth it. If you're surrounded by mature trees and hate ladder work, quality mesh guards can cut cleaning from twice yearly to once every 2-3 years. But you'll still need to clean them eventually — debris builds up on top and reduces water flow.
We install guards when clients request them, but we always explain the limitations. There's no such thing as maintenance-free gutters in Michigan.
What's the lifespan of gutters in Michigan's climate?
+
Aluminum gutters typically last 20-25 years in Michigan if properly maintained. Sectional gutters (the kind with seams every 10 feet) usually fail at 10-15 years because the seams leak. Seamless gutters last longer — 25-30 years — because there are no seams to fail.
Steel gutters rust out faster, especially in areas with road salt spray. Copper gutters last 50+ years but cost 3-4x more than aluminum. For most Michigan homes, seamless aluminum offers the best balance of cost, performance, and longevity.
Proper maintenance extends lifespan significantly. Gutters that are cleaned regularly, kept properly pitched, and have functional downspouts will outlast neglected systems by a decade or more.
How do I prevent ice dams and protect my gutters in winter?
+
Ice dams form because of heat loss through your attic, not because of gutter problems. Warm air escapes, melts snow on the roof, and the meltwater refreezes at the cold eaves. The solution is better attic insulation and ventilation.
We recommend R-49 to R-60 attic insulation for Michigan homes — that's 16-20 inches of blown-in cellulose or fiberglass. Combine that with proper soffit and ridge venting to keep the attic cold, and ice dams won't form.
Gutter heat cables are a band-aid solution. They melt channels through ice but don't address the root cause, and they cost $30-$50 per month to run all winter. Fix the attic insulation instead — it pays for itself in energy savings and eliminates the problem permanently.
Ice Dams Keep Coming Back? Your Gutters Are Part of the Problem
Learn why icicles and ice dams form on Michigan homes, how gutters contribute to overflow damage, and what actually prevents winter ice problems in Southeast Michigan.
📅 February 19, 2026
👤 NEXT Exteriors
⏱ 11 min read
Every winter, homeowners across Sterling Heights, Rochester Hills, and Grosse Pointe Farms watch icicles grow from their roof edges. They look picturesque hanging there against the snow — until water starts dripping behind your siding, gutters pull away from the fascia, or you notice a brown stain spreading across your living room ceiling.
Here's what 35 Michigan winters have taught us: those icicles aren't just ice. They're symptoms of a system failure involving your attic, your roof, and yes — your gutters. Most homeowners think the solution is cleaning their gutters more often or installing heat cables. Those are band-aids. The real problem is heat escaping through your roof deck, and your gutters are collecting the evidence.
Let's talk about what's actually happening on your roof, why your seamless gutters in Detroit, MI are part of the equation, and what it takes to fix this for good.
Why Ice Dams Form on Michigan Homes
Ice dams aren't caused by cold weather — they're caused by warm attics. Here's the building science:
When heat from your living space escapes into your attic (through inadequate insulation, air leaks around recessed lights, attic hatches, or ductwork), it warms the underside of your roof deck. Snow on the roof melts from the bottom up. The water runs down the roof until it reaches the overhang — the part of the roof that extends past your exterior walls.
That overhang isn't heated. It's the same temperature as the outside air. When the melted water hits that cold section, it refreezes. Over time, ice builds up at the roof edge, forming a dam. More water backs up behind it, and eventually, that water finds its way under your shingles and into your home.
This is why you see ice dams on homes with Detroit roofing services that look perfectly fine from the ground. The roof isn't the problem — the attic is. And when your gutters are clogged with leaves, ice, or debris, they create an additional collection point where water freezes, accelerating the whole cycle.
The Michigan Freeze-Thaw Factor
Southeast Michigan's weather makes this worse. We don't get consistent sub-zero temperatures all winter. Instead, we get freeze-thaw cycles — days in the 30s followed by nights in the teens. Every time the temperature crosses 32°F, you get another melt-and-refreeze event. That's why ice dams in Troy or Warren can be more severe than in northern Michigan, where it stays cold and snow stays frozen.
Lake-effect snow from Lake St. Clair and Lake Huron adds another layer. Heavy, wet snow insulates your roof, trapping even more heat and accelerating the melt cycle underneath.
How Gutters Contribute to Ice Dam Damage
Gutters don't cause ice dams, but they absolutely make them worse. Here's how:
Clogged Gutters Trap Water
When gutters are full of leaves, pine needles, or shingle granules, water can't flow to the downspouts. It sits in the gutter channel, freezes overnight, and expands. Ice is powerful — it can bend aluminum, crack seams, and pull gutter hangers right out of the fascia board.
We've seen gutters in Clinton Township completely detached from the house after a single bad winter, all because they weren't cleaned before the first freeze.
Poor Gutter Pitch Creates Ice Pockets
Gutters need to be pitched toward downspouts at 0.25 to 0.5 inches per 10 feet. If they're installed flat (or worse, pitched backward), water pools instead of draining. Those pools freeze solid, creating ice dams right in your gutter system.
Old sectional gutters — the kind with seams every 10 feet — are especially prone to this. Seams sag over time, creating low spots where water collects. That's why we install seamless gutters on every project: no seams, no weak points, consistent pitch.
Overflow Damage to Siding and Foundation
When ice blocks your gutters, water has nowhere to go but over the sides. It runs down your house siding in Detroit, seeps behind trim boards, and drips onto the ground right next to your foundation.
In the short term, that causes staining and rot on wood siding or trim. Long-term, it saturates the soil around your foundation, increasing hydrostatic pressure and the risk of basement leaks. We've seen homes in St. Clair Shores with foundation cracks that started as a gutter problem.
Real Talk: If you're seeing water stains on your fascia boards or soffit panels, your gutters are overflowing. That's not just cosmetic — it's a sign that water is getting where it shouldn't, and in Michigan winters, that water will freeze and cause more damage.
The Real Solution: A Three-Part System
Fixing ice dams requires addressing the root cause: heat loss through your roof. Gutters are part of the solution, but only if you fix the attic first. Here's the system that actually works:
Part 1: Proper Attic Insulation and Air Sealing
Michigan building code calls for R-49 to R-60 insulation in attics. Most homes built before 2000 have R-19 or less. That's not enough.
But here's the critical part most contractors skip: air sealing comes before insulation. You can pile R-60 fiberglass batts in your attic, but if warm air is leaking through gaps around recessed lights, plumbing penetrations, or the attic hatch, you're still heating your roof deck.
We use spray foam or canned foam to seal every penetration, then install blown-in cellulose or fiberglass to the target R-value. This is what our top-rated insulation contractor in Detroit team does on every attic job — and it's the single most effective way to stop ice dams.
Part 2: Adequate Attic Ventilation
A properly insulated attic still needs ventilation. The goal is to keep the attic temperature as close to the outside temperature as possible. That means balanced intake (soffit vents) and exhaust (ridge vents or gable vents).
The rule of thumb: 1 square foot of ventilation per 150 square feet of attic space, split evenly between intake and exhaust. On homes with CertainTeed Landmark or GAF Timberline shingles, we install ridge vents along the peak and ensure soffit vents aren't blocked by insulation.
Without ventilation, even a well-insulated attic can trap heat and moisture, leading to ice dams, mold, and premature shingle failure. This is non-negotiable for any professional roofing in Southeast Michigan.
Part 3: Clean, Properly Pitched Seamless Gutters
Once your attic is fixed, your gutters need to do their job: move water away from the house, fast.
That means:
Seamless aluminum gutters — no seams to leak or sag
Proper pitch — 0.25 to 0.5 inches per 10 feet toward downspouts
Secure mounting — hidden hangers every 24 inches, screwed into fascia (not just nailed)
Adequate downspouts — one downspout per 30-40 feet of gutter, with extensions that carry water at least 6 feet from the foundation
Regular cleaning — at minimum, clean gutters in late fall before the first freeze
We've installed thousands of feet of seamless gutters across Macomb County, Oakland County, and St. Clair County. When they're installed right and paired with a properly insulated attic, ice dams become rare.
Signs Your Home Has an Ice Dam Problem
Not sure if you're dealing with ice dams or just normal winter ice? Here are the warning signs:
Icicles longer than 6 inches hanging from your gutters or roof edge
Thick ice buildup at the edge of your roof, visible from the ground
Water stains on interior ceilings near exterior walls, especially in upstairs bedrooms or along the roofline
Sagging or detached gutters after a winter storm
Ice visible inside gutters during freezing weather
Peeling paint or rot on fascia boards or soffit panels
Damp insulation in the attic near the roof edge
If you're seeing any of these, it's time to call a contractor who understands building science — not just someone who'll install heat cables and call it good.
When to Call a Professional
If you're already dealing with active ice dams and water is leaking into your home, don't try to chip the ice off yourself. You can damage shingles, gutters, and hurt yourself in the process.
Call a licensed contractor who can safely remove the ice (usually with steam, not hammers) and assess the underlying problem. Then schedule an attic inspection for spring. That's when we can see the full extent of insulation and ventilation issues and plan the right fix.
NEXT Exteriors offers comprehensive exterior services in Detroit that address the whole system — not just the symptom.
What Michigan Homeowners Can Do Right Now
You don't have to wait for a contractor to take action. Here's what you can do this season:
Clean Your Gutters Before the First Freeze
Late October or early November — before the first hard freeze — get up there (safely) and clear out all leaves, twigs, and debris. Flush the gutters with a hose to make sure downspouts are clear. If you're not comfortable on a ladder, hire someone. It's cheaper than fixing water damage.
Check Your Attic Insulation
Go into your attic on a cold day and look at the underside of your roof deck. If you see frost or moisture, you have a heat loss problem. Check the depth of your insulation — if you can see the tops of your ceiling joists, you don't have enough.
Look for gaps around chimneys, plumbing vents, and the attic hatch. Those are the biggest sources of air leaks.
Inspect Your Roof After Every Storm
After heavy snow, look at your roof from the ground. If you see bare spots where snow has melted while the rest of the roof is still covered, that's a heat loss zone. Those are the areas where ice dams will form.
Why Heat Cables Are a Band-Aid
Heat cables (also called heat tape) are electric wires you install along the roof edge to melt ice. They work — sort of. They'll melt a channel through the ice so water can drain, but they don't stop ice dams from forming. You're just treating the symptom, and you're paying for electricity all winter.
Heat cables are a temporary measure for homes that can't get attic work done until spring. They're not a permanent solution.
Pro Tip: If you're planning to sell your home in the next few years, fixing ice dam problems now will prevent red flags during the buyer's inspection. Water stains on ceilings are deal-killers.
Cost Reality: Preventing Ice Dams in Southeast Michigan
Let's talk money. Homeowners want to know: what does it actually cost to fix this?
Attic Insulation and Air Sealing
For a typical 1,500-square-foot ranch home in Shelby Township or Chesterfield, upgrading attic insulation to R-49 or R-60 (including air sealing) runs $2,000 to $4,500, depending on access and existing conditions.
That includes sealing penetrations with spray foam, installing baffles to protect soffit vents, and blowing in cellulose or fiberglass insulation to code depth.
It's not cheap, but it pays for itself in lower heating bills (typically 15-25% reduction) and prevents thousands in water damage repairs. Plus, many utility companies offer rebates for insulation upgrades — DTE Energy and Consumers Energy both have programs.
Seamless Gutter Replacement
Seamless aluminum gutters cost $6 to $12 per linear foot installed, depending on the home's height, gutter size (5-inch or 6-inch), and downspout configuration.
For an average home with 150 linear feet of gutters, expect to pay $900 to $1,800. That includes hidden hangers, end caps, downspouts, and extensions.
If your fascia boards are rotted (common on older homes), add $500 to $1,500 for fascia replacement before the gutters go up.
Roof Ventilation Upgrades
Adding or upgrading ridge vents during a roof replacement adds $300 to $800 to the project. If you're not replacing the roof, retrofitting ridge vents costs $1,200 to $2,500, depending on roof complexity.
Soffit vent installation or repair runs $300 to $1,000, depending on how much soffit needs to be opened or replaced.
Long-Term Savings
Compare those costs to repairing ice dam damage:
Ceiling drywall repair: $500 to $2,000
Fascia and soffit replacement: $1,000 to $3,000
Roof deck repair from water infiltration: $1,500 to $5,000
Foundation repairs from chronic overflow: $3,000 to $10,000+
Preventing the problem is always cheaper than fixing the damage. And if you're already planning window replacement in Detroit or exterior painting in Southeast Michigan, bundling insulation and gutter work into the same project can save on labor costs.
Insurance Considerations
Most homeowners insurance policies cover sudden ice dam damage (like a ceiling leak), but they won't cover the cost of fixing the underlying insulation or ventilation problem. That's considered maintenance.
If you file a claim for ice dam damage, expect your insurance company to ask what you've done to prevent future occurrences. Documenting attic insulation upgrades and gutter maintenance can help if you ever need to file another claim.
Ready to Get Started?
NEXT Exteriors has been protecting Michigan homes since 1988. Get a free, no-pressure estimate from a team that shows up on time and does the job right.
Or call us: (844) 770-6398
Frequently Asked Questions
Do gutter guards prevent ice dams?
+
Gutter guards keep debris out, which helps water flow freely — but they don't prevent ice dams. Ice dams form because of heat escaping through your roof, not because of clogged gutters. Guards can reduce maintenance, but they won't solve the underlying attic insulation problem. We've seen plenty of homes with gutter guards that still get ice dams every winter.
Can I just remove the snow from my roof to prevent ice dams?
+
Yes, removing snow can help reduce ice dam formation — but it's dangerous, labor-intensive, and only a temporary fix. If you're going to do it, use a roof rake from the ground (never get on a snow-covered roof). The real solution is fixing your attic so the snow doesn't melt in the first place.
How much insulation should a Michigan attic have?
+
Michigan building code recommends R-49 to R-60 for attics. That's about 16 to 20 inches of blown-in fiberglass or cellulose insulation. Most homes built before 2000 have R-19 or less. Upgrading to code levels significantly reduces heat loss and prevents ice dams.
Will new gutters stop ice dams?
+
New gutters alone won't stop ice dams, but they'll prevent the secondary damage (overflow, detachment, fascia rot) that happens when ice blocks the gutter system. The key is pairing new seamless gutters with proper attic insulation and ventilation. That's the system that works.
Is it normal to have icicles on my house in winter?
+
Small icicles (2-3 inches) after a sunny day are normal — that's just snow melting and dripping off the edge. But icicles longer than 6 inches, or thick ice buildup along the entire roof edge, are signs of heat loss and potential ice dam problems. That's not normal, and it's worth investigating.
Can ice dams damage my roof?
+
Absolutely. When water backs up behind an ice dam, it can seep under shingles and soak the roof deck, causing rot, mold, and structural damage. It can also leak into your attic and down through ceilings. Ice dams can also rip gutters off the house and crack fascia boards. Left unchecked, they cause thousands in damage.
When should I call a contractor about ice dams?
+
Call immediately if you see water stains on your ceilings, active leaks, or gutters pulling away from the house. For prevention, schedule an attic inspection in spring or fall — before winter hits. A licensed contractor can assess your insulation, ventilation, and gutter system and recommend the right fixes before the next ice dam season.
Gutter Guards in Michigan: Who Benefits & Who Shouldn't Bother
Not every Michigan home needs gutter guards. Learn who benefits most from them—and who's better off skipping them—from a licensed contractor with 35+ years of experience.
By:
NEXT Exteriors
Published:
February 19, 2026
Read time:
11 minutes
Here's the truth about gutter guards in Michigan: they're not a universal solution. After 35 years installing seamless gutters in Detroit, MI and throughout Southeast Michigan, I've seen homeowners spend thousands on gutter protection systems they didn't need—and I've seen others who absolutely should have installed them years ago.
The difference comes down to your specific situation: the trees around your home, your roof design, your physical ability to maintain gutters, and whether your existing gutter system is even healthy enough to warrant the investment. This isn't about upselling you on something—it's about helping you make the right call for your property in Macomb, Oakland, or St. Clair County.
Let's walk through who actually benefits from gutter guards in Michigan's climate, and who's better off saving their money.
What Gutter Guards Actually Do (And What They Don't)
Gutter guards—also called gutter covers, leaf guards, or gutter screens—are designed to keep debris out of your gutters while allowing water to flow through. The basic premise is simple: block the leaves, seeds, and twigs, but let rainwater and snowmelt pass.
But here's what most homeowners don't realize until after installation: gutter guards reduce maintenance, they don't eliminate it. You'll still need to clean them occasionally, especially in Michigan where we deal with pine needles, maple seeds (those helicopter things), oak tassels, and the fine silt that accumulates from our freeze-thaw cycles.
The Main Types You'll See in Southeast Michigan
Not all gutter guards perform the same, especially in our climate:
Mesh screens: Fine metal mesh that sits over the gutter opening. Good for most leaf types, but small debris can still get through. Affordable option for homes with moderate tree coverage.
Reverse-curve (surface tension) guards: These guide water around a curved surface into the gutter while debris falls off the edge. Work well in heavy rain, but can struggle with Michigan's slow, steady autumn drizzle when leaves stick to wet surfaces.
Foam inserts: Porous foam that fits inside the gutter. Inexpensive, but they can trap fine debris and break down over time, especially with our UV exposure in summer and freeze-thaw in winter.
Micro-mesh systems: The highest-performing (and most expensive) option. Surgical-grade stainless steel mesh that blocks even pine needles and roof grit. This is what we typically recommend for homes surrounded by mature trees in places like Rochester Hills or Bloomfield Hills.
Michigan Reality Check: Any gutter guard system will accumulate some debris on top. In fall, you'll still need to blow or brush off the guards themselves—but that's a 20-minute job from the ground with a leaf blower, not a dangerous ladder climb with a scoop and bucket.
The other thing gutter guards don't do? They don't fix existing problems. If your gutters are sagging, pulling away from the fascia, or improperly pitched, guards won't help. In fact, they'll make diagnosis harder because you can't see inside the gutter without removing the guards. That's why our team at NEXT Exteriors always inspects the entire gutter system before recommending guards—sometimes the better investment is new seamless gutters first.
Who Benefits Most from Gutter Guards in Southeast Michigan
Let's get specific. Here are the situations where gutter guards make genuine financial and practical sense in Michigan:
1. Homes Surrounded by Mature Trees
If your property in Troy, Sterling Heights, or Shelby Township has multiple large oaks, maples, or pines within 30 feet of your roofline, you're cleaning gutters at least three times a year—spring (oak tassels and seeds), fall (leaves), and possibly winter (pine needles and twigs from ice storms).
The math is straightforward: professional gutter cleaning runs $150-250 per visit in Southeast Michigan. Three cleanings a year = $450-750 annually. Quality micro-mesh gutter guards cost $8-12 per linear foot installed. For a typical 150-foot gutter system, you're looking at $1,200-1,800. That's a 2-3 year payback, and then you're ahead—plus you avoid the safety risk of repeated ladder work.
The specific trees matter, too. Pin oaks drop tassels and small leaves that slip through basic screens. White pines shed needles year-round. If you've got these species, micro-mesh is the only type worth considering.
2. Two-Story Homes and Difficult Rooflines
Many homes in Lake Orion, Rochester Hills, and Grosse Pointe Farms have steep rooflines, dormers, or second-story gutters that make DIY cleaning dangerous and professional cleaning expensive. If you need a 32-foot extension ladder and scaffolding just to reach your gutters safely, guards become a safety investment, not just a convenience.
We've seen too many homeowners fall from ladders trying to save $200 on gutter cleaning. If your home requires more than a standard 24-foot ladder to access gutters safely, factor that risk into your decision.
3. Aging Homeowners or Mobility Concerns
This is the most common reason we install gutter guards—and the most important. If you're in your 60s or 70s, or if you have any mobility limitations, climbing ladders to clean gutters isn't just inconvenient, it's a genuine fall risk. Gutter guards let you age in place safely without depending on others for routine maintenance.
We've installed guards for dozens of retired homeowners in Clinton Township and Macomb who want to maintain their homes independently. It's not about laziness—it's about safety and autonomy.
4. Homes with Specific Tree Species
Certain trees create gutter problems that guards solve particularly well:
Cottonwoods: The fluffy seeds clog gutters and downspouts completely. Micro-mesh guards block them effectively.
Willows: Fine, thin leaves that mat together and create slow-draining clogs. Guards prevent the initial accumulation.
Pines (white, red, or Scotch): Needles slip through most screens but get caught by micro-mesh systems.
If your property has these species and you're tired of cleaning gutters monthly, guards are worth it.
Who Should Skip Gutter Guards
Now let's talk about when gutter guards are a waste of money—because there are plenty of situations where they are.
1. Homes with Minimal Tree Coverage
If you've got a newer subdivision home in Chesterfield or St. Clair Shores with young trees or minimal landscaping, you're probably cleaning gutters once a year, if that. Spending $1,500+ on gutter guards to avoid a $150 annual cleaning doesn't make financial sense. You're 10+ years from payback, and by then the guards may need replacement anyway.
Save your money. Clean your gutters once a year in late fall after the leaves drop. Takes an hour with a ladder and a scoop.
2. Homes with Existing Gutter Problems
This is critical: gutter guards are not a Band-Aid for failing gutters. If your gutters are:
Sagging or pulling away from the fascia
Improperly pitched (standing water after rain)
Undersized for your roof area
Damaged or rusted through
Missing downspouts or extensions
...then guards won't help. In fact, they'll hide the problem and potentially make it worse. Water that can't enter a clogged or poorly functioning gutter system will overflow, and you won't see it happening under the guards until you've got foundation damage or rotted fascia.
We always inspect the full gutter system before quoting guards. Sometimes the honest recommendation is: "Your gutters need replacement first. Let's talk about that, and we can add guards during installation if you want them."
3. Budget-Conscious Homeowners with Accessible Rooflines
If you're comfortable on a ladder, your home is a single-story ranch, and you've got basic tree coverage, DIY gutter cleaning twice a year is perfectly reasonable. There's no shame in that. It's $50 in equipment (a scoop, gloves, and a bucket) and an hour of your time in spring and fall.
Gutter guards are a convenience product. If the convenience isn't worth $1,500-2,000 to you, skip them. Use that money toward other exterior services in Detroit that deliver more immediate value—like attic insulation or window replacement.
4. Homes with Ice Dam Issues
This surprises people, but it's important: if your home has recurring ice dams, gutter guards can make the problem worse.
Ice dams form when heat escapes through your attic, melts snow on the roof, and that water refreezes at the cold eave edge. The ice backs up under shingles and causes leaks. Gutter guards don't prevent ice dams—inadequate attic insulation and ventilation cause them.
When ice forms on top of gutter guards, it can create a thicker ice shelf that extends further up the roof, making the dam worse. We've removed gutter guards from homes in Royal Oak and Warren specifically because they were contributing to ice dam damage.
If you have ice dam problems, the solution is better attic insulation and ventilation—not gutter guards. Fix the root cause first.
Michigan-Specific Gutter Guard Considerations
Our climate creates unique challenges that national gutter guard companies don't always account for. Here's what 35 Michigan winters have taught us:
Freeze-Thaw Cycles and Ice Buildup
Southeast Michigan averages 30-40 freeze-thaw cycles per winter. Water gets under gutter guards, freezes, expands, and can pop guards loose or damage the gutter itself. Cheap snap-on guards fail within 2-3 winters. Quality systems with proper fastening (screwed into the fascia or gutter lip, not just clipped on) survive our climate. This is why we only install guards that we know will last through Michigan winters—we've seen too many failures with the big-box store options.
Lake-Effect Snow and Ice Loading
If you're in St. Clair County or near Lake St. Clair, you know about lake-effect snow. Heavy, wet snow loads can bend gutter guards, especially the thin aluminum varieties. Micro-mesh systems with reinforced frames handle snow weight better. We've replaced dozens of failed guards on lakefront properties in Grosse Pointe and St. Clair Shores—the cheap ones just don't hold up to the snow load.
Pine Needles vs. Maple Seeds vs. Oak Leaves
Different debris requires different guard types. In areas with heavy pine coverage (common in northern Macomb and Oakland counties), only micro-mesh stops needles effectively. In neighborhoods with mature maples, the helicopter seeds can slip through basic screens but get caught by finer mesh. Oak leaves are large and easier to block, but the tassels in spring are tiny and slip through everything except micro-mesh.
A good contractor will look at the actual trees around your home and recommend guards based on what they see—not just sell you whatever they have in the truck.
The Reality of Winter Maintenance
Here's what no one tells you: in Michigan, you may still need to knock ice and snow off your gutter guards in winter. If we get a heavy wet snow followed by a freeze, that snow can bridge across the guards and create an ice dam effect. A roof rake or a broom from the ground usually handles it, but it's still maintenance.
Gutter guards reduce maintenance. They don't eliminate it. Anyone who tells you otherwise is selling, not educating.
Contractor Tip: If you install gutter guards, make sure your roofing system has proper ice and water shield at the eaves and adequate attic ventilation. Guards don't prevent ice dams—proper building science does.
The Real Cost Analysis
Let's break down the actual numbers for Southeast Michigan in 2026:
Professional Gutter Cleaning Costs
Single cleaning: $150-250 depending on home size and accessibility
Annual contract (2-3 cleanings): $400-700
Emergency cleanings (overflowing gutters): $200-300
Gutter Guard Installation Costs
Basic mesh screens: $3-5 per linear foot installed
Mid-grade aluminum guards: $6-8 per linear foot installed
Premium micro-mesh systems: $8-12 per linear foot installed
For a typical 150-foot gutter system (average for a 2,000 sq ft home), you're looking at:
Basic: $450-750
Mid-grade: $900-1,200
Premium: $1,200-1,800
The Payback Calculation
If you're cleaning gutters professionally three times a year at $200 per cleaning, that's $600 annually. A $1,500 micro-mesh system pays for itself in 2.5 years. After that, you're saving $600 every year.
But if you're only cleaning once a year at $150, that same system takes 10 years to break even. That's a different calculation.
The honest answer? Gutter guards make financial sense if you're spending $400+ per year on cleaning, or if the safety benefit is worth the premium to you. If you're spending less, or if you DIY, the math gets harder to justify.
Hidden Costs to Consider
Quality gutter guards should last 15-20 years, but cheaper systems may need replacement in 5-7 years, especially in Michigan's climate. Factor that into your decision. Also consider:
If your fascia is rotted or damaged, it needs repair before guard installation (adds $500-1,500 depending on extent)
If your gutters are old or failing, replacement first is smarter (new seamless gutters: $6-10 per linear foot)
Some roofing warranties require accessible gutters for inspection—check before installing guards
At NEXT Exteriors, we're upfront about these costs during the estimate. If we think you're better off replacing gutters first, or skipping guards altogether, we'll tell you. That's part of changing contractor culture—no upselling, just honest advice based on what we see at your property.
When to Call a Professional
Whether you decide to install gutter guards or not, here are the signs your gutter system needs professional attention:
Immediate Red Flags
Water overflowing during rain: Means clogs, improper pitch, or undersized gutters
Gutters pulling away from the fascia: Indicates failed fasteners or rotted fascia board
Sagging sections: Usually from standing water (improper pitch) or inadequate hangers
Visible rust or holes: Time for replacement, not guards
Water stains on siding below gutters: Leaking seams or overflowing gutters
Foundation erosion or basement moisture: Gutters aren't directing water away from the house
Any of these issues needs fixing before you even consider gutter guards. Guards on failing gutters just hide the problem until it causes expensive damage to your fascia, soffit, or foundation.
Questions to Ask Any Contractor
If you're getting quotes for gutter guards in Southeast Michigan, ask these questions:
"Will you inspect my existing gutters first?" If they say no, walk away. Responsible contractors assess the system before recommending guards.
"What type of guards do you recommend for my specific trees?" If they don't look at your trees or give a generic answer, they're not tailoring the solution to your property.
"How are the guards fastened?" Snap-on systems fail in Michigan winters. Look for screwed or properly clipped systems that won't pop loose under ice and snow.
"What's the warranty, and what does it cover?" Quality systems come with 15-20 year warranties. Read the fine print—some only cover the product, not the installation.
"Do I still need to maintain them?" If they say "never," they're lying. Honest answer: minimal maintenance, but not zero.
What Quality Installation Looks Like
When we install gutter guards at NEXT Exteriors, here's what you should see:
Complete gutter cleaning and inspection before installation
Any necessary repairs to fascia, gutters, or hangers completed first
Guards installed with proper fastening (screwed into fascia or gutter lip, not just clipped)
Proper overlap and sealing at seams to prevent debris entry
Downspout guards or screens to prevent clogs at the outlet
Final water test to confirm proper flow
The installation should take most of a day for a typical home. If a crew claims they can do it in an hour, they're cutting corners.
Beyond Gutters: While we're talking about your home's exterior, it's worth considering how all your systems work together. Gutters are just one part of protecting your home from Michigan weather. Your siding, roofing, windows, and insulation all play a role in keeping water out and energy costs down. A comprehensive approach usually saves money in the long run.
If you're also considering exterior painting, coordinate it with gutter work—it's easier to paint fascia and soffit when gutters are temporarily down for guard installation or replacement.
Ready to Get Started?
NEXT Exteriors has been protecting Michigan homes since 1988. Whether you need new gutters, gutter guards, or a full exterior assessment, we'll give you honest advice based on what we actually see at your property—no pressure, no gimmicks. Get a free, no-obligation estimate from a team that shows up on time and does the job right.
Or call us: (844) 770-6398
Frequently Asked Questions About Gutter Guards in Michigan
Do gutter guards work in Michigan winters?
Yes, but with caveats. Quality micro-mesh systems work well in Michigan winters if properly installed. However, no gutter guard completely prevents ice buildup during freeze-thaw cycles. You may still need to knock snow and ice off the guards occasionally. The key is choosing a system designed for northern climates with proper fastening that won't pop loose under ice expansion. Cheap snap-on guards typically fail within 2-3 Michigan winters.
Will gutter guards prevent ice dams?
No. Ice dams are caused by heat escaping through your attic, melting snow on the roof, which then refreezes at the cold eave edge. Gutter guards don't address the root cause—inadequate attic insulation and ventilation. In some cases, ice forming on top of gutter guards can actually make ice dams worse by creating a thicker ice shelf. If you have ice dam problems, fix your attic insulation and ventilation first before considering gutter guards.
How much do gutter guards cost in Southeast Michigan?
Professional installation ranges from $3-12 per linear foot depending on the system quality. For a typical 150-foot gutter system, expect $450-750 for basic mesh screens, $900-1,200 for mid-grade aluminum guards, and $1,200-1,800 for premium micro-mesh systems. The higher-end systems last longer in Michigan's climate and require less maintenance. DIY options are cheaper upfront but often fail within a few years in our freeze-thaw cycles.
Do I still need to clean gutters with gutter guards?
Yes, but much less frequently. Gutter guards reduce maintenance by 80-90%, but they don't eliminate it. You'll still need to brush or blow debris off the top of the guards once or twice a year, and occasionally rinse them with a hose. The difference is you can usually do this from the ground with a leaf blower instead of climbing a ladder with a scoop. Fine debris like roof grit and pollen can still accumulate on top of guards and need removal.
What type of gutter guard works best for pine needles?
Micro-mesh systems are the only type that effectively blocks pine needles. Basic screens and foam inserts let needles slip through, and reverse-curve guards can't prevent needles from washing into the gutter during rain. Look for surgical-grade stainless steel micro-mesh with openings smaller than 50 microns. These systems cost more ($8-12 per linear foot installed) but are the only option that works for homes surrounded by white pines, red pines, or Scotch pines common in Southeast Michigan.
Should I install gutter guards myself or hire a professional?
It depends on your skill level and your home's specifics. DIY installation can work for simple ranch homes with basic mesh screens, but professional installation is worth it for two-story homes, complex rooflines, or premium systems. Professionals ensure proper fastening (critical in Michigan's freeze-thaw cycles), correct gutter pitch, and identify underlying gutter problems before installing guards. Poor DIY installation often leads to guards popping loose in winter or water overflow issues. If you're not comfortable on a ladder or your home requires more than a 24-foot ladder, hire a professional.
Are gutter guards worth it if I only have a few trees?
Probably not. If you're only cleaning gutters once a year and it's a simple job, the 10+ year payback period doesn't make financial sense. Save your money for other home improvements. Gutter guards make sense when you're surrounded by mature trees requiring 3+ cleanings per year, when you have a difficult-to-access roofline, or when safety concerns make ladder work risky. For minimal tree coverage, annual DIY cleaning is the smarter choice.
Clogged Gutters = Basement Problems: The Chain Reaction
Learn how clogged gutters trigger basement flooding in Michigan homes. A licensed contractor explains the chain reaction and how to protect your foundation.
By:
NEXT Exteriors
Published:
February 19, 2026
Reading time:
9 minutes
Why Your Gutters Matter More Than You Think
Last November, I got a call from a homeowner in Sterling Heights. She'd just discovered water seeping through her basement wall — right after the first big freeze-thaw cycle of the season. When I asked about her gutters, there was a pause. "I haven't cleaned them in... maybe three years?"
That's the conversation I have at least once a week during Michigan's wet seasons. Homeowners see gutters as an afterthought — until water shows up in their basement. By then, what started as a $200 gutter cleaning has turned into a multi-thousand-dollar foundation problem.
Here's what most people don't realize: your gutters aren't just there to keep water off your head when you walk out the front door. They're the first line of defense protecting your foundation from thousands of gallons of water every year. When they fail, the damage follows a predictable chain reaction — and it always ends in your basement.
I've been doing exterior services in Detroit and across Southeast Michigan since 1988. In that time, I've seen this same pattern play out hundreds of times. The good news? Once you understand how the chain reaction works, it's completely preventable.
How the Chain Reaction Starts: Water Has to Go Somewhere
Let's start with some basic physics. A typical Michigan home with 1,500 square feet of roof collects about 935 gallons of water during a one-inch rainstorm. That's roughly seven 125-gallon hot water tanks' worth of water. During a heavy spring thunderstorm that dumps two or three inches? You're looking at 2,000+ gallons hitting your roof in a couple of hours.
When your gutters are working properly, that water flows through the system, down the downspouts, and gets discharged 6-10 feet away from your foundation. The ground absorbs it, or it runs off toward the street. Your foundation stays dry.
But when your gutters are clogged with leaves, shingle granules, and decomposing organic matter — which is the reality for most Michigan homes by late fall — that water has nowhere to go except over the edge. And where does it land? Right at the base of your foundation.
I see this constantly on jobs in Troy and Rochester Hills, especially on homes with mature oak and maple trees. The gutters fill up with leaves in October and November. The homeowner doesn't notice because everything looks fine from the ground. Then winter hits, the debris freezes into a solid mass, and when the spring thaw comes, the gutters are completely useless.
Now you've got meltwater and spring rain — Michigan gets about 3-4 inches of precipitation in March and April combined — cascading directly onto the soil around your foundation. That's when the real problems start.
Michigan-specific problem: Our freeze-thaw cycles make clogged gutters even more destructive. Water trapped in debris freezes, expands, and can crack gutter seams or pull hangers loose. Come spring, you don't just have clogged gutters — you have damaged gutters that can't function even after cleaning.
The Foundation Assault: What Happens Underground
Once water starts pooling around your foundation, you're dealing with hydrostatic pressure. That's the force water exerts when it's trying to find the path of least resistance. And concrete, despite being strong in compression, is porous. It has microscopic channels that water can penetrate, especially as it ages and develops hairline cracks.
Here's where Southeast Michigan's clay soil makes everything worse. We've got heavy clay content in the soil throughout Macomb County, Oakland County, and St. Clair County. Clay absorbs water and expands — sometimes by 10% or more of its original volume. When it's pressed against your foundation wall, that expansion creates enormous lateral pressure. We're talking thousands of pounds per square foot.
I've seen foundation walls in Shelby Township and Clinton Township with visible bowing from years of this pressure. The homeowners had no idea it was happening because it's slow and gradual. But every spring, when the soil saturates and expands, it pushes a little harder. Every winter, when it freezes, it pushes even more.
Eventually, something gives. Usually it's a crack in the foundation wall — either a new crack or the widening of an existing one. And once you have a crack, water doesn't need hydrostatic pressure anymore. It just walks right in.
This is where our seamless gutters in Detroit, MI make a real difference. Traditional sectional gutters have seams every 10 feet where sections connect. Those seams leak over time, especially after Michigan winters. Seamless gutters eliminate 90% of potential leak points, so water actually makes it to the downspouts instead of dripping along your foundation line.
Inside Your Basement: The Visible Damage
By the time water shows up inside your basement, the chain reaction is complete. What you're seeing is the end result of months — sometimes years — of water assault from above.
The first sign is usually efflorescence: those white, chalky deposits on your foundation walls. That's mineral salts being pulled out of the concrete as water migrates through. It looks harmless, but it's proof that water is actively moving through your foundation.
Next comes actual seepage. You'll see damp spots on the wall, usually near the bottom where the wall meets the floor. In finished basements, this often shows up as water stains on drywall or carpet that feels damp in the corners. I've pulled back carpet in Grosse Pointe Farms basements and found black mold growing on the padding — all from gutter overflow that the homeowner never connected to the basement moisture.
If the problem continues, you get standing water. Your sump pump (if you have one) starts running constantly during wet weather. If you don't have a sump pump, water pools in low spots or along walls. This is when homeowners panic and call a basement waterproofing company — which is treating the symptom, not the cause.
The worst cases involve structural damage. I've been in basements in Warren and St. Clair Shores where horizontal cracks run the length of the foundation wall, with visible inward bowing. At that point, you're not just dealing with water intrusion — you're dealing with structural instability that requires engineering-level intervention.
And all of this — every bit of it — started with clogged gutters.
The Cost Reality: Gutters vs. Foundation Repair
Let's talk numbers, because this is where the chain reaction really stings.
Gutter cleaning: Professional gutter cleaning in Southeast Michigan runs $150-$300 for a typical single-family home, depending on house size and gutter condition. You should do this twice a year — late spring and late fall. Annual cost: $300-$600.
Gutter replacement: If your gutters are old, damaged, or poorly installed, a complete gutter installation in Southeast Michigan with seamless aluminum gutters typically runs $1,200-$2,500 for an average home. Add gutter guards, and you're looking at $2,000-$4,000 total. This is a one-time investment that lasts 20-30 years with minimal maintenance.
Foundation crack repair: Sealing a foundation crack from the outside (the proper way to fix it) costs $500-$1,500 per crack, depending on length and severity. Interior sealants are cheaper but don't address the root problem.
Interior basement waterproofing: A full interior waterproofing system — which includes a perimeter drain, sump pump, and vapor barrier — runs $5,000-$15,000 for a typical Michigan basement. This is what contractors install when water intrusion is already a chronic problem.
Foundation wall repair: If you've got bowing or structural damage, you're looking at $10,000-$30,000+ for carbon fiber reinforcement, wall anchors, or helical piers. This is major structural work that requires engineering analysis and permits.
Mold remediation: Professional mold removal in a basement runs $2,000-$6,000 depending on the extent of contamination. And if you have finished basement spaces with drywall, flooring, and insulation, you're adding demolition and reconstruction costs on top of that.
So we're comparing $300-$600 per year for gutter maintenance — or $2,000-$4,000 for a permanent gutter solution — against potential foundation and basement repair costs of $20,000, $30,000, or more.
The math isn't complicated. The gutters always win.
Insurance reality check: Most homeowner's insurance policies exclude water damage from "maintenance issues" — which includes clogged gutters. If your basement floods because you didn't maintain your gutters, you're paying out of pocket. Don't count on your insurance company to bail you out.
Prevention: Breaking the Chain Before It Starts
The good news is that preventing this entire chain reaction is straightforward. You just need to keep water moving where it's supposed to go.
Clean Your Gutters Twice a Year
This is non-negotiable in Michigan. Clean them in late spring after tree pollination (usually May) and again in late fall after the leaves drop (November). If you have a lot of trees — especially oaks, maples, or pines — you might need a mid-season cleaning too.
When you clean, don't just scoop out the big stuff. Flush the gutters and downspouts with a hose to make sure water flows freely all the way to the discharge point. Check for sagging sections, loose hangers, and leaks at seams or corners.
Extend Your Downspouts
Your downspouts need to discharge water at least 6-10 feet away from your foundation. I see too many homes in Lake Orion and Bloomfield Hills where downspouts dump water right at the foundation line. That defeats the entire purpose of the gutter system.
Use solid downspout extensions, not the flimsy corrugated ones that collapse or get kicked around. Bury them if you want a cleaner look, but make sure they slope away from the house and terminate in an area with good drainage.
Check Your Grading
The soil around your foundation should slope away from the house at a minimum of 6 inches over the first 10 feet. This ensures that even if some water does land near the foundation — from rain splash or minor gutter overflow — it runs away instead of pooling.
A lot of older Michigan homes have settled over the decades, creating low spots against the foundation. If that's your situation, add soil to re-establish proper grading. It's a simple fix that makes a huge difference.
Consider Gutter Guards
If you're tired of climbing ladders twice a year — or if you have a steep roof that makes gutter cleaning dangerous — invest in quality gutter guards. Not the cheap plastic screens from the hardware store; I'm talking about professionally installed systems with a proven track record in Michigan winters.
Good gutter guards reduce maintenance by about 80-90%. You'll still need to inspect and occasionally rinse them, but you won't be scooping out pounds of wet leaves every fall.
Inspect After Storms
Michigan's spring and summer storms can be intense. After a heavy rain or windstorm, take a quick walk around your house and look for signs of gutter overflow — water stains on siding, eroded soil near downspouts, or standing water around the foundation. Catching problems early prevents the chain reaction from starting.
While you're thinking about exterior maintenance, remember that your Detroit roofing services should include regular inspections too. Damaged shingles or flashing can contribute to water problems, especially where the roof meets the gutters.
When to Call a Professional
Some gutter and foundation problems are DIY-friendly. Others require professional expertise — and knowing the difference can save you from making an expensive mistake.
Call a Professional If You Notice:
Gutters sagging or pulling away from the fascia: This usually means the hangers are failing or the fascia board is rotting. Both require proper repair before the gutter tears completely loose.
Rust holes or cracks in gutters: Patching rarely works long-term. If your gutters are rusting through, it's time for replacement.
Water stains on siding below the gutter line: This indicates overflow or leaks that need to be traced and fixed.
Basement moisture that appears during or after rain: This is the chain reaction in action. A professional can assess both your gutters and your foundation to determine the source and proper fix.
Foundation cracks wider than 1/4 inch: Large cracks or cracks that are growing need professional evaluation. They may indicate structural movement that requires more than simple sealing.
Visible bowing in foundation walls: This is a structural emergency. Don't wait — get a licensed contractor or structural engineer out immediately.
At NEXT Exteriors, we've been handling these exact issues across Southeast Michigan for over 35 years. When we inspect a home for gutter services, we don't just look at the gutters themselves. We check the fascia, the roof edge, the downspout discharge points, and the grading around the foundation. We're looking at the whole water management system, because that's the only way to prevent the chain reaction.
We also coordinate with foundation specialists when needed. If you've got basement water problems that started with failed gutters, we can help you understand whether fixing the gutters alone will solve the issue, or if you need foundation work first. No upselling, no runaround — just honest assessment based on what we see.
What a proper gutter inspection includes: Checking gutter pitch and alignment, inspecting all seams and end caps for leaks, testing downspout flow, examining fascia and soffit for rot or damage, verifying proper downspout extensions, and assessing overall system capacity for your roof size. This takes 30-45 minutes for a thorough job — not the 5-minute drive-by estimate some companies offer.
The Bottom Line: An Ounce of Prevention
The chain reaction from clogged gutters to basement problems is predictable, preventable, and surprisingly common in Michigan. I've seen it play out in every city we serve — from Detroit to Mount Clemens, from Royal Oak to Chesterfield.
The homeowners who avoid this problem aren't lucky. They're just consistent about maintenance. They clean their gutters, they keep downspouts extended, and they pay attention to how water moves around their property. When they spot a problem, they fix it before it cascades into something bigger.
And when they need professional help — whether it's siding installation in Southeast Michigan, window replacement in Detroit, or comprehensive gutter work — they call someone who understands how all these systems work together.
Your home is a system. The roof sheds water to the gutters. The gutters move it away from the foundation. The foundation stays dry, and your basement stays livable. Break any link in that chain, and the whole system fails.
Don't let clogged gutters be the weak link. The basement you save will be your own.
Ready to Get Started?
NEXT Exteriors has been protecting Michigan homes since 1988. Get a free, no-pressure estimate from a team that shows up on time and does the job right. We'll inspect your gutters, assess your water management, and give you straight answers about what you need — not what we want to sell you.
Or call us: (844) 770-6398
More Resources from NEXT Exteriors
Looking for more information about protecting your Michigan home? Check out our comprehensive guides on insulation services in Southeast Michigan to improve energy efficiency, or learn about our exterior painting services using exclusive Sherwin-Williams products. For a complete overview of everything we offer, visit our services page.
Frequently Asked Questions
How often should I clean my gutters in Michigan?
+
Twice a year minimum: late spring (May) and late fall (November). If you have mature trees overhead — especially oaks, maples, or pines — consider adding a mid-season cleaning in July or August. Michigan's heavy leaf drop and spring pollen make regular cleaning essential to prevent overflow and ice dam formation in winter.
Can clogged gutters really cause foundation damage?
+
Absolutely. When gutters overflow, thousands of gallons of water saturate the soil around your foundation. In Southeast Michigan's clay soil, this creates hydrostatic pressure against foundation walls and can cause cracks, bowing, and water infiltration. Over time, this leads to basement flooding and structural problems that cost tens of thousands to repair.
How far should downspouts extend from my house?
+
At least 6-10 feet away from your foundation, discharging onto ground that slopes away from the house. Shorter extensions dump water too close to the foundation, defeating the purpose of your gutter system. Use solid extensions rather than corrugated ones, and consider burying them for a cleaner look while maintaining proper drainage.
Are seamless gutters worth the extra cost?
+
Yes, especially in Michigan. Seamless gutters eliminate 90% of the seams where traditional sectional gutters leak. After years of freeze-thaw cycles, sectional gutter seams fail and leak water along your foundation line. Seamless gutters last longer, require less maintenance, and provide better protection. The small upfront cost difference pays for itself in reliability.
What are the first signs of basement water problems from gutters?
+
Watch for efflorescence (white chalky deposits on foundation walls), damp spots near the wall-floor junction, musty odors, and increased sump pump activity during rain. Outside, look for eroded soil near downspouts, water stains on siding below gutters, and standing water around the foundation after storms. These are early warning signs that your gutter system isn't managing water properly.
Do gutter guards really work in Michigan winters?
+
Quality gutter guards work well, but avoid cheap plastic screens that ice over or collapse under snow load. Professional-grade systems with solid covers or fine mesh reduce debris by 80-90% while allowing water and melting snow to flow through. They won't eliminate all maintenance, but they significantly reduce the frequency of cleaning and help prevent ice dam formation along the gutter line.
When should I replace gutters instead of just cleaning them?
+
Replace gutters if you see rust holes, large cracks, sagging sections that can't be re-pitched, seams that leak even after resealing, or if they're pulling away from the fascia due to rotted mounting boards. Also consider replacement if your gutters are undersized for your roof area — many older Michigan homes have 4-inch gutters that should be upgraded to 5 or 6-inch for proper capacity during heavy storms.
Michigan Gutter Basics: Size, Pitch, Downspouts Explained
Learn what actually matters for gutter performance in Michigan: proper sizing for lake-effect snow, correct pitch for freeze-thaw cycles, and downspout placement from a licensed contractor.
NEXT Exteriors
•
February 19, 2026
•
9 min read
After 35 years installing seamless gutters in Detroit, MI and across Southeast Michigan, I can tell you this: most gutter problems don't come from the gutters themselves. They come from three fundamentals that got skipped during installation—size, pitch, and downspout placement.
Michigan's freeze-thaw cycles, lake-effect snow, and spring downpours create a perfect storm for gutter failure. A system that works fine in Georgia will fail here by March. The difference between a gutter that lasts 20 years and one that pulls away from your fascia in three winters comes down to understanding what actually matters in our climate.
This isn't about brand names or fancy coatings. It's about the building science fundamentals that keep water moving away from your foundation, prevent ice dams from tearing your fascia apart, and stop basement flooding before it starts.
Gutter Size—Why 5-Inch Is Standard (and When You Need 6-Inch)
Walk through any neighborhood in Sterling Heights or Rochester Hills and you'll see mostly 5-inch K-style gutters. That's the residential standard, and for most Michigan homes, it's the right choice. But "standard" doesn't mean it works for every situation.
Gutter sizing comes down to how much water your roof sheds during peak rainfall. In Southeast Michigan, we design for storms that dump 1.5 to 2 inches per hour—not uncommon during summer thunderstorms rolling off Lake St. Clair. Your gutter needs to handle that volume without overflowing.
The Math Behind Gutter Capacity
A 5-inch K-style gutter can handle approximately 1,200 square feet of roof area per downspout under typical Michigan rainfall conditions. That assumes proper pitch (we'll get to that) and adequate downspout spacing. If your roof has a steeper pitch—common on Colonial-style homes in Grosse Pointe Farms—water hits the gutter faster and harder, reducing effective capacity by 10-15%.
Here's when you need to consider 6-inch gutters:
Roof area exceeds 1,800 square feet per gutter run — Large ranch homes or homes with complex rooflines
Roof pitch is 8:12 or steeper — Water velocity overwhelms standard gutters
You have tall trees overhanging the roof — More debris volume requires larger capacity
Your home sits in a low spot — Poor drainage means gutters work harder
You're replacing old 6-inch gutters — The fascia is already sized for them
We installed 6-inch seamless gutters on a brick Colonial in Troy last spring. The homeowner had been dealing with overflow at the corners every storm. The problem wasn't the gutters—it was undersizing for a 2,400-square-foot roof with an 11:12 pitch. The upgrade solved it completely.
Michigan-Specific Consideration: Spring snowmelt can dump more water into your gutters than any rainstorm. A warm March day after heavy February snow creates runoff equivalent to 3-4 inches of rain in a few hours. If your gutters overflow during snowmelt, sizing is likely the issue.
Gutter Pitch—The Quarter-Inch Rule Everyone Gets Wrong
This is where most DIY installations fail and where plenty of contractors cut corners. Gutter pitch—the slope from the high end to the downspout—determines whether water flows or sits. Sitting water in Michigan winter? That's ice. Ice means weight. Weight means your gutters pull away from the fascia, and now you're calling someone like us to fix structural damage.
The Standard: Quarter-Inch Per 10 Feet
The building code standard is ¼ inch of slope for every 10 feet of gutter run. That's roughly 0.025 inches per foot—barely visible to the eye but critical for performance. Too little pitch and water pools. Too much and the gutter looks crooked, plus water moves so fast it overshoots the downspout opening.
Here's the problem: that quarter-inch rule assumes your fascia is perfectly level. On a 1960s ranch in Warren or Shelby Township, the fascia board has probably sagged a bit over 60 years. The roof sheathing might have settled. Your gutter installer needs to account for that, not just follow the fascia line.
How We Set Pitch Correctly
We use a laser level and chalk line to establish true pitch, independent of the fascia. Mark the high point, calculate drop to the downspout location, snap a line, and install to that line—not to the existing fascia curve. If the fascia is severely warped, we address that first as part of our Detroit roofing services, because you can't hang a proper gutter on bad substrate.
On longer runs—say 40 feet or more—we pitch from the center toward downspouts at both ends. This keeps pitch gradual and prevents the "ski slope" look some homeowners hate.
Winter Reality Check: When ice forms in a gutter with improper pitch, it doesn't just sit there. It expands. That expansion pushes against the fascia brackets, bending them outward. By spring, your gutters are sagging or detached. We see this every year in March and April across Macomb County.
Signs Your Pitch Is Wrong
Standing water visible in gutters after rain stops
Algae or moss growing inside the gutter channel
Overflow at corners or seams during moderate rain
Ice buildup in winter that doesn't drain during thaws
Gutters pulling away from fascia at the high end
Pitch problems don't fix themselves. If you're seeing these signs, the system needs adjustment or reinstallation. Trying to patch it with additional brackets just transfers stress to other weak points.
Downspout Placement and Sizing
A gutter is only as good as its ability to move water off the roof and away from the foundation. That's the downspout's job, and it's where we see the most shortcuts—both in placement and sizing.
The Downspout-to-Gutter Ratio
Standard residential practice: one downspout for every 30-40 feet of gutter, depending on roof area and rainfall intensity. In Southeast Michigan, we lean toward the conservative end—one downspout per 30 feet maximum, especially on homes with steep roofs or large overhangs.
Downspout size matters as much as quantity. Standard residential downspouts are 2x3 inches. For 5-inch gutters, that's adequate. For 6-inch gutters, you need 3x4-inch downspouts to match capacity. Undersized downspouts create a bottleneck—your gutters overflow even though they're properly sized and pitched.
Placement Strategy
Downspouts should discharge at least 6-10 feet away from the foundation. In Michigan's clay soil—common across Oakland and Macomb counties—water doesn't percolate quickly. It sits. It saturates. It finds its way into your basement through hydrostatic pressure against foundation walls.
We use solid extensions or underground drains to carry water to daylight or a dry well. Splash blocks alone don't cut it in Michigan. They work for the first season, then sink into the soil or get buried under mulch. Next spring, you've got water pooling at the foundation again.
Corner Downspouts vs. End Runs
Aesthetically, homeowners often prefer downspouts tucked into corners rather than running down the middle of a wall. We get it. But sometimes the roof geometry or gutter run length demands a mid-wall downspout for proper drainage. A competent installer will explain the trade-offs and give you options.
On homes where we're also handling house siding in Detroit, we can plan downspout placement to align with trim boards or corners, making them less visually intrusive. Coordination between trades matters—another reason to work with a full-service exterior contractor rather than a gutter-only crew.
Foundation Protection: More basement water problems in Southeast Michigan trace back to gutter and downspout failures than any other single cause. Proper gutter function isn't just about protecting your fascia—it's about protecting your foundation, your basement, and everything you've stored down there.
Material Choices That Hold Up in Michigan Weather
Material selection for gutters comes down to three factors: durability in freeze-thaw cycles, resistance to thermal expansion/contraction, and long-term maintenance requirements. Michigan weather tests all three harder than most climates.
Aluminum—The Residential Standard
Most residential gutters in Southeast Michigan are aluminum, and for good reason. It doesn't rust, it's lightweight (less stress on fascia), and it handles freeze-thaw cycles without cracking. Standard thickness is .027 or .032 inches—we use .032 for better rigidity and longer bracket spacing.
Aluminum's weakness is denting. Hail, falling branches, or a ladder leaned too hard can leave permanent dings. But for most homeowners, the trade-off is worth it. Aluminum gutters properly installed last 20-25 years in Michigan.
Steel—When You Need Extra Strength
Galvanized or galvalume steel gutters are stronger and more dent-resistant than aluminum. We use them on commercial projects or homes with heavy snow load concerns—think lake-effect snow zones near Lake St. Clair or homes with multiple roof valleys concentrating runoff.
Steel's downside: it's heavier (more stress on fascia and brackets) and it will eventually rust if the coating is compromised. Expect 15-20 years before corrosion becomes an issue, depending on maintenance.
Copper—The Premium Option
Copper gutters are beautiful, durable, and expensive. They develop a natural patina over time—green oxidation that protects the underlying metal. We've installed copper gutters on historic homes in Grosse Pointe Farms where aesthetics and longevity justify the cost. Expect 50+ years of service life.
Copper requires specialized soldering at seams and corners. It's not a DIY material, and not every gutter contractor has the skill set to work with it properly. If you're considering copper, make sure your installer has a portfolio of copper work—it's a different trade than aluminum.
Seamless vs. Sectional
Seamless gutters are formed on-site from a continuous coil, eliminating seams except at corners and downspout outlets. Fewer seams mean fewer leak points and cleaner appearance. Sectional gutters use pre-cut 10-foot lengths joined with connectors and sealant—more seams, more potential failure points.
In Michigan's freeze-thaw environment, seamless is the better choice. Ice expansion at seams is a common failure mode for sectional systems. Every spring we replace sectional gutters that have split at the seams after a tough winter. Seamless gutters in Detroit, MI and across Southeast Michigan simply perform better long-term.
Common Gutter Problems We Fix Every Spring
March and April are our busiest months for gutter repairs. Michigan winters reveal every installation shortcut and deferred maintenance issue. Here's what we see most often:
Ice Dam Damage
Ice dams form when heat escapes through your attic, melting snow on the roof. Meltwater runs down to the cold eaves, refreezes, and backs up under shingles. The ice also fills gutters, adding hundreds of pounds of weight. Brackets bend. Gutters pull away. Fascia boards rot.
The fix isn't better gutters—it's better attic insulation in Metro Detroit and proper ventilation. We address ice dams as part of a whole-house approach, because replacing gutters without fixing the attic just means you'll be replacing them again in five years.
Gutters Pulling Away From Fascia
This happens for three reasons: improper bracket spacing, bad fascia substrate, or ice/debris weight. Standard bracket spacing is 24 inches on center—we use 18 inches in Michigan for better snow load distribution.
If the fascia board itself is rotted or water-damaged, no amount of brackets will hold. We often discover fascia rot during gutter replacement, especially on homes with old roofing in Southeast Michigan where ice dams have been a chronic problem. The fascia gets replaced before new gutters go up.
Downspouts Draining at Foundation
Extensions get knocked off by lawnmowers, buried under mulch, or removed and never replaced. Water dumps right at the foundation. Clay soil saturates. Hydrostatic pressure builds. Basement walls crack or leak.
We install solid PVC extensions or bury 4-inch corrugated pipe to carry water at least 10 feet from the foundation. It's not glamorous work, but it prevents thousands in foundation and basement repairs down the road.
Clogs and Overflow
Leaves, shingle granules, and debris accumulate in gutters. When they clog, water overflows, defeating the entire purpose of the system. Gutter guards help but aren't foolproof—fine debris still gets through, and some guards create ice dam problems in winter.
We recommend twice-yearly cleaning—spring and fall—as the baseline. Homes with heavy tree coverage need more frequent attention. If you're not comfortable on a ladder, hire it out. Gutter cleaning is cheap compared to the water damage from a clogged system.
When to Call a Professional
Some gutter work is DIY-friendly—cleaning, minor bracket adjustments, resealing a small leak. But installation and major repairs require specialized tools, material knowledge, and an understanding of building science that most homeowners don't have.
Signs You Need Professional Help
Gutters are sagging or pulling away from the house — Structural issue requiring proper fastening and possibly fascia repair
Water overflows during moderate rain — Sizing, pitch, or downspout placement problem
Ice dams form every winter — Attic insulation and ventilation issue, not just a gutter problem
Basement floods after heavy rain — Downspout drainage inadequate or improperly placed
Gutters are 20+ years old — Likely nearing end of service life; replacement more cost-effective than repeated repairs
Visible rust, holes, or cracks — Material failure; patching is temporary at best
What a Proper Installation Includes
When you hire NEXT Exteriors for gutter work, here's what you're getting:
Site assessment including roof area calculation, pitch measurement, and drainage evaluation
Fascia inspection and repair if needed—we don't hang new gutters on bad substrate
Seamless gutter fabrication on-site for exact-fit runs with minimal seams
Proper pitch using laser level, not eyeballing or following sagging fascia
Hidden hangers or brackets at 18-inch spacing for Michigan snow loads
Downspouts sized to match gutter capacity with extensions to carry water away from foundation
Coordination with other exterior services in Detroit if you're doing roofing, siding, or trim work at the same time
We've been doing this since 1988. We know what works in Michigan weather and what fails. Our crews show up on time, work carefully around your landscaping, and clean up when the job's done. No drama. No surprises. Just solid work backed by our reputation and a real warranty.
Integrated Exterior Approach: Gutters don't exist in isolation. They interact with your roof, fascia, siding, and foundation drainage. That's why working with a full-service contractor like NEXT Exteriors—offering window replacement, exterior painting, and all other exterior services—makes sense. We see the whole system, not just one component.
Cost Reality for Southeast Michigan
Seamless aluminum gutter installation in Southeast Michigan typically runs $8-12 per linear foot installed, depending on home height, access difficulty, and downspout requirements. A typical 150-foot installation (average single-story ranch) costs $1,200-1,800.
Add $200-400 for fascia repairs if needed. Add $300-600 for underground drainage extensions. Premium materials like steel or copper cost significantly more—copper can run $25-40 per linear foot.
That's not cheap, but it's a fraction of what you'll spend fixing foundation damage, basement flooding, or rotted fascia and soffit from a failing gutter system. Done right, gutters are a 20-year investment. Done wrong, you're back at it in five years.
Ready to Get Started?
NEXT Exteriors has been protecting Michigan homes since 1988. Get a free, no-pressure estimate from a team that shows up on time and does the job right.
Or call us: (844) 770-6398
Frequently Asked Questions
How often should gutters be cleaned in Michigan?
+
Minimum twice per year—late spring after tree pollen and seed drop, and late fall after leaves come down. Homes with heavy tree coverage (especially oak, maple, or pine) should be cleaned 3-4 times annually. Neglecting cleaning leads to clogs, overflow, ice dam formation, and potential structural damage to fascia and soffit.
Do gutter guards really work in Michigan winters?
+
They reduce debris accumulation but aren't foolproof. Fine material like shingle granules and pine needles still get through most guards. Some mesh-style guards can trap ice and create mini ice dams in winter. Solid surface guards (where water flows over the edge) work better in freeze-thaw conditions but cost more. Guards reduce cleaning frequency but don't eliminate it entirely.
What causes gutters to pull away from the house?
+
Three main causes: improper bracket spacing (too far apart for Michigan snow loads), rotted fascia board that can't hold fasteners, or excessive weight from ice and debris. Standard 24-inch bracket spacing isn't enough in Michigan—we use 18 inches. If the fascia is compromised, it needs replacement before new gutters go up. Ice dams add hundreds of pounds of weight that no bracket system can handle indefinitely.
Should I replace gutters when I replace my roof?
+
If your gutters are 15+ years old or showing signs of failure (sagging, leaking, pulling away), yes—it's the most cost-effective time. The roof crew is already there with scaffolding and equipment. You avoid the risk of damaging old gutters during roof work. Plus, new drip edge and fascia flashing integrate better with new gutters. We coordinate gutter and roofing work all the time—it saves money and ensures proper integration between systems.
How do I know if my gutter pitch is correct?
+
After a rainstorm, check for standing water in the gutters within 15-20 minutes of rain stopping. Properly pitched gutters drain completely. If you see pools of water, algae growth, or debris accumulation in certain spots, the pitch is inadequate. You can also watch water flow during rain—it should move steadily toward downspouts without pooling or overflowing at seams.
Can I install gutters myself?
+
Sectional gutter installation is technically DIY-possible, but seamless gutters require specialized equipment (portable roll-forming machine) that contractors use. The bigger challenge is getting pitch, bracket spacing, and downspout placement correct. Mistakes lead to chronic problems—overflow, ice damage, foundation issues—that cost more to fix than professional installation would have cost upfront. For most homeowners, professional installation is the smarter investment.
Why do my gutters overflow only in certain spots?
+
Usually a localized clog (leaves, shingle granules, or a bird's nest) or a low spot in the gutter run where pitch reverses. Sometimes a downspout is partially blocked, causing backup. Check for debris first. If the gutter is clean, the pitch is wrong at that location—either the gutter has sagged or it was installed incorrectly. This requires re-pitching that section or adding a downspout to relieve the load.
How to Choose Window Styles for Curb Appeal in Michigan
Colonial, Ranch, or Modern home? Learn how to choose window styles that boost curb appeal and fit Michigan's architecture. Expert advice from NEXT Exteriors.
📅 February 19, 2026
👤 NEXT Exteriors
⏱ 12 min read
We've replaced windows on hundreds of Michigan homes over the past 35 years, and I can tell you this: the wrong window style can make even a well-maintained home look awkward. The right choice? It transforms curb appeal instantly.
The challenge isn't finding good windows — it's matching the style to your home's architecture. A Colonial in Grosse Pointe Farms has different requirements than a mid-century Ranch in Sterling Heights or a Modern build in Rochester Hills. Get it right, and your home looks intentional, balanced, and worth more. Get it wrong, and it looks like someone grabbed windows from the clearance bin.
Here's what 35 Michigan winters have taught us about choosing window styles that actually improve curb appeal, based on your home's architecture.
Understanding Your Home's Architectural Style
Before you look at window catalogs, you need to identify what you're working with. Michigan's housing stock is diverse — we've got brick Colonials from the 1940s, sprawling Ranches from the 1960s and 70s, and newer Modern builds that break all the old rules.
Colonial homes are all about symmetry and proportion. They're typically two stories with a centered front door, evenly spaced windows, and a formal presence. Think Bloomfield Hills and Grosse Pointe — these homes demand windows that respect traditional proportions and grille patterns.
Ranch homes emphasize horizontal lines and casual living. They're single-story (or split-level), with low-pitched roofs and wide facades. These homes dominated Michigan suburbs in the post-war boom, and they're everywhere from Warren to Clinton Township. The windows should reinforce that horizontal emphasis, not fight it.
Modern homes (Contemporary, Craftsman-influenced new builds, etc.) play with asymmetry, large glass expanses, and clean lines. They're less common in older Michigan neighborhoods but increasingly popular in new construction. These homes give you the most freedom — but that doesn't mean anything goes.
The key principle: your windows should look like they were always part of the home's original design. That means understanding the architectural language your house speaks and choosing windows that fit the conversation.
Window Styles for Colonial Homes
Colonial architecture demands double-hung windows — that's non-negotiable if you want authentic curb appeal. These are the classic windows with two operable sashes that slide vertically. They've been the standard for Colonial homes since the 18th century, and there's a reason: they fit the formal, symmetrical aesthetic perfectly.
Grille Patterns Matter
The grille configuration (also called muntins or divided lites) defines the window's character. For traditional Colonial homes, you're looking at:
6-over-6: Six panes over six panes. This is the most common traditional pattern and works on nearly all Colonial styles.
8-over-8: More formal, often seen on larger or higher-end Colonial homes.
9-over-9: Less common, but appropriate for some Georgian or Federal-style Colonials.
Here's the critical detail most homeowners miss: grille-between-glass (GBG) looks cleaner but simulated-divided-lite (SDL) looks more authentic. GBG has the grilles sealed inside the glass unit — easier to clean, but it lacks the depth and shadow lines of real divided lites. SDL has grilles applied to both the interior and exterior glass surfaces, creating that three-dimensional look that matches historic windows.
If your Colonial home is in a historic district or you're aiming for high-end curb appeal, SDL is worth the upgrade. If ease of maintenance is your priority and your home is more suburban than historic, GBG works fine.
Symmetry Is Non-Negotiable
Colonial homes are built on balance. Your front facade should have evenly spaced windows flanking the entry door. If you're replacing windows, maintain the existing proportions and alignment. Don't try to enlarge windows or add new openings on the front — it destroys the architectural integrity.
Side and rear elevations can be more flexible, but the front facade is sacred.
Michigan-Specific Consideration: Many older Michigan Colonials have original wood windows with true divided lites. If you're replacing them with vinyl or fiberglass, choose SDL grilles to maintain that authentic look. The difference is visible from the street, and it matters for resale value in neighborhoods like Royal Oak or Lake Orion.
Our Detroit window experts have replaced hundreds of Colonial home windows, and the homes that maintain traditional grille patterns consistently show better curb appeal than those that went with plain glass or mismatched configurations.
Window Styles for Ranch Homes
Ranch homes are the opposite of Colonial formality — they're about casual living, indoor-outdoor flow, and horizontal emphasis. Your window choices should reinforce that low, wide aesthetic.
Horizontal Sliding Windows
Sliding windows (also called gliders) are the natural fit for Ranch architecture. They open horizontally, which mirrors the home's horizontal lines. They're practical for Michigan — easy to operate, good ventilation, and they don't protrude into landscaping or walkways when open.
Sliders work especially well on the sides and rear of Ranch homes, where you want ventilation but don't need the formality of double-hung windows.
Picture Windows with Flanking Casements
The classic Ranch front window configuration is a large picture window (fixed, non-operable) flanked by narrow casement windows on each side. This creates a wide, horizontal expanse of glass that brings in light and frames outdoor views — exactly what Ranch architecture is about.
The picture window is purely for light and views. The casement windows (which hinge on the side and crank open) provide ventilation. This combination gives you the best of both worlds: maximum glass area and functional airflow.
Bay and Bow Windows
Ranch homes are also great candidates for bay or bow windows, especially on the front facade or dining room. These windows project outward, creating interior space and adding architectural interest to what can otherwise be a plain, flat facade.
Bay windows: Three-sided, with a center picture window and angled side windows (usually casements or double-hungs). More angular and traditional.
Bow windows: Four or more windows arranged in a gentle curve. Softer, more contemporary look.
Both add curb appeal and interior space, but they're a significant investment — plan on $3,000–$6,000+ installed for a quality unit in Southeast Michigan.
Avoid These Mistakes
Don't install tall, vertical windows on a Ranch home. They fight the horizontal architecture and look out of place. Also, avoid over-grilling Ranch windows — simple grilles (if any) work best. Ranch homes aren't formal, and heavy grille patterns make them look confused.
Window Styles for Modern Homes
Modern and Contemporary homes give you the most creative freedom, but that doesn't mean anything goes. The goal is clean lines, intentional asymmetry, and windows that function as design elements, not just functional openings.
Casement Windows for Clean Lines
Casement windows are the go-to for Modern architecture. They hinge on the side and crank open, creating a clean, uninterrupted glass surface when closed. No visible sashes, no horizontal dividers — just glass and frame.
Casements also offer excellent energy performance (they compress against the frame when closed, creating a tight seal) and full ventilation (they open 90 degrees). In Michigan, where you want maximum airflow during the short summer and tight seals during the long winter, casements deliver.
Large Fixed Panes for Light
Modern homes often feature large picture windows or fixed glass panels — sometimes floor-to-ceiling. These maximize natural light and create dramatic sight lines, but they require careful placement.
In Michigan, large glass areas mean higher heating costs in winter unless you invest in high-performance glazing (Low-E coatings, triple-pane glass, etc.). The upfront cost is higher, but the energy savings and comfort are worth it.
Black or Dark Frames as Design Elements
One of the defining trends in Modern architecture is black or dark bronze window frames. They create strong contrast against light-colored siding or brick, and they give the home a contemporary, high-end look.
Most vinyl and fiberglass windows are available in black or bronze exterior finishes. The frames cost 10–15% more than white, but the visual impact is significant. If you're building or renovating a Modern home in Troy or Rochester Hills, dark frames are worth considering.
Mixing Window Types Strategically
Modern homes often mix window types — casements, fixed panes, awning windows (hinged at the top), and even corner windows (where two glass panes meet at a 90-degree angle with no vertical post). This creates visual interest and emphasizes the home's custom, architect-designed character.
The key is intentionality. Don't mix window types randomly — use them to highlight specific architectural features or functional needs (e.g., awning windows above a kitchen sink for ventilation while keeping rain out).
Michigan Reality Check: Modern homes with large glass areas need serious attention to insulation and air sealing. We've seen beautiful Modern builds in Oakland County with stunning windows that are expensive to heat because the rest of the envelope wasn't properly insulated. Windows are part of a system — if you're investing in high-performance windows, make sure your insulation contractor is doing their job too.
Energy Performance Matters in Michigan
Curb appeal is important, but windows also need to perform in Michigan's climate — which means cold winters, hot summers, and everything in between. The good news: you don't have to sacrifice aesthetics for energy efficiency. You just need to know what to look for.
U-Factor: The Critical Number
U-factor measures heat loss — lower is better. For Michigan (ENERGY STAR Northern climate zone), you want a U-factor of 0.30 or lower. This is non-negotiable if you care about heating costs and comfort.
Most modern vinyl and fiberglass windows hit this target easily, but cheaper builder-grade windows don't. When you're comparing quotes, ask for the U-factor — if the contractor can't tell you, that's a red flag.
Low-E Coatings and Argon Gas
Low-E (low-emissivity) coatings are microscopically thin metallic layers applied to the glass. They reflect heat back into your home in winter and block solar heat gain in summer. For Michigan, you want Low-E² or Low-E³ coatings (the numbers refer to which glass surface has the coating).
Argon gas fills replace the air between the glass panes with argon, a denser gas that reduces heat transfer. It's standard in quality windows and adds minimal cost.
Together, Low-E coatings and argon fills can improve a window's U-factor by 30–40% compared to basic dual-pane glass. That's the difference between a window that pays for itself in energy savings and one that doesn't.
Balancing Aesthetics and Performance
Here's the good news: high-performance windows don't look different from standard windows. Low-E coatings are invisible (or have a slight tint that most people don't notice). Argon gas is invisible. Triple-pane windows are slightly thicker, but not noticeably so once installed.
You can have traditional Colonial grilles, Modern black frames, or Ranch-style sliders — all with excellent energy performance. The aesthetic and the performance are independent choices.
Our exterior services in Detroit include energy-efficient window installation across all architectural styles, and we help homeowners balance curb appeal with real-world performance in Michigan's climate.
Cost Considerations by Style and Material
Window replacement is a significant investment, and costs vary widely based on style, material, size, and installation complexity. Here's what we're seeing in Southeast Michigan as of 2026.
Vinyl vs. Fiberglass: The Material Decision
Vinyl windows are the most common and most affordable. They're low-maintenance, energy-efficient, and available in a wide range of styles and colors. For most Michigan homeowners, quality vinyl windows are the right choice.
Cost: $400–$700 per window installed for standard double-hung or casement windows
Pros: Affordable, durable, no painting or staining required
Cons: Can't be repainted if you want to change color; cheaper vinyl can warp in extreme heat (rare in Michigan)
Fiberglass windows are more expensive but offer superior strength and longevity. They're dimensionally stable (don't expand/contract with temperature changes), can be painted, and have a more refined appearance.
Cost: $600–$1,000+ per window installed
Pros: Stronger frames (allowing more glass area), paintable, long lifespan
Cons: Higher upfront cost, fewer color options out of the box
For high-end homes (Bloomfield Hills, Grosse Pointe) or Modern designs where frame aesthetics matter, fiberglass is worth considering. For most Colonial and Ranch homes, quality vinyl delivers excellent performance and curb appeal at a lower cost.
Custom Sizes and Specialty Shapes
Standard-size windows (common double-hung and casement sizes) are manufactured in volume and cost less. Custom sizes, bay/bow windows, and specialty shapes (arched tops, trapezoids, etc.) are made to order and cost significantly more.
Bay/bow windows: $3,000–$6,000+ installed
Large picture windows: $800–$1,500+ installed
Custom shapes: $1,000–$2,500+ each
If you're replacing windows in an older Michigan home with non-standard openings, expect custom pricing. This is common in Colonials from the 1940s–50s and some Ranch homes with unique window configurations.
Installation Complexity by Home Type
Colonial homes: Second-story windows require scaffolding or lifts, which adds labor cost. Brick exteriors (common in Michigan) require careful flashing and sealing around window openings.
Ranch homes: Generally easier to install (single-story access), but large picture windows and bay/bow units require multiple installers and careful handling.
Modern homes: Large fixed panes and custom configurations can be complex to install and require experienced crews. Corner windows and floor-to-ceiling glass are specialty installations.
Real Numbers for Southeast Michigan
For a typical Michigan home (15–20 windows), you're looking at:
Full replacement with vinyl windows: $8,000–$15,000
Full replacement with fiberglass windows: $12,000–$20,000+
Partial replacement (5–8 windows): $3,000–$6,000
These are ballpark figures. Actual costs depend on window sizes, styles, material choices, and installation complexity. The only way to get accurate pricing is to have a contractor measure your openings and provide a detailed quote.
We've been providing transparent, no-pressure quotes for Michigan homeowners since 1988. No gimmicks, no high-pressure sales tactics — just honest pricing based on what your home actually needs. Our Detroit siding company often works alongside window replacements, and we can coordinate both projects to save you time and hassle.
Signs It's Time to Replace Your Windows
Even if your windows aren't broken, they might be costing you money and comfort. Here's when it's time to call a contractor.
Drafts and Energy Loss
If you feel cold air around your windows in winter or hot air in summer, your windows are leaking. This is common in homes with original 1960s–1980s windows — they simply don't seal like modern units.
You can test this with a candle or incense stick on a windy day. Hold it near the window frame and watch for movement. If the smoke wavers, you're losing conditioned air (and money).
Condensation Between Panes
If you see fog or moisture between the glass panes (not on the interior surface), the seal has failed. This means the insulating gas has leaked out and moisture has gotten in. The window has lost its thermal performance, and it's not coming back.
Condensation between panes is a clear sign the window needs replacement. Don't bother trying to "fix" it — it can't be repaired.
Difficulty Operating
Windows should open and close smoothly. If you're fighting with stuck sashes, broken balances, or cranks that won't turn, it's time for an upgrade. This is especially common in older double-hung windows where the balance mechanisms have worn out.
Visible Damage or Rot
Wood windows in Michigan are prone to rot, especially around the sill and bottom rail. If you see soft, spongy wood or peeling paint that reveals decay, the window is compromised structurally and thermally.
Vinyl and fiberglass windows don't rot, but they can crack or warp if they're low-quality or improperly installed. If you see cracks in the frame or sashes that don't close flush, replacement is the fix.
Michigan-Specific Issue: Freeze-thaw cycles are brutal on windows. Water gets into small cracks or gaps, freezes, expands, and makes the damage worse. If your windows are showing any signs of failure, don't wait — Michigan winters will accelerate the problem.
Beyond windows, other exterior components work together to protect your home. Our Detroit roofing services address the critical barrier above your windows, while our seamless gutters in Detroit, MI ensure water drains properly away from window openings. For homes that need comprehensive exterior updates, our Southeast Michigan painting professionals can refresh your home's appearance once the windows are in place.
Ready to Upgrade Your Windows?
NEXT Exteriors has been installing energy-efficient, architecturally appropriate windows in Southeast Michigan since 1988. We'll help you choose the right styles for your home's architecture and provide honest, transparent pricing. No pressure, no gimmicks — just quality work from a team that shows up on time and does the job right.
Or call us: (844) 770-6398
Frequently Asked Questions
What window style is best for a brick Colonial home in Michigan?
+
Double-hung windows with simulated-divided-lite (SDL) grilles in a 6-over-6 or 8-over-8 configuration are the traditional choice for brick Colonial homes. They maintain the formal, symmetrical appearance that defines Colonial architecture. For Michigan's climate, choose windows with a U-factor of 0.30 or lower, Low-E coatings, and argon gas fills to ensure energy efficiency without compromising the classic aesthetic.
Can I mix different window styles on my Ranch home?
+
Yes, but do it strategically. A common and effective approach is to use a picture window flanked by casements on the front facade for maximum light and view, while using horizontal sliding windows on the sides and rear for ventilation. The key is maintaining the horizontal emphasis that defines Ranch architecture. Avoid tall, vertical windows that fight the home's low, wide profile.
Are black window frames more expensive than white?
+
Yes, but not dramatically. Black or dark bronze exterior frames typically cost 10–15% more than standard white vinyl or fiberglass windows. The upcharge covers the specialized finish and the fact that darker colors absorb more heat, requiring higher-quality vinyl formulations to prevent warping. For Modern homes where dark frames significantly enhance curb appeal, the modest additional cost is usually worth it.
How long do vinyl windows last in Michigan's climate?
+
Quality vinyl windows should last 20–30 years in Michigan, even with our freeze-thaw cycles and temperature extremes. The key is proper installation with correct flashing and sealing to prevent water intrusion. Cheaper builder-grade vinyl windows may show problems sooner — warping, discoloration, or seal failures within 10–15 years. Fiberglass windows typically last even longer (30–40+ years) due to their superior dimensional stability.
Should I replace all my windows at once or do them in phases?
+
If budget allows, replace all windows at once. You'll get better pricing (contractors offer discounts for full-house projects), consistent appearance, and immediate energy savings throughout the home. If you need to phase the project, prioritize windows that face prevailing winds (typically west and north in Michigan), windows with visible damage or seal failures, and windows in the most-used rooms (bedrooms, living areas). Front facade windows should all be replaced together to maintain consistent curb appeal.
Do I need permits to replace windows in Metro Detroit?
+
It depends on the municipality and the scope of work. In most Southeast Michigan communities, simple window replacement (same size, same location) doesn't require a permit. However, if you're changing window sizes, adding new openings, or altering structural framing, permits are typically required. Some historic districts have additional review requirements. A licensed contractor will know the local requirements and handle permits if needed — that's part of what you're paying for.
What's the ROI on window replacement for curb appeal?
+
According to Remodeling Magazine's Cost vs. Value Report, vinyl window replacement in the Midwest typically recoups 70–75% of the cost at resale. However, the actual ROI depends heavily on your home's condition and market. If you're replacing failing 1970s windows on a well-maintained Colonial in a desirable neighborhood, the ROI can be even higher because the new windows bring the home up to buyer expectations. If you're installing high-end windows on a modest Ranch in a lower-price-point neighborhood, you may not recoup the full cost. The energy savings and comfort improvements are also part of the value equation.