

Blown-In Attic Insulation Royal Oak MI: What It Actually Costs
Real pricing for blown-in attic insulation in Royal Oak, MI. Learn R-values, coverage, and what Michigan contractors charge for cellulose and fiberglass jobs.

If you're researching blown-in attic insulation in Royal Oak, MI, you're probably noticing one of three things: your energy bills keep climbing, your second floor is uncomfortable no matter what the thermostat says, or you've got ice dams forming every winter. All three point to the same problem — your attic isn't doing its job.
We've been installing attic insulation in Metro Detroit since 1988, and the most common question we hear is straightforward: What's this actually going to cost? The answer depends on your attic's current condition, the material you choose, and how much coverage you need to hit Michigan's recommended R-value. But we can give you real numbers based on what we're quoting in Royal Oak right now.
This isn't a sales pitch. It's a breakdown of what blown-in insulation costs, why it works better than batts in Michigan attics, and what you should expect when a crew shows up to do the work.
Why Blown-In Beats Batt Insulation in Michigan Attics
Walk into most Royal Oak attics built before 2000, and you'll find pink or yellow fiberglass batts laid between the joists. Some are compressed, some have gaps around electrical boxes, and most are doing less than you'd think. Batt insulation works fine when it's installed perfectly — but attics aren't perfect. They've got wiring, junction boxes, recessed lights, and irregular joist spacing. Every gap is a thermal bridge.
Blown-in insulation fills those gaps. It settles around obstacles, covers the entire floor plane, and creates a continuous thermal barrier. You're not relying on a contractor to cut batts to fit perfectly around every pipe and wire — the material does it automatically.
There are two types of blown-in insulation: cellulose (made from recycled paper treated with fire retardant) and fiberglass (loose, fluffy fiberglass strands). Both get blown in with a hose, both settle into place, and both outperform batts in real-world conditions. The choice between them comes down to R-value per inch, settling rate, and cost.

Cellulose vs. Fiberglass: Which Material Works Better
Cellulose has a higher R-value per inch — about R-3.6 to R-3.8 compared to fiberglass's R-2.2 to R-2.7. That means you need less depth to hit the same thermal performance. In a shallow attic where headroom matters, cellulose wins. It also does a better job blocking air infiltration because the fibers pack tighter.
The downside? Cellulose settles more over time. You might lose 15-20% of your initial depth in the first few years. Good installers account for this by over-blowing slightly, but it's something to know upfront. Cellulose also absorbs moisture if your attic has a humidity problem, though it's treated to resist mold and won't lose R-value unless it stays wet for extended periods.
Fiberglass settles less — usually around 2-4% — and doesn't absorb water. It's lighter, which makes it easier to work with in attics with limited access. The trade-off is you need more depth to hit the same R-value, and it doesn't block air movement as effectively. If your attic floor isn't air-sealed before installation, fiberglass won't compensate the way cellulose might.
In Royal Oak, we install both. For most homes, cellulose makes sense — it's cost-effective, performs well in Michigan's freeze-thaw cycles, and handles our humidity swings without issue. For attics with ventilation concerns or moisture history, fiberglass is the safer bet.
Material Comparison: Cellulose vs. Fiberglass Blown-In
| Feature | Cellulose | Fiberglass |
|---|---|---|
| R-Value per Inch | R-3.6 to R-3.8 | R-2.2 to R-2.7 |
| Settling Rate | 15-20% over time | 2-4% over time |
| Air Sealing Performance | Excellent | Good (requires separate air sealing) |
| Moisture Resistance | Absorbs moisture, treated for mold | Does not absorb moisture |
| Cost per Square Foot | $1.20 - $1.80 | $1.00 - $1.50 |
What Blown-In Attic Insulation Actually Costs in Royal Oak
Here's what we're quoting for blown-in attic insulation in Royal Oak and surrounding Oakland County communities in 2026. These are real numbers based on recent projects — not national averages pulled from a cost estimator.
Cellulose blown-in insulation: $1.20 to $1.80 per square foot, installed. For a 1,200-square-foot attic, you're looking at $1,440 to $2,160. That price assumes we're adding insulation on top of an existing layer (topping off from R-19 to R-49, for example). If we're starting from scratch or removing old insulation first, add $0.50 to $1.00 per square foot for removal and disposal.
Fiberglass blown-in insulation: $1.00 to $1.50 per square foot, installed. Same 1,200-square-foot attic runs $1,200 to $1,800. Fiberglass costs slightly less per square foot, but you'll need more depth to hit the same R-value, so the gap narrows in practice.
Those prices include labor, material, and basic air sealing around penetrations (top plates, wire holes, plumbing stacks). They don't include major air sealing work like sealing a whole-house fan opening, adding baffles for roof ventilation, or fixing structural issues. If your attic needs those, we'll call them out in the estimate.
What affects the price:
- Attic access: A pull-down stairway is easy. A scuttle hole in a closet costs more because it takes longer to get equipment and material up there.
- Current insulation level: If you've got R-11 and we're taking you to R-49, that's 10-12 inches of new material. If you've already got R-30, we're adding 4-6 inches. Less material = lower cost.
- Air sealing scope: If your attic floor looks like Swiss cheese (recessed lights, unsealed wire penetrations, gaps around the chimney), air sealing adds $300 to $800 depending on how much work it takes.
- Ventilation fixes: Blocked soffit vents or missing baffles need to be addressed before we blow insulation. Budget $200 to $600 for baffle installation if needed.
We've done projects in Birmingham, Troy, and Rochester Hills at similar pricing. The cost doesn't change much across Oakland County unless we're dealing with a historic home with unusual access or a ranch with a massive attic footprint.

R-Value Requirements: Code vs. Reality in Southeast Michigan
Michigan building code (Zone 5) requires R-49 in attics for new construction. That's the minimum. Most Royal Oak homes built before 2000 have R-19 to R-30, which was code at the time but isn't enough by today's standards — or by the standards of your heating bill.
R-49 translates to about 13-14 inches of cellulose or 16-18 inches of fiberglass. If your attic currently has 6 inches of old fiberglass batts (R-19), you're adding 7-8 inches of cellulose to get to R-49. That's the sweet spot for Michigan — enough to handle our winters without over-insulating to the point where you're spending money for diminishing returns.
Some contractors will push R-60. It's not a bad idea if you're planning to stay in the house long-term and want maximum energy savings, but the payback period stretches. Going from R-30 to R-49 makes a noticeable difference in comfort and energy bills. Going from R-49 to R-60 makes a smaller difference unless your heating system is inefficient or your ductwork runs through the attic (which is a separate problem).
We typically recommend R-49 for most Royal Oak homes. If you've got cathedral ceilings, bonus rooms over the garage, or other thermal weak points, we'll address those separately — often with spray foam insulation instead of blown-in.
Signs Your Attic Needs More Insulation
You don't need to climb into your attic to know it's under-insulated. These are the symptoms we hear about most often from homeowners in Royal Oak and Sterling Heights:
- Ice dams every winter: If you're getting icicles along the eaves and ice buildup in your gutters, your attic is too warm. Heat escaping through the ceiling melts snow on the roof, which refreezes at the eaves. More insulation (and proper ventilation) stops the cycle. We've written a full breakdown on why ice dams form and how to stop them.
- Uneven temperatures between floors: Second floor feels like a sauna in summer and an icebox in winter? That's a clear sign your attic isn't buffering the temperature swings.
- High energy bills: If your gas bill spikes in January and your AC runs nonstop in July, your HVAC system is working overtime to compensate for heat loss (or gain) through the attic.
- Drafts and cold spots: Cold air leaking in around ceiling fixtures, recessed lights, or attic hatches means your attic floor isn't sealed. Insulation helps, but air sealing is just as important.
If you're seeing any of these, it's worth getting an insulation assessment. We'll measure your current R-value, check for air leaks, and give you a straight answer about whether adding insulation will solve the problem or if you've got other issues (like attic ventilation problems or ductwork leaks).
What to Expect During Installation
Blown-in insulation is fast. Most Royal Oak attics take 3-5 hours from start to finish, depending on size and prep work. Here's what the process looks like:
Step 1: Air sealing. Before we blow anything, we seal the attic floor. That means caulking around wire penetrations, sealing gaps around plumbing stacks, and covering open stud bays at the top plates. If you've got recessed lights, we'll install covers rated for insulation contact (IC-rated). This step matters more than most homeowners realize — air sealing can reduce heat loss by 15-30% on its own.
Step 2: Install baffles (if needed). If your soffit vents aren't already baffled, we'll add them. Baffles keep insulation from blocking airflow from the soffits to the ridge vent. Without them, you lose ventilation, which leads to moisture problems and shortened roof lifespan.
Step 3: Blow the insulation. We use a hose fed through the attic access and blow the material evenly across the attic floor. We're marking depth with rulers as we go to make sure we're hitting the target R-value. The blower machine stays outside (it's loud), and the hose runs through a window or door. There's dust, but it's contained to the attic.
Step 4: Clean up and inspect. Once we've hit the target depth across the entire attic, we double-check coverage, make sure baffles are still in place, and clean up any material that escaped the attic. The whole process is minimally invasive — you don't need to leave the house, and we're not tearing anything apart.
If you're also dealing with gutter issues or need roof repairs, we can coordinate those projects to minimize trips and maximize efficiency. A lot of Royal Oak homeowners bundle insulation with gutter replacement or roof work — it makes sense to address the whole building envelope at once.

Other Services from NEXT Exteriors
Insulation is just one piece of your home's exterior performance. If you're upgrading your attic, it's worth looking at the rest of the building envelope. We offer siding installation in Detroit for homes that need better weather protection, energy-efficient window replacement to cut down on drafts, and exterior painting services using Sherwin-Williams products. Every project we take on is about making your home perform better in Michigan's climate — not just making it look good for the next buyer. You can see the full range of exterior services in Detroit on our site.
Ready to Get Started?
NEXT Exteriors has been protecting Michigan homes since 1988. Get a free, no-pressure estimate from a team that shows up on time and does the job right.
Get Your Free QuoteOr call us: (844) 770-6398
Frequently Asked Questions About Blown-In Attic Insulation in Royal Oak
Cellulose and fiberglass blown-in insulation typically last 20-30 years before needing a top-off. Cellulose settles more over the first few years, losing about 15-20% of its initial depth, but stabilizes after that. Fiberglass settles less (2-4%) and holds its R-value longer. The bigger factor is moisture — if your attic stays dry and well-ventilated, the insulation will last decades. If you've got roof leaks or condensation issues, the insulation degrades faster.
Yes, and that's the most common scenario we see in Royal Oak. If your existing batts are in decent shape (not compressed, wet, or moldy), we'll blow new insulation right over them. The batts act as a base layer, and the blown-in material fills the gaps and brings you up to the target R-value. If the old insulation is damaged or moldy, we'll remove it first — but that's the exception, not the rule.
No. Insulation slows heat transfer, but it doesn't seal air leaks — that's what air sealing does. A well-insulated, well-sealed house needs proper ventilation (bathroom fans, kitchen exhaust, fresh air intake), but it won't suffocate. Michigan homes built before 1990 are usually leaky enough that adding insulation and air sealing just brings them up to a reasonable baseline. If you're worried about indoor air quality, we can talk about ventilation strategies, but it's rarely an issue in older homes.
It depends on your current insulation level and your heating/cooling costs. Going from R-19 to R-49 in a 1,200-square-foot attic can cut heating and cooling costs by 15-25%, which translates to $200-$400 per year for most Royal Oak homes. Payback period is usually 5-8 years. If you're starting from R-11 or less, the savings are higher. If you're already at R-30, the improvement is smaller but still noticeable in comfort.
Only if the old insulation is wet, moldy, or severely compressed. Most of the time, we leave it in place and blow new material on top. Removing old insulation adds cost ($0.50-$1.00 per square foot) and doesn't improve performance unless the existing layer is damaged. We'll inspect your attic before quoting and let you know if removal is necessary.
Not if your attic is properly ventilated and free of moisture sources. Mold needs moisture, not insulation. If you've got roof leaks, blocked soffit vents, or bathroom fans venting into the attic, those need to be fixed before adding insulation. Cellulose is treated with borate (a fire retardant and mold inhibitor), and fiberglass doesn't support mold growth. The insulation itself isn't the problem — it's the conditions around it.
The rule of thumb is 1 square foot of net free ventilation area for every 150 square feet of attic floor space (or 1:300 if you've got a vapor barrier). That ventilation should be balanced between intake (soffit vents) and exhaust (ridge vent, gable vents, or roof vents). If your attic feels hot and stuffy in summer or you see frost on the underside of the roof sheathing in winter, your ventilation isn't working. We check this during every insulation assessment and recommend fixes if needed.
Window Replacement Cost Metro Detroit: Real 2026 Pricing
What window replacement actually costs in Metro Detroit. Licensed contractor breaks down real pricing, material options, and what drives costs up or down in Southeast Michigan.
If you're researching window replacement cost in Metro Detroit, you've probably noticed the numbers are all over the map. One contractor quotes $400 per window. Another says $1,200. A third won't give you a number until they've measured your house, inspected your trim, and asked about your basement.
Here's the straight answer: In Southeast Michigan, quality window replacement typically runs $450 to $750 per window installed for standard vinyl double-hungs, $650 to $1,100 for fiberglass, and $900 to $1,500+ for wood-clad units. A whole-house project for a typical Michigan ranch or Colonial—12 to 18 windows—usually lands between $8,000 and $18,000, depending on material choice, glass packages, and installation complexity.
Those ranges aren't arbitrary. After 35 years installing Detroit window experts in homes across Macomb, Oakland, and St. Clair counties, we've learned that window costs in Michigan are driven by factors most online calculators ignore: freeze-thaw cycles that punish cheap frames, brick openings that require careful flashing, and energy efficiency standards that actually matter when it's 5°F outside in January.
This post breaks down what window replacement actually costs in Metro Detroit—and what you're paying for when you hire a contractor who knows how to install them correctly in Michigan weather.
What Window Replacement Actually Costs in Metro Detroit
Let's start with real numbers from actual projects in Southeast Michigan. These are installed costs—material, labor, disposal of old windows, cleanup, and warranty. They reflect what homeowners in Sterling Heights, Rochester Hills, Grosse Pointe Farms, and Troy are paying in 2026.
Vinyl Windows
$450–$750 per window installed
Vinyl is the most common choice in Metro Detroit, and for good reason. Quality vinyl windows handle Michigan's freeze-thaw cycles well, require minimal maintenance, and deliver solid energy performance. The range depends on glass package (double-pane vs. triple-pane, Low-E coatings), frame thickness, and brand. A basic builder-grade vinyl double-hung runs closer to $450. A premium vinyl window with triple-pane glass, argon fill, and reinforced frames pushes toward $750.
Fiberglass Windows
$650–$1,100 per window installed
Fiberglass costs more upfront but offers superior durability and thermal performance. The material expands and contracts at nearly the same rate as glass, which means fewer seal failures over time—critical in Michigan, where temperature swings from -10°F to 90°F aren't unusual. Fiberglass also holds up better in direct sun without warping or fading. If you're planning to stay in your home long-term, fiberglass is worth considering.
Wood-Clad Windows
$900–$1,500+ per window installed
Wood-clad windows—typically aluminum or vinyl exterior with a wood interior—deliver the aesthetics many homeowners want, especially in historic districts or upscale neighborhoods. The wood interior can be stained or painted to match trim. The protected exterior requires less maintenance than bare wood but still demands attention. These are premium units, and the cost reflects that. Expect to pay more for custom sizes, specialty shapes, or high-end brands.
Whole-House Projects: What to Expect
Most Michigan homes have 12 to 20 windows. A typical whole-house replacement breaks down like this:
- Small ranch (10–12 windows): $6,000–$12,000
- Medium Colonial (14–18 windows): $10,000–$18,000
- Large two-story (20+ windows): $15,000–$30,000+
These ranges assume standard double-hung or casement windows in reasonably accessible locations. Add bay windows, second-story installations, or structural repairs, and costs climb. Subtract a few windows by keeping newer units in good shape, and you'll save accordingly.
Michigan-Specific Cost Factor: Brick openings are common in Metro Detroit—especially in older Colonials and ranch homes. Removing old windows from brick, repairing mortar, and properly flashing new units adds time and cost compared to vinyl-sided homes. Expect to pay 10–20% more per window when working with brick.
Five Factors That Drive Window Costs Up or Down
Window replacement cost in Metro Detroit isn't just about the window itself. Here's what actually moves the needle on your final invoice.
1. Window Material and Construction Quality
Not all vinyl windows are created equal. A basic vinyl window might have thin walls, minimal reinforcement, and mediocre weatherstripping. A premium vinyl window uses thicker extrusions, steel or aluminum reinforcement in the sash and frame, multi-chamber construction for better insulation, and high-quality seals that don't fail after five winters. The difference in material cost is $100 to $300 per window—but the performance gap is significant in Michigan weather.
Fiberglass and wood-clad windows start at a higher baseline because the materials themselves cost more to manufacture. You're paying for dimensional stability, longevity, and thermal performance that vinyl can't quite match.
2. Glass Packages: More Than Just "Double-Pane"
The glass is where energy efficiency lives—or dies. Here's what different glass packages cost and deliver:
- Standard double-pane, air-filled: Baseline. Adequate for Michigan, but you'll feel the difference on cold nights.
- Double-pane with Low-E coating and argon fill: Adds $50–$100 per window. Blocks UV, reduces heat transfer, and cuts energy bills. This is the minimum we recommend for Southeast Michigan.
- Triple-pane with Low-E and argon: Adds $150–$250 per window. Significantly better insulation, less condensation, quieter operation. Worth it if you're in an exposed location or prioritize comfort and efficiency.
Low-E coatings are thin metallic layers that reflect infrared heat while allowing visible light through. In winter, they keep heat inside. In summer, they block solar heat gain. Argon is a dense, inert gas that insulates better than air. These aren't gimmicks—they're building science that works.
3. Window Style and Operability
Different window styles have different price points:
- Double-hung windows: Most common, most affordable. Two operable sashes, tilt-in for cleaning.
- Casement windows: Hinged on the side, crank open. Better air seal than double-hungs, slightly higher cost. Excellent for ventilation.
- Sliding windows: Similar cost to double-hungs. Work well in tight spaces or above counters.
- Bay and bow windows: Significantly more expensive—$2,500 to $5,000+ installed. These are structural assemblies that project from the wall and often require framing modifications.
- Picture windows: Fixed glass, no moving parts. Less expensive than operable windows of the same size.
At NEXT Exteriors, we help homeowners choose window styles based on function, not just aesthetics. A casement window in a kitchen provides better ventilation than a double-hung. A picture window in a living room maximizes light and views without the cost of unnecessary operability.
4. Installation Complexity
This is where contractor experience matters—and where costs vary widely. Installing a window in a wood-sided ranch is straightforward. Installing a window in a 1960s brick Colonial with rotted framing, out-of-square openings, and no existing flashing is a different job entirely.
Factors that increase installation cost:
- Brick or stone exterior: Requires careful removal, mortar repair, and proper flashing integration.
- Structural repairs: Rotted sills, headers, or framing need to be replaced before the new window goes in.
- Second-story or difficult access: Scaffolding, lifts, or extra labor time.
- Custom or oversized units: Anything outside standard dimensions costs more and takes longer to install.
- Interior trim work: If you want new interior trim, extension jambs, or drywall repair, that's additional labor.
A good contractor will identify these issues during the estimate. A bad contractor will lowball the price, then hit you with change orders once the old windows are out.
5. Project Size and Timing
Replacing all your windows at once is more cost-effective per window than doing them one at a time. Contractors can order materials in bulk, schedule crews efficiently, and minimize mobilization costs. You'll typically save 10–15% on a whole-house project compared to piecemeal replacements.
Timing matters too. Spring and fall are peak seasons for window replacement in Michigan. If you're flexible and can schedule work in late winter or early summer, some contractors offer off-season discounts. At NEXT Exteriors, we work year-round—Michigan winters don't stop us—but demand does fluctuate.

Window Materials That Work in Michigan Weather
Michigan weather is hard on windows. Freeze-thaw cycles stress frames and seals. Summer humidity tests weatherstripping. Ice dams and wind-driven rain find every weak point. Not every window material handles these conditions equally.
Vinyl: The Practical Choice
Vinyl windows dominate the Michigan market for good reason. Quality vinyl—thick-walled, multi-chamber construction with proper reinforcement—handles freeze-thaw cycles without cracking or warping. It doesn't rot, doesn't need painting, and delivers solid thermal performance at a reasonable price.
The key word is quality. Cheap vinyl windows with thin walls and minimal reinforcement sag over time, especially in larger sizes. The frames flex, seals fail, and you're back to drafts and condensation. We install vinyl windows from manufacturers who engineer for Michigan conditions—brands that use thicker extrusions, steel or aluminum reinforcement, and fusion-welded corners that don't separate.
Best for: Homeowners who want low-maintenance, energy-efficient windows at a reasonable cost.
Fiberglass: Built for the Long Haul
Fiberglass is the most dimensionally stable window material available. It expands and contracts at nearly the same rate as glass, which means fewer seal failures and longer-lasting performance. In Michigan, where a window might see a 100°F temperature swing from winter to summer, that stability matters.
Fiberglass is also stronger than vinyl, so frames can be thinner, which means more glass area and better views. The material doesn't degrade in UV exposure, doesn't warp, and can be painted if you want to change the color down the road.
The downside? Cost. Fiberglass windows run 30–50% more than comparable vinyl units. But if you're planning to stay in your home for 20+ years, the durability and performance often justify the investment.
Best for: Homeowners prioritizing long-term durability, thermal performance, and minimal maintenance.
Wood-Clad: Aesthetics with Protection
Wood-clad windows give you the warmth and beauty of wood on the interior with a weather-resistant exterior cladding—typically aluminum or vinyl. The wood can be stained or painted to match your trim. The cladding protects the exterior from Michigan weather.
Wood-clad windows are premium products. They cost more, and they require more maintenance than vinyl or fiberglass—though far less than bare wood. The interior wood needs occasional refinishing, and the exterior cladding can dent or scratch. But for homeowners who want the look of traditional wood windows without the full maintenance burden, wood-clad is a solid middle ground.
Best for: Historic homes, upscale properties, or homeowners who prioritize aesthetics and are willing to invest in maintenance.
What We Install at NEXT Exteriors
We work with vinyl and fiberglass windows from manufacturers who engineer for Michigan conditions and back their products with real warranties. We don't push the most expensive option—we recommend what makes sense for your home, your budget, and how long you plan to live there. Our window replacement in Detroit projects reflect that philosophy: honest recommendations, quality materials, and installation that lasts.
Signs It's Time to Replace Your Windows
Not every drafty window needs immediate replacement. Sometimes weatherstripping, caulk, or a tune-up is enough. But if you're seeing these signs, replacement is the right call:
Condensation Between the Panes
If you see fog, moisture, or condensation between the glass layers, the seal has failed. That means the insulating gas (argon or krypton) has leaked out, and the window's thermal performance is shot. You can't fix a failed seal—the insulated glass unit needs to be replaced. In many cases, especially with older windows, replacing the entire window makes more sense than trying to source and install new glass.
Drafts You Can Feel
Stand next to your windows on a cold day. If you feel air movement, the window isn't sealing properly. Weatherstripping degrades over time, frames warp, and sashes settle. Some of this can be addressed with maintenance, but if the window is more than 15–20 years old and you're feeling significant drafts, replacement is usually the better investment.
Difficulty Opening, Closing, or Locking
Windows that stick, bind, or won't lock properly are more than an annoyance—they're a security and safety issue. In Michigan, this often happens because vinyl frames have warped, wood components have swollen or rotted, or the window was improperly installed to begin with. If multiple windows in your home are difficult to operate, it's time to consider replacement.
Visible Rot, Decay, or Damage
Check your window sills, jambs, and exterior trim. If you see soft wood, peeling paint that exposes bare wood, or visible rot, water is getting in. This isn't just a window problem—it's a structural problem. Water infiltration leads to mold, insulation damage, and framing rot. Replacing the windows and properly flashing them stops the problem before it gets worse.
Rising Energy Bills
Old, inefficient windows are a major source of heat loss in winter and heat gain in summer. If your energy bills have climbed and your HVAC system is running constantly, your windows are likely part of the problem. Modern windows with Low-E glass, argon fill, and quality frames can cut heat loss by 30–50% compared to old single-pane or early double-pane units.
Ice Buildup on Interior Frames
If you're seeing ice or heavy condensation on the interior side of your windows during Michigan winters, the window isn't insulating properly. This is common with old aluminum-frame windows or single-pane glass. The cold exterior surface is cooling the interior frame below the dew point, causing condensation that freezes. This isn't just uncomfortable—it damages paint, trim, and drywall. New windows with better thermal breaks and insulated glass solve this.
If you're experiencing any of these issues in your Sterling Heights, Shelby Township, or Clinton Township home, it's worth getting an assessment. At NEXT Exteriors, we'll tell you honestly whether your windows need replacement or if a repair will buy you a few more years.
What You're Actually Paying For
When you hire a contractor for window replacement, you're not just buying windows. You're paying for expertise, proper installation, and long-term performance. Here's what separates a quality window job from a cheap one.
Proper Flashing and Weatherproofing
The window itself is only half the job. How it's integrated into the wall assembly determines whether it leaks or lasts. In Michigan, where we get wind-driven rain, ice dams, and freeze-thaw cycles, flashing is critical.
Proper flashing means:
- A continuous water-resistive barrier (housewrap or building paper) behind the siding
- Sill pan flashing at the bottom of the opening to direct water out, not into the wall
- Head flashing above the window to shed water away from the opening
- Jamb flashing on the sides, integrated with the water-resistive barrier
- Proper caulking and sealant at all joints
This takes time. It requires knowledge of building science and attention to detail. A contractor who skips flashing or uses improper materials is setting you up for water damage down the road. We've repaired plenty of window installations where the previous contractor didn't flash correctly—and the homeowner paid twice.
Structural Repairs Done Right
When we remove old windows, we often find rotted sills, damaged headers, or compromised framing. Quality contractors fix these issues before installing the new window. They sister in new framing, replace rotted wood, and ensure the opening is square and structurally sound.
Bad contractors ignore the rot, shim around it, and hope the homeowner doesn't notice. The new window goes in crooked, doesn't operate smoothly, and fails prematurely because it's not properly supported.
Insulation and Air Sealing
The gap between the window frame and the rough opening needs to be insulated and air-sealed. We use low-expansion spray foam to fill the gap without bowing the frame, then back it up with backer rod and sealant on the interior. This prevents drafts, improves energy efficiency, and stops moisture infiltration.
Some contractors skip this step or use the wrong type of foam (high-expansion foam that bows the frame and causes the window to bind). The result is a window that looks fine but performs poorly.
Quality Materials and Manufacturer Warranties
We install windows from manufacturers who stand behind their products—brands with real warranties, local support, and a track record in Michigan. When a window fails, we can get parts or replacements without a fight. Cheap windows from unknown brands might save you $100 per unit upfront, but when the seal fails in year three and the manufacturer is out of business, you're stuck.
Cleanup and Respect for Your Home
Window replacement is messy. Old windows get cut out, insulation gets disturbed, and debris piles up. Quality contractors protect your floors, contain the mess, and haul everything away when the job is done. We treat your home like it's ours—because reputation matters more than saving 20 minutes on cleanup.
This is part of what you're paying for when you hire exterior services in Detroit from a licensed, insured contractor with 35 years in business. It costs more than the guy who shows up in an unmarked van with no insurance. It's also why our customers don't call us back to fix problems.

How to Get Accurate Pricing for Your Home
Online cost calculators are useful for ballpark estimates, but they can't account for the specifics of your home. Here's how to get accurate pricing for window replacement in Metro Detroit.
Why Online Calculators Fall Short
Most online calculators ask for the number of windows, your zip code, and maybe the window style. They spit out a range—often a wide one—based on national averages. What they don't account for:
- Your home's construction type (brick, vinyl siding, wood siding)
- The condition of existing framing and trim
- Window sizes and custom dimensions
- Access challenges (second story, landscaping, tight spaces)
- Local labor rates and material costs
- The specific glass packages and features you want
A calculator might tell you $7,000 to $15,000 for 12 windows. That's a $8,000 spread—not particularly helpful when you're trying to budget.
What to Expect During an Estimate
A quality contractor will visit your home, measure every window, assess the condition of the openings, and ask about your goals. Here's what that process looks like with NEXT Exteriors:
- Measurement and inspection: We measure each window opening, check for square and level, and inspect the surrounding framing, siding, and trim. We note any structural issues, rot, or water damage.
- Material discussion: We explain the differences between vinyl, fiberglass, and wood-clad windows, and recommend options based on your home, budget, and priorities.
- Glass package options: We discuss double-pane vs. triple-pane, Low-E coatings, and argon fill. We explain what each option costs and what it delivers in terms of energy efficiency and comfort.
- Detailed quote: We provide a written estimate that breaks down material costs, labor, any necessary repairs, and timeline. No surprises, no hidden fees.
This process takes 60–90 minutes for a typical home. It's the only way to provide accurate pricing.
Questions to Ask Contractors
When you're getting estimates, ask these questions to separate quality contractors from the rest:
- "Are you licensed and insured in Michigan?" This should be a yes with proof. A Michigan Residential Builder's License is required for window replacement.
- "How do you handle flashing and weatherproofing?" A good contractor will explain their process in detail. A bad one will give you a vague answer or say "we seal it up real good."
- "What brands do you install, and why?" Quality contractors work with reputable manufacturers and can explain why they choose those brands.
- "What's included in your warranty?" Ask about both the manufacturer's warranty on the windows and the contractor's warranty on installation. Get it in writing.
- "What happens if you find structural damage during installation?" A good contractor will explain how they handle repairs and provide pricing upfront or as a change order with your approval.
- "Can you provide references from recent projects in my area?" Any contractor worth hiring will have a list of satisfied customers in Southeast Michigan.
Red Flags in Window Quotes
Watch out for these warning signs:
- Pressure tactics: "This price is only good today" or "We can start tomorrow if you sign now." Quality contractors don't need to pressure you.
- Quotes without a site visit: No one can give you accurate pricing over the phone or based on square footage alone.
- Vague line items: "Windows and installation: $12,000." What windows? What glass? What's included? A detailed quote protects both parties.
- No license or insurance: This is illegal in Michigan and leaves you with zero recourse if something goes wrong.
- Payment upfront: Never pay the full amount before work starts. A reasonable deposit (typically 25–50%) is standard, with the balance due upon completion.
At NEXT Exteriors, we provide detailed, written estimates with no pressure. We're happy to answer questions, explain our process, and give you time to think it over. Our free quote page is where most homeowners start—we'll schedule a visit, assess your home, and provide accurate pricing based on what you actually need.
Related Services: Window replacement often pairs well with other exterior upgrades. If your siding is aging or your insulation services in Southeast Michigan need attention, tackling multiple projects at once can save time and money. We also handle roof replacement in Metro Detroit, gutter installation in Southeast Michigan, and exterior painting in Detroit. Coordinating these projects improves efficiency and ensures consistent quality across your home's exterior.
Ready to Get Started?
NEXT Exteriors has been protecting Michigan homes since 1988. Get a free, no-pressure estimate from a team that shows up on time and does the job right. We'll assess your windows, explain your options, and provide accurate pricing—no gimmicks, no surprises.
Get Your Free QuoteOr call us: (844) 770-6398
Frequently Asked Questions
Most window replacement projects in Metro Detroit take 1–3 days, depending on the number of windows and any structural repairs needed. A typical whole-house job (12–18 windows) is usually completed in 2 days. We work efficiently but never rush the critical steps—flashing, insulation, and air sealing take time to do correctly. We'll give you a specific timeline during your estimate.
Yes. We install windows year-round in Southeast Michigan. The process is the same—we remove the old window, prep the opening, and install the new unit as quickly as possible to minimize heat loss. Most windows are replaced in under an hour each. We use tarps and temporary coverings to protect your home during the swap. Cold weather doesn't affect the quality of the installation, though some materials (like caulk and spray foam) require specific cold-weather formulations.
No, but there are advantages to doing them all at once. You'll save 10–15% per window on a whole-house project compared to replacing them individually. You'll also get consistent performance, aesthetics, and warranty coverage. That said, if budget is a concern, prioritize the windows that are in the worst shape—typically north-facing windows, windows with visible damage, or windows in high-traffic areas like living rooms and bedrooms. We can help you phase the project if needed.
Energy savings alone typically don't justify window replacement—the payback period is often 15–25 years. But that's not the full picture. New windows improve comfort (less drafts, more consistent temperatures), reduce noise, enhance curb appeal, and eliminate maintenance headaches like painting or repairing rotted frames. If your windows are failing—condensation between panes, drafts, difficulty operating—replacement isn't about payback, it's about fixing a problem before it gets worse. For more on real ROI, check our post on replacement windows in Michigan: real ROI and energy savings.
If the issue is minor—worn weatherstripping, a broken lock, or a cracked pane of glass—repair is often the right call. If you're dealing with failed seals (condensation between panes), rotted frames, warped sashes, or windows that are 20+ years old and inefficient, replacement makes more sense. We'll assess your windows honestly and tell you which route is best. Sometimes a repair buys you a few more years. Sometimes it's throwing good money after bad.
Yes. We work with financing partners to offer flexible payment options for homeowners in Southeast Michigan. Whether you want to pay over time or take advantage of promotional rates, we can help you find a plan that fits your budget. Ask about financing options when you schedule your free estimate.
NEXT Exteriors provides a workmanship warranty on all installations, and the windows themselves come with manufacturer warranties that typically cover the frame, glass, and hardware for 10–20 years or more, depending on the brand and model. We'll explain both warranties in detail during your estimate and provide everything in writing. If there's ever an issue, we handle it—no runaround, no finger-pointing between us and the manufacturer.
Attic Insulation Levels: What's "Enough" in Metro Detroit?
Michigan winters demand specific R-values. Learn what attic insulation levels actually work in Metro Detroit's climate—from a contractor who's been doing this since 1988.
Here's a question we hear constantly from homeowners in Sterling Heights, Troy, and across Southeast Michigan: "How much attic insulation do I actually need?"
The internet will tell you R-38. Your neighbor's contractor might say R-49. The guy who came out for a quote last week probably threw out R-60. And if you're sitting there wondering what any of that means—or why the numbers keep changing—you're not alone.
After 35 years installing attic insulation in Metro Detroit, we've learned this: Michigan winters don't care about generic national recommendations. They care about whether your attic can handle 15°F nights in January, lake-effect snow in February, and 90°F attic temperatures in July—sometimes all in the same week.
This isn't about hitting some arbitrary number. It's about understanding what actually works in our climate, what you're paying for, and what "enough" looks like when you're trying to keep ice dams off your roof and your heating bill under control.
Let's break it down.
What R-Value Actually Means (And Why It Matters in Michigan)
R-value measures thermal resistance—how well a material resists heat flow. The higher the number, the better it insulates. Simple enough.
But here's what most contractors won't tell you: R-value assumes perfect conditions. It doesn't account for air leaks, moisture intrusion, compression over time, or the way Michigan's freeze-thaw cycles stress building materials.
When you read "R-38 recommended," that's based on Department of Energy climate zones. Metro Detroit sits in Zone 5, which covers most of the northern United States. The DOE's baseline recommendation for Zone 5 is R-38 to R-60 for attics.
That's a 22-point spread. Why? Because "recommended" depends on your home's age, construction type, existing insulation, air sealing quality, and whether you're dealing with a vented or unvented attic.
Michigan Reality Check: A 1960s ranch in Warren with original insulation probably has R-11 to R-19—less than half of what it should be. A newer home in Rochester Hills built to 2015 code might have R-38 but still underperform if the attic isn't properly air-sealed.
The Michigan Residential Code requires a minimum of R-49 for attic insulation in new construction. That's not a suggestion—it's code. But thousands of homes across Macomb and Oakland counties were built before that standard existed, and insulation degrades over time.
Fiberglass batts settle. Cellulose compacts. Rodents nest in it. Roof leaks soak it. After 20 to 30 years, what started as R-30 might be performing closer to R-20.
The Michigan Standard: R-49 to R-60
If you're upgrading attic insulation in Metro Detroit, here's the target range we recommend: R-49 to R-60.
Not R-38. Not "whatever the last guy said." R-49 minimum, R-60 if you want to future-proof your home and maximize energy savings.
Why this range?
- R-49 meets Michigan code and provides solid thermal performance for most homes in Macomb, Oakland, and St. Clair counties.
- R-60 is the Energy Star recommendation for Zone 5 and delivers measurably better performance during extreme cold snaps and summer heat.
- Anything below R-38 leaves you vulnerable to ice dams, high heating costs, and HVAC strain during Michigan winters.
What R-49 to R-60 Looks Like in Different Insulation Types
| Insulation Type | R-Value per Inch | Depth for R-49 | Depth for R-60 |
|---|---|---|---|
| Blown-in Fiberglass | R-2.5 | 19.6 inches | 24 inches |
| Blown-in Cellulose | R-3.5 | 14 inches | 17 inches |
| Open-Cell Spray Foam | R-3.5 | 14 inches | 17 inches |
| Closed-Cell Spray Foam | R-6.5 | 7.5 inches | 9.2 inches |
Most homes in Southeast Michigan use blown-in fiberglass or cellulose because it's cost-effective and performs well when properly installed. Spray foam is more expensive but makes sense in specific situations—cathedral ceilings, unvented attics, or homes with significant air leakage issues.
The key isn't just hitting a number. It's ensuring the insulation is evenly distributed, properly air-sealed at penetrations (recessed lights, plumbing stacks, attic hatches), and not compressed or damaged.
What "Not Enough" Looks Like in Real Life
You don't need a thermal camera to know your attic insulation is inadequate. Michigan winters make it obvious.
Ice Dams and Icicle Formation
This is the big one. If you're getting ice dams along your roof edges or giant icicles hanging from your gutters, your attic is too warm. Heat from your living space is escaping through the ceiling, warming the roof deck, melting snow, and refreezing at the eaves.
Ice dams aren't just cosmetic. They force water under shingles, rot fascia boards, damage gutters, and cause interior water damage. We've seen ice dams rip entire gutter systems off homes in Shelby Township during particularly brutal winters.
Proper attic insulation—combined with adequate ventilation—keeps your roof deck cold and prevents this cycle. If you're dealing with recurring ice dams, your attic insulation is almost certainly below R-38.
Uneven Heating and Cold Spots
Rooms directly below the attic that feel noticeably colder in winter? That's heat escaping through inadequate insulation. You'll notice it most in second-story bedrooms, bonus rooms, or any space with a vaulted ceiling.
Your furnace runs constantly trying to compensate, but the heat just keeps bleeding into the attic and out through the roof.
High Energy Bills
We've worked with homeowners in Clinton Township whose heating bills dropped 25% to 35% after upgrading from R-19 to R-60. That's not a sales pitch—it's building science.
If your natural gas or electric bills spike every winter and you can't figure out why, check your attic. Chances are good you're heating the neighborhood instead of your house.
HVAC System Strain
Furnaces and air conditioners aren't designed to run 24/7. When your attic insulation is inadequate, your HVAC system works overtime trying to maintain temperature. That means more wear, more breakdowns, and a shorter lifespan for expensive equipment.
We've seen furnaces in 15-year-old homes fail prematurely because they were compensating for R-19 attic insulation in a house that should have had R-49.

Insulation Types and How to Hit Target R-Values
Not all insulation is created equal, and what works best depends on your home's construction, budget, and specific needs. Here's what we install most often in Southeast Michigan—and why.
Blown-In Fiberglass
This is the workhorse. Blown-in fiberglass (made by manufacturers like Owens Corning and CertainTeed) is cost-effective, non-combustible, and performs well in Michigan's climate.
At roughly R-2.5 per inch, you need about 20 inches to hit R-49 and 24 inches for R-60. It's installed with a blowing machine that distributes the material evenly across the attic floor, filling gaps and covering joists.
Pros: Affordable, fire-resistant, doesn't settle as much as cellulose, and widely available.
Cons: Lower R-value per inch than cellulose or spray foam, so you need more depth. Can be itchy to work around (but that's why you hire professionals).
Blown-In Cellulose
Cellulose is made from recycled paper treated with fire retardants. At R-3.5 per inch, it's denser than fiberglass and requires less depth to achieve the same R-value—about 14 inches for R-49.
Pros: Higher R-value per inch, better air-sealing properties, eco-friendly (recycled content), and slightly better soundproofing.
Cons: Settles more over time (loses about 20% of its initial R-value), can absorb moisture if your roof leaks, and is heavier than fiberglass.
We use cellulose often in older homes where we're topping off existing insulation or filling wall cavities as part of a broader exterior services project.
Spray Foam Insulation
Spray foam comes in two types: open-cell (R-3.5 per inch) and closed-cell (R-6.5 per inch). Both expand on contact, filling gaps and creating an air seal in addition to insulating.
Open-cell spray foam is softer and less expensive. It's good for sound dampening and works well in vented attics where you want insulation at the attic floor.
Closed-cell spray foam is rigid, moisture-resistant, and adds structural strength. It's ideal for unvented attics, cathedral ceilings, or situations where you're insulating the roof deck instead of the attic floor.
Pros: Superior air sealing, high R-value per inch (especially closed-cell), and excellent for problem areas like rim joists or around recessed lights.
Cons: Expensive—often 3x to 5x the cost of blown-in insulation. Not DIY-friendly. Requires professional installation and proper ventilation during application.
Spray foam makes sense for specific applications, but for most attics in Metro Detroit, blown-in fiberglass or cellulose delivers better value.
Hybrid Approaches
Sometimes the best solution is a combination. We'll often use spray foam to air-seal problem areas (attic hatches, recessed lights, plumbing penetrations) and then top with blown-in insulation to hit R-49 or R-60.
This gives you the air-sealing benefits of spray foam without the cost of foaming the entire attic.
Cost Reality: What to Budget for Attic Insulation in Southeast Michigan
Let's talk numbers. Attic insulation costs vary based on square footage, insulation type, existing conditions, and how much prep work is required.
Here's what we typically see for a 1,500-square-foot attic in Metro Detroit:
| Insulation Type | Target R-Value | Cost Range |
|---|---|---|
| Blown-in Fiberglass | R-49 | $1,800 - $2,800 |
| Blown-in Fiberglass | R-60 | $2,200 - $3,400 |
| Blown-in Cellulose | R-49 | $2,000 - $3,200 |
| Blown-in Cellulose | R-60 | $2,400 - $3,800 |
| Spray Foam (Open-Cell) | R-49 | $4,500 - $7,000 |
| Spray Foam (Closed-Cell) | R-49 | $7,000 - $11,000 |
These are ballpark figures. Your actual cost depends on accessibility, whether we need to remove old insulation, air sealing requirements, and any structural repairs (like replacing damaged decking or fixing roof leaks before we insulate).
ROI and Energy Savings
Upgrading from R-19 to R-49 typically pays for itself in 5 to 8 years through lower heating and cooling costs. In Michigan, where we run furnaces from October through April, the savings add up fast.
Homeowners in Sterling Heights and Troy regularly report 20% to 30% reductions in winter energy bills after upgrading attic insulation. Over a 15-year period, that's thousands of dollars in savings—plus increased home comfort and resale value.
Utility Rebates and Tax Credits
Check with your utility provider. DTE Energy and Consumers Energy both offer rebates for insulation upgrades that meet Energy Star standards. The federal Energy Efficient Home Improvement Credit also covers insulation—up to 30% of the cost, capped at $1,200 annually.
These incentives change, so ask us during your estimate. We'll help you navigate available rebates and maximize your savings.

When to Call a Professional (And What to Look For)
You can measure your existing insulation yourself—grab a tape measure, head into the attic, and check the depth. But knowing whether you need more insulation is only part of the equation.
Here's when you should call a professional:
Signs Your Attic Needs Attention
- Ice dams or icicles forming along roof edges every winter
- High heating bills that don't match your thermostat settings
- Uneven temperatures between rooms, especially second-story spaces
- Visible insulation damage—water stains, compression, rodent nests, or mold
- Your home was built before 2000 and you've never upgraded insulation
- You're planning other exterior work—roof replacement, siding upgrades, or window installation—and want to tackle insulation at the same time
What a Proper Insulation Assessment Includes
A legitimate contractor won't give you a quote over the phone. They'll come to your house, get in the attic, and assess:
- Current insulation type and depth
- Existing R-value and whether it's performing as designed
- Air leaks around penetrations, hatches, and recessed lights
- Ventilation—soffit vents, ridge vents, gable vents, and whether they're functioning properly
- Moisture issues—roof leaks, condensation, mold, or water stains
- Structural concerns—damaged rafters, sagging decking, or inadequate support
If a contractor skips any of these steps, they're guessing. And guessing leads to problems down the road.
Red Flags When Hiring a Contractor
Not all insulation contractors are created equal. Here's what to watch out for:
- No license or insurance. Michigan requires a Residential Builder's License for insulation work. If they can't show proof, walk away.
- Pressure tactics. "This price is only good today" is a sales gimmick, not a legitimate business practice.
- Vague estimates. A proper quote specifies insulation type, target R-value, square footage, and exactly what's included.
- No air sealing. If they're not addressing air leaks before blowing in insulation, they're doing it wrong.
- Skipping ventilation. Insulation without proper attic ventilation creates moisture problems and reduces insulation effectiveness.
At NEXT Exteriors, we've been doing this since 1988. We're a CertainTeed Master Shingle Applicator, BBB A+ Accredited, and licensed in Michigan. We don't do high-pressure sales, and we don't cut corners. We show up on time, do the work right, and clean up when we're done.
If you're also considering other improvements—like upgrading your home's curb appeal with exterior painting—we can coordinate everything as part of a comprehensive approach to protecting your home.
Ready to Upgrade Your Attic Insulation?
NEXT Exteriors has been protecting Michigan homes since 1988. Get a free, no-pressure estimate from a team that shows up on time and does the job right.
Get Your Free QuoteOr call us: (844) 770-6398
Frequently Asked Questions About Attic Insulation in Metro Detroit
Michigan building code requires R-49 minimum for attic insulation in new construction. For optimal energy efficiency and comfort in Metro Detroit's climate, we recommend R-49 to R-60. Homes built before 2000 often have R-19 or less and should be upgraded. The exact amount depends on your home's age, existing insulation, and whether you're experiencing ice dams or high energy bills.
R-49 meets Michigan code and provides solid thermal performance for most homes. R-60 is the Energy Star recommendation for our climate zone and delivers measurably better performance during extreme cold and heat. The difference is about 4-5 inches of additional insulation depth (depending on material type) and typically costs $400-$600 more for an average attic. R-60 pays off faster in homes with high heating costs or recurring ice dam problems.
Yes, in most cases. If your existing insulation is dry, undamaged, and not compressed, we can blow new insulation on top to reach R-49 or R-60. However, if the old insulation is wet, moldy, infested with rodents, or heavily compressed, it should be removed first. We always inspect existing insulation during the estimate to determine the best approach. Mixing insulation types (like adding fiberglass over old cellulose) is fine as long as the existing material is in good condition.
Blown-in fiberglass and cellulose typically last 20-30 years before settling and losing effectiveness. Spray foam can last 80+ years if properly installed. However, insulation performance degrades faster if your attic has moisture issues, roof leaks, or pest problems. Regular attic inspections—especially after severe storms or roof work—help catch problems early. If your home is 25+ years old and you've never upgraded insulation, it's likely time for an assessment.
Proper attic insulation is critical for preventing ice dams, but it's not the only factor. Ice dams form when heat escapes through your ceiling, warms the roof deck, melts snow, and refreezes at the eaves. To stop them, you need three things: adequate insulation (R-49 minimum), proper air sealing (to prevent warm air from reaching the roof deck), and adequate ventilation (to keep the roof deck cold). We address all three during installation. If you're getting ice dams every winter, your attic insulation is almost certainly inadequate.
Spray foam has advantages—higher R-value per inch, superior air sealing, and moisture resistance—but it costs 3x to 5x more than blown-in insulation. For most attics in Metro Detroit, blown-in fiberglass or cellulose delivers excellent performance at a fraction of the cost. Spray foam makes sense for specific applications: unvented attics, cathedral ceilings, rim joists, or homes with severe air leakage. We'll recommend the most cost-effective solution based on your home's needs, not what makes us the most money.
For a typical 1,500-square-foot attic, blown-in fiberglass to R-49 costs $1,800-$2,800. Upgrading to R-60 adds $400-$600. Cellulose runs slightly higher. Spray foam costs $4,500-$11,000 depending on type and coverage. Prices vary based on accessibility, prep work, and whether we need to remove old insulation. Most homeowners see 20-30% reductions in heating costs, with the upgrade paying for itself in 5-8 years. Utility rebates and federal tax credits can offset 20-30% of the cost.
Exterior Paint Prep: The Step Homeowners Underestimate
Michigan contractors reveal why proper exterior paint prep determines your paint job's lifespan. What to expect, what to demand, and what most painters skip.

Here's what most homeowners in Sterling Heights, Royal Oak, and across Southeast Michigan don't realize about exterior painting: the paint you choose matters far less than the prep work that happens before the first brush stroke.
I've been doing this work since 1988, and I can tell you with absolute certainty — a $30-per-gallon paint applied over properly prepped surfaces will outlast a $70-per-gallon premium paint slapped onto dirty, poorly prepared siding. Every single time.
The problem? Prep work is invisible once it's done. You can't see the hours of scraping, sanding, caulking, and priming under that beautiful finished coat. So when you're comparing bids from three different painting contractors, the lowest number looks tempting. But that low bid almost always means one thing: they're cutting corners on prep.
And in Michigan, where we deal with brutal freeze-thaw cycles, summer humidity, and UV exposure that would make a Phoenix contractor wince, cutting corners on prep isn't just wasteful — it's setting you up for paint failure within three to five years instead of the ten to fifteen you should expect.
What Proper Exterior Paint Prep Actually Involves
Let's walk through what actually needs to happen before paint touches your home's exterior. This isn't theory — this is what our crews do on every Southeast Michigan painting project, and what any reputable contractor should be doing.
Surface Cleaning and Power Washing
Every exterior surface accumulates dirt, mildew, pollen, and environmental contaminants. Paint doesn't stick to dirt — it sticks to clean substrate. We power wash every surface at the right pressure (too much pressure damages wood siding, too little leaves contaminants behind). Then we let everything dry completely, usually 48 to 72 hours depending on weather conditions.
Mildew is particularly problematic in Michigan's humid summers. If you paint over mildew, it continues growing under the paint film, causing premature failure. We treat affected areas with appropriate cleaners before washing.
Scraping and Sanding
This is where the real labor happens. Every square inch of loose, peeling, or bubbling paint gets scraped off. Not just the obvious stuff — we're looking for paint that's lost adhesion even if it looks okay from ten feet away.
After scraping, we sand the edges where old paint meets bare wood. This creates a smooth transition so you don't see ridges through the finished coat. On older homes in Grosse Pointe Farms or Bloomfield Hills with multiple layers of paint, this process can take days.
Caulking and Sealing
Michigan's freeze-thaw cycles open gaps in every joint, seam, and corner. Water gets in, freezes, expands, and makes the gap worse. The cycle repeats until you've got rot.
We caulk every joint between trim and siding, around windows and doors, at corner boards — anywhere water could infiltrate. We use paintable, flexible caulk that moves with the wood as it expands and contracts with temperature and moisture changes.
This step alone can prevent thousands of dollars in future siding repair costs. Water infiltration is the number one cause of premature paint failure and wood rot.
Priming Bare Wood and Problem Areas
Any bare wood gets primed. Period. Primer seals the wood, prevents tannin bleed-through, and provides a proper base for topcoat adhesion. Skipping primer on bare wood is painting malpractice.
We also spot-prime problem areas: knots that might bleed sap, areas where old paint was scraped to bare wood, and any repairs we've made. Different substrates require different primers — what works on cedar doesn't necessarily work on pine or fiber cement.
Our partnership with Sherwin-Williams means we're using primers specifically engineered for Michigan's climate and the substrates we're working with. This isn't generic big-box store primer — it's commercial-grade product matched to the specific conditions and materials.
Why Michigan Weather Makes Prep Even More Critical
If you lived in Southern California where it's 72 degrees and sunny 300 days a year, you could probably get away with mediocre prep work. In Michigan? Not a chance.
Freeze-Thaw Cycle Damage
Southeast Michigan typically sees 80 to 100 freeze-thaw cycles per winter. Water infiltrates any crack or gap, freezes overnight when temperatures drop, expands (water expands about 9% when it freezes), then thaws during the day. This cycle literally tears paint and wood apart from the inside.
Proper prep — thorough caulking, complete coverage with no thin spots, good adhesion to clean substrate — is your only defense against this relentless mechanical stress. Bad prep means water gets in, and once water gets in during a Michigan winter, the countdown to failure begins.
Moisture Infiltration and Wood Movement
Michigan's humidity swings are extreme. Summer humidity regularly hits 70-80%. Winter indoor heating drops indoor humidity to 20-30%, creating massive moisture gradients between inside and outside.
Wood responds to these moisture changes by expanding and contracting. Paint needs to move with the wood. But it can only do that if it's properly adhered to a clean, well-prepared surface. Paint applied over dirt, loose paint, or improperly sealed wood will crack and peel as the substrate moves beneath it.
Michigan Reality Check: That beautiful paint job you see in July might look completely different by March. Temperature swings from -5°F to 85°F put enormous stress on exterior finishes. Proper prep isn't optional — it's the foundation that allows paint to survive these conditions.
UV Exposure and Paint Degradation
Michigan's summer sun is more intense than most homeowners realize. UV radiation breaks down paint binders and causes chalking, fading, and loss of gloss. South and west-facing walls take the worst beating.
High-quality paint helps, but even the best paint fails prematurely if applied over poor prep. UV damage accelerates wherever adhesion is compromised — at edges where old paint wasn't properly feathered, over dirty surfaces, anywhere moisture has gotten under the film.
The Prep Steps Most Painters Skip (And Why That's a Problem)
After 35+ years in this business, I can spot a rushed prep job from across the street. Here's what corners get cut when a painting contractor is trying to maximize profit or move on to the next job.
Inadequate Surface Cleaning
The shortcut: A quick spray with a garden hose or a half-hearted power wash that doesn't actually remove mildew and contaminants.
Why it matters: Paint needs to bond to the substrate, not to a layer of dirt and mildew. Poor cleaning means poor adhesion, which means premature peeling. You might get two or three years before problems show up, but they will show up.
Skipping Primer on Bare Wood
The shortcut: Slapping topcoat directly on bare wood or scraped areas, claiming "modern paints don't need primer" or "this is paint-and-primer-in-one."
Why it matters: Bare wood is porous and absorbs paint unevenly, leading to thin spots and poor coverage. Without primer, tannins can bleed through (especially on cedar and redwood), causing brown stains. And most importantly, topcoat adhesion to bare wood is significantly worse than adhesion to properly primed wood.
"Paint-and-primer-in-one" is marketing language. These products work fine over previously painted surfaces in good condition. They're not a substitute for actual primer on bare wood.

Poor or Incomplete Caulking
The shortcut: Minimal caulking, using cheap non-paintable caulk, or skipping caulking entirely on areas that "don't look that bad."
Why it matters: Every unsealed gap is a water entry point. In Michigan's freeze-thaw cycles, these gaps widen every winter. Water infiltration leads to paint failure, wood rot, and eventually structural damage. The $200 saved by skipping proper caulking can easily turn into $5,000+ in siding replacement costs within five years.
Rushing the Drying Process
The shortcut: Painting too soon after power washing, applying topcoat before primer has fully cured, or painting in marginal weather conditions (too cold, too humid, rain in the forecast).
Why it matters: Paint chemistry requires proper conditions to cure correctly. Moisture trapped under paint leads to blistering and peeling. Primer needs adequate cure time before topcoat application. Rushing these steps compromises the entire system.
Sherwin-Williams technical specs are clear: substrate moisture content needs to be below 15% before painting, primer needs appropriate cure time (varies by product and conditions), and application should only happen within specified temperature and humidity ranges. These aren't suggestions — they're requirements for warranty coverage and long-term performance.
What a Professional Prep Process Looks Like
When you hire NEXT Exteriors for exterior painting in Southeast Michigan, here's what actually happens before we open the first paint can.
Initial Assessment and Planning
We inspect every surface that's getting painted. We're looking for underlying problems: wood rot that needs repair, failed caulking, areas where previous paint is failing and why. We check substrate moisture content with a moisture meter — if readings are above 15%, we need to identify and fix the moisture source before painting.
We also assess the existing paint: how many coats are on there, what type of paint was used, whether there's lead paint (common on homes built before 1978), and the overall condition. This assessment determines our prep strategy and timeline.
The Prep Timeline
On a typical 2,000-square-foot home in Rochester Hills or Troy, proper prep takes three to five days before we start painting. That breaks down roughly like this:
- Day 1: Power washing and cleaning. Then we wait for everything to dry completely.
- Day 2-3: Scraping, sanding, making minor repairs. This is the most labor-intensive part.
- Day 4: Caulking all joints and seams. Spot-priming bare wood and problem areas.
- Day 5: Final inspection, touch-up any missed spots, verify everything is ready for topcoat.
Only then do we start applying finish coats. Weather can extend this timeline — we're not painting if rain is forecast within 24 hours or if temperatures are going to drop below 50°F before the paint has adequate cure time.
Quality Materials Make a Difference
Our exclusive partnership with Sherwin-Williams isn't just marketing. Their Duration, Emerald, and SuperPaint lines are engineered for extreme weather performance. But more importantly, we have access to their technical support team when we encounter unusual situations.
We use Sherwin-Williams Loxon Concrete & Masonry Primer on foundation areas, their PrepRite ProBlock Interior/Exterior Primer on bare wood, and their Extreme Climate Wood Stain for deck and fence projects. Different substrates and conditions require different products — one-size-fits-all doesn't work in Michigan's climate.
The caulk matters too. We use Sherwin-Williams Krack Kote or similar high-quality, paintable, flexible sealants. Cheap caulk from the big-box store dries hard, cracks within a year, and doesn't adhere properly to paint. Professional-grade sealants cost more but remain flexible and maintain their seal through Michigan's temperature extremes.
Signs Your Painter Is Cutting Corners on Prep
You've got three bids on your kitchen table. Two are similar, one is 30% lower. Before you sign with the low bid, watch for these warning signs.
Red Flags in the Estimate
- Vague language about prep work: If the bid just says "prep as needed" or "standard prep," that's not specific enough. You want to see line items for power washing, scraping/sanding, caulking, priming.
- Unrealistic timeline: If they're promising to prep and paint your whole house in three days, they're either bringing a massive crew (expensive) or cutting corners (likely).
- No mention of primer: If primer isn't listed as a separate line item with its own material cost, they're probably skipping it or using "paint-and-primer-in-one" as a substitute.
- No weather contingency: Professional painters know Michigan weather is unpredictable. If there's no language about weather delays or rescheduling, they're planning to paint regardless of conditions.
Red Flags During the Job
- Painting too soon after power washing: Surfaces need 48-72 hours to dry. If they're washing Monday morning and painting Monday afternoon, moisture is trapped under that paint.
- Minimal scraping: If you're not seeing piles of scraped paint debris, they're not doing enough scraping.
- No caulking or minimal caulking: Walk around the house. You should see fresh caulk at every joint, seam, and gap. If you don't, they're skipping this critical step.
- Painting in bad weather: If they're painting in temperatures below 50°F, above 90°F, in high humidity, or when rain is forecast, they're compromising the paint's ability to cure properly.
Questions to Ask Before Hiring: "How many days do you allocate for prep work?" "What specific primer will you use and where?" "How do you handle weather delays?" "Can I see your process for caulking and sealing?" A good contractor will have detailed answers. A bad one will give you vague reassurances.
Contract Language to Insist On
Make sure your contract specifies:
- Power washing with appropriate equipment and cleaning solutions
- Scraping and sanding of all loose or failing paint
- Caulking of all joints, seams, and gaps with paintable, flexible sealant
- Primer application on all bare wood and problem areas (specify the primer brand/type)
- Number of topcoats (two coats minimum for most applications)
- Paint brand and product line (not just "exterior paint")
- Weather contingencies and rescheduling policy
If a contractor resists putting these details in writing, that tells you everything you need to know about how seriously they take prep work.
The Real Cost of Skipping Proper Prep
Let's talk numbers, because this is where the low-bid trap becomes obvious.
A proper exterior paint job on a typical 2,000-square-foot home in Macomb County or Oakland County runs $6,000 to $10,000 depending on condition, number of stories, and complexity. Roughly 40-50% of that cost is labor, and most of the labor is prep work.
A low-bid painter might come in at $4,000. They're saving money by cutting prep time from 40 hours to 15 hours. That's $1,000-$1,500 in labor savings, which lets them undercut everyone else.
What Happens When Prep Gets Skipped
Year 1-2: Paint looks fine. You think you got a great deal.
Year 3-4: You start noticing peeling at corners, around windows, on south-facing walls. The paint is failing where prep was inadequate.
Year 5: Significant peeling and paint failure. Water has been infiltrating through the failed areas, and now you've got wood rot starting. You need to repaint, but first you need to repair rotted wood.
The repaint costs $7,000-$9,000 (prices have gone up). The wood rot repairs add another $2,000-$4,000. Total: $9,000-$13,000.
If you'd paid $7,500 for proper prep and quality paint five years ago, you'd still have a paint job that looks good and protects your home. Instead, you paid $4,000 five years ago and now you're paying $11,000 to fix it. You're out $15,000 total versus $7,500 — you literally doubled your cost by going with the cheap option.
The Hidden Costs of Paint Failure
Beyond the repaint cost, consider:
- Energy costs: Failed paint and caulking means air infiltration. Your heating and cooling costs go up.
- Structural damage: Water infiltration through failed paint leads to wood rot, which can compromise structural integrity. I've seen situations where failed paint led to $20,000+ in structural repairs.
- Reduced home value: Peeling paint is one of the first things potential buyers notice. It signals deferred maintenance and raises questions about what else has been neglected.
- Stress and disruption: Dealing with contractors, living through another paint job, the hassle of getting it right the second time — these aren't costs you can put on a spreadsheet, but they're real.
What Proper Prep Gets You
A properly prepped and painted exterior should last 10-15 years in Michigan's climate before needing a full repaint. You might need minor touch-ups at 7-8 years, but the paint should still be protecting your home and looking decent.
That $7,500 investment spread over 12 years is $625 per year. The cheap paint job that fails in five years costs $800 per year ($4,000 ÷ 5 years), and that's before you factor in the repair costs.
Proper prep isn't an expense — it's an investment in long-term protection and value.
Beyond Painting: Protecting Your Home's Exterior
While we're talking about exterior protection, it's worth noting that paint is just one component of your home's weather defense system. At NEXT Exteriors, our comprehensive exterior services in Detroit and throughout Southeast Michigan include everything that protects your home from the elements.
Your roof is obviously the first line of defense against Michigan weather. We're CertainTeed Master Shingle Applicators — the highest credential in the roofing industry — and we work with premium manufacturers like GAF and Owens Corning to ensure your roof can handle everything from summer storms to winter ice dams.
Quality seamless gutters work hand-in-hand with proper paint to keep water away from your siding and foundation. And if your siding itself is failing, sometimes paint isn't the answer — you need new siding installation with options like James Hardie fiber cement or LP SmartSide engineered wood.
Energy-efficient windows reduce the moisture differential between inside and outside, which reduces stress on your paint. And proper attic insulation prevents ice dams that can damage both your roof and your siding, extending the life of your paint job.
The point is this: your home is a system. Every component affects every other component. That's why we take a comprehensive approach to exterior work, and why we're honest when paint isn't the right solution — sometimes you need to address underlying issues first.
Ready to Get Started?
NEXT Exteriors has been protecting Michigan homes since 1988. We don't cut corners on prep work, we don't rush the job, and we use Sherwin-Williams commercial-grade products engineered for Michigan's extreme weather. Get a free, detailed estimate that shows exactly what we'll do and why it matters.
Get Your Free QuoteOr call us: (844) 770-6398
Frequently Asked Questions About Exterior Paint Prep
For a typical 2,000-square-foot home in Southeast Michigan, proper prep takes 3-5 days before any paint goes on. This includes power washing (with 48-72 hours drying time), scraping and sanding all loose paint, caulking every joint and seam, and priming bare wood and problem areas. Larger homes, homes with multiple stories, or homes with significant paint failure will take longer. If a contractor promises to prep and paint your whole house in three days total, they're cutting corners somewhere.
Yes, if you have any bare wood. "Paint-and-primer-in-one" products work fine over previously painted surfaces in good condition, but they're not a substitute for actual primer on bare wood. Bare wood needs a dedicated primer to seal the surface, prevent tannin bleed-through, and provide proper adhesion for the topcoat. This is especially critical in Michigan's climate where moisture infiltration and freeze-thaw cycles will exploit any weakness in the paint system. Sherwin-Williams and other professional paint manufacturers are clear about this in their technical specifications.
Premature paint failure is almost always a prep issue, not a paint quality issue. The most common causes: painting over dirty or mildewed surfaces (poor adhesion), skipping primer on bare wood, inadequate caulking allowing water infiltration, painting over moisture (trapped water causes blistering and peeling), or painting in poor weather conditions. In Michigan, freeze-thaw cycles accelerate failure wherever prep was inadequate. If your paint is peeling after 3-5 years instead of lasting 10-15 years, the problem happened before the first coat of paint went on.
Professional-grade paintable caulk (like Sherwin-Williams Krack Kote) remains flexible through Michigan's temperature extremes, maintains its seal for 10+ years, adheres properly to both wood and paint, and doesn't shrink significantly as it cures. Cheap caulk from big-box stores often dries hard and brittle, cracks within 1-2 years, shrinks excessively leaving gaps, and doesn't adhere well to painted surfaces. The cost difference is maybe $3-$5 per tube, but the performance difference is enormous. In Michigan's freeze-thaw cycles, cheap caulk fails quickly, allowing water infiltration that leads to paint failure and wood rot.
Most exterior paints require temperatures above 50°F during application and for 24-48 hours afterward to cure properly. Some specialty cold-weather paints can be applied down to 35°F, but performance is still compromised. In Michigan, this means the exterior painting season typically runs from late April through October. Painting outside these windows risks improper curing, which leads to poor adhesion, slow drying, and premature failure. If a contractor is willing to paint your house in November or March when temperatures are marginal, that's a red flag — they're prioritizing their schedule over your paint job's long-term performance.
If the siding substrate is sound (no rot, no warping, no structural damage), repainting is usually the right choice. But if you're seeing wood rot, extensive cracking, warping, or if the siding is so deteriorated that proper prep would require replacing boards anyway, new siding makes more sense financially. We do both — painting and siding installation — so we don't have a bias toward one solution. During the estimate, we'll probe suspect areas with an awl to check for soft spots, assess the overall condition, and give you an honest recommendation. Sometimes a section needs replacement but the rest can be painted. Sometimes the whole thing needs to go. We'll show you exactly what we're seeing and why we're recommending what we recommend.
A detailed estimate should include specific line items for power washing, scraping/sanding labor hours, caulking (with the product specified), primer (brand and type), topcoat paint (brand, product line, number of coats), and any repairs needed. It should specify how surfaces will be prepared, what products will be used, and what weather conditions will trigger delays. Vague language like "prep as needed" or "standard prep" isn't acceptable. You want to see the specific Sherwin-Williams (or equivalent) products listed by name, not just "exterior paint." The estimate should also include timeline expectations, payment schedule, and warranty information. If you're comparing estimates and one is significantly lower, look at the prep specifications — that's almost always where the cost difference is.
Soffit and Fascia Installation Metro Detroit | NEXT Exteriors
Expert soffit and fascia installation in Metro Detroit. Learn why proper installation matters, what materials work in Michigan, and how to protect your home's roofline.
Most homeowners don't think about soffit and fascia until something goes wrong — a gutter pulling away, water stains on the eaves, or squirrels chewing their way into the attic. By then, what started as a small problem has usually turned into rotted wood, compromised ventilation, and a repair bill that could've been avoided.
Here's what 35 Michigan winters have taught us: soffit and fascia aren't just trim. They're the first line of defense against water infiltration, ice dams, and pest entry. When they're installed correctly with the right materials, they protect your roof deck, attic insulation, and the structural integrity of your home. When they're done wrong — or when they're left to rot — the damage spreads fast.
This guide covers what proper soffit and fascia installation in Metro Detroit looks like, why Michigan's freeze-thaw cycles destroy bad work, and how to know when it's time to replace what you have. If you're in Sterling Heights, Troy, or anywhere across Macomb and Oakland counties, this is what you need to know before you hire a contractor.
What Are Soffit and Fascia? (And Why They Matter)
Let's start with the basics, because most homeowners confuse the two or don't realize they serve completely different functions.
Fascia is the vertical board that runs along the edge of your roofline, right where the roof meets the outer walls of your house. It's what your gutters attach to. Fascia protects the ends of your roof rafters from weather exposure and provides a finished edge for your roofline. When fascia rots, your gutters sag or pull away, and water starts running behind your siding.
Soffit is the horizontal surface underneath the eaves — the part you see when you stand next to your house and look up. Soffit closes off the space between the fascia and the exterior wall, keeping pests out. But here's the critical part: soffit also provides ventilation for your attic. Those small perforations or vent strips aren't decorative — they allow air to flow into your attic, which prevents heat buildup in summer and moisture accumulation in winter.
Without proper soffit ventilation, your attic becomes a sweatbox in July and a condensation trap in January. That leads to mold, ice dams, and shortened shingle life. Michigan building code requires a minimum ventilation ratio of 1:150 (one square foot of vent area for every 150 square feet of attic space), and soffit vents are typically how you meet that requirement.
The Bottom Line: Fascia keeps water out. Soffit keeps pests out and air moving. Both are structural components, not cosmetic trim. When either fails, the damage spreads to your roof, insulation, and framing.
Why Michigan Weather Destroys Bad Installations
If you've lived in Southeast Michigan for more than one winter, you already know: our weather is brutal on exterior materials. The combination of freeze-thaw cycles, ice dams, summer humidity, and lake-effect snow creates conditions that expose every shortcut a contractor took.
Freeze-Thaw Cycles and Expansion
Michigan winters average 80-100 freeze-thaw cycles per season. Water gets into cracks, freezes, expands, and splits the material. Wood fascia that wasn't properly primed and painted will absorb moisture, freeze, and rot within a few years. Vinyl soffit that wasn't installed with expansion gaps will buckle and warp when temperatures swing from 10°F to 50°F in a single week.
We see this constantly in older homes around Royal Oak and Grosse Pointe Farms — fascia boards that were painted but never sealed at the ends. Water wicks into the grain, freezes, and the board splits vertically. By the time the homeowner notices, the rot has spread to the roof deck.
Ice Dams and Water Backup
Ice dams form when heat escapes through your attic, melts snow on the roof, and the water refreezes at the eaves. That ice buildup forces water under the shingles and behind the fascia. If your soffit ventilation is inadequate or blocked, you're creating the conditions for ice dams every winter.
Proper soffit and fascia installation includes continuous venting, proper insulation baffles in the attic, and flashing that directs water away from the fascia board. When contractors skip these steps, you get water damage, rotted fascia, and expensive Detroit roofing services repairs that could've been prevented.
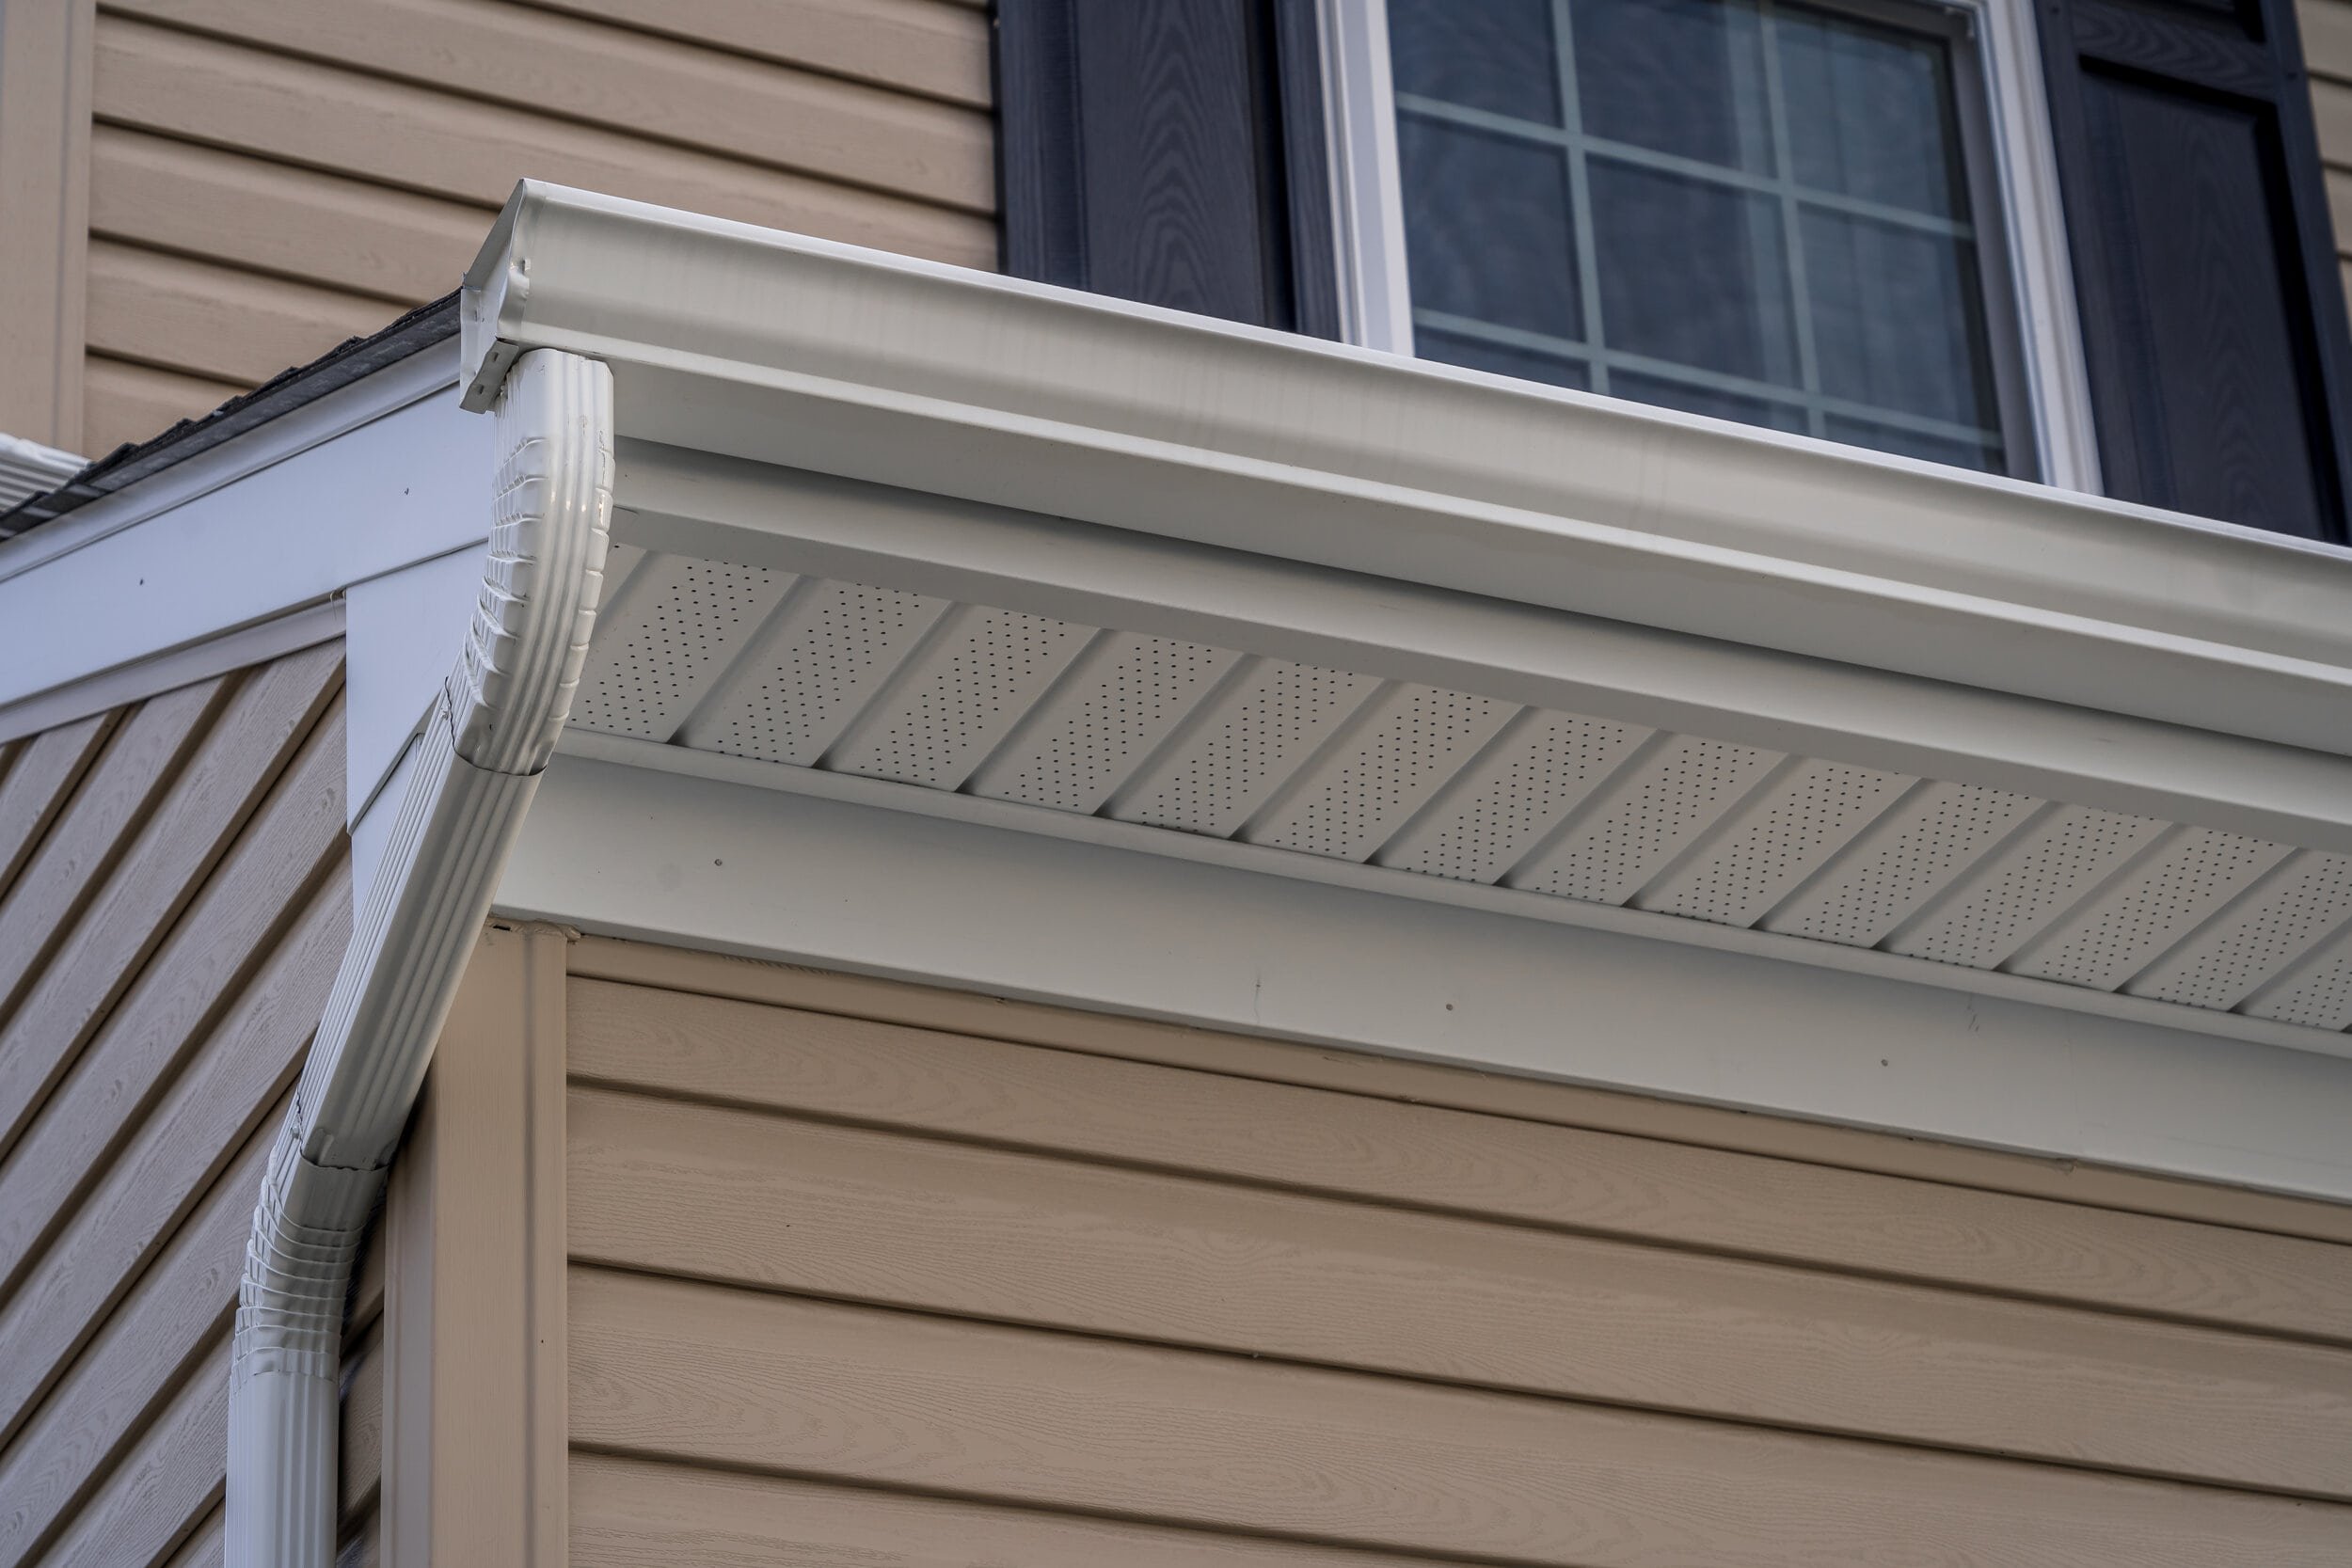
Summer Humidity and Condensation
Michigan summers are humid. When your attic isn't properly ventilated, that humidity condenses on the underside of the roof deck and drips onto your insulation. Over time, this leads to mold, compressed insulation (which kills R-value), and rotted fascia from the inside out.
We've opened up soffits in Clinton Township homes where the wood was completely black with mold because the previous contractor installed solid soffit with no vents. The homeowner had no idea until they started smelling it through the ceiling.
Lake-Effect Snow and Wind Load
If you're near Lake St. Clair or in the northern parts of Macomb County, you know about lake-effect snow. Heavy, wet snow piles up on your eaves and puts serious weight on your fascia and gutters. If the fascia board is undersized, poorly fastened, or already weakened by rot, it'll sag or pull away from the house.
Proper installation uses 1x8 or 2x8 fascia boards (depending on rafter spacing and gutter size) and fastens them into solid blocking or rafter tails — not just into the old board. We see too many "repairs" where a contractor just nailed new fascia over rotted wood. That lasts about one winter.
Material Options for Southeast Michigan Homes
Not all soffit and fascia materials perform the same in Michigan's climate. Here's what we install, what we avoid, and why.
Vinyl Soffit and Fascia
Vinyl is the most common material for soffit and fascia in Metro Detroit, and for good reason: it's affordable, low-maintenance, and holds up well in freeze-thaw cycles when installed correctly. Quality vinyl won't rot, doesn't need painting, and resists moisture.
The key phrase is "when installed correctly." Vinyl expands and contracts with temperature changes. If a contractor doesn't leave proper expansion gaps (typically 1/4 inch), the panels will buckle in summer heat. If they over-fasten the panels (driving nails too tight), the vinyl can't move and will crack in winter cold.
We use CertainTeed and GAF vinyl soffit and fascia systems because they're engineered for thermal movement and come with vented options that meet Michigan code. The panels lock together, the vents are integrated, and the color goes all the way through — no fading or peeling.
Best for: Most residential applications, especially if you're also replacing siding and want a cohesive look. Works well with our house siding in Detroit projects.
Aluminum Soffit and Fascia
Aluminum is more durable than vinyl and doesn't expand or contract as much. It's also more expensive and harder to work with, which means installation costs are higher. Aluminum fascia is a good choice if you have wide eaves or need extra strength to support heavy gutters.
The downside: aluminum dents. If a ladder leans against it or a hailstorm comes through, you'll see the damage. It also requires proper painting or a factory finish — bare aluminum will oxidize and look chalky over time.
Best for: Commercial buildings, homes with wide overhangs, or situations where you need maximum durability and don't mind the higher cost.
Wood Fascia (And Why We Rarely Recommend It)
Traditional wood fascia — usually pine or cedar — was standard on older Michigan homes. It looks great when it's new, but it requires constant maintenance. You need to prime all six sides before installation, caulk every joint, and repaint every 5-7 years. Miss a step, and water gets in.
We still install wood fascia on historic homes in areas like Bloomfield Hills or Grosse Pointe where architectural guidelines require it. But for most homeowners, the maintenance burden isn't worth it. Wood rots, especially at the joints and where gutters attach. Once rot starts, it spreads fast.
If you're committed to wood, use a rot-resistant species like cedar or composite trim boards (like Azek or Versatex), which are cellular PVC and won't rot. They cost more upfront but eliminate the maintenance cycle. We often pair these with our Southeast Michigan painting professionals services for a complete exterior refresh.
Best for: Historic homes, high-end custom builds, or homeowners who don't mind ongoing maintenance and want a traditional look.
Signs Your Soffit and Fascia Need Replacement
Here's how to know if you're looking at a repair or a full replacement. Walk around your house and check for these warning signs:
1. Visible Rot or Water Damage
If you see dark stains, soft spots, or peeling paint on your fascia, you've got water infiltration. Press on the board with your finger — if it feels spongy or you can push into it, the wood is rotted and needs to be replaced. Don't just paint over it. The rot will continue spreading behind the paint.
2. Peeling Paint or Cracked Vinyl
Paint peeling off fascia boards is a sign that moisture is getting behind the finish. On vinyl, look for cracks, warping, or panels that have pulled loose. Both indicate the material has reached the end of its service life.
3. Pest Infiltration
If you're hearing scratching in your attic or seeing squirrels, bats, or birds around your roofline, check your soffit. Damaged soffit panels are a common entry point. Pests chew through rotted wood or push through loose vinyl to get into your attic. Once they're in, they damage insulation and wiring.
We've done soffit replacements in Lake Orion and Shelby Township where raccoons had torn through old wood soffit and built nests in the attic. The insulation was destroyed, and the homeowner had to deal with both the pest removal and the top-rated insulation contractor in Detroit repairs.
4. Gutters Pulling Away From the House
If your gutters are sagging or pulling away from the fascia, the fascia board is likely rotted and can't hold the fasteners anymore. This is especially common after heavy snow or ice buildup. Don't just reattach the gutters — you need to replace the fascia first, or it'll happen again. Our seamless gutters in Detroit, MI installations always include a fascia inspection first.
5. Poor Attic Ventilation
If your attic is hot and stuffy in summer or you're seeing condensation in winter, your soffit vents may be blocked or inadequate. Old soffit installations often used solid panels with no vents, or the vents were painted over. This creates moisture problems, shortens your roof's lifespan, and drives up cooling costs.
Pro Tip: If you're planning a roof replacement, that's the perfect time to upgrade your soffit and fascia. The roof deck is already exposed, and you can address any rot or ventilation issues before the new shingles go on. We coordinate this regularly on our Detroit roofing services projects.
What Proper Installation Looks Like
There's a right way and a fast way to install soffit and fascia. The fast way looks fine for a year or two. The right way lasts 20-30 years. Here's what proper installation includes:
Ventilation Calculations
Before we install soffit, we calculate your attic's ventilation requirements based on square footage. Michigan code requires 1:150 net free area (1 square foot of vent per 150 square feet of attic). We match soffit intake vents with ridge or gable exhaust vents to create continuous airflow. This prevents moisture buildup, reduces cooling costs, and extends your roof's lifespan.
If your attic doesn't have enough ridge vent, we'll recommend adding it during the roof replacement. Soffit vents alone don't work — you need both intake and exhaust for proper air circulation.
Fastening Methods for Michigan Wind
Vinyl soffit and fascia need to move with temperature changes, but they also need to stay put during windstorms. We use stainless steel or coated fasteners driven into solid blocking or rafter tails — never into old, rotted wood. Fasteners go in the center of the nailing slots (not the ends) and are left slightly loose so the panel can expand and contract.
Fascia boards get fastened every 16 inches into rafter tails or blocking. If the existing framing is rotted, we sister in new blocking before installing the fascia. This is the step most contractors skip because it takes time, but it's what keeps your gutters from pulling away three years later.
Flashing Integration
Proper installation includes drip edge flashing along the roof edge and behind the fascia. This directs water away from the fascia board and into the gutters, preventing water infiltration. If your roof has an ice and water shield membrane at the eaves (which it should), the flashing ties into that system.
We see a lot of installations where the drip edge was left off or installed incorrectly. Water runs behind the fascia, the wood rots, and the homeowner ends up with expensive repairs. Flashing is cheap. Rot repair is not.
Common Shortcuts Contractors Take
Here's what to watch out for when you're getting quotes:
- Installing new fascia over old, rotted boards. This hides the problem for a year, then everything fails again.
- Using solid soffit with no vents. Looks cleaner, creates moisture problems.
- Over-fastening vinyl panels. Causes cracking and buckling when temperatures change.
- Skipping the drip edge. Water runs behind the fascia and causes rot.
- Not sealing wood fascia ends. Water wicks into the grain and the board splits.
If a contractor's quote is significantly lower than others, ask what they're leaving out. We've been doing this since 1988, and the jobs we're called in to fix are almost always the result of someone taking shortcuts to hit a low price.
Cost Reality in Metro Detroit
Let's talk numbers. Soffit and fascia replacement costs vary based on material, linear footage, roof height, and the condition of the underlying structure. Here's what you can expect in Southeast Michigan in 2026:
Vinyl Soffit and Fascia
For a typical single-story home (1,500-2,000 sq ft), vinyl soffit and fascia replacement runs $3,500-$6,500, depending on the amount of trim, the number of corners, and whether we're replacing fascia boards or just covering them. Two-story homes or homes with complex rooflines (lots of gables, dormers, or bay windows) will be higher — typically $6,500-$10,000.
If the existing fascia boards are rotted and need full replacement (not just covering), add another $1,500-$3,000 for lumber, blocking, and labor. This is common on homes built before 1990 where the original fascia was never properly maintained.
Aluminum Soffit and Fascia
Aluminum runs about 20-30% more than vinyl. Expect $4,500-$8,000 for a single-story home, $8,000-$12,000 for a two-story. The material cost is higher, and installation takes longer because aluminum is less forgiving to work with.
Wood or Composite Fascia
If you're using real wood or composite trim boards (Azek, Versatex), material costs are significantly higher. Budget $6,000-$12,000 for a typical home, depending on the species and the amount of custom trim work. This is usually reserved for high-end homes or historic restorations.
What Affects the Cost?
- Roof height and pitch: Two-story homes and steep roofs require scaffolding or lift equipment, which increases labor costs.
- Extent of rot: If we need to replace fascia boards, blocking, or rafter tails, costs go up.
- Gutter removal and reinstallation: If your gutters are in good shape, we'll remove and reinstall them. If they're old or damaged, it's often more cost-effective to replace them at the same time.
- Custom colors or profiles: Standard white or almond vinyl is cheapest. Custom colors or specialty profiles cost more.
- Accessibility: Homes with landscaping, decks, or tight lot lines that limit access will take longer to work on.
When to Replace vs. Repair
If the damage is isolated to one section — say, a corner where a gutter leaked — you can often get away with a partial replacement for $800-$1,500. But if you're seeing rot or damage in multiple areas, it's usually more cost-effective to replace everything at once. Piecemeal repairs add up fast, and you'll end up with mismatched materials and colors.
We also recommend replacing soffit and fascia when you're doing other major exterior work — a roof replacement, new siding, or window upgrades. The scaffolding is already up, and you can coordinate materials and colors across the whole house. Our exterior services in Detroit often bundle these projects for efficiency and cost savings.
Real Talk: If a contractor quotes you $2,000 for a full soffit and fascia replacement on a two-story home, they're either skipping critical steps or using bottom-tier materials. Quality work costs what it costs. We're not the cheapest, but we're fair, and we do it right the first time.
Ready to Get Started?
NEXT Exteriors has been protecting Michigan homes since 1988. Whether you're dealing with rotted fascia, poor ventilation, or you just want to upgrade before the next storm season, we'll give you an honest assessment and a fair quote. No pressure, no gimmicks — just straight answers from a team that's been doing this for 35 years.
Get Your Free QuoteOr call us: (844) 770-6398
Other Ways NEXT Exteriors Protects Your Home
Soffit and fascia are just one part of your home's exterior system. If you're planning upgrades, here's how we can help with the rest:
Our Detroit window experts can replace drafty, inefficient windows that are costing you money every month. We install energy-efficient double-hung, casement, and bay windows that hold up in Michigan's climate and reduce your heating bills.
If your attic is under-insulated or you're dealing with ice dams, our insulation services in Southeast Michigan include blown-in cellulose, spray foam, and batt insulation that meet or exceed Michigan energy code. Proper insulation works hand-in-hand with soffit ventilation to keep your home comfortable year-round.
And if you're ready to refresh your home's curb appeal, our exterior painting professionals use Sherwin-Williams products exclusively — the best paint for Michigan weather. We handle surface prep, priming, and application so your paint job lasts 10-15 years, not 3-5.
We're a full-service exterior contractor, which means you work with one team, one point of contact, and one warranty. No subcontractors. No finger-pointing. Just honest work from a crew that's been doing this since 1988.
Frequently Asked Questions
Quality vinyl soffit and fascia should last 20-30 years in Michigan's climate when properly installed. Aluminum can last 30-40 years. Wood fascia requires repainting every 5-7 years and may need replacement after 15-20 years, depending on maintenance. The key is proper installation with ventilation, flashing, and expansion gaps. Cheap materials or poor installation will fail much sooner — we regularly replace soffit and fascia that's only 8-10 years old because it was done wrong the first time.
No. If the fascia is rotted or water-damaged, painting over it just hides the problem temporarily. Rot spreads behind the paint, and within a year or two, the damage will be worse. Paint also traps moisture in rotted wood, accelerating the decay. If the fascia is structurally sound but just needs a refresh, painting is fine — but it needs to be properly prepped, primed, and sealed. If there's any soft spots, spongy areas, or visible rot, replacement is the only real fix.
Not necessarily, but it's often the most cost-effective approach. We remove and reinstall gutters during soffit and fascia replacement, so if your gutters are old, leaking, or damaged, it makes sense to replace them at the same time. You'll save on labor costs since the crew is already there with scaffolding up. If your gutters are in good shape and less than 10 years old, we can work around them. But if they're showing rust, leaks, or sagging, bundling the replacement saves you money in the long run.
For most Michigan homeowners, vinyl is the best balance of cost, durability, and low maintenance. It handles freeze-thaw cycles well, doesn't rot, and never needs painting. We use CertainTeed and GAF vinyl systems because they're engineered for thermal expansion and come with integrated venting. Aluminum is more durable but costs more and can dent. Wood looks great but requires constant maintenance and is prone to rot. For high-end homes or historic properties, composite trim boards (Azek, Versatex) offer the look of wood without the rot risk, but they're expensive.
For a typical single-story home, installation takes 2-3 days. Two-story homes or homes with complex rooflines (multiple gables, dormers, or bay windows) can take 4-5 days. If we're replacing rotted fascia boards or dealing with extensive water damage, add another 1-2 days for structural repairs. Weather can also affect the timeline — we won't install in rain or freezing temperatures because materials need to acclimate and fasten properly. We'll give you a realistic timeline in your quote and keep you updated throughout the project.
Yes. Vinyl soffit and fascia come in a range of standard colors (white, almond, clay, gray), and we can usually match your existing trim or siding. If you're doing a partial replacement and need an exact match, we'll bring samples to compare. If you're replacing all the soffit and fascia, you can choose any color you want — we often coordinate with siding, shutters, and trim for a cohesive look. Custom colors cost a bit more, but the color goes all the way through the material, so it won't fade or peel like paint.
In most cases, no — soffit and fascia replacement is considered maintenance and doesn't require a permit in most Michigan municipalities. However, if we're doing structural repairs (replacing rafter tails, blocking, or roof framing), a permit may be required. We handle all permit applications and inspections as part of our service, so you don't have to deal with the township or county. We're licensed, insured, and familiar with building codes in Macomb, Oakland, and St. Clair counties, so you can trust the work will pass inspection if one is needed.